Table of Contents
Advertisement
Advertisement
Table of Contents

Summary of Contents for ROYAL OAK C1809A
-
Page 1: Assembly Instructions
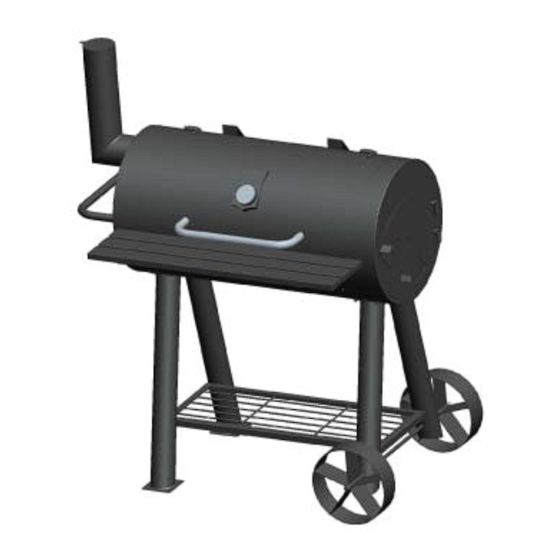
ASSEMBLY INSTRUCTIONS HEAVY DUTY HEAVY DUTY CHARCOAL ADD-ON FIREBOX GRILL/SMOKER (OPTIONAL – SOLD SEPARATELY) Model # C1809A Model # C1809B Product Code # 230-940-431 Product Code # 230-941-433 READ INSTRUCTIONS CAREFULLY BEFORE ASSEMBLY. RETAIN THIS MANUAL FOR FUTURE REFERENCE. -
Page 2: Safety Warnings
SAFETY WARNINGS Before assembling or using your new grill, carefully read the instruction manual – including all safety warnings! Failure to follow safety warnings could result in death, serious bodily injury, and/or property loss. ASSEMBLY • Check the box and make sure you have all parts listed. If you have parts missing or damaged, please contact Customer Service for assistance at (800) 543-5912, 24 hours a day / 7 days a week. - Page 3 LIGHTING A FIRE (cont.) • Do not add lighter fluid to warm or hot coals. This may result in a flare up, flash fire, or explosion. • Do not add instant light charcoal to an existing fire. This may result in a flare up, flash fire, or explosion. •...
-
Page 4: Parts List
PARTS LIST PART DESCRIPTION PICTURE OF PART QUANTITY NUMBER MAIN BODY ASSEMBLY 1 PC RIGHT LEG 2 PC LEFT LEG 2 PC BOTTOM SHELF 1 PC WHEEL AXLE 1 PC WHEEL 2 PC SMOKE STACK ASSEMBLY 1 PC FRONT SHELF 1 PC FRONT SHELF SUPPORT 2 PC... - Page 5 SIDE HANDLE 1 PC SIDE DOOR 1 PC LID HANDLE 1 PC PORCELAIN COATED 3 PC COOKING GRATE CHARCOAL GRATE 3 PC HEAT INDICATOR 1 PC DRIP CUP HOLDER 1 PC LATCH RECEIVER 1 PC HINGE 1 PC MAIN BODY LID 1 PC...
-
Page 6: Hardware List
HARDWARE LIST HARDWARE PICTURE OF DESCRIPTION QUANTITY LETTER HARDWARE SCREW 35 PC 26 PC (2 pre-installed) WHEEL AXLE 2 PC WASHER 4 PC HINGE PIN 2 PC SCREW (pre-installed) - Page 7 ASSEMBLY INSTRUCTIONS Read assembly instructions before attempting to assemble grill. The estimated assembly time is 45 minutes. We recommend that two people assemble this grill. Separate and identify all parts and hardware. You will need a Phillips head screwdriver, an adjustable wrench, and a pair of pliers. Check the parts and hardware according to the number (for parts) and letter (for hardware) from pages 4 - 6.
- Page 8 STEP 3: Using 4 pieces each of “Hardware A” (Screw) and “Hardware B” (Nut), attach 1 piece of “Part 3” (Left Leg) to the lower left set of mounting holes in “Part 1” (Main Body Assembly). Make sure when attaching leg, that the small hole for the Bottom Shelf side tab is pointed in toward the center.
- Page 9 STEP 5: Take 1 piece of “Part 2” (Right Leg) and attach to “Part 4” (Bottom Shelf) by inserting side tab into the hole in the side of the Leg. Using 4 pieces each of “Hardware A” (Screw) and “Hardware B” (Nut), attach Leg to the upper right set of mounting holes in “Part 1”...
- Page 10 STEP 7: Slide “Part 5” (Wheel Axle) through the holes in both Right Legs. STEP 8: Slide both pieces of “Part 6” (Wheel) onto the ends of “Part 5” (Wheel Axle). Make sure that the side of the wheel that has the longer stub faces inward towards the leg. Tighten both pieces of “Hardware C” (Wheel Axle Nut) onto the Wheel Axle, locking the Wheels in place.
- Page 11 STEP 9: Turn grill upright onto its legs. Using 4 pieces each of “Hardware A” (Screw) and “Hardware B” (Nut), attach “Part 7” (Smoke Stack Assembly) to Main Body as shown below. STEP 10: Thread “Part 16” (Drip Cup Holder) through drip hole in bottom of Main Body.
- Page 12 STEP 11: Using 2 pieces of “Hardware A” (Screw), attach “Part 8” (Front Shelf) to the Main Body using the holes in the front of the Main Body as shown below. Then using 4 pieces of “Hardware A” (Screw), attach the 2 pieces of “Part 9”...
- Page 13 IF INSTALLING OPTIONAL HEAVY-DUTY ADD-ON FIREBOX C1809B (SOLD SEPARATELY) – SKIP TO PAGE 14 STEP 13: Using 1 piece of “Hardware A” (Screw), attach “Part 17” (Latch Receiver) to Main Body. Using 2 pieces of “Hardware A” (Screw), attach “Part 18” (Hinge) to Main Body. STEP 14: Slide the hinge pins of “Part 11”...
- Page 14 STEP 15: Insert all 3 pieces of “Part 14” (Charcoal Grates) and then all 3 pieces of “Part 13” (Porcelain Coated Cooking Grates) into grill. To help distinguish the grates, the Porcelain Coated Cooking Grates have a glossy black finish. STEP 16: Slide “Part 19”...
- Page 15 Using 2 pieces of “Hardware B” (Nut), attach “Part 15” (Heat Indicator) to the Lid. Using 2 pieces of “Hardware A” (Screw), attach “Part 12” (Lid Handle) to the Lid. Assembly of Royal Oak Heavy Duty Smoker/Grill is now complete. BE SURE TO REMOVE ANY LABELS FROM GRILL BEFORE USE!
- Page 16 INSTALLING THE OPTIONAL HEAVY-DUTY ADD-ON FIREBOX C1809B (SOLD SEPARATELY) ADDITIONAL PARTS AND HARDWARE PART 20 FIREBOX 1 PC PART 21 FIREBOX SHELF 1 PC FIREBOX SHELF PART 22 2 PC SUPPORT PART 23 FIREBOX LID 1 PC FIREBOX LID PART 24 1 PC HANDLE FIREBOX...
- Page 17 IF HEAVY DUTY GRILL/SMOKER IS ALREADY FULLY ASSEMBLED, FOLLOW THESE STEPS FIRST: 1.) Remove “Part 11” (Side Door) by sliding door off of “Part 18” (Hinge). Set aside. 2.) Unscrew the 2 pieces of “Hardware A” (Screw) and remove “Part 18” (Hinge) from Main Body. Set aside. 3.) Unscrew the 1 piece of “Hardware A”...
- Page 18 STEP 18: Unscrew 2 pieces of “Hardware E” (Hinge Pin Screw) from “Part 23” (Firebox Lid) and slide Lid off of Firebox. Set aside. -- E -- STEP 19: Be sure to have 2 people complete this step! Using 9 pieces of “Hardware A” (Screw), attach “Part 20” (Firebox) to “Part 1”...
- Page 19 STEP 20: Using 1 piece of “Hardware A” (Screw), attach “Part 17” (Latch Receiver) to Firebox. Using 2 pieces of “Hardware A” (Screw), attach “Part 18” (Hinge) to Firebox. STEP 21: Slide the hinge pins of “Part 11” (Side Door) into the Hinge and use latch to open and close Side Door for ash cleanout.
- Page 20 STEP 22: Using 2 pieces of “Hardware A” (Screw), attach “Part 21” (Firebox Shelf) to front of Firebox. Using 4 pieces of “Hardware A” (Screw), attach both pieces of “Part 22” (Firebox Shelf Support) to the Firebox and the Firebox Front Shelf.
- Page 21 STEP 24: Using 2 pieces of “Hardware A” (Screw), attach “Part 24” (Firebox Lid Handle) to “Part 23” (Firebox Lid). STEP 25: Insert 2 pieces of “Part 26” (Firebox Charcoal Grate) into the Firebox. Then insert 2 pieces of “Part 25” (Firebox Porcelain Coated Cooking Grate) into the Firebox.
-
Page 22: Troubleshooting
ASSEMBLY OF THE ROYAL OAK HEAVY DUTY GRILL/SMOKER WITH ADD-ON FIREBOX IS COMPLETE. MAKE SURE TO REMOVE ANY LABELS FROM GRILL BEFORE USE! TROUBLESHOOTING • “I’M HAVING TROUBLE MAINTAINING COOKING TEMPERATURE.” Every 2 hours, add up to an additional 5 pounds of regular charcoal briquets OR up to an additional 3 pounds of lump charcoal into the firebox. - Page 23 CARE AND USE OF YOUR GRILL/SMOKER BE SURE TO REMOVE ALL LABELS FROM SMOKER BEFORE USE! CLEANING ASH FROM THE GRILL/FIREBOX WARNING: Do not attempt to empty burning charcoal pieces or hot ash. After the ashes and grill/firebox have completely cooled, it is imperative that you clean out the ashes from inside the grill and/or firebox before moisture can combine with the ash.
- Page 24 LIGHTING AND CONTROLLING THE FIRE (cont.) Chimney starters, electric starters, or other types of fire starters may be used instead of lighter fluid to light fire, but use only according to manufacturer’s instructions. Never use instant light charcoal or charcoal lighter fluid with any of these other starting methods.
- Page 25 COOKING METHODS (cont.) TYPES OF CHARCOAL You can burn either charcoal briquets or natural wood lump charcoal. These two types of charcoal have different attributes. Charcoal briquets typically provide longer cooking times than lump charcoal and are usually less expensive. However, lump charcoal burns hotter than briquets and produces less ash.
-
Page 26: Joe's Davidson's "Sticky, Sweet And Spicy" Chicken
Pour some apple juice into a misting bottle for use when cooking the chicken. • Fire up your Royal Oak Heavy Duty Grill/Smoker as per the instructions in the manual. • Make sure to build fire next to the Side Door of the Grill/Smoker, or in the optional Add-On Firebox (sold separately) so that you cook with indirect heat. -
Page 27: Joe Davidson's "Oklahoma Style" Bbq Spare Ribs
Let the ribs set at room temperature for 1 hour to let the spices start working on the ribs. • While ribs are resting, fire up your Royal Oak Heavy Duty Grill/Smoker as per the instructions in the manual. •... - Page 28 4 Beef Bouillon Cubes PROCESS • Fire up your Royal Oak Heavy Duty Grill/Smoker as per the instructions in the manual. • Make sure to build the fire next to the Side Door of the Grill/Smoker, or in the optional Add-On Firebox (sold separately) so that you cook with indirect heat.
-
Page 29: Limited Warranty
LIMITED WARRANTY For one (1) year from the date of purchase, Royal Oak Enterprises, LLC warrants the Grill/Smoker and/or Firebox against defects due to workmanship or materials to the original purchaser. Royal Oak’s obligations are limited to the following: •...
Need help?
Do you have a question about the C1809A and is the answer not in the manual?
Questions and answers