
Summary of Contents for Lite-Purter CX-12
-
Page 1: User Manual
ISO 9001 CERTIFIED www.liteputer.com.tw CX-12 DMX 96 Control channel Dimming Controller 【User Manual】 Lite-Puter Enterprise Co., Ltd. Website: www.liteputer.com.tw E-mail: sales@liteputer.com.tw Lite-Puter CX-12 [EUM-D]... -
Page 2: Table Of Contents
CHAPTER 8. SET FUNCTION 8-1 LCD display / system default setting ..............17 8-2 output memory card loading / saving ..............18 8-3 Channel patch setting / warm up setting ............19 8-4 Lock / Unlock setting ..................21 Lite-Puter CX-12 [EUM-D]... -
Page 3: Chapter 1. Function
ISO 9001 CERTIFIED www.liteputer.com.tw Chapter 1. CX-12 Feature & Function Feature Dual control signal output (1.) DMX512 / 1990 (2.) 24 channel analog signal output 0 - 10V 96 control channel, and able to control up to CH97 – CH512 by patch... -
Page 4: Dimension
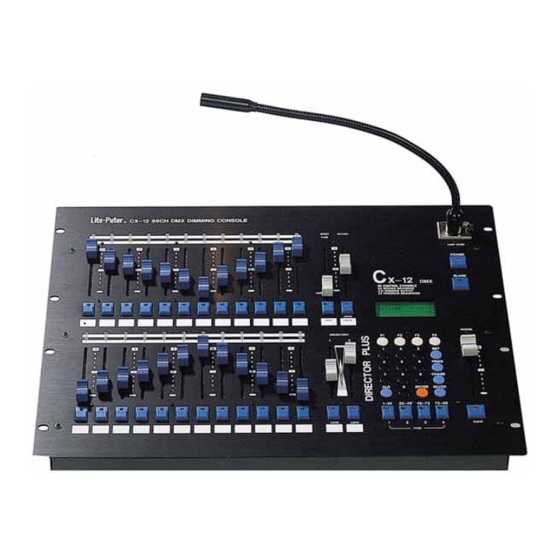
ISO 9001 CERTIFIED www.liteputer.com.tw 1-3 Dimension CX-12 96CH DMX DIMMING CONSOLE SPEED CHASER FADE LAMP 12VDC POWER X-12 BLANK 96 CONTROL CHANNELS 96 SCENES MEMORIES 512 DIMMERS OUTPUT AUDIO 24 PROGRAM SEQUENCES LOAD FADE PAUSE MASTER CROSSFADER PROG CHASE ENTER... -
Page 5: Chapter 2. Specification
ISO 9001 CERTIFIED www.liteputer.com.tw CHAPTER 2. CX-12 SPECIFICATION 2-1 Introduction of control panel 4 6 7 CX-12 96CH DMX DIMMING CONSOLE SPEED CHASER FADE LAMP 12VDC POWER X-12 BLANK 96 CONTROL CHANNELS 96 SCENES MEMORIES 512 DIMMERS OUTPUT AUDIO 24 PROGRAM SEQUENCES... -
Page 6: The Feature Function Of Rear Panel
PUSH ( 1) Power switch ( 2) fuse ( 3) AC 100-240V 50-60 Hz ( 4) goosenecks power switch ( 5) DMX 512 input ( 6) DMX 512 output ( 8) memory card ( 9) audio input Lite-Puter CX-12 [EUM-D]... -
Page 7: Chapter 3. Power Switch
(1.) Turn off the power switch on front panel Battery recharging mode ★ (2.) Turn off the power switch on rear panel Battery un-recharge, 7 days duration of save data maintains only ★ Remark:The using status will keeping on after power off Lite-Puter CX-12 [EUM-D]... -
Page 8: Chapter 4. Channel
24】to set CH. 73 ~ 96 of brightness value. PAGE START CH73 CHASE FADE ON F1/2:FADE ON/OFF p.s. when on page function, the VR should be adjust to 0 value, and move the VR key to get the new dimming value Lite-Puter CX-12 [EUM-D]... -
Page 9: Modification Of Brightness Of Control Channel
1】key to CH01=50 to change the setting. 4-3 setting delete adjust 【VR 1 ~ VR 24】and【MASTER VR】key to the bottoms “0”, and press the CLEAR key on below of ”MASTER VR” key to delete. Lite-Puter CX-12 [EUM-D]... -
Page 10: Chapter 5. Scene
ARE YOU SURE ?F1 SAVE SCENE STEP-6 for further SC2 --- SC96 setting, please refer to the setting procedure of above Each【PAGE】 24 set of SCENE setting available 4 PAGE able to store 96 set of scene Lite-Puter CX-12 [EUM-D]... -
Page 11: Scene 1
STEP-6 Press【ENTER】to confirmed the scene loading 5-2-2 use【SC/CH】key for SCENE loading (FLASH status) 【PAGE】LED ● → SCENE mode 【PAGE】LED ● → CHANNEL mode STEP-1 Set all dimming value to 0%. (refer to 4-3 ) STEP-2 Adjust the【MASTER VR】key STEP-3 Press【PAGE 1】 Lite-Puter CX-12 [EUM-D]... - Page 12 STEP-3 Press【PAGE 1】 STEP-4 press【SC/CH】to select SCENE mode (LED light on RED on PAGE key ) STEP-5 Adjust【VR 1】key to for SCENE loading 【1】 5-2-1 or 5-2-2: SCENE speed loading 【2】 5-2-3:Adjust the VR key for dimming function Lite-Puter CX-12 [EUM-D]...
-
Page 13: Chapter 6. Sequence
F1 / 2/ 3/ 4=1/ + / - /E SEQU.STEP01=S - - STEP-5 according to the STEP-3 procedures, to continues the SCENE setting, and press【F4】key to complete the editing, and press【ENTER】to save SELECT [01...24] SAVE SEQUENCE01 Lite-Puter CX-12 [EUM-D]... -
Page 14: Sequence Modify
F1: Load F3: Edit F2: Save F4: Clear STEP-5 Press【F3】key for Sequence setting CHASE Loading 6-3-1 CHASE loading : to load the 1 set of chase ※ CHASE number = SEQUENCE number STEP-1 press【CHASE】key SELECT 01…24 CHASE: OFF Lite-Puter CX-12 [EUM-D]... -
Page 15: Chase Fade On/Off Setting
Step=01 CHASE FADE ON F1/2:FADE ON/OFF STEP-2 press【F1】key, to enter CHASE FADE ON MODE. press【F2】key, to enter CHASE FADE OFF MODE. CHS=FL SPEED=FL CHS=FL SPEED=FL Step=01 Step=01 CHASE FADE ON CHASE FADE OFF F1/2:FADE ON/OFF F1/2:FADE ON/OFF Lite-Puter CX-12 [EUM-D]... -
Page 16: To Stop The Chase Execution
ISO 9001 CERTIFIED www.liteputer.com.tw 6-5 to stop the CHASE execution function 1. Press twice【CHASE】key to stop function 2. Adjust the【CHASE FADER VR】key to the “ 0% “ value to stop Lite-Puter CX-12 [EUM-D]... -
Page 17: Chapter 7. A/B Cross Faders Switching
According to the setting procedures of above, use the【A CROSS FADER VR】key for further setting 7-3 To pause the A / B CROSS FADER Adjust the 【A CROSS FADER VR】key to the “0%” value, and press【LOAD】key to pause / stop Lite-Puter CX-12 [EUM-D]... -
Page 18: Lcd Display / System Default Setting
STEP-4 and press 【F1】 for brightness of LCD background lighting, press 【F1】 again to save. F1 : Backlight F2 : Concen 8-1-2 LCD contrast adjustment STEP-4 refer to STEP-4,press【F2】key to adjust the contrast of LCD, and press 【F2】again to confirmed. F1 : Backlight F2 : Concen Lite-Puter CX-12 [EUM-D]... -
Page 19: Output Memory Card Loading / Saving
8-2 External memory card save / load STEP-1 Press【SET】 F1 : Setup F3 : Patch F2 : Xio F4 : Lock STEP-2 and press【F2】 press【F1】for external memory loading F1 : Read press【F2】for external memory saving F2 : Save Lite-Puter CX-12 [EUM-D]... -
Page 20: Channel Patch Setting / Warm Up Setting
8-3 Channel patch setting / warm up setting 8-3-1 Channel patch setting ( up to 4 set of setting ) : To patch DIMMER097channel to CH01 of CX-12 STEP-1 Press【SET】 F1 : Setup F3 : Patch F2 : Xio F4 : Lock STEP-2 and press【F3】... - Page 21 ISO 9001 CERTIFIED www.liteputer.com.tw STEP-7 key 【0】 , 【 1】 for DIMMER097<=CH01, and press 【ENTER】 key to confirmed 之 the setting, the DIMMER097 had PATCH to CX-12 CH01 F1/2/3/4=1/+/-/d DIMMER097<=CH01 STEP-8 press【SET】to escape F1 : Load F3 : Edit F2 : Save F4 : Clear STEP-9 press【F2】the save (4 set of setting available F1~F4 )
-
Page 22: Lock / Unlock Setting
STEP-3 press【F1】,to lock【PROG】key Enter 4 digit number, or enter “6248” of default LOCK PROGRAM: password setting PASSWORD : 0000 STEP-4 press【ENTER】key to confirmed the setting 8-4-2 unlock press【SET】,and press 4 digit number of password【XXXX】and press【ENTER】 to unlock Lite-Puter CX-12 [EUM-D]...
Need help?
Do you have a question about the CX-12 and is the answer not in the manual?
Questions and answers