Table of Contents
Advertisement
Advertisement
Table of Contents

Related Manuals for Ehrgeiz Fusion FS-60 RGB/1


Summary of Contents for Ehrgeiz Fusion FS-60 RGB/1
- Page 1 FS-60 RGB/1 Operating manual Bedienungsanleitung...
- Page 2 Operating Manual Page...
-
Page 3: Table Of Contents
Table of contents SAFTY INSTRUCTIONS................3 UNIT ....................7 2.1....................7 EAR 2.2..................8 ONTROL PANEL OPERATION ANS SETTINGS..............9 3.1....................9 ETUP 3.1.1. Display..................9 3.1.2. DMX ...................9 3.1.3. Master..................10 3.1.4. Red ...................10 3.1.5. Green..................10 3.1.6. Blue ..................10 3.1.7. Reset to default................10 3.1.8. LED PCB ..................11 3.1.9. Software version ..............11 3.2. -
Page 4: Safty Instructions
1. Safty instructions FOR SAFE AND EFFICIENT OPERATION Be careful with heat and extreme temperatureAvoid exposing it to direct rays of the sun or near a heating appliance. Not put it in a temperature bellow 41°F /5°C, or exceeding 95°F /35°C. - Page 5 Overhead Rigging This Item must be built in a way that it can hold 10 times more of its weight for 1 hour without causing any damages. The installation must be secured with a secondary safety attachment. The safety attachment has to be constructed in a way that no part of the installation can fall down When rigging, de-rigging or servicing the fixture staying in the area below the installation place, on bridges, under high working...
-
Page 6: Power Connection
DANGER OF FIRE! When installing the device, make sure there is no highly- inflammable Material (decoration articles, etc.) within a distance of min. 0.5 m. Mount the projector with the mounting-bracket to your trussing system using an appropriate clamp. For overhead use, always install a safety-rope that can hold at least 12 times the weight of the fixture. - Page 7 Please make sure that safety-relating and machine-technical installations are inspected by a skilled person once a year. 1. Make sure before installing that all screws are tightly connected and not corroded. 2. There must be no deformations on the housings, fixations and installations spots.
-
Page 8: Unit
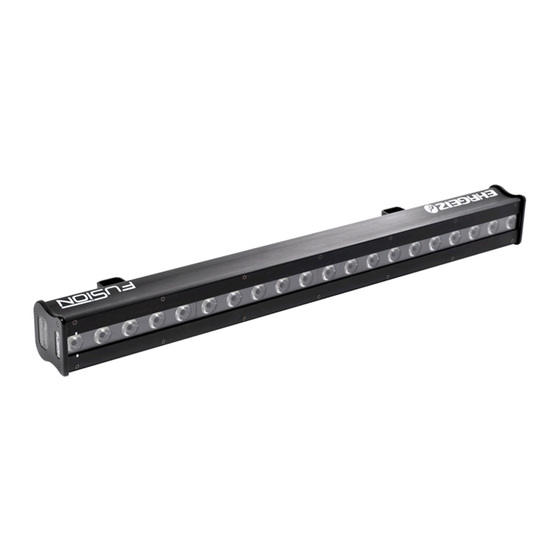
2. Unit The Fusion is a LED bar developed for wall, background, stage and ambient lighting. 2.1. Rear Side 1.) Bracket for mounting ( M10 Screw) 2.) M10 Screw 3.) Rail to adjust the bracket 4.) Control panel... -
Page 9: Control Panel
2.2. Control panel 1.) DMX output 5 pin 2.) DMX output 3 pin 3.) DMX input 5 pin 4.) DMX Input 3 pin 5.) Data input for software updates 6.) Mode button 7.) Up button 8.) Down button 9.) Enter button 10.) LC Display 11.) PowerCon input 12.) PowerCon output... -
Page 10: Operation Ans Settings
3. Operation ans settings The operations on the unit are taking place on the digital display. The settings can be changed comfortably by the 4 buttons under the display. 3.1. Setup Push the UP or DOWN button until SETUP SETINGS appears in the display. -
Page 11: Master
3.1.3. Master Set up the maximum light output of the Fusion. Press ENTER to change the value. Press the UP or DOWN button to set up the maximum light output from 0 to 100%. Confirm with ENTER. This setting can not be overwritten by the DMX signal. -
Page 12: Led Pcb
3.1.8. LED PCB Shows the temperature of the LED board. If the temperature is higher than 75°C, the unit regulates down the light output until the temperature is within the working temperature. 3.1.9. Software version Shows the actual software version. 3.2. -
Page 13: Master Mode
3.2.2. Master mode The master mode has not to be set up. It is automatically started in the automatic program, the music control or in the manual control. It’s important to make sure that the other plugged units are working in the slave mode, and that there is only one master unit in the line. - Page 14 confirm again with ENTER. In the same way you can go on with the other values By pressing MODE you are able to leave the menu.
-
Page 15: Sound Control
3.4. Sound control Press the UP or DOWN button until SOUND MODE appears in the display. Confirm by pressing ENTER to enter the submenu Here you can choose the submenu SOUND to choice the sound active programs or you can choose SENS to set up the sensitivity of the built in microphone. -
Page 16: Reference
4. Reference 4.1. DMX channel chart... -
Page 18: Programs
4.2. Programs... -
Page 23: Menu Structure
4.3. Menu structure... -
Page 25: Technical Data
4.4. Technical data Power supply: AC 90V-260V 50/60Hz Power consumption: Max.110W LEDs: 20x3W 3 in 1 RGB Beam angle: 10° (NSP) Weight: 8 KG Measurements: 1008 x 104 x 152mm Ambient temperature: 0°C/40°C Protection class: IP-20 DMX protocol: DMX 512 Connectors: XLR 3 Pin IN / OUT XLR 5 Pin IN / OUT... - Page 26 FS-60 RGB Imported by B&K Braun GmbH 76307 Karlsbad Germany Phone: +49(0)7248 912 0 Fax: +49(0)7248 912 22 Email: info@bkbraun.com www.bkbraun.com...
Need help?
Do you have a question about the Fusion FS-60 RGB/1 and is the answer not in the manual?
Questions and answers