Table of Contents
Advertisement
Quick Links
USER'S AND MAINTENANCE HANDBOOK FOR
ECO-PELLET STOVES
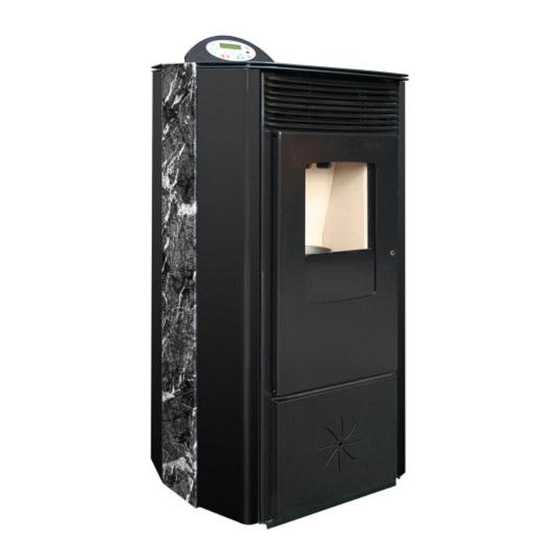
STQ14 square covering
ST18 Round covering-STQ18 Square covering-STC18 Fantasy
MT28 Round covering-MTQ28 Square covering-MTC28 Fantasy
STQ-MTQ
ST-MT
STC-MTC
SERIAL NUMBER
COSDEP di Vighesso Onorio S.a.s.
Via Copernico, 25, 36034 Malo (VI) ITALY
Tel. (0039) 0445 605255 / 602414 Fax (0039) 0445 602464
Internet:
e-mail:
www.cosdep.com
info@cosdep.com
1
Advertisement
Table of Contents

Summary of Contents for COSDEP STQ14
- Page 1 ST18 Round covering-STQ18 Square covering-STC18 Fantasy MT28 Round covering-MTQ28 Square covering-MTC28 Fantasy STQ-MTQ ST-MT STC-MTC SERIAL NUMBER COSDEP di Vighesso Onorio S.a.s. Via Copernico, 25, 36034 Malo (VI) ITALY Tel. (0039) 0445 605255 / 602414 Fax (0039) 0445 602464 Internet: e-mail: www.cosdep.com...
-
Page 2: Table Of Contents
CONTENTS 1. INTRODUCTION..………………...………………………………………………..... 1.1 General precautions 1.2 Compliance with standards 1.3 Rules and instructions 1.4 Declaration of conformity 2. GENERAL DESCRIPTION…………………………………..………………....2.1 Operating principle 2.2 Pellets and qualities available on the market 2.3 The pellet tank 3. INSTALLATION AND IGNITION …………………………………………….... 3.1 Choosing the correct stove size 3.2 Unpacking and positioning the stove 3.3 The location of the stove and connection to a chimney... -
Page 3: Introduction
1. INTRODUCTION 1.1 GENERAL PRECAUTIONS This user’s and installation handbook is an Do not obstruct the intake and ventilation indispensable, integral part of the product; grilles of the stove in any way whatsoever. it should be used and kept with care where Installation, maintenance ... -
Page 4: Rules And Instructions
A11:95 +A12:96+A1:96+A13:98+A14:98+A2:00+A15:00+A16:01 DEVIATION PROCEDURES: EN 50165:1997+A1:01 The company COSDEP di Vighesso Onorio sas, registered office Via Copernico No. 25, MALO, Italy hereby declares that the products PELLET STOVES mods. STQ14-ST18-STQ18-SCT18 and MT28-MTQ28-MTC28 have been designed and built in conformity with the aforementioned EU Directives and with the corresponding assimilated Italian laws, in order to apply the CE mark. -
Page 5: General Description
2. GENERAL DESCRIPTION 2.1 OPERATING PRINCIPLE The STQ14-ST18-STQ18-STC18 and MT28-MTQ28-MTC28 stoves have been especially designed to satisfy requirements for a practical heating appliance. They have a fan to circulate the heat produced by the burning pellets and are designed for clean, extremely efficient combustion. -
Page 6: Installation And Ignition
8m x 5m x 2.7m = 108 m³ 108 m³ x 40 Kcal/h = 4320 kcal/h total requirement for the room Pellet consumption per hour: STQ14 1,4 kg/h at maximum speed ST18-STQ18-STC18 1.8 kg/h at maximum speed MT28-MTQ28-MTC28 2.8 kg/h at maximum speed... - Page 7 very important only exclusively material that is suitable for this type of installation therefore it must be resistant to high temperatures. Installation should carried specialised, skilled personnel. If the floor under the stove is made of inflammable material, you must insert a heat-resistant surface between the floor and the stove and comply with minimum safety distances.
-
Page 8: Ignition, Starting Up
3.4 IGNITION, STARTING UP Before using the stove make sure all the moving and movable parts are positioned correctly. Also make sure the ash box is in position; remove any labels and adhesives from the glass, otherwise they may leave a permanent mark. ... -
Page 9: Diagram Explaining Display Sequences
Lighting the stove for the first time The first time you light up the stove it will be necessary to wait about 5 minutes for the pellets in the tank to reach the combustion chamber, because the cylinder containing the feed screw has to be filled. -
Page 10: Switching Off/Extinguishing The Stove
3.6 SWITCHING OFF/EXTINGUISHING THE STOVE WARNING: DO NOT DISCONNECT THE POWER SUPPLY If you want to extinguish the fire and switch off the stove you must proceed as follows: Press the OFF button on the manual control panel of the stove for at least 3 seconds or on the ... -
Page 11: Selecting Function Menus
+ (increase) - (decrease) key: Increases or decreases the temperature setting that must be reached by the stove. + (plus) - (minus) key: selects the programme setting. SET key: Saves the changes in the function menus. 4.2 SELECTING THE FUNCTION MENUS Changing the function settings in the menus will allow you to personalise stove operation. -
Page 12: The Recipe Selection
2. RECIPE SELECTION The stove is predisposed to manage 5 different operation recipe. The recipes are different under- programs for the 5 operation powers. The recipe 1 supplies the quantity minimal feed, while the recipe 5 supplies the maximum quantity. If as an example we use pellet of good quality, the stove works well to recipe 2 or 3. -
Page 13: The Operating Mode Menu
3. THE OPERATING MODE MENU In the OPERATING MODE menu it is possible to choose between MANUAL and AUTOMATIC operation of the stove. If the system is set in MANUAL mode the stove will only work (or stop) when the ON (or OFF) keys are pressed on the control panel or on the remote control. -
Page 14: The Timer Countdown Menu
Enter the temperature sequence. Using the UP F1 SS 08:30 20° and DOWN keys select the desired temperature in °C (in our example: 20). Press the RIGHT key Enab. pass to the next sequence. Enter the menu for programming the stove power. F1 SS 08:30 20°... -
Page 15: The Select Language Menu
and DOWN keys select the number of the desired 94 hours Enab. programme (in our example: 3). Press the RIGHT to pass to the next sequence. Enter the sequence for setting the number of hours to Timer ON Prog. 3 countdown. -
Page 16: The Thermostat Mode Menu
Internal thermostat or by radio control External manual thermostat Electronic chronothermostat GSM (optional), can be selected in automatic mode For the first 2 options (Internal and external thermostat), confirm the selection with the UP DOWN key then press SET to save and exit. For the electronic chronothermostat and (optional) GSM it is also necessary to save the chosen recipe programme as follows: e.g. -
Page 17: The Debug Menu
HOURS F. ASSISTANCE Here they are visualized the past hours from the last technical assistance 00005 To reset the hours after having performed the assistance. Press the UP the program until the sound beep signal to reset the hours. Press the SET key to confirm and go out. SETTING DEBUG MENU At any time during the working cycle, it is possible to verify the operating status of the stove using the DEBUG menu. -
Page 18: The Service Menu
SETTING THE SERVICE MENU The SERVICE menu has been especially designed to improve stove performance depending on the system in which it is installed and the quality of pellet. For example, if you have a tall chimney flue and you observe decreased pellet combustion you can change the speed of both the air circulation fan and the smoke exhaust fan. -
Page 19: Formulation Parameters To The Type Of Pellet
5. FORMULATION PARAMETERS ACCORDING TO THE TYPE OF PELLET TEST OF VOLTAGE IN THE SMOKE EXHAUST FAN ACCORDING TO THE PLANNED NUMBER: PLANNED NUMBER VOLT OF FAN REGULATION SMOKE EXHAUST FAN Press RED key until seeing SERVICE menu. After, pressing SET key will appear the numbers for every speed. -
Page 20: Cleaning, Maintenance And Repairs
.. etc. .., and the result is that the fall of the pellets in the grate can be of different amount. How Cosdep, we program the fall of the pellets is of... -
Page 21: Once A Week
ONCE A WEEK 1. Repeat the cleaning operations described in section 5.1 2. Take out the combustion chamber, lifting it up to uncouple it and clean the air tube bundle with a vacuum cleaner. 3. Switch on the stove and make sure that the ign. torch resistance becomes red during ignition. -
Page 22: Repairs
Use a Phillips screwdriver to undo the screws on the back of the remote control and change the battery, taking care to install the correct polarity + and -. We recommend using an alkaline battery type 23ae 12v. REPAIRS To open the lateral panels as premise CANDLE SUBSTITUTION In order to replace the candle, to unscrew the implantation screw and... - Page 23 SENSOR SUBSTITUTION In case of unbalanced numbers of the temperature smoke, replace electronic (see substitution electronic) and eventually the smoke temperature sensor BREAKDOWN TO THE THERMOSTAT OR THE RECYCLE FAN If the thermostat of control recycle fan doesn’t go off when the temperature of stove arrives 70°...
- Page 24 7. TECHNICAL SPECIFICATIONS AND DIAGRAM SHOWING OPERATION DATI TECNICI STQ14 ST18-STC18-STQ18 MT28-MTC28-MTQ28 Power rating 220-230 V / 50 Hz Min. heat rating kW Max. heat rating kW Consumption, Watts Dimensions, mm L60xP45xH99 ST18 L65xP60xH111 MT28 L49xP45xH89 L54xP47xH99 STC18 L59xP62xH111 MTC28...
-
Page 25: Electrical Diagram
8. ELECTRICAL DIAGRAM... -
Page 26: General Thermostat With Manual Reset
9.GENERAL THERMOSTAT WITH MANUAL RESET Under certain circumstances when the stove is used incorrectly, e.g. when there are obstructions or if dirt has accumulated in the ventilation grilles, or if pellet feed is too fast due to a fault in the control system, the stove may become overheated. -
Page 27: Error Messages
To operate the external thermostat or chronothermostat, take out the 2-way connector for the room thermostat and insert the 3-way connector. 11.ERROR MESSAGES MESSAGE ON MEANING CAUSE REMEDY DISPLAY ERR. code 1 IGN. FAILURE USER: Insert pellets in No ignition due to lack of (no ignition) the tank and repeat pellets... -
Page 28: Guarantee
The liability of COSDEP di Vighesso Onorio sas is limited to provision of the appliance, which must be installed correctly by the specialised technician appointed by the seller, who will assume liability for final installation and the consequent correct operation of the installed product, after following the instructions contained in the handbook and in compliance with current legislation and standards.
Need help?
Do you have a question about the STQ14 and is the answer not in the manual?
Questions and answers