Table of Contents
Advertisement
Available languages
Available languages
Quick Links
Downloaded from
www.Manualslib.com
GEAppliances.com
Operating Instructions
Auto Features . . . . . . . . . . . . . . . . . . 19
Microwave Terms . . . . . . . . . . . . . . 26
Oven Features . . . . . . . . . . . . . .10-12
Other Features . . . . . . . . . . . . . .23-26
Power Levels . . . . . . . . . . . . . . . . . . . 13
Sensor Features . . . . . . . . . . . . .20-22
Time Features . . . . . . . . . . . . . . .14-18
Consumer Support
Consumer Support . . . . . .Back Cover
Warranty . . . . . . . . . . . . . . . . . . . . . . 31
Write the model and serial
numbers here:
Model # __________________
Serial # ___________________
You can find them on a label inside the
oven.
manuals search engine
. . . . . . . .2-9
. . . . . .27-29
. . . . . . 30
Español
For a Spanish version of this manual, visit
our Website at GEAppliances.com.
Para consultar una version en español de
este manual de instrucciones, visite nuestro
sitio de internet GEAppliances.com.
Owner's Manual
JVM6175
JVM6177
LVM6177
49-40700
05-13 GE
Advertisement
Chapters
Table of Contents

Subscribe to Our Youtube Channel
Related Manuals for GEAppliances JVM6175


Summary of Contents for GEAppliances JVM6175
-
Page 1: Table Of Contents
Warranty ..... . 31 Español For a Spanish version of this manual, visit our Website at GEAppliances.com. Para consultar una version en español de este manual de instrucciones, visite nuestro sitio de internet GEAppliances.com. -
Page 2: Precautions To Avoid Possible Exposure To Excessive Microwave Energy
IMPORTANT SAFETY INSTRUCTIONS. READ ALL INSTRUCTIONS BEFORE USING. WARNING! To reduce risk of burns, electric shock, fire, personal injury or exposure to excessive microwave energy. PRECAUTIONS TO AVOID POSSIBLE EXPOSURE TO EXCESSIVE MICROWAVE ENERGY (a) Do Not Attempt to operate this oven with the door (c) Do Not Operate the oven if it is damaged. -
Page 3: Instrucciones Importantes De Seguridad
INSTRUCCIONES IMPORTANTES DE SEGURIDAD. LEA PRIMERO TODA LAS INSTRUCCIONES. GEAppliances.com ¡PRECAUCIÓN! Por su seguridad, la información contenida en este manual debe seguirse para minimizar el riesgo de incendio, explosión, descarga eléctrica, exposición a energía microondas . PRECAUCIONES PARA EVITAR POSIBLE EXPOSICIÓN A UNA EXCESIVA ENERGÍA DE MICROONDAS. -
Page 4: Safety Instructions
IMPORTANT SAFETY INSTRUCTIONS. READ ALL INSTRUCTIONS BEFORE USING. WARNING! IMPORTANT SAFETY INSTRUCTIONS. Do not clean with metal scouring pads. Pieces can burn off the This over-the-range oven is designed for use over ranges no pad and touch electrical parts involving risk of electric shock. wider than 36”. - Page 5 INSTRUCCIONES IMPORTANTES DE SEGURIDAD. LEA PRIMERO TODA LAS INSTRUCCIONES. GEAppliances.com ¡PRECAUCIÓN! INSTRUCCIONES IMPORTANTES DE SEGURIDAD. No limpie con almohadillas metálicas para fregar. Las piezas Este horno puede instalarse encima de la cocina y está podrán quemar la almohadilla y tener contacto con partes diseñado para su uso sobre cocinas encimeras no más...
-
Page 6: Important Safety Information
IMPORTANT SAFETY INFORMATION. READ ALL INSTRUCTIONS BEFORE USING. WARNING! Make sure all cookware used in your microwave oven is Cookware may become hot because of heat transferred from suitable for microwaving. Most glass casseroles, cooking dishes, the heated food. Pot holders may be needed to handle the measuring cups, custard cups, pottery or china dinnerware which cookware. - Page 7 INSTRUCCIONES IMPORTANTES DE SEGURIDAD. LEA PRIMERO TODA LAS INSTRUCCIONES. GEAppliances.com ¡PRECAUCIÓN! Asegúrese de que todos los utensilios de cocina que use en su Podrían calentarse los utensilios por el calor transferido por los horno sean aptos para microondas. Pueden usarse la mayoría alimentos calientes.
-
Page 8: Grounding Instructions
IMPORTANT SAFETY INFORMATION. READ ALL INSTRUCTIONS BEFORE USING. GROUNDING INSTRUCTIONS WARNING This appliance must be grounded. In the event of an electrical If the outlet is a standard 2-prong wall outlet, it is your personal short circuit, grounding reduces the risk of electric shock by responsibility and obligation to have it replaced with a properly providing an escape wire for the electric current. - Page 9 INSTRUCCIONES IMPORTANTES DE SEGURIDAD. LEA PRIMERO TODA LAS INSTRUCCIONES. GEAppliances.com INSTRUCCIONES DE TOMA DE TIERRA ¡ADVERTENCIA! El uso indebido del enchufe de tierra puede resultar en riesgo de descarga eléctrica. . Este electrodoméstico debe estar conectado a tierra. Si se su responsabilidad personal y su obligación el reemplazarla por...
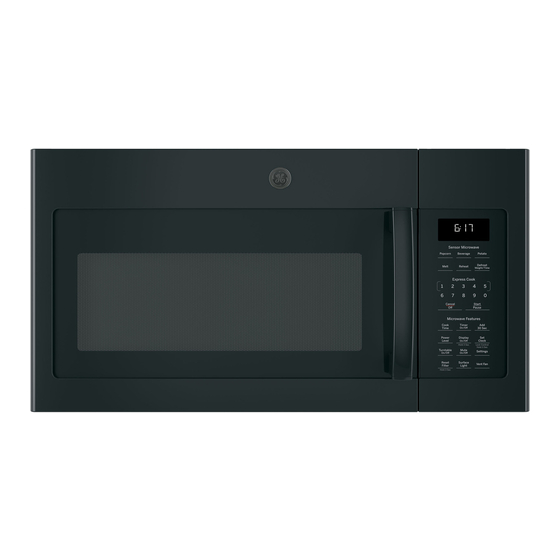
- Page 10 About the features of your microwave oven. Throughout this manual, features and appearance may vary from your model. 1000 Watts Features of the Oven 1 Door Handle. Pull to open the door. The door must 6 Cooktop Light. be securely latched for the microwave to operate. 7 Grease Filter .
-
Page 11: Optional Accessories
About the features of your microwave oven. GEAppliances.com Optional Accessories Filler Panel Kits JX81J (sales number) JX48WH - White WB02X1124 (service number) JX48BL - Black When replacing a 36” range hood, filler panel kits fill in the additional width to provide a custom built-in appearance. -
Page 12: Cooking Controls
About the features of your microwave oven. You can microwave by time or with the convenience features. Not all features on all models. Express Cook Sensor Microwave Beverage Potato Popcorn 30 Sec Defrost Vegetable Reheat Timer Weight/Time On/Off Cook Time Power Help Level... - Page 13 GEAppliances.com Rest periods (when the microwave energy cycles Changing the Power Level Cook off) give time for the food to “equalize” or transfer Time The power level may be entered or changed Power is shown with power level 3 immediately after entering the feature time for...
- Page 14 About the time features. Cook Time I Cook Time Allows you to microwave for any time up to 99 minutes and 99 seconds. Power level 10 (high) is automatically set, but 1. Press Cook Time. 2. Enter cooking time. 3. Change power level if you don’t want full Power Level Clock...
- Page 15 GEAppliances.com Cooking Guide for Cook Time NOTE: Use power level 10 (High) unless otherwise noted. Vegetable Amount Time Comments Asparagus (fresh spears) 1 lb. 6 to 9 min., In 1 ¼ -qt. oblong glass baking dish, place 1/4 cup water.
- Page 16 About the time features. Time Defrost allows you to defrost for a Defrosting Tips Defrost selected length of time. See the Defrosting Weight/Time Guide for suggested times. (Weight Defrost is defrosted in the package. Closed packages should be slit, pierced or vented AFTER 1.
- Page 17 GEAppliances.com Defrosting Guide Food Time Comments Breads, Cakes Bread, buns or rolls (1 piece) 1 min. Fish and Seafood Fillets, frozen (1 lb.) 6 to 8 min. Shellfish, small pieces (1 lb.) 5 to 7 min. Place block in casserole.
- Page 18 About the time features. Express Cook This is a quick way to set cooking time for 1 –6 minutes. Press one of the Express Cook pads (from 1 to 6) for 1 to 6 minutes of cooking at power level 10. For 2 pad for 2 minutes of cooking time.
-
Page 19: Auto Features
About the auto features. GEAppliances.com Weight Defrost Conversion Guide Defrost Weight defrost automatically sets the Weight/Time If the weight of food is stated in pounds and defrosting times and power levels to give ounces, the ounces must be converted to even defrosting results for meats, poultry tenths (.1) of a pound. - Page 20 About the sensor features. The Sensor Features detect the increasing humidity released during cooking. The oven essential for best sensor cooking. Always use microwave-safe containers Covered various types and amounts of food. and cover them with lids or vented Do not use the Sensor Features twice in plastic wrap.
- Page 21 About the sensor features. GEAppliances.com To use the Reheat feature: Reheat The Reheat feature reheats single servings Some Foods Not Recommended For Use of previously cooked foods or a plate of With Reheat: leftovers. It is best to use Cook Time for these foods: 1.
- Page 22 About the sensor features. Vegetable Vegetable 1. Place covered food in the oven. Press If food is undercooked after the countdown, Vegetable. use Cook Time for additional cooking time. 2. Press Start/Pause . The oven signals when the steam is sensed and the time remaining begins counting down.
- Page 23 About other features. Set Clock Clock Press to enter the time of day or to check the time of day while microwaving. 1. Press Set Clock. 2. Enter time of day. 2. Select AM/PM. 3. Press Start or Set Clock. To check the time of day while microwaving, Clock Display press Set Clock.
- Page 24 About other features. Surface Light On some models, there is a night light option. Surface Press to turn the surface light on or off. Press Surface Light once for bright light, twice for the Light night light or three times to turn the light off. Sound Sound.
- Page 25 About other features. Shelf (on some models) NOTICE: Only use microwave sehf when How to Use the Shelf when Microwaving reheating on more than one level. DO NOT Food microwaves best when placed on the store the oven shelf in the microwave. turntable or on the shelf in the lower position.
- Page 26 About other features. Shelf and Reheating To reheat on 2 levels To reheat 2 dishes on the lower level: 1 Multiply reheat time Switch places after 1/2 time. by 1 2 Switch places after 1/2 the time. To reheat on 3 levels (on some models) Switch places after 1/2 time.
-
Page 27: Care And Cleaning
Care and cleaning of the microwave oven. Helpful Hints An occasional thorough wiping with a solution of baking soda and water keeps the inside fresh. Unplug the cord before cleaning any part of this oven. How to Clean the Inside Walls, Floor, Inside Window, Metal and Plastic Parts on the Door Some spatters can be removed with a paper towel;... - Page 28 Care and cleaning of the microwave oven. Cooktop Light/Night Light 3 Be sure the bulb(s) to be replaced are Replacement cool before removing. After breaking the adhesive seal, remove the bulb by Replace the burned-out bulb with a gently turning. Replace with the same 120 volt, 40-watt incandescent bulb size and type bulb.
- Page 29 Care and cleaning of the microwave oven. Removing and Cleaning the Filter Rinse, shake and let it dry before replacing. To remove, slide it to the side using the tab. Pull it down and out. To replace, slide the filter in the frame slot on the left side of the opening.
-
Page 30: Troubleshooting Tips
Troubleshooting Tips. GEAppliances.com Problem Possible Cause What to Do A fuse in your home Oven will not may be blown or the start circuit breaker tripped. Power surge. it back in. Plug not fully inserted into wall outlet. oven is fully inserted into wall outlet. - Page 31 ® Proof of the original purchase To schedule service, on-line, 24 hours a day, visit us at GEAppliances. date is needed to obtain com, or call 800.GE.CARES (800.432.2737). Please have serial and service under the warranty.
-
Page 32: Consumer Support
Consumer Support. GE Appliances Website GEAppliances.com Have a question or need assistance with your appliance? Try the GE Appliances Website 24 hours a day, any day of the year! For greater convenience and faster service, you can now download Owner’s Manuals, ”... - Page 33 Seguridad ... . .2–5 propietario Instrucciones JVM6175 de Funcionamiento JVM6177 Funciones Automáticas ..15 Términos del Microondas ..22 LVM6177 Funciones del Horno .
- Page 34 INSTRUCCIONES IMPORTANTES DE SEGURIDAD. LEA PRIMERO TODA LAS INSTRUCCIONES. ¡PRECAUCIÓN! Por su seguridad, la información contenida en este manual debe seguirse para minimizar el riesgo de incendio, explosión, descarga eléctrica, exposición a energía microondas . PRECAUCIONES PARA EVITAR POSIBLE EXPOSICIÓN A UNA EXCESIVA ENERGÍA DE MICROONDAS.
-
Page 35: Instrucciones De Seguridad
INSTRUCCIONES IMPORTANTES DE SEGURIDAD. LEA PRIMERO TODA LAS INSTRUCCIONES. GEAppliances.com ¡PRECAUCIÓN! INSTRUCCIONES IMPORTANTES DE SEGURIDAD. No limpie con almohadillas metálicas para fregar. Las piezas Este horno puede instalarse encima de la cocina y está podrán quemar la almohadilla y tener contacto con partes diseñado para su uso sobre cocinas encimeras no más... - Page 36 INSTRUCCIONES IMPORTANTES DE SEGURIDAD. LEA PRIMERO TODA LAS INSTRUCCIONES. ¡PRECAUCIÓN! Asegúrese de que todos los utensilios de cocina que use en su Podrían calentarse los utensilios por el calor transferido por los horno sean aptos para microondas. Pueden usarse la mayoría alimentos calientes.
- Page 37 INSTRUCCIONES IMPORTANTES DE SEGURIDAD. LEA PRIMERO TODA LAS INSTRUCCIONES. GEAppliances.com INSTRUCCIONES DE TOMA DE TIERRA ¡ADVERTENCIA! El uso indebido del enchufe de tierra puede resultar en riesgo de descarga eléctrica. . Este electrodoméstico debe estar conectado a tierra. Si se su responsabilidad personal y su obligación el reemplazarla por...
- Page 38 Acerca de las funciones de su horno microondas Es posible que las funciones y apariencias varíen con relación a su modelo a lo largo del manual. 1000 Watts Funciones del Horno 1. Manija de la Puerta. Empuje para abrir la puerta. 6.
- Page 39 GEAppliances.com Accesorios Opcionales Kits del Panel de Relleno JX81J (número de venta) JX48WH - Blanco WB02X1124 (número del servicio técnico) JX48BL - Negro Al reemplazar una campana de estufa de 36”, los kits del panel de relleno completan el ancho adicional a fin de brindar un aspecto de construcción a medida.
- Page 40 Acerca de las funciones de su horno microondas. Puede usar el horno microondas por tiempo o con funciones convenientes. No todos los modelos cuentan con todas las funciones. Express Cook Sensor Microwave Beverage Potato Popcorn 30 Sec Defrost Vegetable Reheat Timer Weight/Time On/Off...
- Page 41 GEAppliances.com Algunas comidas podrán tener mejor Cómo Modificar el Nivel de Potencia Cook sabor, textura o aspecto si se usa una de Time las configuraciones inferiores. Use un nivel El nivel de potencia se podrá ingresar o modificar Power de potencia inferior al cocinar comidas con...
- Page 42 Acerca de las funciones del temporizador. Tiempo de Cocción I Cook Time Le permite cocinar en el horno microondas por cualquier tiempo hasta 99 minutos y 99 segundos. Power level 10 (Nivel de potencia 10) se configura de forma automática, pero lo puede modificar para una mayor flexibilidad.
- Page 43 GEAppliances.com Guía de Cocción para la Cocción por Tiempo NOTA: Use el nivel de potencia 10 (Alto) a menos que se indique lo contrario. Verdura Cantidad Tiempo Comentarios Espárragos (tallos frescos) 1 libra 6 a 9 min., En un plato de horneado de vidrio rectangular de 1¼, Med-High (7) coloque ¼...
- Page 44 Acerca de las funciones del temporizador Time Defrost (Descongelación por Tiempo) le Es posible que se escuchen ruidos de golpes Defrost permite descongelar durante un período de secos durante la descongelación. Esto es Weight/Time tiempo seleccionado. Consulte los tiempos normal cuando el horno no está funcionando sugeridos en la Guía de Descongelación.
- Page 45 GEAppliances.com Guía de Descongelación Comida Tiempo Comentarios Panes, Tortas Panes, buñuelos o panecillos (1 trozo) 1 min. Pastelitos (12 oz. aprox.) 3 a 5 min. Reordene luego de la mitad del tiempo. Pescado y Mariscos Lomos, congelados (1 lb.) 6 a 8 min.
- Page 46 Acerca de las funciones del temporizador. Cocción Express Ésta es una forma rápida de configurar el tiempo de cocción entre 1 y 6 minutos. Presione una de las teclas de Express Cook (Cocción Express) (de 1 a 6) para una cocción de entre 1 y 6 minutos en power level 10 (nivel de potencia 10).
- Page 47 Acerca de la función automática. GEAppliances.com Descongelación por Peso Guía de Conversión Defrost La función de descongelación por tiempo Weight/Time Si el peso de la comida se expresa el libras configura automáticamente los tiempos y onzas, las onzas se deberán convertir a de descongelación y los niveles de...
- Page 48 Acerca de las funciones del Sensor. Sensor Features (Funciones del Sensor) detectan la humedad creciente liberada cobertores para una mejor cocción con durante la cocción. El horno ajusta de sensor. Covered forma automática el tiempo de cocción a Siempre utilice envases de uso seguro diferentes tipos y cantidades de comida.
- Page 49 GEAppliances.com Para usar la función Reheat (Recalentar): Reheat La función Reheat (Recalentar) vuelve podrán tener amplias variaciones de a calendar las porciones de comidas temperatura. Algunas partes de la comida cocinadas previamente o un plato con podrán estar extremadamente calientes.
- Page 50 Acerca de las funciones del Sensor. Verdura Vegetable 1. Coloque la comida cubierta en el horno. detecta vapor y el tiempo restante comienza Presione Vegetable (Verdura). la cuenta regresiva. Si es necesario, gire o revuelva la comida. 2. Presione Start/ Pause (Iniciar/ Pausar). El horno emite una señal cuando el Si la comida no termina de cocinarse luego de sensor detecta vapor y el tiempo restante...
- Page 51 Acerca de otras funciones. GEAppliances.com Configuración del Reloj Clock Presione para ingresar la hora del día o para Para controlar la hora del día mientras completar la hora del día mientras cocina cocina en el horno microondas, presione la con microondas.
- Page 52 Acerca de otras funciones. Luz de la Superficie Presione Surface Light (Luz de la Superficie) una vez Surface para activar la luz brillante, dos veces para activar la Presione para encender o apagar la luz del horno. Light luz nocturna o una tercera vez para apagar la luz. Algunos modelos cuentan con la opción de luz nocturna.
- Page 53 GEAppliances.com Estante (en algunos modelos) AVISO: Sólo use el estante para microondas Cómo Usar el Estante al Cocinar en el al recalentar en más de un nivel. NO guarde Horno Microondas el estante del horno dentro del microondas. La comida se cocina mejor en el horno microondas cuando se coloca en el plato giratorio o en el estante en la posición baja.
-
Page 54: Términos Del Microondas
Acerca de otras funciones. Estante y Recalentamiento Estante y Recalentamiento Para recalentar 2 platos en el nivel inferior: Cambie las posiciones luego de la mitad del tiempo. 1. Multiplique el tiempo de recalentamiento por 1 2. Cambie las posiciones luego de la mitad del tiempo. -
Page 55: Cuidado Y Limpieza
Cuidado y limpieza del horno microondas. GEAppliances.com Consejos Útiles Una limpieza completa de forma ocasional con una solución de bicarbonato y agua mantiene el interior fresco. Desenchufe el cable antes de limpiar cualquier parte del horno. Cómo Limpiar el Interior Paredes, Piso, Ventana Interior, Partes Metálicas y Plásticas de la Puerta... - Page 56 Cuidado y limpieza del horno microondas. Luz de la Placa de Cocción/ Reemplazo 3. Asegúrese de que la lámpara(s) que se de la Luz Nocturna reemplazará esté fría antes de retirar la misma. Luego de romper el sello Reemplace la lámpara quemada por una adhesivo, retire la lámpara girando lámpara incandescente de 120 voltios, 40 la misma suavemente.
- Page 57 GEAppliances.com Retiro y Limpieza del Filtro suavemente para retirar cualquier suciedad incrustada. Para retirar, deslice el mismo sobre la parte lateral usando la lengüeta. Empuje Enjuague, sacuda y deje secar antes de hacia abajo y afuera. realizar el reemplazo. Para reemplazar, deslice el filtro en la...
-
Page 58: Consejos Para Solucionar Problemas
Consejos para Solucionar Problemas. Problema Causa Posible Qué Hacer El horno no se inicia Es posible que un fusible de Reemplace el fusible o reinicie el disyuntor. su hogar se haya quemado o que el disyuntor se haya desconectado. Pico de tensión. Desenchufe el horno microondas;... - Page 59 Para programar una consulta del servicio de acuerdo con la garantía técnico a través del Internet, las 24 horas, visítenos en GEAppliances. deberá contar con la prueba com, o llame al 800. GE.CARES (800.432.2737). Cuando llame para de la fecha original de compra.
-
Page 60: Soporte Al Cliente
Soporte al Cliente. Sitio Web de Electrodomésticos de GE GEAppliances.com ¿Desea realizar una consulta o necesita ayuda con su electrodoméstico? ¡Intente a través del Sitio Web de Electrodomésticos de GE las 24 horas del día, cualquier día del año! Para mayor conveniencia y un servicio más rápido, ahora puede descargar el Manual del Propietario, ordenar piezas, catálogos o incluso un servicio programado...
Need help?
Do you have a question about the JVM6175 and is the answer not in the manual?
Questions and answers