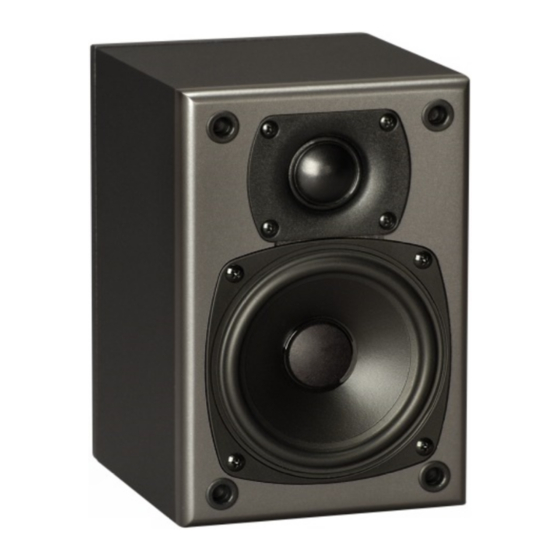
Summary of Contents for MK Sound K-15 K-7
- Page 1 operation manual K-17, K-15 K-7, K-5 Miller & Kreisel Sound, Inc. 9351 Deering Avenue Chatsworth, CA 91311-5858 USA (818) 701-7010 fax (818) 701-0369 www.mksound.com ©2002 Miller & Kreisel Sound, Inc.
-
Page 2: Table Of Contents
OPTIMIZING SPEAKER PLACEMENT...5 HOME THEATRE USAGE...7 CENTER CHANNEL...7 SURROUND CHANNEL...8 SATELLITE/SUBWOOFER PHASING TEST...9 SPEAKER DAMAGE & HOW TO AVOID IT...10 M&K 5.1 MULTICHANNEL & PRO-LOGIC SYSTEM SETUP GUIDE...11 IF YOU NEED SERVICE OR SET-UP ASSISTANCE...13 M&K 10 YEAR WARRANTY...13 CABINET MAINTENANCE...13 USE WITH M&K BRACKETS...13... -
Page 3: Introduction
If you have any questions about your speaker system, please contact your M&K dealer or call the M&K factory directly at (818) 701-7010, from 8:30 AM to 5:00 PM Pacific Time, Monday through Friday. We will be happy to help you with any question, no matter how simple or complex it may be. -
Page 4: Speaker Hook-Up
ANCHORS THROUGH THE WALL OR OVERTIGHTEN THE SCREWS. That's it! All that is left for you to do is attach the speaker wire to the input terminals (Section 4), and, from the top, gently slide the speaker into place against the wall. -
Page 5: Optimizing Speaker Placement
HOOKUP For each speaker, connect the Positive (+) lead from your amplifier or receiver to the RED (+) INPUT terminal and connect the Negative (-) lead from your amplifier or receiver to the BLACK (-) INPUT terminal. See Figure 2. - Page 6 Your Speakers should be located, whenever practical, away from walls, the floor, furniture, or any other reflecting surfaces. Do the best you can. Objects close to the speaker will reflect sound, and this reflected sound arrives at your ear slightly later than the direct sound, which blurs sonic imaging and makes transients seem muted.
-
Page 7: Home Theatre Usage
If the television is not in the center of the room (or not centered between the Left and Right speakers), the Center channel speaker should still be as close as possible to the screen -- even if it is outside the left and right speakers (such as a TV located in a corner of the room outside the stereo spread of the left and right speakers). -
Page 8: Surround Channel
It is also preferred that the speakers be equidistant from the listening position. Equidistant usually means that when the center speaker is on top of the television, the left and right speakers will sit in front of the set (they will be farther from the wall behind the TV than the center speaker). -
Page 9: Satellite/Subwoofer Phasing Test
If your Subwoofer has a PHASE switch on its back panel, move it either from (+) to (—) or vice versa. If your Subwoofer does not have a PHASE switch, it takes a bit more work. You will have to change the Positive and Negative speaker inputs on the back of BOTH Main speakers. FIGURE 6... -
Page 10: Speaker Damage & How To Avoid It
You need to perform this test because when Main speakers are located separate from a Subwoofer, each speaker is at a different distance from your ear. In some cases, the difference will be just enough so that the output from the Subwoofer arrives out of phase with the output of the Satellites. When this happens, that critical mid-bass is actually cancelled. -
Page 11: M&K 5.1 Multichannel & Pro-Logic System Setup Guide
Locate the surrounds. Determine the best position in the room. It will probably be the position used for THX speaker, directly to the right and left of the main listening position on the side walls (so that a listener in the center seat is directly between the speakers). - Page 12 Set all channels to exactly the same level. Use a Sound Level Meter. Point it directly at the speaker being measured. Set all channels to the same level, using the processor/receiver/receiver’s internal test signal. Set the meter to “C” weighting and “Slow”...
-
Page 13: If You Need Service Or Set-Up Assistance
13. Switch the processor/receiver to each input that you will use. Check your settings for each input and each mode. Some processor/receivers require that you enter settings separately for each mode and/or input. 14. Before playing the system, check levels and speaker alignment one last time. Make sure that you write down all processor settings for future reference. -
Page 14: Specifications
K-SERIES SATELLITE SPEAKER 14. SPECIFICATIONS K-17/K-7 TWEETER: IMPEDANCE: MINIMUM POWER: RECOMMENDED POWER: MAXIMUM POWER: RECOMMENDED CROSSOVER FREQUENCY: FREQUENCY RESPONSE: DIMENSIONS (H x W x D): WEIGHT K-15/K-5 TWEETER: IMPEDANCE: MINIMUM POWER: RECOMMENDED POWER: MAXIMUM POWER: RECOMMENDED CROSSOVER FREQUENCY: FREQUENCY RESPONSE:... -
Page 15: K-15/K-5 Wall Mountingbracket Template
Attach the speaker wires to the speaker. Place the back of the speaker (with the other component of the bracket in place) and carefully slide the speaker down the wall until the brackets mate. -
Page 16: K-17/K-7 Wall Mountingbracket Template
Attach the speaker wires to the speaker. Place the back of the speaker (with the other component of the bracket in place) and carefully slide the speaker down the wall until the brackets mate.


Need help?
Do you have a question about the K-15 K-7 and is the answer not in the manual?
Questions and answers