
Related Manuals for D.A.C.E Compact 300

Summary of Contents for D.A.C.E Compact 300
- Page 1 COMPACT 300 / 500 OWNERS MANUAL Please read carefully before installing the motor...
-
Page 2: Table Of Contents
INDEX SPECIFICATIONS COMPACT 500 COMPACT 300 Intended use Domestic Domestic General info rmation …………………………….3. Max gate mass 500 kg 300 kg Safety instructions ………………………………4. Max gate length Terms and definitions …………………………...5. Max number of operations per day Max start—up force... -
Page 3: General Info Rmation
Remember that if a gate causes injury or damage due to faulty installation, the law will hold the person who installed D.A.C.E. warrants the original purchaser, at the point of sale, that the product is in good working order and is free from the motor responsible. - Page 4 Do not open , tamper or modify any of the electrical components of this equipment in any way . LOW BATT—this indicates that the battery is flat. Do not attempt to repair the equipment, this should only be done by a qualified D.A.C.E. technician. MAINS FAIL—this indicates that the mains power is off.
-
Page 5: Terms And Definitions
This ensures that the electrical contacts of an electric fence make a solid connection when the gate is closed. This is a pre-set function on the Compact 300. It is an optional function on the Compact 500. To set up positive close on the Compact 500, simply program the motor with no magnet on the gate. -
Page 6: General Motor Layout
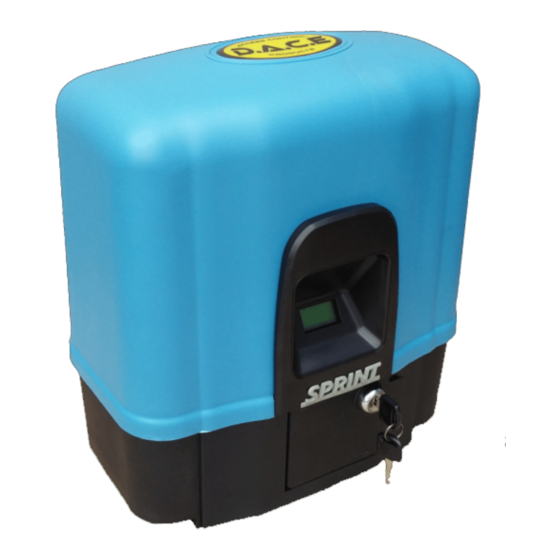
GENERAL MOTOR LAYOUT CONNECTING AN EXTERNAL RECEIVER (OPTIONAL) The pictures below show the Compact 500 and the Compact 300 motors. The lids have been removed to show greater Main P.C.Board detail. The Compact 500 and Compact 300 share the same major components. The differences are shown in the pictures. -
Page 7: General Site Layout
CONNECTING AN INTERCOM (OPTIONAL) GENERAL SITE LAYOUT There are many different ty pes of intercoms available on the market today . The diagram below shows a basic site lay out. Some items shown are optional extras. It should be noted that infra-red The wiring of these intercoms can vary in some way s, but the general wiring is the same. -
Page 8: Site Evaluation
SITE EVALUATION WIRING AUXILIARY EQ UIPMENT All auxiliary equipment should be connected with caution as an incorrect connection could lead to the P.C.Board The site should be evaluated before the installation begins. The following items should be checked. being damaged. Consult the wiring diagrams below. All power should be removed from the P.C.Board. before any Flood level. -
Page 9: Gate Evaluation
PULL (Compact 500 = 10 kg) 2 off 3 off 4 on = 40 seconds (Compact 300 = 6 kg) 2 on 3 on 4 on = 70 seconds Any combination can be used to select the desired auto-close time. - Page 10 Remove the jumper. • IMPORTANT.!!! Compact 300 only. The gate must always be operated THREE (3) times after it has been The remote will now be erased. The next remote to be programmed will take the place of the erased remote.
-
Page 11: P.c.board Layout
PROGRAMMING THE MOTOR P.C.BOARD LAYOUT 2. While turning the thumb wheel anti clockwise, move the gate slightly until a click is heard and the motor locks into place The P.C. board is a sensitive piece of electronic equipment. All electronic equipment should be handled with care. Never 1. - Page 12 BLACK WIRE BLACK WIRE BLUE WIRE DO NOT RUN 220 VOLTS IN THE SAME CONDUIT AS 16 VOLTS. COMPACT 300 WIRING Closing direction Closing direction PROGRAMMING THE MOTOR The motor must be programmed to the gate in order to operate correctly . .
- Page 13 MOUNTING THE RACK ELECTRICAL SHOCK MAY OCCUR. PLEASE TAKE EXTREME CARE WHEN WIRING THE TRANSFORMER The rack is attached to the gate using the TEK screws supplied. It is recommended that the rack is not welded to the gate as this prevents any adjustment at a later stage. The rack must mesh with the pinion gear throughout the complete length of the gate.
- Page 14 ANCHORING THE MOTOR SECURING THE MOTOR TO THE FOUNDATION PLATE hen anchoring the motor it is important to ensure that the following points are checked. It is very important that the motor is mounted on a firm foundation that can not move or become loose over time. The The electrical cable is in place.
Need help?
Do you have a question about the Compact 300 and is the answer not in the manual?
Questions and answers
i have set up gate but the gates are out of sych
To synchronize the gates on the D.A.C.E Compact 300, follow these steps:
1. Remove the lid by unscrewing the two screws at the side.
2. Place the motor in manual override if needed.
3. To program remotes, press and hold the learn button on the control board (this connects the remote to the motor).
4. Number remotes in order during programming to manage them later (e.g., to erase lost or stolen remotes).
Ensure the gate is not jammed, rollers turn freely, the gate doesn't stick in the catch bracket, and the gate mass does not exceed specifications.
This answer is automatically generated