Table of Contents
Advertisement
For the Installation, Operation and Service of
Should the installer or owner be unfamiliar with the correct
installation or operation of this type of equipment you should contact
the distributor/manufacturer for the correct advice before proceeding
with the installation or operation of this product.
Advertisement
Table of Contents

Related Manuals for Hammerhead ONGA


Summary of Contents for Hammerhead ONGA
- Page 1 For the Installation, Operation and Service of Should the installer or owner be unfamiliar with the correct installation or operation of this type of equipment you should contact the distributor/manufacturer for the correct advice before proceeding with the installation or operation of this product.
-
Page 2: Table Of Contents
Table of Contents Page Component Checklist Assembly Suction Seal Assembly Preparations 1 Backwash Rinse 2 Strainer Basket Return Line Adjustments Hose Assembly & Weights Installation Balancing the Hose Fine Tuning Maintenance Trouble Shooting Warranty... -
Page 3: Component Checklist
Component Checklist Please note changes to the contents of this unit: (Changed items printed in Bold Print) 1..Cleaner Body (1) 2..Suction Seal (1) 3..Regulator Valve (1) 4..Elbow (90 degree) & Threaded Skimmer Plate Adaptor (1) 5..Hose Weights (2) 6.. -
Page 4: Assembly
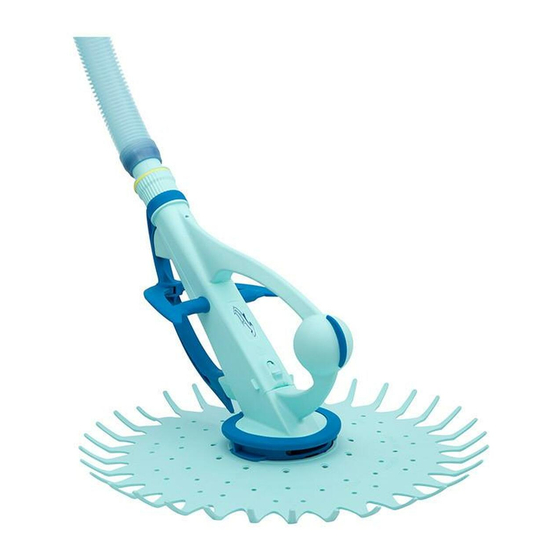
Assembly Suction Seal Assembly Pull Suction Seal over the cleaners Foot Pad so that it will fi t properly into the Foot Pad’s groove as shown in illustration #1. Ensure that the curved tips of the Suction Seal face upwards. Ensure that the Suction Seal rotates freely. -
Page 5: Preparations
Preparations 1 Backwash Rinse: Thoroughly backwash and rinse the fi lter to ensure that it is free from dirt and debris. Switch the pump off. Clean skimmer/weir and leaf strainer/basket. Insert the basket and vacuum lid back in weir once clean. Backwash Rinse Skimmer/Weir... -
Page 6: Return Line Adjustments
Return Line Adjustments Important The cleaner must move randomly throughout the pool. Water circulating at the surface will infl uence the hose thus limiting Cleaner’s coverage. Adjust Return Line Flow as described in diagrams below. To adjust the Eyeball Diverters; loosen the lock ring and redirect the Eyeball Diverters slightly downwards and also try different directions to see what works best in your pool. -
Page 7: Hose Assembly & Weights
Hose Assembly & Weights Important The exclusive three-year warranty is only valid if the machine is operating with genuine Hammer Head hose. N.B. Hammer Head hose is specially constructed for optimum performance and is protected by a three-year warranty against factory defect. Twist and push the female ends to the male after dipping the ends into the pool to wet them. -
Page 8: Installation
Installation Skimmer Ensure the pump and fi ltration system is switched off before commencing. Insert the weir adaptors into vacuum lid. Connect the already measured out hose sections Regulator to the Hammer Head. Valve To Pump 1. Insert Flow Gauge into leader hose. 2. -
Page 9: Balancing The Hose
Installation continued Balancing the Hose You will also have to attach hose weights to the hose to neutralize the hose’s buoyancy in the water. Hose weight is not required for most of the pools. To improve cleaner’s pool coverage place 1st hose weight between the 3rd and 4th hose and the 2nd hose weight between 4th and 5th hose from the cleaner. -
Page 10: Maintenance
Maintenance Your Cleaner requires very little maintenance. Check the Flapper from time to time. 1. It is quick and easy to open up the Flapper’s chamber. Simply stop the pump, push the sliding lock up into open position and remove the lid. With your fi... - Page 11 Maintenance • Check the Suction Seal for wear. If it becomes thin and too fl oppy, it will impair the correct random movement of the pool cleaner and should be replaced. • Check the footpad. It is a wearing part and should be replaced when worn. •...
-
Page 12: Trouble Shooting
Trouble Shooting Problem: Cleaner is sluggish or has stopped operating. Solution: • Check Hammer Head for blockage inside the Oscillator chamber. • Clean your fi lter system, empty pump basket and empty skimmer/weir basket. • Clean cartridge inside cartridge fi lter, if one is installed. •... - Page 13 Trouble Shooting Problem: Cleaner does not stick/climb onto the wall. Solution: • Using your Flow Gauge, verify proper water fl ow to your Cleaner. • Increase the water fl ow slightly, by adjusting the valve to faster. • Verify proper hose length and correct position of the Hose Weights. •...
- Page 14 Trouble Shooting Problem: Cleaner leaves patches. Solution: • Ensure the swivel on top of the Hammer Head is rotating freely and is screwed on securely. • Adjust Eyeball Diverters downwards. • Check the footpad under the Hammer Head for wear. •...
-
Page 15: Warranty
Notes... - Page 16 IMPORTANT Please attach your sales invoice/docket here as proof of purchase should warranty service be required. Please do not return Warranty Form to Pentair Australia - please retain for your records. Purchased From ........................Purchase Date........Serial No......Model No......Head Office Pentair AU/NZ: 1-21 Monash Drive,...
Need help?
Do you have a question about the ONGA and is the answer not in the manual?
Questions and answers