
Summary of Contents for Cook's essentials BM002
- Page 1 BREADMAKER Model: BM002 CONTENTS Important Safeguards 1 Know Your Bread Maker 3 Using Your Bread Maker 7 Frequently Asked Questions 19 Care and Cleaning 20 Recipes 21 CEBRDMKR_MAN_QVC_V10_20120427 ...
-
Page 2: Important Safeguards
IMPORTANT SAFEGUARDS When using electrical appliances, basic safety precautions should always be followed, including the following: 1. Read all instructions. 2. Do not touch hot surfaces. Use handles or knobs. 3. To protect against electrical shock do not immerse cord, plug or bread maker in water or other liquid. 4. Close supervision is necessary when any appliance is used by or near children. 5. Unplug from outlet when not in use and before cleaning. Allow to cool before putting on or taking off parts. 6. Do not operate any appliance with a damaged cord or plug or after the appliance malfunctions or has been damaged in any manner. Return appliance to the nearest authorized service facility for examination, repair, or adjustment. 7. The use of accessory attachments not recommended by the appliance manufacturer may cause injuries. 8. Do not use outdoors. 9. Do not let cord hang over edge of table or counter, or touch hot surfaces. 10. Do not place on or near a hot gas or electric burner, or in a heated oven. 11. Extreme caution must be used when moving an appliance containing hot oil or other hot liquids. 12. Always attach plug to appliance first, then plug cord into the wall outlet. To disconnect, press and hold Start/Stop button for 2 seconds, remove plug from wall outlet. 13. Do not use appliance for other than intended use. 14. Avoid contact with moving parts. 15. - Page 3 THIS UNIT IS FOR HOUSEHOLD USE ONLY. CAUTION, HOT SURFACES: This appliance generates heat and escaping steam during use. Proper precautions must be taken to prevent the risks of burns, fires or other injury to persons or damage to property. POLARIZED PLUG (120V Models Only): This appliance has a polarized plug (one blade is wider than the other). To reduce the risk of electric shock, this plug is intended to fit into a polarized outlet only one way. If the plug does not fit fully into the outlet, reverse the plug. If it still does not fit, contact a qualified electrician. Do not attempt to modify the plug in any way. TAMPER‐RESISTANT SCREW: Warning: This appliance is equipped with a tamper‐resistant screw to prevent removal of the outer cover. To reduce the risk of fire or electric shock, do not attempt to remove the outer cover. There are no user‐serviceable parts inside. Repair should be done only by authorized service personnel. ELECTRICAL CORD • A short power‐supply cord (or detachable power‐supply cord) has been provided to reduce the risk resulting from becoming entangled in or tripping over a longer cord. • Longer detachable power‐supply cords or extension cords are available and may be used if care is exercised in their use. • If a long detachable power‐supply cord or extension cord is used, a. The marked electrical rating of the detachable power‐supply cord or extension cord should be at least as great as the electrical rating of the appliance, b. If the appliance is of the grounded type, the extension cord should be a grounding‐type 3‐wire cord, and c. The longer cord should be arranged so that it will not drape over the countertop or tabletop where it can be pulled on by children or tripped over. Note: If the power supply cord is damaged, it should be replaced by qualified personnel. SPECIFICATIONS Capacity: ...
-
Page 4: Know Your Bread Maker
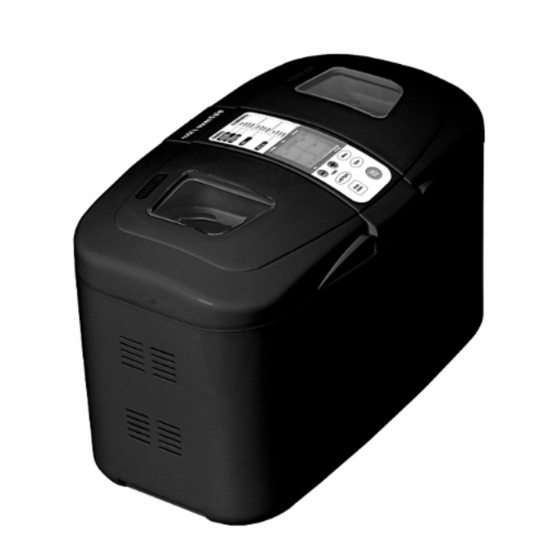
KNOW YOUR BREAD MAKER Parts Fig.1 Fig.2 Fig. 1 Fig. 2 1‐ Main housing 2‐... - Page 5 CONTROL PANEL SETTINGS LCD Display Information Fig. 3 Mode Display “ ” This unit offers five working modes: NORMAL、FAST、EXPRESS、MIX and SPECIAL. The small triangle in the LED display will indicate the current mode selected and illuminate. “LEFT” and “RIGHT” Display This section of the LCD will indicate which side(s) of the Bread Maker is (are) being used. “TIMER” Display This section of the LCD indicates the working time for the chosen menu option. “MENU” Display This section of the LCD indicates the selected menu options, 1, 2, 3 or 4 under each of the 5 modes available, as listed below: NORMAL、FAST、EXPRESS Modes : “1”—BASIC “3” —FRENCH “2”— SWEET “4” —WHEAT MIX Mode: “1”—PASTA “3”—PIZZA “2”—DOUGH ...
- Page 6 Button Function Information Fig. 4 “Mode Select” Button Press the “Mode Select” button to choose the mode. When the Left and Right pans are both in use at the same time, the same mode must be selected, but the crust color selection may differ. “Left/Right” Button This button allows you to select the pan you would like to work with, left or right. If you do not select a specific pan side, the default setting is that both the left and right pans will work. “Menu” Button Press the “Menu” button to choose the menu option. The chosen menu option will be indicated on the LCD display, I, 2, 3 or 4. “TIMER” and Buttons Decreases the time in 10 minutes intervals. Increases the time in 10 minutes intervals. ...
- Page 7 The time will be indicated on the LCD. This function should be used when you want the delay function to make bread under the NORMAL and FAST modes. “Color” Button Press the “Color” button to select the crust color from LIGHT, MED. or DARK. When a color is selected, a black bar will be displayed under the color selected. “Start/Stop” Button Press the ”Start/Stop” button to start or stop the machine. Length of Cycles Program Specification Chart (Approximate Times; M=Minutes; S=Seconds; All other times are in Hours: Minutes) MENU MAX. FRUTT& TOTAL RISE KNEAD RISE RISE DELAY KNEAD1 PUNCH BAKE WARM NUT TIME 1 ...
-
Page 8: Using Your Bread Maker
USING YOUR BREAD MAKER This product is for household use only . GETTING STARTED • Remove packing materials and any stickers. • Place your Bread Maker on a dry, stable, level surface away from heat and areas where cooking grease or water may splatter on unit. • Do not place near the edge of a countertop. If placing beneath cabinets, make sure there is enough room to open the lid without interference. Note: During first use, the Bread Maker may smoke and/or emit an odor from mineral oils used in manufacturing. This is normal. • When inserting bread pan(s) into the Bread Maker, make sure to set them firmly in place. • To remove bread pan(s) from baking chamber, hold handle with an oven mitt and lift straight up firmly. Important: When you remove bread pan(s) after baking, be sure to wear oven mitts to prevent burning. • After removing bread loaf (by turning bread pan upside down and shaking gently), check to see that the kneading paddle has remained in the bread pan. • If the kneading paddle is stuck in the bread, allow bread to cool, and then use the paddle removal key to remove it, taking care not to scratch the kneading paddle. Important: Allow bread to cool before removing kneading paddle from bread. BAKING BREAD Select your recipe, and follow the steps listed below. 1. - Page 9 Be sure that the paddle is secured, otherwise it may come off during operation, which may affect the kneading and mixing, and may cause leakage. 3. Add ingredients into the baking pan Place ingredients into the baking pan, following the order outlined in the recipe. Be sure to start with water and end with yeast. (See Figure 7) Yeast must be added last so that it does not come into direct contact with the water. Be careful not to mix the yeast with the water, or the bread may not bake properly. Fig. 7 ...
- Page 10 6. Begin an operation a. Press the ‘Left/Right’ button to select the left pan, the right pan or both pans. A beep will sound each time this button is pressed. ◦ Press once to use only the left side. ‘LEFT’ will display on the LCD. (See Figure 10) ◦ Press twice to use only the right side. ‘RIGHT’ will display on the LCD. ◦ Press three times to use both sides. Both ‘LEFT’ and “RIGHT’ will display. Notes: I f both sides show information other than 0:00 this indicates that both sides have been selected. If using both pans, note that the same mode must be selected for both sides. If you choose to use only one side, both rotating axles will turn, but only the side you have chosen will heat (If applicable). Fig. 10 Fig. 11 ...
- Page 11 d. Press the ‘Color’ button and select between LIGHT, MED. and DARK. The option selected will be underlined with a black bar on the LCD. (See Figure 13 for the DARK color in the FAST mode) A beep will sound each time this button is pressed. Notes: Color selection is applicable with the ‘NORMAL’ and ‘FAST’ modes. If using both bread pans, you may choose different color selections for each side. The preset is MED. e. Use the Timer, ‘+’ or ‘‐‘ buttons to delay the completion of the baking process. Press the , ‘+’ or ‘‐‘ Fig. 13 buttons to increase or decrease the delay timer. — Increases the time in 10 minute intervals ...
- Page 12 6. To stop a process To stop a process at any time, press the ‘Start/Stop’ button until a buzzer sound is heard, to indicate that the process has been stopped. 7. Completion of an operation Once the baking process has been completed, the LCD will display 0:00 under the Timer and the unit will beep 10 times to indicate that it has finished the baking process. (See Figure 15) For best results, remove the bread immediately after baking. The appliance will keep the bread warm for a maximum of 60 minutes. After 60 minutes, the Bread Maker will automatically turn off. Fig. 15 8. Removing a bread pan Once the baking process is complete, the bread pan can be removed by following the steps below. ...
- Page 13 b. Place bread upright on a wire rack to cool for at least 20 minutes before slicing. Note: Do not place the bread pan or any other object on top of the unit. To avoid damaging the machines surface, do not put any object on top of the unit. c. If the kneading paddle is stuck in the bread, allow bread to cool, and then use the paddle removal key to remove it, taking care not to scratch the kneading paddle. (See Figure 18) Fig. 18 For Mix Settings Follow steps 1 through 5 for the Bread Settings outlined above, then follow the steps listed below. Note that when using the ‘MIX’ mode, neither the ‘Color’ or ‘Timer’ functions can be used. 1. Begin an operation a. Press the ‘Left/Right’ button to select the left pan, the right pan or both pans. A beep will sound each time this button is pressed. ◦ Press once to use only the left side. ‘LEFT’ will display on the LCD. (See Figure 19) ◦ Press twice to use only the right side. ‘RIGHT’ will display on the LCD. ◦...
- Page 14 b. Press the ‘Mode Select’ button until the MIX mode is displayed. This will be indicated by a small triangle on the LCD. (See Figure 20) A beep will sound each time this button is pressed. Fig. 20 Fig. 21 c. Press the ‘Menu’ button until the desired menu selection is displayed, 1 Pasta, 2 Dough, 3 ...
- Page 15 4. Removing a bread pan Once the mixing process is complete, the bread pan can be removed by following the steps below. a. Unplug the cord from the wall socket. b. Open the lid and use oven mitts to remove the bread pan from the baking compartment by grasping the handle and pulling the pan straight up and out of the unit. (See Figure 23) Fig. 23 5. Removing dough from the bread pan Gather the dough in the center of the bread pan and pull it out carefully so it won’t be damaged. ...
- Page 16 If using both pans, note that the same mode must be selected for both sides. If you choose to use only one side, both rotating axles will turn, but only the side you have chosen will heat (if applicable). Fig. 25 b. Press the ‘Mode Select’ button until the SPECIAL mode is displayed. This will be indicated by a small triangle on the LCD. (See Figure 26) A beep will sound each time this button is pressed. Fig.26 ...
- Page 17 2. To stop a process To stop a process at any time, press the ‘Start/Stop’ button until a buzzer sound is heard, to indicate that the process has been stopped. 3. Completion of an operation Once the selected process has been completed, the LCD will display 0:00 under the Timer and the unit will beep 10 times to indicate that it has finished the selected process. (See Figure 28) ...
- Page 18 b. Place bread upright on a wire rack to cool for at least 20 minutes before slicing. Note: Do not place the bread pan or any other object on top of the unit. To avoid damaging the machines surface, do not put any object on top of the unit. c. If the kneading paddle is stuck in the bread, allow bread to cool, and then use the paddle removal key to remove it, taking care not to scratch the kneading paddle. (See Figure 31) Fig. 31 For Cake This setting may be used for baking cakes. a. Using oven mitts turn the bread pan upside down and shake gently to loosen and release the cake. (See Figure 32) ...
- Page 19 c. If the kneading paddle is stuck in the bread, allow bread to cool, and then use the paddle removal key to remove it, taking care not to scratch the kneading paddle. (See Figure 35) Fig. 35 ...
-
Page 20: Frequently Asked Questions
FREQUENTLY ASKED QUESTIONS Question Answer Why am I receiving an If the temperature in the baking compartment is higher than 50°C, the “E01” message on the digital display will indicate “E01”. The appliance will not operate until display? it has cooled down. Why am I receiving an If the temperature in the baking compartment is lower than ‐10°C, the “E00” message on the digital display will indicate “E00”. The appliance will not operate until display? it has warmed up. How do I know if the unit This BreadMaker has several sound indications to let you know it is is on and working? working. ‐ Once powered on, it will sound beeps lasting several seconds. ‐ When a button is pressed, the unit will beep once with each press. ‐ When you Start or Stop the unit, it will beep once following each press. ‐ During processing, there is an indication when using the Fruit & Nut Dispense function; it will sound 12 beeps to remind you to add Fruit & Nuts ‐ When processing is complete, the unit will beep 10 times to indicate that processing is finished. ‐... -
Page 21: Care And Cleaning
My bread has an unusual Stale ingredients may have been used or too much yeast may have smell. Why? been used. Always use fresh ingredients. What should I do if the If the kneading paddle is stuck in the bread, allow bread to cool, and Kneading Paddle comes then use the paddle removal key to remove it, taking care not to out with the bread? scratch the kneading paddle. Why do I have to add the This allows the Bread Maker to mix the ingredients in the most ingredients in a certain efficient manner possible. When using the Timer, it also keeps the order? yeast from combining with the liquid before the dough is mixed. Why does my bread have Sometimes flour in the corners of the bread pan may not have been floured corners? completely kneaded into dough. Scrape it off the loaf with a knife. You can check bread about 10 minutes into the kneading cycle. If all flour is not incorporated, use a rubber spatula to remove the flour from the sides of the bread pan so it can be incorporated into the dough. Can ingredients be halved NO. If there is too little in the bread pan, the kneading paddle or doubled? cannot knead well enough. If there is too much, bread will rise out of bread pan. ... -
Page 22: Recipes
Important: The inside of the main unit contains heating elements and drive shafts. When cleaning, NEVER pour water, solvents or cleaning solutions into this area. Do not put lid in dishwasher, as it may cause warping. Do not immerse unit in water, as it contains sensitive electronic sensors. 6. To clean view window in lid, use a mild detergent and damp sponge. Do not use abrasive cleaners or scouring pads, as they may scratch the window. 7. Clean the rotating axles with a soft sponge so that you don’t damage the rotating axle seal. 8. Clean the kneading paddles with a soft soapy sponge. 9. Clean the bread pans by filling them with mild soap and lukewarm water. Wipe them with a clean, damp cloth. Caution: Do not place bread pans in dishwasher, or soak in water. Note: Do not use abrasive cleaners or scouring pads, or the units surface may be damaged. To reduce the risk of electrical shock, do not immerse the Bread Maker or cord in water or other liquid. Special Care To avoid damaging the special coating on the bread pans, do not use hard utensils such as metal spatulas, knives or forks. When storing, place bread pans into Bread Maker with kneading paddles inside, close the lid securely and do not place anything on top of the lid. ... - Page 23 Sweet Bread Recipe: Ingredients: NORMAL FAST EXPRESS Water 1/2 Cup + 4 Tbsp. 7/8 Cup 7/8 Cup (38‐40℃) Oil 1 Tbsp. 1 Tbsp. 1 Tbsp. Salt 1/2 tsp. 1/2 tsp. 1/2 tsp. Sugar 1/4 Cup 1/4 Cup 1/4 Cup Dry Milk 1 Tbsp. 1 Tbsp. 1 Tbsp. Bread Flour 2 Cups 2 Cups 2 Cups. Active Dry Yeast 1+1/2 tsp. ...
Need help?
Do you have a question about the BM002 and is the answer not in the manual?
Questions and answers