Table of Contents
Advertisement
Quick Links
Advertisement
Table of Contents

Related Manuals for Generic TR 125


Summary of Contents for Generic TR 125
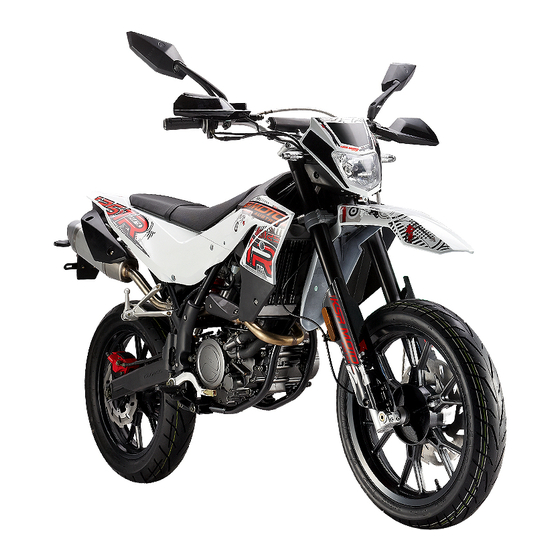
- Page 1 USERMANUAL mod.# J68...
- Page 2 IMPORTANT MANUAL INFORMATIONS Congratulations on your purchase of the motorcycle. This model is the result of a vast experi- dealer. The design and manufacture of this motorcycle fully comply with the emissions standards for clean air applicable at the date of manufacture. We have met these standards without reducing the performance or economy of attention to the recommended maintenance schedules and operating instructions contained within this manual.
- Page 3 IMPORTANT MANUAL INFORMATIONS Particularly important information is distinguished in this manual by the following notations: Failure to follow WARNING instructions could result in severe injury or death of the WARNING motorcycle operator a bystander or a person inspecting or repairing the motorcycle. A CAUTION indicates special precautions that must be taken to avoid damage to the motorcycle.
- Page 4 IMPORTANT MANUAL INFORMATIONS DEALER STAMP HERE...
-
Page 5: Table Of Contents
TABLE OF CONTENTS SAFETY INFORMATION ....6 PRE-OPERATION CHECKS..22 ECU..........32 Other Safe driving points....9 Pre-operation check list ....23 Adjust the idling…………..…..32 Location of labels ......10 Checking the throttle cable free OPERATION AND IMPORTANT play..........32 DESCRIPTION......11 RIDING POINTS......24 Clutch adjustment.......33 Left view ........11 Starting the engine .....24 Tires..........33 Right view........12... - Page 6 TABLE OF CONTENTS Replacing headlight bulb.....41 Front and rear turnsignal lamp..41 Tail/brake and license plate lamp............41 Fuel pump........41 TROUBLESHOOTING....42 Troubleshooting chart....43 CLEAN AND STORAGE....45 SPECIFICATIONS......47 WIRING DIAGRAM.....48 WARRANTY INFORMATION..49 SERVICE PLAN ......50...
-
Page 7: Safety Information
SAFETY INFORMATIONS THIS MOTORCYCLE IS A TWO Therefore making yourself cons- WHEEL ON ROAD VEHICLE. NING & LEGAL LICENSE FOR picuous in the public will be very OPERATING OF THIS VEHICLE. effective in preventing this kind of BEFORE YOU USE THE VEHIC- accidents LE THE FIRST TIME PLEASE READ THIS MANUAL CAREFUL-... - Page 8 SAFETY INFORMATIONS The posture of operator and Protective clothing passenger is important for proper clothing will keep control. Properly riding posture can yourself safe from potential acci- which have not been approved by keep motorcycle in balance while dents: the producer or the removal of ori- riding.
- Page 9 SAFETY INFORMATIONS Loading cargo are securely attached to mo- with electrical accessories please The total weight of the operator the torcycle. passenger the accessories and the sure that the items will not exceed cargo may not exceed the maxi- items to the handlebar the front fork the capacity of the electrical sys- mum load limit.
-
Page 10: Other Safe Driving Points
SAFETY INFORMATIONS The exhaust fumes are poisonous and may cause loss of conscious- Gasoline is not environmentally ness and death within a short time. friendly. leaving the motorcycle and remove Other safe driving points the key from the main switch. When urn the signal before making parking the motorcycle please note turns. -
Page 11: Location Of Labels
DESCRIPTION Location of labels The anti tampering plate (1) is located under the seat bench. head tube. The engine number (3) is stamped into the left engine cover. -
Page 12: Description
DESCRIPTION Left view 1. Front wheel 2. Front brake caliper 3. Front turn signal light 4. Battery 9. Shift pedal... -
Page 13: Right View
DESCRIPTION Right view 10. Tail/brake light 12. Fuel tank cap 13. Seat 14. Spark plug... -
Page 14: Operation Instruments
DESCRIPTION Operation instruments 18. Clutch lever 19. Left handlebar switches 20. Speedometer unit 21. Main switch/steering 22. Right handlebar switches 23. Throttle grip 24. Front brake lever... -
Page 15: Instrument And Control Functions
OPERATION INSTRUMENTS Main switch/steering lock OFF “ ” WARNING The electrical systems are off. The Never turn the key to “ ” or key can be removed. “ ”while the vehicle is moving. Otherwise the electrical systems LOCK “ ” will be switched off which may re- sult in loss of control or an acci- dent. - Page 16 OPERATION INSTRUMENTS Indicator and warning lights Press the adjust button for 3 sec 0-999.9km or mile and the alarm light will turn off. After every 1000 km it will come 9. Fuel meter again to remind checking the oil le- vel.
- Page 17 OPERATION INSTRUMENTS 1. Adjust button function instruc- tion button once to switch from clock to the main screen. 2.The trip screen 4. Select button function instruc- tion creen press and hold the select button for 3 sec to switch the 1.The main screen backlight color.
- Page 18 OPERATION INSTRUMENTS Example: Handlebar switches 1. High/low beam switch to 14h press the adjust button to When the switch is in the low beam choose the hour you want to set. position move the switch down- wards to use the high beam light. The switch will not return automati- cally to the low beam position.
-
Page 19: Front Brake Lever
OPERATION INSTRUMENTS Rear/ foot brake pedal The rear brake pedal is located on 6,5,4,3,2 the right side of the vehicle and re- fers to the rear brake. Press down the brake pedal to activate the rear brake. 5. Starter switch Use the starter switch to operate located under the seat bench. -
Page 20: Fuel/ Fuel Tank
OPERATION INSTRUMENTS Fuel/ fuel tank WARNING and then turn it clockwise to open. Make sure that there is all the time It is not recommended to use E10 fuel. This can damage the engine bench. and fuel system. terclockwise. Fill the fuel tank until Immediately wipe off spilled fuel with a clean and dry soft cloth because fuel may destroy pain-... -
Page 21: Engine Oil
OPERATION INSTRUMENTS Engine oil should be visible at the upper limit. Add engine oil if necessary. The oil level should be measured between the upper and the lower li- Recommended engine oil: mit on the inspection glas (1) on the SAE 10W-40 right side of the engine. -
Page 22: Sides Stand
OPERATION INSTRUMENTS WARNING 13. Check the oil level Make sure that your torcycle park stable. Side stand Please avoid to park the motor- cycle on a precipitous or soft The side stand is located on the left ground. side of the frame. Catalytic converter catalytic converter in the exhaust system. -
Page 23: Pre-Operation Checks
PRE-OPERATION CHECK The condition of a vehicle is in the owner’s responsibility. Vital components can start to deteriorate quickly and unexpectedly even if the vehicle remains unused (for example as a result of exposure to Therefore it is very important to check the following points before each ride. NOTE: The pre-operation check should be made each time the vehicle is used. -
Page 24: Pre-Operation Check List
PRE-OPERATION CHECK Pre-operation check list Fuel Final transmission Front brake Brake lever Throttle grip Wheels and tires Chasis fasteners Instruments and lights... -
Page 25: Operation And Important Riding Points
OPERATION AND IMPORTANT POINTS Starting the engine Shifting and riding a) Shifting gears upwards gine should be warmed up with 1. Turn on the ignition medium R.P.M. and small load. 1. Release the throttle 3. Actuating one of the brakes 2. - Page 26 OPERATION AND IMPORTANT POINTS Acceleration and deceleration Engine break-in period WARNING The speed can be adjusted by ope- ning and closing the throttle. To in- rev the engine or make it exceed (especially when cornering) crease the speed turn the throttle 80% of the maximum speed in any otherwise the motorcycle may grip in direction (a).
- Page 27 OPERATION AND IMPORTANT POINTS First inspection and routine main- Parking the same speed long time du- tenance 1. Reduce the throttle to 0 position. ring the running-in period. Of- The inspection immediately after the 2. Pull the clutch lever ten change it because it is hel- pful for the running-in of parts.
-
Page 28: Checking/ Maintaining Service Intervals
CHECKING/ MAINTAINING SERVICE INTERVALS lubrication and cleaning. The following contents help the operator to complete this tasks. dealer. WARNING Not authorized manipulation on the motorcycle leads to the loss of warranty. If you are not familiar with maintenance work have a dealer to do it for you. The vehicle has to be checked for rust constantly. -
Page 29: Periodic Maintenance Chart
CHECKING/ MAINTAINING SERVICE INTERVALS 1000 km or 4000 km or 10000 km or 13000 km or 1. month 12. month 18. month 24. month PART Air filter clean/ exchange Control Tires Control/ tire pressure Wheel bearing Control/ exchange lubricate Steering bearing Control/ clean/ lubricate Screws Coverparts Control/ tighten... - Page 30 CHECKING/ MAINTAINING SERVICE INTERVALS Cable/ bowden Control/ clean/ lubricate Throttle Control/ adjust/ lubricat e Lights/ switches Control/ adjust Fuel line/ fuel filter Control/ exchange Control/ adjust Exhaust system Control/ tighten Coolant Control Important Information Brake lines have to be exchanged at least every 4 years. Starting at 13000 km the maintenance should be done every 3000 km or annually.
-
Page 31: Spark Plug
CHECKING/ MAINTAINING Spark plug WARNING The spark plug is an important element this will damage the engine component which is easy to cleaned and replaced regarding the check. Since heat and deposits will dry cleaned use special cleaner from the dealer or replace the air cause any spark plug to slowly erode the spark plug should be riding in unusually wet or dusty... -
Page 32: Coolant Inspection
CHECKING/ MAINTAINING Coolant inspection Bleeding the coolant system 1. Open the radiator cap. 2. Place a small container under the bike on a level place and hold the bike. 3. Open the hose clamp (1) and let the cap of the radiator to inspect the coolant level. -
Page 33: Ecu
CHECKING/ MAINTAINING ECU (Engine Control Unit) The ECU is one of the most important parts of the vehicle and it The ECU is installed on top of the is adjusted properly during According to the pre-set control problem please contact a dealer for consultation. -
Page 34: Clutch Adjustment
CHECKING/ MAINTAINING Clutch adjustment Tires Put the heaviest cargo to the cen- 1. Loosen the locknut (1) on the ter of motorcycle then distribute crank case. the weight evenly from side to side. 2. Turn the adjusting bolt (2) in or This will ensure proper handling of the vehicle. -
Page 35: Cast Wheels
CHECKING/ MAINTAINING WARNING To operate the motorcycle with attempt even the smallest repair to worn tires decrease riding stability the wheel a deformed or cracked and can lead to loss of control. Ple- wheel must be replaced. ase replace the worn tires by new The wheel should be balanced whe- one immediately. - Page 36 CHECKING/ MAINTAINING Front brake free play adjustment Rear brake 1. Loosen the locknut (1) CAUTION 2. Turn the adjusting bolt (2) until There should be no free play at the freeplay on the lever) contact a dealer to inspect the brake 3.
- Page 37 CHECKING/ MAINTAINING Brake pads and production of sparks from the The front and rear brake pads must be checked for wear in periodical and soundness of the disc would intervals. thus be negatively affected. Checking the front and rear brake Place the vehicle that the master cy- CAUTION linder is in horizontal position.
- Page 38 CHECKING/ MAINTAINING WARNING WARNING DOT 4 - CASTROL MOTORCYCLE BRAKE cables may result in internal rusting FLUID and cause interference with cable contact a dealer to check movement. Replace damaged or repair it. cables as soon as possible to Contact a dealer to change the bra- prevent dangerous wear of the Checking the steering cables.
-
Page 39: Wheel Bearings
CHECKING/ MAINTAINING Checking the wheel bearings 2. Loosen counter nuts (2) transmission and rear wheel 3. Turn right and left adjusting The front and rear wheel bearings bearings) will be subjected to must be checked at the intervals unnecessary stress resulting in 4. -
Page 40: Battery
CHECKING/ MAINTAINING Adjust the preload For any replacement please re- CAUTION Turn the adjusting ring (1): on On both sides of the vehicle and sealed type (MF) battery which clockwise to increase the preload ver. counterclockwise to After this take off the plastic covers. WARNING decrease the preload Electrolyte is poisonous and dange-... -
Page 41: Fuses
CHECKING/ MAINTAINING Charging the battery install a new fuse of the CAUTION 1. Switch off all consumers. 3. Turn on the electrical circuits 2. Measure the battery voltage charging please contact a dealer. to check if all devices operate using a multimeter. Storing a discharged battery can correctly. -
Page 42: Front And Rear Turnsignal Lamp
CHECKING/ MAINTAINING When you need to adjust the head- changing the bulb. light turn in or turn out the adjusting screw (9). Injection system Front and rear turn signal lamp The injection system consists afuel injector. (10) does not glow contact a dealer to check the electrical circuit or to CAUTION replace the lamp. -
Page 43: Troubleshooting
CHECKING/ MAINTAINING The fuel pump module is mounted Troubleshooting Although our company’s motorcy- cles receive a thorough inspection before shipment from the factory and the injector against impurity trouble may occur during operation. from fuel. The following trouble shooting chart CAUTION dure for checking these vital sys- tems by yourself. - Page 44 TROUBLESHOOTING Cause To Do AILURE Engine does not start when the electric Battery discharged Charge the battery starter button is pushed Check the charging of the battery Check if the generator is working correctly Fuse is blown Change the fuse Starter relay defective Check the starter relay Starter motor defective...
- Page 45 TROUBLESHOOTING Cause To Do AILURE To high oil consumption Engine oil level too high Bleed the oil system Cylinder/Piston is worn Replace the cylinder/piston Engine vent hose bent Correct the layout of the hose Failure in the fuel injection/electric pears system Stop the motorcycle and identify the faulty part by pushing the Select Button on the speedo-...
- Page 46 CLEANING Cleaning CAUTION performance. Before cleaning Sea salt or salt sprayed on the roads during winter are extremely corrosive. After riding in the rain, near the sea or on salt-sprayed roads: Clean the motorcycle with cold water and a mild detergent after the engine has cooled down. Apply a corrosion After cleaning tection spray onall metal including chrome- and nickel-plated surfaces.
-
Page 47: Clean And Storage
CLEANING/ STORAGE with a regular brake disc cleaner and wash the tires with warm water and a mild detergent. WARNING Before operating the motorcycle test the brake performance and tires. Storage Always store your motorcycle in a cool dry place and protect it against dust with a motorcycle cover. Please corrosion avoid damp cellars stables (because of the presence of ammonia) and areas where strong chemicals are stored. -
Page 48: Specifications
SPECIFICATION TR 125 QJ125GY-16A Model TR 125 Engine type QJ 160 MI - A Overall Length 95 octane unleaded 2030 Fuel type (mm) gasoline Number of Overall Width (mm) cylinders Overall height 1120 Bore*stroke 60 mm *44 mm (mm) Wheelbase (mm) -
Page 49: Wiring Diagram
WIRING DIAGRAM... -
Page 50: Warranty Information
WARRANTY INFORMATION Information on warranty claim Please carefully read the instruction manual of your vehicle before operating it in order to make yourself familiar with its stated in the instruction manual ensures the prolonging of the natural life of your vehicle. Starting with the date of the invoice a limited warranty of 24 months is granted regarding the accuracy of the vehicle in terms of material and manufacturing according to latest standards. -
Page 51: Serviceplan
SERVICEPLAN 1000 km or 1. Month Stamp/ Signature Stamp/ Signature 10000 km or 18. Month Stamp/ Signature Stamp/ Signature 13000 km or 24. Month Stamp/ Signature Stamp/ Signature 19000 km 22000 km Stamp/ Signature Stamp/ Signature 28000 km Stamp/ Signature Stamp/ Signature From 13000 km maintenance should place every 3000 km or annually.
Need help?
Do you have a question about the TR 125 and is the answer not in the manual?
Questions and answers