Table of Contents
Advertisement
Advertisement
Table of Contents
Troubleshooting

Related Manuals for Monoprice MHD Sport 2.0 Wi-Fi 12570

Summary of Contents for Monoprice MHD Sport 2.0 Wi-Fi 12570
-
Page 2: Table Of Contents
CONTENTS SAFETY WARNINGS AND OPERATING GUIDELINES ....6 INTRODUCTION ................9 FEATURES ................. 10 MINIMUM SYSTEM REQUIREMENTS ........11 CUSTOMER SERVICE ............... 11 PACKAGE CONTENTS ............... 12 PRODUCT OVERVIEW ............... 13 CAMERA BUTTON FUNCTIONALITY ......... 15 CAMERA LED INDICATORS ............16 THE OLED SCREEN .............. - Page 3 Connecting to a Computer ............30 Connecting An External Microphone ........31 CAMERA SETTINGS ..............32 Changing the Video Settings ..........36 Changing the Photo Settings ..........38 Changing the Time Lapse Settings ......... 40 Changing the Self-Timer Delay ..........42 Changing the Camera's Orientation (Up/Down) ......
- Page 4 Capturing Time Lapse Videos and Photos ......59 Capturing Photos Using the Self-Timer........60 Loop Recording ..............60 WIRELESS OPERATION ............62 THE RF WRIST REMOTE ............63 Charging the Wrist Remote Battery ........63 Pairing the Camera with the RF Wrist Remote ....... 64 Setting the Date and Time ............
- Page 5 Using the Mounting Sockets ........... 81 TROUBLESHOOTING ..............82 Camera Troubleshooting ............82 RF Wrist Remote Troubleshooting .......... 83 TECHNICAL SUPPORT .............. 83 SPECIFICATIONS ............... 84 REGULATORY COMPLIANCE............ 87 Radio Notice for FCC ............. 87 Radio Notice for Industry Canada ........... 87 Trademarks ................
-
Page 6: Safety Warnings And Operating Guidelines
SAFETY WARNINGS AND OPERATING GUIDELINES • To prevent damage to internal components, do not store this device in excessively dusty, dirty, or sandy areas. • Do not store this device in conditions of excessively high temperatures. Excessively high temperatures can shorten the life of electronic components, damage batteries, and warp or melt plastic parts. - Page 7 • Do not short the battery terminals. Doing so could damage the battery and cause a potential fire hazard. • Ensure that power is turned off and disconnected before making any electrical connections. • This device has no user serviceable parts. Do not attempt to open, service, repair, or modify this device.
- Page 8 • When using the camera in cold or humid environments, use the included anti-fog inserts to help prevent the build-up of moisture inside the waterproof case. Note that the anti-fog inserts can provide only a limited amount of moisture protection and must be replaced after each use. •...
-
Page 9: Introduction
Thank you for purchasing this MHD Sport 2.0 Wi-Fi Action Camera from Monoprice! This camera allows you to capture full HD 1080p video at 60 fps, 720p video at 120 fps, and WVGA video at 240 fps. It can also be used to take still images up to 16 megapixels in size. -
Page 10: Features
FEATURES • Uses a 3.4mm ƒ/2.8 lens • Captures full HD 1080p video images at 60 fps, 720p at 120 fps, and WVGA at 240 fps • Takes still photos at 5, 8, 12, or 16 megapixels resolution • Uses the H.264 video codec and mp4 file format •... -
Page 11: Minimum System Requirements
• At least 2GB free hard drive space CUSTOMER SERVICE The Monoprice Customer Service department is dedicated to ensuring that your ordering, purchasing, and delivery experience is second to none. If you have any problem with your order, please give us an opportunity to make it right. You can contact a Monoprice Customer Service representative through the Live Chat link on our website (www.monoprice.com) during normal business... -
Page 12: Package Contents
Please take an inventory of the package contents to ensure you have all the items listed below. If anything is missing or damaged, please contact Monoprice Customer Service for a replacement. 1x MHD Sport 2.0 Wi-Fi Action Camera 1x Waterproof Case... -
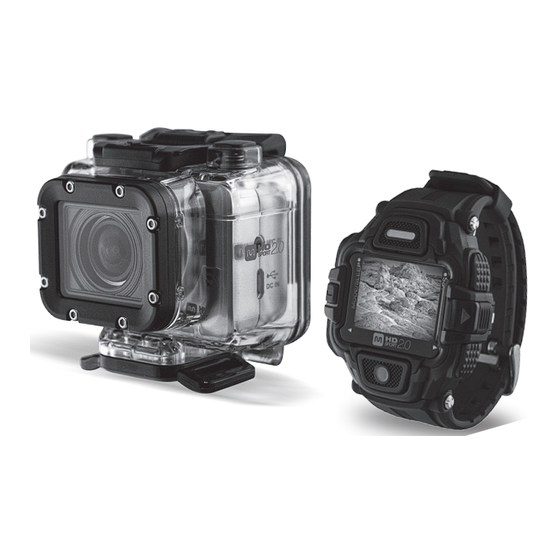
Page 13: Product Overview
PRODUCT OVERVIEW The following illustrations highlight the various camera features, indicators, controls, and connections:... - Page 14 The following illustration shows the locations of the buttons and charging port on the RF Wrist Remote. Note that the RF Wrist Remote is only included with PID 12570.
-
Page 15: Camera Button Functionality
CAMERA BUTTON FUNCTIONALITY Button Functions • Power / Mode Press and hold for 3 seconds to turn the camera ON or OFF. • Press to cycle through the camera's modes: Video, Photo, WiFi, Burst, Time Lapse, Self-Timer, and Set. • In Set mode, press to scrolls through the available menu items. -
Page 16: Camera Led Indicators
CAMERA LED INDICATORS The camera has four LED indicators. There are three Power/Status LEDs on the top, bottom, and rear of the camera, allowing you to see the status from any angle. Color Description Power / Solid Green On for 3 seconds during Status startup and initialization Blinking Green... -
Page 17: The Oled Screen
THE OLED SCREEN Whenever the camera is powered ON, the OLED screen displays information in the five areas shown in the illustration below. Area 1 - Current Mode Icon Name Description Use this mode to record videos. The values on the icon Video Mode indicate the current video recording settings (resolution... - Page 18 Select this mode to connect the camera to a smartphone using a Wi-Fi connection. With Wi-Fi Wi-Fi Mode mode enabled, videos and photos on the microSD card can be viewed on your smartphone. Use this mode to capture 7 photos over a period of 1 Burst Mode second with only a single press of the Shutter button.
- Page 19 Area 2 - Battery Status Icon Name Description Indicates the approximate charge level of the installed Battery battery. The number of level Capacity bars inside the icon represent 25%, 50%, 75%, or 100% charge level. Area 3 - Storage Capacity Icon Name Description...
- Page 20 Area 5 - Button Functions Icon Name Description When in Video mode, press the Shutter button to begin recording a video. When in Time Lapse mode, press the Shutter button to begin capturing photos. Record While recording videos or capturing photos in Time Lapse mode, the label changes to STOP.
- Page 21 When in Photo mode, press the Shutter button to capture a photo. When in Burst mode, press the Shutter button to capture a Capture series of 7 photos over a period of 1 second. When in Self-Timer mode, press the Shutter button to capture a photo after the specified delay.
-
Page 22: Changing Modes
CHANGING MODES With the camera powered ON, press the Power/Mode button to cycle through the seven different modes. The cycle order is shown in the illustration below. -
Page 23: Getting Started
GETTING STARTED This section includes information related to basic camera operation, setup, and maintenance functions. Installing the MicroSD Card A microSD card is required to capture and store photos and videos. The camera supports microSDHC cards with capacities up to 32GB and a minimum Class 6 rating. -
Page 24: Removing The Microsd Card
Removing the MicroSD Card Ensure that the camera is powered OFF. Using your fingertip or fingernail, gently push on the edge of the microSD card to release the catch and partially eject the card. Gently remove the microSD card from the card slot. Warning! To avoid data corruption and/or damage to the microSD card, do not remove it while data is being recorded or saved. -
Page 25: Removing The Battery
Ensure that the nylon ribbon inside the battery compartment is extended out the side of the battery compartment opposite the battery contacts. Align the contacts on the battery with the contacts inside the battery compartment, then press down on the opposite side, while ensuring that the end of the ribbon can be grasped, as shown in the illustration to the right. -
Page 26: Charging The Battery Using A Computer
Charging the Battery Using a Computer Ensure that the camera is powered OFF. The computer can be powered ON. If you have not already done so, install the battery using the instructions above. Plug the included micro USB cable into the micro USB charging port on the camera. -
Page 27: Charging The Battery Using The Usb Wall Charger
Charging the Battery Using the USB Wall Charger Ensure that the camera is powered OFF. If you have not already done, install the battery using the instructions above. Plug the included micro USB cable into the micro USB charging port on the camera. Plug the other end of the cable into the included USB wall charger. -
Page 28: Powering The Camera On And Off
Powering the Camera ON and OFF With the camera powered OFF, press and hold the Power/Mode button for 3 seconds to power the camera ON. The Power/Status LEDs will illuminate solid green for about 3 seconds, then will turn off. With the camera powered ON, press and hold the Power/Mode button for 3 seconds to power the camera OFF. -
Page 29: Connecting To An Hdtv Using An Hdmi Cable
Connecting to an HDTV Using an HDMI Cable You can connect the camera directly to an HDTV using a High Speed HDMI Cable with an HDMI Mini Connector (not included) to use the television as the camera's viewfinder. To do so, perform the following steps: Ensure that both the camera and the display are powered OFF. -
Page 30: Connecting To A Computer
Connecting to a Computer You can connect the camera to a Windows or Mac OS X based computer to access the photos and videos stored on the microSD card. To do so, perform the following steps: Ensure that the camera is powered OFF. The computer can be powered ON. -
Page 31: Connecting An External Microphone
Connecting An External Microphone The camera has a built-in microphone, which adds audio to your video recordings. You can use an external microphone to improve the ability to pick up audio. To do so, simply plug a microphone into the external microphone jack. Note that the external microphone jack is a 2.5mm TRS type. -
Page 32: Camera Settings
CAMERA SETTINGS With the camera powered ON, press the Power/Mode button until the Set mode is displayed. Press the Shutter button to display the menu screen to the right. Use the Power/Mode button to cycle between the Setup and More menu options. Press the Shutter button to enter either menu. - Page 33 Select this menu option to enable or disable inverted operation. This Up/Down is useful when the camera is mounted upside down. Select this menu option to enable Loop or disable the Loop recording function. Select this menu option to delete Delete recorded files or to format the microSD card.
- Page 34 More Menu Icon Name Description Select this menu option to invert Up/Down the OSD display. Select this menu option to enable or disable the Power/Status LEDs. Note that the Power/Status LED will still illuminate solid green for 3 seconds after the camera is powered ON and the Battery Status LED will still indicate when the battery is being charged.
- Page 35 Select this menu option to set the Time camera's internal date and time. Select this menu option to pair the camera with the RF Wrist Remote (PID 12570 only). Select this menu option to reset all camera settings back to the Default values they had when it shipped from the factory.
-
Page 36: Changing The Video Settings
Changing the Video Settings This camera supports Dual Stream recording. Each time a video is recorded, the camera saves a normal sized .mp4 file and a smaller one, for streaming to your smartphone. The camera supports nine different resolution, frame rate, and field of view combinations for recording videos. - Page 37 The following table shows the icons and settings details for the nine different video settings. Icon Resolution Aspect Frame Field of Ratio Rate View 1920x1080 Normal 16:9 60fps (1080p) 126° Ultra 1920x1080 Wide 16:9 30fps (1080p) 126° 1920x1080 Wide 16:9 30fps (1080p) 102°...
-
Page 38: Changing The Photo Settings
848x480 Normal 16:9 240fps (WVGA) 140° Changing the Photo Settings Perform the following steps to change the Photo settings: Power the camera ON. Press the Power/Mode button repeatedly until the Set mode is displayed. Press the Shutter button to enter the Set mode menu. - Page 39 Press the Power/Mode button repeatedly until the Exit menu option is highlighted. 10. Press the Shutter button to exit Set mode. The following table shows the specific 4:3 photo resolution and the size of the field of view for each of the four different photo settings. Megapixels 4:3 Resolution Field of View...
-
Page 40: Changing The Time Lapse Settings
Changing the Time Lapse Settings You can change the type of capture and the interval between captures in Time Lapse mode by performing the following steps: Power the camera ON. Press the Power/Mode button repeatedly until the Set mode is displayed. - Page 41 Note: In Video mode, the camera will record a single video file composed of still images captured at the specified interval. In Photo mode, the camera will create multiple still image files captured at the specified interval. 10. Press the Shutter button to confirm selection of the highlighted Lapse Mode.
-
Page 42: Changing The Self-Timer Delay
Changing the Self-Timer Delay Perform the following steps to change the shutter delay for the Self- Timer mode: Power the camera ON. Press the Power/Mode button repeatedly until the Set mode is displayed. Press the Shutter button to enter the Set mode menu. -
Page 43: Changing The Camera's Orientation (Up/Down)
Changing the Camera's Orientation (Up/Down) This camera's orientation can be swapped so that it captures images and records video with the correct orientation when the camera is mounted upside down. Perform the following steps to change the orientation: Power the camera ON. Press the Power/Mode button repeatedly until the Set mode is displayed. -
Page 44: Loop Mode
Press the Power/Mode button repeatedly until the Exit menu option is highlighted. 10. Press the Shutter button to exit Set mode. Loop Mode Loop Mode is a video recording feature in which the camera continuously records a series of video files, automatically deleting old files when it needs space for new files. - Page 45 Perform the following steps to enable or disable Loop Mode: Power the camera ON. Press the Power/Mode button repeatedly until the Set mode is displayed. Press the Shutter button to enter the Set mode menu. Press the Shutter button again to enter the Setup menu.
-
Page 46: Deleting Files And Formatting The Microsd Card
Deleting Files and Formatting the MicroSD Card The Delete menu allows you to delete individual files from the microSD card, delete all files on the card, or format the card, which also deletes all files. Perform the following steps to perform one of the Delete functions: Power the camera ON. - Page 47 Icon Description Select this option to delete the "last" file on the microSD card. The "last" file is the file with the most recent time/date. You can repeatedly select this function and it will continue to delete the newest file on the card. Select this option to delete all existing video and photo files on the microSD card.
-
Page 48: Changing The Oled Display Orientation
12. When you have no further Delete actions to perform, repeatedly press the Power/Mode button to move the highlight to the Exit menu icon. 13. Press the Shutter button to exit the Setup menu. 14. Press the Power/Mode button repeatedly until the Exit menu option is highlighted. -
Page 49: Changing Led Indications
Repeatedly press the Power/Mode button to move the highlight to one of the two orientations. The orientation on the left makes the OLED readable when the camera lens is facing towards you, while the one on the right makes the OLED readable when the camera lens is facing away from you, just as the icons would indicate. - Page 50 Press the Power/Mode button once to move the highlight to the More entry. Press the Shutter button to enter the More menu. Press the Power/Mode button repeatedly to move the highlight to the LED icon. Press the Shutter button to enter the LED menu.
-
Page 51: Changing The Oled Brightness Level
Changing the OLED Brightness Level Perform the following steps to change the brightness level of the OLED (OSD) menu: Power the camera ON. Press the Power/Mode button repeatedly until the Set mode is displayed. Press the Shutter button to enter the Set mode menu. Press the Power/Mode button once to move the highlight to the More entry. -
Page 52: Changing The Audible Beep Volume Level
Changing the Audible Beep Volume Level Normally, whenever you press any button, the camera will respond with an audible beep. Perform the following steps to change the volume level or to disable the beep altogether: Power the camera ON. Press the Power/Mode button repeatedly until the Set mode is displayed. -
Page 53: Changing The Auto-Off Time
Changing the Auto-Off Time To conserve battery life, you can set the camera to automatically power off after a defined period of inactivity. Perform the following steps to change the amount of time for the Auto-Off function: Power the camera ON. Press the Power/Mode button repeatedly until the Set mode is displayed. -
Page 54: Changing The Date And Time
11. Press the Shutter button to exit the Set menu. Changing the Date and Time Perform the following steps to change the camera's internal clock: Power the camera ON. Press the Power/Mode button repeatedly until the Set mode is displayed. Press the Shutter button to enter the Set mode menu. - Page 55 Use the Power/Mode button to move the highlight to the different elements of the date/time display. Use the Shutter button to increment the highlighted date/time element. The elements are identified in the illustration below: When you are finished editing the date and time, press the Power/Mode button repeatedly until the OK button is highlighted.
-
Page 56: Restoring The Factory Default Settings
Restoring the Factory Default Settings Perform the following steps to reset all of the camera's settings to the values they were at when the camera was shipped from the factory: Power the camera ON. Press the Power/Mode button repeatedly until the Set mode is displayed. -
Page 57: Operation
OPERATION Recording Videos This camera supports Dual Stream recording. Each time a video is recorded, the camera saves a normal sized .mp4 file and a smaller one, for streaming to your smartphone. Perform the following steps to start recording a video: Power the camera ON. -
Page 58: Capturing Burst Photos
Capturing Burst Photos Burst mode allows you to capture a series of seven photos over a period of one second with only a single press of the Shutter button. Perform the following steps to capture a burst of seven photos: Power the camera ON. -
Page 59: Capturing Time Lapse Videos And Photos
Capturing Time Lapse Videos and Photos The Time Lapse mode allows you to capture a series of still images at a specified interval of time. This is useful for viewing the progress of long-term projects or operations within a short period of time. Time Lapse mode can be configured to capture the images into a single video file for easy viewing or to individual photo files, which can be viewed individually or used to create a video using third... -
Page 60: Capturing Photos Using The Self-Timer
Capturing Photos Using the Self-Timer The self-timer allows you to capture a photo after a short delay. This gives you time to move into the field of view so that you can be included in the captured photo. Perform the following steps to capture a photo using the Self-Timer: Power the camera ON. - Page 61 Power the camera ON. Press the Power/Mode button repeatedly until the Set mode is displayed. Press the Shutter button to enter the Set mode menu. Press the Shutter button again to enter the Setup menu. Press the Power/Mode button repeatedly to move the highlight to the Loop icon.
-
Page 62: Wireless Operation
WIRELESS OPERATION You can use the Wi-Fi connection to view or record videos and photos from the camera using your Android or iOS smartphone. Perform the following steps to connect the camera with your smartphone: If you have not already done so, go to the AppStore (iOS) ™... -
Page 63: The Rf Wrist Remote
THE RF WRIST REMOTE PID 12570 includes an RF Wrist Remote, which allows you to remotely control up to six cameras and to view their live video feeds. Note that PID 12571 does NOT include the RF Wrist Remote, so this section of the manual does not apply to PID 12571. Charging the Wrist Remote Battery Perform the following steps to charge the battery in the RF Wrist Remote:... -
Page 64: Pairing The Camera With The Rf Wrist Remote
Release the plastic tab to lock the cable in place. Gently tug on the connector to ensure that it is locked into place. Plug the USB end of the charging cable into a computer USB port or into the USB port of the included wall charger. If using the wall charger, plug the charger into a nearby power outlet. - Page 65 Press the Shutter button to put the camera in Pairing mode. The display will cycle back and forth between the two icons shown in the illustration to the right, indicating that the camera is searching for the RF wrist remote. Press the Mode button on the RF wrist remote to switch to Live View/Preview mode.
-
Page 66: Setting The Date And Time
16. Press the Shutter button on the camera to exit the Set menu. Setting the Date and Time In addition to acting as a controller and live view monitor for the camera, the RF Wrist Remote also serves as a time piece with alarm, stopwatch, and countdown timer. -
Page 67: Using The Stopwatch Function
Using the Stopwatch Function The RF Wrist Remote includes a stopwatch function, with the ability to display up to 12 split/lap times. Perform the following steps to use the remote as a stopwatch: Press the Mode/Sleep button repeatedly until the time is displayed. Press the Left button repeatedly until the Stopwatch mode is displayed, as shown in the illustration to the right. -
Page 68: Using The Countdown Timer Function
Using the Countdown Timer Function You can set a countdown timer, which will sound an alarm when the timer reaches zero. Perform the following steps to set and use the countdown timer: Press the Mode/Sleep button repeatedly until the time is displayed. Press the Left button repeatedly until the Countdown Timer mode is displayed, as shown in the following image. -
Page 69: Using The Alarm Clock Function
Using the Alarm Clock Function You can set an alarm, which will sound at the specified time of day. Perform the following steps to set and use the alarm: Press the Mode/Sleep button repeatedly until the time is displayed. Press the Left button repeatedly until the Alarm Clock mode is displayed, as shown in the image to the right. -
Page 70: Setting The Auto Off Time
Setting the Auto Off Time To conserve battery life, you can choose to have the RF Wrist Remote's display go to "sleep" after a period of inactivity. Perform the following steps to set the "auto off" time: Press the Mode/Sleep button repeatedly until the Live View/Preview mode is displayed. -
Page 71: Enabling Or Disabling Sound
Enabling or Disabling Sound By default, the RF Wrist Remote will beep whenever a button is pressed. Perform the following steps to enable or disable the button beep sound: Press the Mode/Sleep button repeatedly until the Live View/Preview mode is displayed. -
Page 72: Adjusting The Screen Brightness Level
Adjusting the Screen Brightness Level Perform the following steps to change the brightness level of the display. Note that a bright display will be easier to see in daylight, but will consume battery power at a faster rate than a dimmer display. -
Page 73: Live View/Preview Mode
Live View/Preview Mode The primary use for the RF Wrist Remote is as a remote monitor and controller for one or more paired cameras. When in Live View/Preview mode, you can start and stop video recording and can take still photos. To enter Live View/Preview mode, press the Mode/Sleep button repeatedly until the Live View/Preview mode is displayed. - Page 74 The Video and Photo buttons perform the actions shown in the following table, depending on the mode in use by the paired camera. Action Cam Mode Video Button Photo Button Video Start/stop video Capture a still recording photo* Photo Start/stop video Capture a still recording photo*...
-
Page 75: Using The Accessories
USING THE ACCESSORIES The camera includes a waterproof case and several T Tip mounting accessories. Using the Waterproof Case Notes Concerning the Waterproof Case • The camera and other components are only waterproof when properly enclosed in the waterproof case. Do not otherwise subject this device to water or moisture of any kind. - Page 76 • Physically inspect the waterproof case for cracks, scratches, or other damage prior to use. Do not use it if it shows signs of damage. • Do not subject the waterproof case to water temperatures greater than +104°F (+40°C) or less than +32°F (0°C). •...
- Page 77 Perform the following steps to install the camera into the waterproof case: While holding the latch lock to the right, lift the front portion of the case latch. Lift the rear portion of the latch to disengage the rear door. Swing the rear door open to reveal the empty camera housing.
-
Page 78: Using The T Tip Adapter
Using the T Tip Adapter The camera comes with the T Tip Adapter mounted on the bottom of the waterproof case. Depending on your usage needs and any optional accessories you wish to use, you may need to move the T Tip Adapter to another location. -
Page 79: Changing The Rear Door
Changing the Rear Door The camera includes both a waterproof rear door and a vented rear door for the waterproof case. Depending on your usage needs, you many need to change doors. Perform the following steps to swap the doors on your waterproof case. While holding the latch lock to the right, lift the front portion of the case latch. -
Page 80: Assembling The T Tip Accessories
Assembling the T Tip Accessories The Swivel T Tip is used to secure the camera to a mounting socket or other accessory. To attach the Swivel T Tip to the T Tip Adapter on the camera house, depress the locking latch and slide the Swivel T Tip onto the adapter, as shown to the right. -
Page 81: Using The Mounting Sockets
Using the Mounting Sockets The camera includes both a Flat and a Curved Adhesive Mounting Socket to which the Swivel T Tip can be attached. For best results, adhere to the following guidelines when using the Adhesive Mounting Sockets. • Attach only to a smooth surface •... -
Page 82: Troubleshooting
TROUBLESHOOTING Camera Troubleshooting Q1: The Battery LED is flashing red. A1: The battery charge is almost depleted. Replace the battery with a fully charged one or charge the battery before attempting to use again. Q2: Nothing happens when the Shutter button is pressed. A2: The microSD card is full. -
Page 83: Rf Wrist Remote Troubleshooting
A3: Ensure that the camera is powered on. Pair the camera to the RF wrist remote. TECHNICAL SUPPORT Monoprice is pleased to provide free, live, online technical support to assist you with any questions you may have about installation, setup, troubleshooting, or product recommendations. If you ever need assistance with your new product, please come online to talk to one of our friendly and knowledgeable Tech Support Associates. -
Page 84: Specifications
SPECIFICATIONS Camera Lens 3.4mm, ƒ=2.8 2.6 ft. ~ ∞ (0.8m ~ ∞) Focus Range Field of View Video: 75 ~ 140°, Photo: 73 ~ 142° Video Resolutions 1080p (16:9): 60fps (126°), 30fps (126°), and Frame Rates 30fps (102°), 30fps (75°) (FOV) 960p (4:3): 60fps (140°), 30fps (140°) 720p (16:9): 120fps (102°), 60fps (126°) - Page 85 White Balance Auto Built-in Wi-Fi RF Remote Included with PID 12570 only OLED Display 0.83" (21mm) Inputs Micro USB, 2.5mm TRS (external microphone) Outputs HDMI Mini Connector Battery Type SLB-10A (1130mAh Lithium-ion) Battery Duration Video (1080p60): about 90 minutes Photo (16 MP): about 250 photos Auto Power Off 1, 3, 5, 10, 30, or 60 minutes Dimensions...
- Page 86 RF Wrist Remote Display 1.29" OLED Aspect Ratio Stream Format MJPEG, 128 x 96 pixels, 8 fps RF Frequency 2.4GHz RF Range Up to 9.8 ft. (3m) Auto Sleep Mode Never or 5, 10, 30, or 60 seconds Battery Capacity 370mAh Battery Charging About 2 hours...
-
Page 87: Regulatory Compliance
This FCC Part 15 radio device operates on a non-interference basis with other devices operating at this frequency. Any changes or modification to said product not expressly approved by Monoprice, including the use of non-approved antennas, could void the user’s authority to operate this device. -
Page 88: Trademarks
harmful interference, and (2) this device must accept any interference received, including interference that may cause undesired operation. Trademarks HDMI, the HDMI Logo, and High-Definition Multimedia Interface are trademarks or registered trademarks of HDMI Licensing LLC in the United States and other countries. Wi-Fi is a registered trademark of Wi-Fi Alliance.
Need help?
Do you have a question about the MHD Sport 2.0 Wi-Fi 12570 and is the answer not in the manual?
Questions and answers