
Related Manuals for SimpleParenting Doona


Summary of Contents for SimpleParenting Doona
- Page 1 User Guide Group 0+ Weight: Up to 35 lbs (15.8 kg) Height: 32 inches (81 cm) or less Language: English KEEP THIS USER GUIDE in its’ storage compartment at the back of the product.
-
Page 2: Table Of Contents
7.2. Adjusting the rotation angle of the handle......19 7.3. Extending andretracting the handle........20 7.4. Rear wheels brakes..............21 7.5. Changing between modes..........21 08/ Securing Your Child in the Doona Car Seat......27 8.1. Infant Insert use..............29 8.2. Head Support use..............30 8.3. Harness use................32 8.4. - Page 3 13.3. Seat Pad Re-fitting...............58 13.4. Sunshade Re-fitting..............63 13.5. Cleaning the Seat Pad............65 13.6. Care for the harness straps \ harness buckle \ harness adjuster strap............66 13.7. Cleaning the Doona Car Seat accessories......66 13.8. Replacement parts..............66 13.9. Storage..................66 14/ Accessories................67 15/ Two-Year Warranty..............68 16/ Warranty Card.................69...
- Page 4 Congratulations for choosing Simple Parenting’s Doona Car Seat as your child’s safety and mobility solution. In order to protect your child, the Doona Car Seat must always be used and installed as described in this user guide. IMPORTANT! Keep these instructions for future use.
-
Page 5: 01/ Safety Warnings
• Read all instructions in this user guide and the instructions in your vehicle manual before using the Doona Car Seat. • NEVER allow others to use or install the Doona Car Seat before they read the instructions in this user guide and the child restraint installation instructions in their vehicle manual. - Page 6 • The Doona Car Seat is not suitable for use while running or skating. • DO NOT USE the Doona Car Seat if it has been involved in a crash. • DO NOT USE the Doona Car Seat if it is damaged or broken.
- Page 7 • DO NOT let your child play with the Doona Car Seat. • Suffocation Hazard: an Infant carrier can roll over on soft surfaces and suffocate a child. NEVER place an infant carrier on beds, sofas, or other soft surfaces.
-
Page 8: 02/ Certifications
2 / Certifications. The Doona Car Seat conforms to all applicable Federal Motor Vehicle Safety Standards. This Restraint is certified for use in Motor Vehicles. The Doona Car Seat has been designed, tested, and certified according to US safety standards and regulations. -
Page 9: 03/ Aircraft Installation
Before arriving at the airplane with the Doona Car Seat, please contact the airline regarding suitability and transport conditions in advance. The use of the Doona Car Seat is allowed only on a plane with a 2-point seat belt. Do not use the Doona Base on an aircraft. -
Page 10: 04/ Registration & Recall
168 East Main Street Prospect Park, NJ 07508 Or call Customer Service at (862) 240-1755 Or register this product on-line at: www.simpleparenting.co/register For recall information, call the US Government Vehicle Safety Hotline 1-888-327-4236 (TTY:1-800-424-9153), or go to www.NHTSA.gov. Also check the Simple Parenting website at: www.simpleparenting.co... -
Page 11: 05/ Use Requirements
5 / Use Requirements. For rear-facing use only. Use the Doona Car Seat when your child meets all of the following criteria: • Weight: 4 to 35 lbs (1.8 to 15.8 kg) and • Height: 32 inches (81.3 cm) or less and •... -
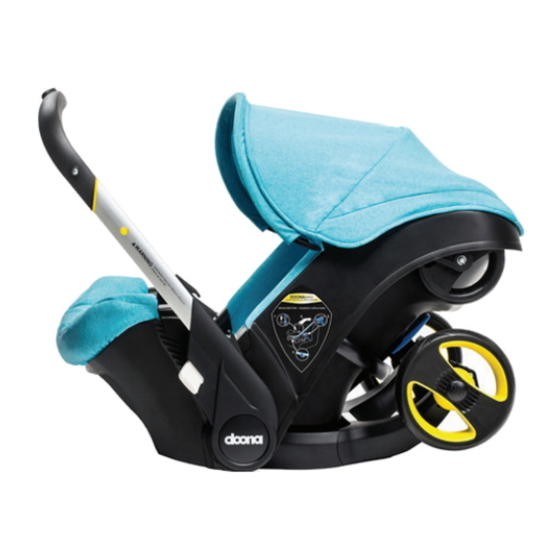
Page 12: 06/ Product Overview
6 / Product Overview. 1. Handle extension button 8. Shoulder straps 2. Handle 9. Buckle tongues 3. Lap belt guides 10. Buckle release button 4. Sunshade 11. Chest clip 5. Handle rotation buttons 12. Harness buckle 6. Front wheels 13. Harness adjustment button 7. - Page 13 15. Brake lock pedal (red) 22. Metal bar 16. Brake release pedal (green) 23. Head support 17. Stroller wheel release 24. Shoulder strap pads 18. Safety lock 25. Lap straps 19. Vehicle shoulder belt guide 26. Infant insert 20. Shoulder strap slots 21.
- Page 14 27. Vehicle shoulder belt 33. Sunshade hinge 28. Vehicle lap belt 34. Seat pad ring 29. Vehicle seat belt buckle 35. Seat pad pin tongue 36. Seat pad 30. Vehicle seat buckle 37. Lap strap slot 31. Sunshade spine 38. Hook 32.
- Page 15 PRO DU CT OVERVIEW...
-
Page 16: 07/ Use Modes
Intended for walking around in open spaces. WARNING • Overloading the Doona Car Seat can cause it to become unstable and tip over. TH E N EX T G EN ER ATI O N CA R S E A T... -
Page 17: Adjusting The Rotation Angle Of The Handle
You should hear a “click” sound when the handle is locked. • For a daily use of the Doona Car Seat, engage the handle in positions B or C. • For storing the Doona Car Seat engage the handle in position A. -
Page 18: Extending Andretracting The Handle
7.3. Extending and retracting the handle WARNING! The handle can only be extended or retracted when it is in position C. Handle extension or retraction is NOT possible when the handle is in positions A or B. To extend the handle (#2) to its maximal length, press the handle extension button (#1) and pull the handle up until you hear a “click”... -
Page 19: Rear Wheels Brakes
7.4. Rear wheels brakes WARNING! Always engage the brakes when placing a child in Doona Car Seat or removing a child from the Doona Car Seat. To apply the brakes on both rear wheels (#7), step on the red brake lock pedal (#15) located next to the right rear wheel. - Page 20 STEP 2. Push in the red safety lock (#18) of the stroller wheel release (#17) at the back of the Doona Car Seat, and squeeze it up, to unfold the wheels. You should hear a “click” sound when the legs are fully opened and locked.
- Page 21 STEP 5. Extend the handle (#2) to its maximal length by pressing the handle extension button (#1) and pulling the handle up. You should hear a “click” sound when the handle is locked and fully extracted. WARNING! The handle can only be extended or retracted when it is in position C.
- Page 22 STEP 2. Press the handle extension button (#1), to retract the handle (#2) by pushing it down until it locks at its minimal length. STEP 3. Press the handle rotation buttons (#5) on both sides simultaneously and rotate the handle (#2) to the upright position B. STEP 4.
- Page 23 Car Seat all the way to the ground, until the legs are fully folded. You should hear a click when the legs are locked. STEP 8. Lift the Doona Car Seat by the handle (#2), and place it in the vehicle in a rear facing position.
- Page 24 WARNING The Doona Car Seat can be folded into car seat mode ONLY when all of the following actions are done simultaneously: • Blocking the rear wheel (#7) • Pressing the safety lock (#18) • Squeezing the stroller wheel release (#17) •...
-
Page 25: 08/ Securing Your Child In The Doona Car Seat
Car Seat or in the user guide, could result in DEATH or SERIOUS INJURY. • NEVER allow others to restrain a child in the Doona Car Seat unless they read the instructions in this user guide and the instructions in the vehicle manual. - Page 26 • The Doona Car Seat does not replace a crib, a bed, a play yard or a bassinet. Should your child need to sleep,...
-
Page 27: Infant Insert Use
8.1. Infant Insert use WARNING! ALWAYS secure your child in the Doona Car Seat WITH the Infant Insert (#26) if your child weighs below 11lbs (5 kg). STEP 1: Place the Infant Insert (#26) at the lowest part of the seat to provide better support for your child’s back. -
Page 28: Head Support Use
• NEVER remove the Head Support as long as you carry your child in the Doona Car Seat. • NEVER place your child in the Doona Car Seat without the Head Support. • Keep using the Head Support in the Doona Car Seat even after removing the Infant Insert. - Page 29 Ensure the head support straps are wrapped around the shoulder straps (#8) and connected to the button snaps, at the back of the head support. IMPORTANT! Ensure the shoulder straps (#8) are inserted through the shoulder strap slots (#20) at or just below the child’s shoulders. S E CUR ING Y OUR CHILD IN T HE DO ON A CAR SEAT...
-
Page 30: Harness Use
• Always properly secure your child with the harness in the Doona Car Seat. • Snugly adjust the harness of the Doona Car Seat around your child. A snug strap should not allow any slack. It lies in a relatively straight line without sagging. It does not press on the child’s flesh or push the child’s body into an... -
Page 31: Adjusting The Harness
Adjusting the Harness Loosening the shoulder straps Press the harness adjustment button (#13) while pulling both shoulder straps (#8) toward you. Tightening the shoulder straps Gently pull the harness adjustment strap (#14) until both the lap straps (#25) and the shoulder straps (#8) are snug around your child’s body. Make sure that both the shoulder portion and the lap portion of the harness have been tightened. - Page 32 Periodically, check that the straps are routed through the correct slots for your child. STEP 1: Place the child in the Doona Car Seat and locate the correct shoulder strap slots (#20) for your child’s height. Remove your child from the Doona Car Seat.
- Page 33 IMPORTANT! Make sure the shoulders straps are routed between the seat body and the metal bar (#22) at the back of the Doona Car Seat. No part should go infront of the metal bar. STEP 4: Attach the shoulder straps (#9) to the metal harness plate (#21).
-
Page 34: Buckle Use
WARNING Prevent risk of ejection in a crash. • Make sure that the shoulder straps are not twisted and are threaded through the shoulder strap slots at the same height. • Make sure that the shoulder straps are correctly reconnected to the metal harness plate. •... -
Page 35: Chest Clip Use
8.5. Chest clip use To release the chest clip (#11), press the chest clip release buttons and pull apart the two parts. To fasten the chest clip (#11), slide the two parts together until a “click” sound is heard. IMPORTANT! Adjust the chest clip to the child’s arm-pit level. S E CUR ING Y OUR CHILD IN T HE DO ON A CAR SEAT... -
Page 36: Shoulder Strap Pads Adjustment
8.7. Securing your child with the harness STEP 1: Place your child in the Doona Car Seat with their rump against the seat back and bottom as shown. STEP 2: Position the shoulder strap pads (#24) above the child’s shoulders. - Page 37 STEP 5: Tighten the harness straps until they are snug around your child’s lap and body. WARNING • Snugly adjust the harness of the Doona Car Seat around your child. A snug strap should not allow any slack. It lies in a relatively straight line without sagging. It does not press on the child’s flesh or push the child’s body into an...
-
Page 38: 09/ Vehicle Compatibility
• Read all instructions in this user guide and the instructions in your vehicle manual before using the Doona Car Seat. • NEVER allow others to use or install the Doona Car Seat before they have read and understood the instructions in this user guide and the child restraint installation instructions in the vehicle manual. - Page 39 • According to accident statistics, children aged of 12 and under are safer when properly restrained in the rear seating positions than in front seating positions. • Secure your child in the Doona Car Seat for every journey! The Doona Car Seat can only be used in a rear-facing position when used in the vehicle.
- Page 40 Forward facing vehicle seat Seat with active frontal airbag Seat with lap-shoulder belt Seat with lap belt only Rear-facing vehicle seat Side-facing vehicle seats NEVER place a rear-facing child restraint in the front seat of a vehicle with an active frontal air bag. An airbag hitting the child restraint can cause serious injuries to your child, possibly resulting in death.
-
Page 41: 10/ Incompatible Vehicle Seat Belt
10 / Incompatible Vehicle Belt. WARNING NEVER install the Doona Infant Car Seat with the Doona Base in a vehicle with the following types of vehicle belts. Check your vehicle manual for information about the vehicle’s seat belt type. 1. Vehicle belts that are attached to the door in any way, or that move along a track automatically to restrain the passenger when the door is closed. -
Page 42: 11/ Installing With A Base
Base. This user guide does not include instructions for installation with a base. For detailed instructions on how to install the Doona Car Seat with the Doona Base, refer to the user guide provided with the Doona Base. -
Page 43: 12/ Installing Without A Base
Base. WARNING Ensure child’s safety • Use only in a rear-facing position when using the Doona Car Seat in a vehicle. • NEVER leave your child unattended in the Doona Car Seat in the vehicle. Vehicle interior temperatures can rise or drop to dangerous levels very quickly. - Page 44 WARNING Ensure correct installation • Make sure that the Doona Car Seat handle is in its anti-rebound position C. • Make sure to adjust the reclining level of the Doona Car Seat according to the red level line that appears on the side sticker.
- Page 45 • Make sure ONLY the lap belt section of the vehicle belt is routed through both lap belt guides located on the handle of the Doona Car Seat. • Make sure the red level line on the side sticker on the Doona Car Seat is parallel to the ground.
-
Page 46: Lap-Shoulder Belt Installation
Doona Base. STEP 1: Place the Doona Car Seat rear-facing on the vehicle seat (child is facing backwards). NOTE: Simple Parenting recommends installing the Doona Car Seat only in a rear vehicle seating position. - Page 47 STEP 3: Make sure that the vehicle belt is not twisted and then buckle it. STEP 4: Pull the vehicle belt out and route the lap portion of the vehicle belt (#28) through the lap belt guides (#3) located on both sides of the handle . IMPORTANT! Do not route the shoulder portion of the vehicle belt (#27) through the lap belt guides (#3).
- Page 48 STEP 6: Pull the shoulder portion of the vehicle belt (#27), route it around the back of the Doona Car Seat and thread it through the vehicle shoulder belt guide (#19) located at the back of the Doona Car Seat.
-
Page 49: Lap Belt Installation
Doona Base. STEP 1: Place the Doona Car Seat rear-facing on the vehicle seat (child is facing backwards). STEP 2: Place the handle (#2) in car seat mode, position C. - Page 50 STEP 3: Make sure that the vehicle belt is not twisted and then buckle it. IMPORTANT! If you cannot achieve a secure installation, try it on a different seating location. If you have any questions about the installation, please contact your local distributor. STEP 4: Pull the vehicle belt out and route the lap vehicle belt through the lap belt guides (#3) on both sides of the handle (#2).
-
Page 51: 13/Care And Maintenance
• Should the Doona Car Seat be damaged (e.g. after dropping it), it must be inspected by an authorized person. • Do not use the Doona Car Seat if it is damaged or broken. • DO NOT use the Doona Car Seat without its seat pad. -
Page 52: Sunshade Removal
13.1. Sunshade Removal. STEP 1: Pull out the 3 sunshade hinges (#33) at the back of the sunshade (#4). STEP 2: Pull out the sunshade spine (#31) from the sunshade hinges (#33). STEP 3: Remove the fabric from the spine. TH E N EX T G EN ER ATI O N CA R S E A T... -
Page 53: Seat Pad Removal
13.2. Seat Pad Removal. STEP 1: Loosen the Shoulder Straps (#8) completely. STEP 2: Release the Harness Buckle (#12). STEP 3: Disconnect the shoulder straps (#8) from the metal harness plate (#21) located at the back of the car seat. CA RE AND MAIN TEN AN CE... - Page 54 STEP 4: Pull out the shoulder straps (#8) from the front and remove the shoulder strap pads (#24) from them. STEP 5: Release the seat pad from the 4 hooks (#38) behind the head area of the car seat. STEP 6: Snap out the seat pad pins (#35) of both sides of the seat pad. TH E N EX T G EN ER ATI O N CA R S E A T...
- Page 55 STEP 7: Remove the seat pad from both sides, as shown below. STEP 8: Snap out the sead pad pins (#35) of the seat pad. STEP 9: Pull up the seat pad from around the harness adjustment button (#13) and the harness buckle (#12) to remove the seat pad completely.
-
Page 56: Seat Pad Re-Fitting
13.3. Seat Pad Re-fitting. STEP 1: Thread the shoulder straps (#8) through the slots in the lap area of the seat pad. STEP 2: Thread the harness buckle (#12) through the designated slot in the seat pad and pull it out from the other side. TH E N EX T G EN ER ATI O N CA R S E A T... - Page 57 STEP 3: Re-fit the seat pad around the harness adjustment button (#13). STEP 4: Tuck in the lower seat pad pin (#35) at the bottom of the car seat. STEP 5: Tuck in the seat pad pins (#35) on both sides. CA RE AND MAIN TEN AN CE...
- Page 58 STEP 6: Tuck in the seat pad around the bottom part of the car seat. STEP 7: Tuck in the seat pad on both sides, as shown below. TH E N EX T G EN ER ATI O N CA R S E A T...
- Page 59 STEP 8: Tuck in the seat pad pins (#35) on both sides of the car seat body. STEP 9: Thread the 4 seat pad rings (#34), attached to the head area of the seat pad, through the slots in the upper part of the car seat, and attach them to the hooks (#38).
- Page 60 STEP 10: Thread the shoulder straps (#8) through the appropriate shoulder strap slots (#20). IMPORTANT! Shoulder straps must be routed at the same height or slightly below the child’s shoulders. STEP 11: Reconnect the shoulder straps to the metal harness plate (#21) at the back of the car seat.
-
Page 61: Sunshade Re-Fitting
13.4. Sunshade Re-fitting. STEP 1: Re-fit the fabric on the sunshade spine (#31). STEP 2: Hook in the sunshade spine (#31) into the sunshade hinges (#33). CA RE AND MAIN TEN AN CE... - Page 62 STEP 3: Reconnect the 3 sunshade pins (#32) at the back of the sunshade (#4). WARNING Correct installation • Make sure the harness straps are not twisted and are correctly routed through the shoulder strap slots. • Make sure that the shoulder straps are correctly reconnected to the metal harness plate.
-
Page 63: Cleaning The Seat Pad
• Always read the care labels before attending to wash any of the Doona Car Seat parts and accessories. • The Doona Car Seat must not be used without the seat pad. The seat pad can be removed and washed with a mild detergent. -
Page 64: Care For The Harness Straps \ Harness Buckle \ Harness Adjuster Strap
NEVER use a washing machine or a dryer to clean the harness, harness buckle, and harness adjuster. NEVER iron the harness webbing. If the harness of the Doona Car Seat must be cleaned, wipe it with a damp cloth or rinse it thoroughly with clean, warm water. NEVER disassemble the harness. -
Page 65: 14/ Accessories
14 / Accessories. Simple Parenting offers various accessories which have been tested to assure that their use does not impair the safety or proper function of the Doona Car Seat. Instructions and warnings are provided with each accessory. WARNING • DO NOT use the Doona Car Seat accessories before reading all warnings and instructions provided with them. -
Page 66: 15/ Two-Year Warranty
US safety standards and regulations, and that it meets the highest standards of quality. For the Doona Car Seat, we provide a 2-year limited warranty against manufacturing and material defects. The warranty period is effective from the day of purchase. -
Page 67: 16/ Warranty Card
16 / Warranty Card. Warranty card: Name: Address: Zip code: City/Town: State: Telephone no. (including area code): E-mail address: Product serial number : Retailer (store where purchased): Receipt number: Note: Keep the receipt together with the warranty card. W ARRAN TY CARD... - Page 68 info@simpleparenting.co...
Need help?
Do you have a question about the Doona and is the answer not in the manual?
Questions and answers