Table of Contents
Advertisement
Quick Links
Advertisement
Table of Contents

Summary of Contents for Hyper Rip Rail
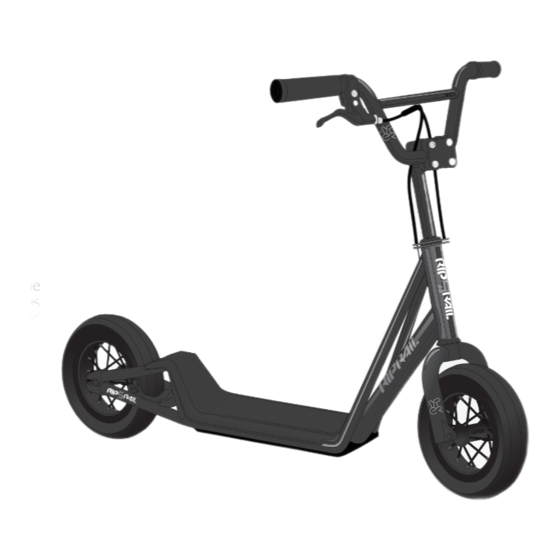
- Page 1 B M X S C O O T E R O W N E R ’ S M A N U A L...
-
Page 2: Serial Number
The following manual is only a guide to assist you and is not a complete or comprehensive manual of all aspects of maintaining and repairing your BMX Scooter. The BMX Scooter you have purchased is a complex object. Ballard Pacific Resources Inc. recommends that you consult a BMX Scooter specialist if you have doubts or concerns as to your experience or ability to properly assemble, repair, or maintain your BMX Scooter. -
Page 3: Table Of Contents
Contents B M X S c o o t e r O W N E R ’ S M A N U A L SAFETY Safety Equipment Mechanical Safety Check Riding Safety IMPORTANT NOTE TO PARENTS 5 Rules of the Road Rules of the Trail Wet Weather Riding Night Riding... -
Page 4: B M X
GENERAL WARNINGS 1. Rider must be age 6 years or older. Maximum weight limit 220 lbs 2. Adults must assist children in the initial adjustment procedures to adjust handlebar and steering to height. 3. Always wear safety equipment such as helmet, knee pads and elbow pads. Always wear a helmet when riding your scooter and keep the chin strap securely buckled. -
Page 5: Mechanical Safety Check
2. LIGHTS MECHANICAL SAFETY CHECK We strongly recommend that children not ride after Here is a simple, sixty-second mechanical safety dusk or before daylight. If you must ride your BMX Scooter check which you should get in the habit of making after dusk or before full daylight, your BMX Scooter must be every time you’re about to get on a bike. - Page 6 Tires in good shape? Spin each wheel slowly and look 4. WHEEL NUTS for cuts in the tread and sidewall. Replace damaged tires before riding the bike. Are the front and rear wheels straight and secure in the dropouts? Are the wheel nuts properly tightened? Wheels true? Spin each wheel and check for brake clearance and side-to-side wobble.
-
Page 7: Important Note To Parents
The lessons that follow relate to some of the most common real situations that children encounter when The RIP RAIL BMX Scooter is not designed or riding their bikes. Go over these situations with your intended for use on public streets. DO NOT... - Page 8 One suggestions is to tape “phone The RIP RAIL BMX Scooter is not designed or intended for use on public streets. DO NOT OPERATE YOUR RIP RAIL ON THE STREET OR IN CLOSE PROXIMITY OF MOTOR VEHICLES!
-
Page 9: Rules Of The Road
money” to the bike so that, in an emergency, the 2. Be thoroughly familiar with the controls of your child will be able to call home. BMX Scooter. Following the Leader: There is increased risk of 3. Be careful to keep body parts and other objects car/bike collision if children are following each other, away because if the first one does something dangerous,... - Page 10 2. You are sharing the road or the path with others - 5. Ride in designated bike lanes, on designated bike motorists, pedestrians and other cyclists. Respect paths or on the right side of the road, in the same their rights, and be tolerant if they infringe on yours. direction as car traffic and as close to the edge of the road as possible.
-
Page 11: Rules Of The Trail
15. Never ride your BMX Scooter while under the 5. Yield right of way to pedestrians and animals. Ride in influence of alcohol or drugs. a way that does not frighten or endanger them, and stay far enough away so that their unexpected moves 16. -
Page 12: Wet Weather Riding
WET WEATHER RIDING Under wet conditions, the stopping power of your Even if you have excellent night vision, many of the people brakes (as well as the brakes of other vehicles sharing with whom you’re sharing the road don’t. A the road) is dramatically reduced and your tires don’t bicyclist is very difficult for motorists and pedestrians grip nearly as well. - Page 13 Riding Safety and Responsibility The Owner's Responsibility WARNING: This BMX Scooter is made to be ridden by one rider at a time for general transportation and recreational use. It is not made to withstand the abuse of stunting and jumping. If the BMX Scooter was purchased unassembled, it is the owner's responsibility to follow BMX Scooter All assembly and adjustment instructions exactly as written in this manual and any...
- Page 14 For more details on inspections, lubrication, maintenance and adjustment of any area please refer to the relevant sections in this manual. If you need replacement parts or have questions pertaining to assembly of your BMX Scooter, call HYPER direct at: TOOLS...
- Page 15 Adjusting the Handlebar Stem Four Bolt Stem and Headset (Four Bolt) Diagram NOTE: the handlebar stem and headset are an integrated system. Both must be adjusted at the same time. 1. To adjust the headset or stem, first loosen the two stem binder bolts, then the adjuster bolt in the top cap.
-
Page 16: Handlebar And Stem
Handlebar and Stem (Single Bolt) Single Bolt Stem Diagram 1. Assemble the stem to the fork: If necessary, assemble the stem to bolt (4),washer (5), and wedge nut (2) to the stem (1). Turn the stem bolt only four revolutions into the wedge nut. Turn the stem bolt only four revolutions into the wedge nut (2). - Page 17 Handlebar and Stem (continued) Put the handlebar in a comfortable position for the rider WARNING: if the handlebar clamp is not tight enough, the handlebar can slip in the stem. This can cause loss of control Tighten the bolts of the handlebar clamp. If the handlebar clamp has more than one bolt, than tighten the bolts equally.
-
Page 18: Front Wheel
(Shown with Bike Sitting Upside-Down) Assemble the front wheel to the fork as shown: - If the BMX Scooter has a front caliper brake and the tire will not go down between the brake shoes (1), remove one brake shoe. AXLE WARNING: If you remove a brake shoe to install the front wheel, return it to the correct... - Page 19 Adjusting the rotor 1) Ensure that the threaded portion of the upper adjusting barrel SINGLE CABLE CASING Rotor CABLE ADJUSTER is flush with or slightly protrudes through the bottom of the CABLE SPLITTER upper cable stop. CABLE UPPER CABLE Ensure that the threaded portion of the lower adjusting barrel (LONG CASING) is flush with or slightly protrudes through the top of the lower cable stop.
-
Page 20: Hand Brake
Hand Brake Front and Rear Handbrake A BMX Scooter with hand brakes may have one hand lever Diagram which operates a rear brake, or two brake levers, one of which operates on the front wheel and the other on the rear wheel. It's important to your safety that you instinctively know which brake lever controls which brake on your bike. - Page 21 Brake Lever Cable Installation 1) Tighten adjuster all the way into lever. Slide the cable end up into the cable end slot. Run the cable into the cable slot through the adjuster slot until cable is seated in adjuster. Turn adjuster slightly counter clockwise so adjuster slot is not aligned with the cable slot.
- Page 22 Brake System Adjustments Brake Shoe WARNING: You must adjust the rear brakes as BRAKE SHOE written before you ride the BMX Scooter. 1. Put the brake shoes in the correct position: Loosen the nut (1) of each brake shoe. Adjust each brake shoe so it is flat against the rim and aligned with the curve of the rim.
- Page 23 The following sections describe final brake system adjustments required before riding. 1. Align and tighten brake shoes: If the top and bottom edges are not evenly aligned to rim then first loosen the brake shoe nuts until brake shoes move freely. Align the brake shoes top and bottom edges evenly to the rim as shown.
- Page 24 Pull or loosen the cable wire slightly. Tighten the cable clamp WARNING: Do not overtighten the cable clamp. Overtightening the cable clamp may cut the cable and cause injury to the rider or to others. Do Step 3 until the brake shoes are the correct distance from the rim. Turn the locknut(s) against the brake lever and the caliper brake.
-
Page 25: Brakes
7. Test the travel of each brake lever: Squeeze each brake lever with strong pressure. If the brake lever touches the grip, do Steps 1 through 7 again. WARNING: After you do Steps 1 though 7 again, if either brake lever touches the grip or does not work well, have a BMX Scooter service shop repair or adjust the caliper or cantilever brakes. - Page 26 WARNING: If you do not obey the following instructions, injury to the rider or to others can occur: Before you ride the BMX Scooter for the first time, check and adjust the brakes as written in the "Adjustments” section. Then test the brakes and practice using them at low speed in a large and level area that is free of obstruction.
-
Page 27: Tire Valves
The tire valve allows air to enter the tire’s inner tube under Shraeder Valve pressure, but doesn’t let it back out unless you want it to. There are primarily two kinds of BMX Scooter tube valves (actually, there are other designs, but they are seldom seen in the US anymore): The Schraeder Valve and the Presta Valve. -
Page 28: Tires
TIRE REMOVAL FIGURE A Press with thumbs to separate tire bead. 1 Let the air out of the tire by depressing the valve core (the little Continue around entire pin in the centre of the valve stem opening). rim until the bead is completely separated. -
Page 29: Repair And Service
Repair and Service WARNING: Inspect the BMX Scooter frequently. Failure to inspect the BMX Scooter and to make repairs or adjustments, as necessary can result in injury to the rider or to others. Make sure all parts are correctly assembled and adjusted as written in this manual and any "Special Instructions". Immediately replace any damaged, missing, or badly worn parts. - Page 30 Tires Maintenance Frequently check the tire inflation pressure because all tires lose air slowly over time. For extended storage, keep the weight of the BMX Scooter off the tires. WARNING: Do not ride or sit on the BMX Scooter if either inner tube is under inflated.
- Page 31 Inspection of Bearings Maintenance: Frequently check the bearings of the BMX Scooter. Have a bicycle service shop lubricate the bearings once a year or any time they do not pass the following tests. Head Tube Bearings: The fork should turn freely and smoothly at all times. With the front wheel off the ground, you should not be able to move the fork up, down, or side-to-side in the head tube.
- Page 32 Using a light machine oil (20W) and the following guidelines, lubricate the BMX Scooter: What When Brake Levers every six months Put one drop of oil on the pivot point of each brake lever Caliper Brakes every six months Put one drop of oil on the pivot point of each caliper brake Brake Cables every six months Put four drops of oil into both ends of each cable.
- Page 33 Repair and Service WHEELS Wheel Inspection It is most important that wheels are kept in top condition. Properly maintaining your BMX Scooter's wheels will help braking performance and stability when riding. Be aware of the following potential problems: Dirty or greasy rims: Caution: These can render your brakes ineffective.
-
Page 34: New Owner
BALLARD PACIFIC RESOURCES INC. WARRANTY and Policy on Replacement Procedures and Responsibilities Your purchase includes the following warranty which is in lieu of all other express warranties. This warranty is extended only to the initial consumer purchaser. No warranty registration is required. This warranty gives you specific legal rights and you may have other rights which vary from state to state. -
Page 35: Purchase Record
PURCHASE RECORD CARD IMPORTANT NOTICE Fill in immediately and send in as a record of your purchase. Record Serial Number and retain in designated spot in front of this Manual. Owner’s Name: Address: Date Purchased: Place of Purchase: Model Name: Wheel Size: Color: Serial Number:... - Page 36 ITEM NO: 55 410 Adele Joplin, Mo 64801 Call Toll Free 1.866.424.0500 Local 417-206-0563 Fax: 775-248-5155 Monday-Friday 8:00AM to 5:00PM (CST) For product related questions email us at: info@motiontrendz.com For customer service questions email us at: service@motiontrendz.com...
Need help?
Do you have a question about the Rip Rail and is the answer not in the manual?
Questions and answers