
Summary of Contents for peerless-AV PeerAir Pro HDS300
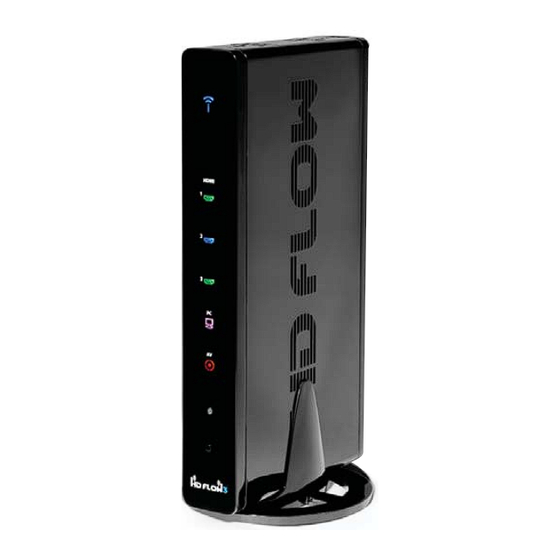
- Page 1 User Manual and Installation Guide Powered by Powered by Models: HDS300 HDS300-2 HDS300-3 HDS300-4 HDS300-5 ® HDS300-6 R E ADY ISSUED: 12-22-14 SHEET #: 180-9064-4 01-20-16...
-
Page 2: Table Of Contents
CONTENTS Safety Precautions ..................................3 Read Before Operating Equipment ............................3 Unit Care Recommendations ..............................3 Introduction .....................................4 Features ....................................4 Packaging Contents ................................4 Product Specifi cations ..................................5 Video Format Supported ............................... 5 Audio Format Supported ............................... 5 Wireless Connection ..............................5 Transmitter Front ..................................6 Transmitter Back ..................................7 Receiver Front ..................................8 Receiver Back ..................................9... -
Page 3: Safety Precautions
Keep the product unplugged if use the product and immediately unused for an extended period call Peerless-AV Customer Care at of time. 1-800-865-2112. Read Before Operating Equipment Thank you for purchasing our product. Before using it, please read this user manual carefully and follow the instructions correctly for safe operation. -
Page 4: Introduction
© 2015 Peerless Industries, Inc. Peerless-AV™ is a trademark of Peerless Industries, Inc. All rights reserved. HD Flow™ is a trademark of I Do It, LTD. Other parties’ marks are the property of their respective owners. www.peerless-av.com Quick Start Guide for PeerAir... -
Page 5: Product Specifi Cations
PRODUCT SPECIFICATIONS HDS300 3x HDMI up to 1080p60 1x HDMI pass-thru output (pass-thru port mirrors HDMI 1) Video Input 1x PC Video (Transmitter) 1x Component & composite (via included dongle) 1x HDMI up to 1080p60 Video Output 1x Component (Receiver) 1x Composite H.264 Baseline Profi... -
Page 6: Transmitter Front
Transmitter Front Power/Link Indicator Light • Blinking indicator light - Establishing link between the Transmitter and the Receiver. • Solid indicator light - Link between the Transmitter and Receiver has been established and is ready for signal transmission. HDMI 1 •... -
Page 7: Transmitter Back
Transmitter Back HDMI 1 IN • HDMI1 input port. HDMI OUT • Pass-Thru for a local display from HDMI 1 input. HDMI 2 IN • HDMI2 input port. HDMI 3 IN • HDMI3 input port. • USB port is used for service only. IR-OUT •... -
Page 8: Receiver Front
Receiver Front Power/Link Indicator Light • Blinking indicator light - Establishing link between the Transmitter and the Receiver. • Solid indicator light - Link between the Transmitter and Receiver has been established and is ready for signal transmission. HDMI • The HDMI indicator light will be illuminated when the HDMI port is selected for video output. -
Page 9: Receiver Back
Receiver Back HDMI-OUT • HDMI output port AV-OUT • Composite video output port IR-IN • Connects IR Extender in order to extend IR reception range. AUDIO-OUT* • 3.5mm stereo audio output port for component output. COMPONENT-OUT* • Component Video output port •... -
Page 10: Remote Control
Remote Control POWER ON Button • Turns the Transmitter and Receiver power ON POWER POWER POWER OFF Button • Turns the Transmitter and Receiver power OFF INFO/OK* • Displays the following information on the screen: Transmitter - WiFi IP, LAN IP, frequency, Single/ SCAN MENU / BACK... -
Page 11: Remote Control Battery Installation And Replacement
Remote Control Battery Installation And Replacement The battery clip is located on the bottom of the remote control. Battery Clip Push the tab, located Place the battery into Place the clip back into on the left of the battery the clip, positive (+) end the remote to complete clip, to the right and pull facing up as shown. -
Page 12: Installation And Operation
INSTALLATION AND OPERATION Before starting the installation, please ensure that all source components (Blu-ray player, cable box, etc.) and the display equipment (TV, display, projector, etc.) are turned off. For initial setup of your PeerAir™ Pro system complete steps A, B, C, D, E and F in order. A) Connecting Source Components To The Transmitter HDMI Media Source •... -
Page 13: Ir Flasher Installation (Setting Up Ir Remote Control Capabilities For Source Devices)
Composite Media Source • Video – Connect “yellow” composite video RCA to green port on Component/Composite Adaptor. • Audio – A 3.5mm stereo audio cable is required (not included) to transmit audio when using this input. Connect the 3.5mm stereo audio cable from the VGA source component’s audio output to the Transmitter's PC AUDIO-IN port. -
Page 14: Connecting The Receiver To The Display Device
D) Connecting The Receiver To The Display Device Note: Connect the Receiver to the display device using the port with the highest capable resolution; HDMI port is preferred. The PeerAir Pro is a video switch, and as such will upconvert all inputs with resolutions of 480p, 720p, and 1080i/p through the HDMI Output. -
Page 15: Input And Output Selection
F) Input and Output Selection Select the output used to connect the Receiver to the display. There are two ways to choose output sources on the PeerAir™ Pro Receiver: a. Using the provided remote - Press the desired output while pointing the remote at the Receiver. b. -
Page 16: Multicast Mode - Pairing Additional Receiver(S) With The Transmitter
Multicast Mode - Pairing Additional Receiver(s) With The Transmitter (Optional) Multicast Wireless Mode enables the Transmitter to stream AV media from one Transmitter to up to six Receivers. Available Multicast Models Model Capability Mode streams to two display devices Multicast Wireless HDS300-2 streams to three display devices Multicast Wireless HDS300-3... -
Page 17: Tips
Tips If the Transmitter and Receiver are not establishing a connection: It is recommended to unplug the power to both units for 30 seconds and then plug them back in. If the above tip does not assist, please reference the Factory Reset section of this manual. If the connection has been established and the HD Flow™3 logo can be seen on the display device, but content is not playing when initiated: Ensure that source cables are properly connected. -
Page 18: Supported Video Formats
Supported Video Formats Notes: Video HD Flow Transmitter HD Flow Receiver Resolution Standard HDMI D-Sub AV(CVBS) HDMI COMP AV(CVBS) 1600 x 1200p60 is a reduced 640 x 480p60 format. 640 x 480p70 PeerAir™ Pro simply relays the 640 x 480p85 input format of the video from 800 x 600p60 800 x 600p70... -
Page 19: Warranty
CONTACT INFORMATION Customer Care Need help with installation or set up? Call Peerless-AV Customer Care 1-800-865-2112 (available 7:00am- 7:00pm CST, Monday - Friday), or email us at info@peerless-av.com. Peerless -AV 2300 White Oak Circle Aurora, IL 60502 USA www.peerless-av.com... - Page 20 2300 White Oak Circle, Aurora, IL 60502 USA 1-800-865-2112 www.peerless-av.com ©2016 Peerless-AV. All rights reserved. Peerless-AV is a trademark of Peerless Industries, Inc. HD Flow is a trademark of I Do It, LTD. Other parties’ marks are the property of their respective owners.
Need help?
Do you have a question about the PeerAir Pro HDS300 and is the answer not in the manual?
Questions and answers