
Related Manuals for Topsoaring New Technology Super TopSky 2.0 DLG

Summary of Contents for Topsoaring New Technology Super TopSky 2.0 DLG
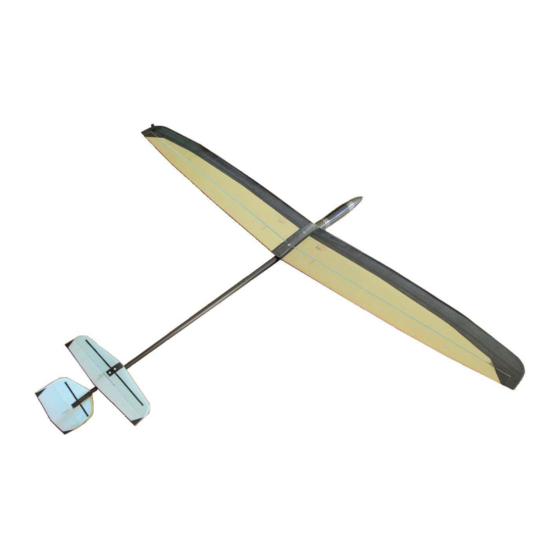
- Page 1 Topsoaring New Technology Co.,LTD. Super TopSky 2.0 installation Manual Super TopSky 2.0 DLG Installation Manual Super TopSky 2.0 Topsoaring New Technology Co.,LTD www.topsoaring.com...
- Page 2 Topsoaring New Technology Co.,LTD. Super TopSky 2.0 installation Manual 1. Locate servo position, we don't recommend installing the servos under the carbon front, that'll result in weakling the wing, you can find a carbon thread tow was embedded as spar 2.
- Page 3 Topsoaring New Technology Co.,LTD. Super TopSky 2.0 installation Manual 5. Remove foam to accept servos 6. Drill slot for servo wire 7. use 4mm brass tube as a drilling tool, file the top as the picture shown 8. Trim the servos and cover it...
- Page 4 Topsoaring New Technology Co.,LTD. Super TopSky 2.0 installation Manual 9. Servos dry fit and mark the exit of the wire 10. Mark the place of the screws connecting wing fuselage, and mark the foam in 30mm wide. 11. Remove the form with mark...
- Page 5 Topsoaring New Technology Co.,LTD. Super TopSky 2.0 installation Manual 13. Apply 30min epoxy on the root of the wing, use a pice of tape on the bottom side to connect 2 panels together 14. Connect 2 panels and place the wing tips on 2 chairs, the...
- Page 6 Topsoaring New Technology Co.,LTD. Super TopSky 2.0 installation Manual 17. Lay enough time for curing 18. Drill hole for wire going through 19. Lightly sand the joining area 20. Cut out a 35mm wide FG tape, lightly spray with 3M77 and...
- Page 7 Topsoaring New Technology Co.,LTD. Super TopSky 2.0 installation Manual 21. Wet with finishing resin 22. Sweep away extra resin with paper towel and wait for cure 23. Drill hole for the bolt, use small size drill bit first to test the position then use M4 bit finish the hole.
- Page 8 Topsoaring New Technology Co.,LTD. Super TopSky 2.0 installation Manual Begin aileron servos installation by guide the wire through the slot 26. Mix some 5min epoxy with micro balloon to glue the servos in place, use square to find the position of the control horn 27.
- Page 9 Topsoaring New Technology Co.,LTD. Super TopSky 2.0 installation Manual 29. Cut the linkage carbon rod, sand the tip and insert to the rear end of the clevis, fix with a drop CA, bend 1mm music wire for connecting servo horn 30.
- Page 10 Topsoaring New Technology Co.,LTD. Super TopSky 2.0 installation Manual 33. Cut through and finish the edge 34. Glue the peg in place, reinforce the wing tip with carbon cloth on both sides 35. A Cute peg that feels good 36. Finished...
- Page 11 Topsoaring New Technology Co.,LTD. Super TopSky 2.0 installation Manual 37. Cut 15mm pylon, drop CA to the rear end of the pylon, then remove the foam inside 38. Mix epoxy with abundant micro balloon, fill all room inside the pylon, then put the pylon on...
- Page 12 Topsoaring New Technology Co.,LTD. Super TopSky 2.0 installation Manual 41. Remove the foam surround the hold inside the stab, fill the holds and the room surrounded with epoxy and micro balloon 42. After curing, re-drill the holes 43. Drill a M2.5 hole for holding...
- Page 13 Topsoaring New Technology Co.,LTD. Super TopSky 2.0 installation Manual 45. Glue the alignment pin in place 46. Sand the pylon to fit the boom 47. Slightly sand the boom for gluing the stab pylon and the vertical fin 48. Glue the pylon to the boom;...
- Page 14 Topsoaring New Technology Co.,LTD. Super TopSky 2.0 installation Manual 49. Plan for cutting, the width equals to the diameter of the rear end of the boom 50. Use a razor saw to cut 2 slots and don't remove the center part, it can help fix the fin to the boom 51.
- Page 15 Topsoaring New Technology Co.,LTD. Super TopSky 2.0 installation Manual 53. Use 2 small FC pieces to reinforce the joining area 54. Wet up with finishing resin and wait for cure 55. Prepare Servo tray, the tray comes with the kit is for Futuba...
- Page 16 Topsoaring New Technology Co.,LTD. Super TopSky 2.0 installation Manual 57. Open the fuse for the tubes going out 58. Inset Teflon tubes with the heat shrink tubes from the rear hole that was just opened 59. Locate the correct position 60.
- Page 17 Topsoaring New Technology Co.,LTD. Super TopSky 2.0 installation Manual 61. Then glue the 2nd one from the hatch for wing connector, use 5min epoxy here, it gave you longer working time and can fix the tube very well 62. Hold for cure...
- Page 18 Topsoaring New Technology Co.,LTD. Super TopSky 2.0 installation Manual 64. Glue the boom to the fuse now, it's quite easy to align everything before the epoxy cure. 65. Run the Teflon tubes along the boom and use transparent tape to fix them with the boom 66.
- Page 19 Topsoaring New Technology Co.,LTD. Super TopSky 2.0 installation Manual 67. Use small diameter heat shrink tube to fix the Teflon tube with the boom here, bend the wire and connect it with the horn, you can use a 0.5mm drill bit to...
- Page 20 Topsoaring New Technology Co.,LTD. Super TopSky 2.0 installation Manual 70. Install battery and receiver to finish the job, then add one more heat shrink tube to fix the Teflon tube, and now the music wire extends to the front servo 71.
Need help?
Do you have a question about the Super TopSky 2.0 DLG and is the answer not in the manual?
Questions and answers