Advertisement
Quick Links
Advertisement

Related Manuals for TechOne Hobby Air Titan EPO

Summary of Contents for TechOne Hobby Air Titan EPO
- Page 1 AIR TITAN...
- Page 2 AIR TITAN AIR TITAN Our model kits are subject to constant quality checks throughout the production process, and we sincerely hope that you are completely satisfied with the contents of your kit. However, we would ask you to check all the parts before you start construction, referring to the Parts List, as we cannot exchange components which you have already modified.
-
Page 3: Charging The Flight Battery
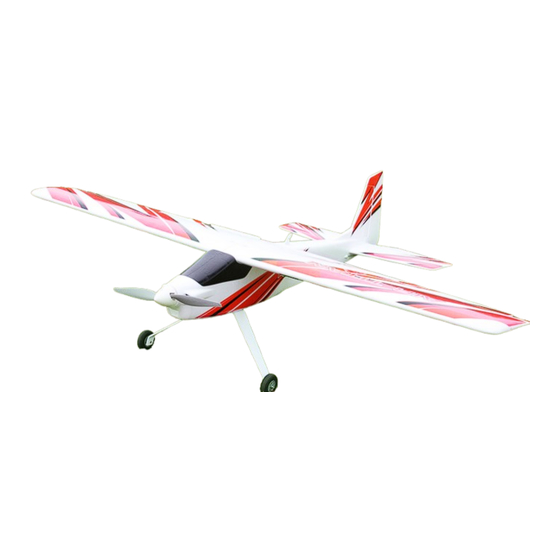
AIR TITAN 1600 AIR TITAN Specification 1600mm big trainer that can take off/landing on ground, water and snowfield. It's also a good plane for night flying.It has LED setting. 63 in (1600 mm) 1.A good trainer in very big wingspan 1600MM, with good resistance easy control and carry. 2.Fuselage main reforcement batten construction,wing fixed construction,landing gear install 50.7 in (1287 mm) construction,motor install construction,and tow system construction,they are associated... - Page 4 CAUTION: When connecting the battery to the battery charger, make sure the two connectors are correctly oriented. Failure to do so could cause the battery terminals to short, resulting in fire, which could lead to property damage and injury. Specification Operating voltage range: AC 110V-240 V, DC 11V-18V.
- Page 5 Transmitter Installing the Transmitter Batteries Insert included batteries in the transmitter CAUTION: If using rechargeable batteries, charge only rechargeable batteries. Mode 1 Charging non-rechargeable batteries may cause the batteries to burst, resulting in injury to persons and/or damage to property. Throttle CAUTION: Do not pick up the transmitter by the antenna.
- Page 6 Rudder Elevator Rudder Aileron Model 2 Aileron Throttle Speed...
-
Page 7: Flight Trimming
·Flying faster or slower: When your aircraft is stable in the air, push the throttle stick up to make the aircraft go faster, and pull the throttle stick back to slow down. The aircraft will climb when the throttle is increased. ·Elevator up and down: Push the elevator stick forward to make the aircraft go down and pull the elevator stick back to go up. - Page 8 4.Insert the thread of airleon servo and flap servo into the corresponding slot of left wing, and put the servo on the slot. 2.Insert elevator and rudder on the corresponding slot of fuselage,meanwhile ensure to insert the tail wheel steel wire to the corresponding slot of rudder, and fix with two pcs screw.
- Page 9 6.Cross pushrod1 on servo arm. 8.Connect the airleon servo thread and flap servo thread(male head) to corresponding female head. 7.Fix the pushrod 1 servo arm on the servo, put one head plastic clip of pushrod1 and fix on servo with screw. 9.Insert the connected thread into the corresponding slot.
- Page 10 11.Connect right and left wing through wing connected batten 14.Put and fix the servo arm with pushrod2 on servo. 12.Install elevator servo and rudder servo in the correspoding slot of fuselage with screw. 15.Installed one clip head of pushrod2 on rudder servo arm, fix on rudder with screw. 13.Cross pushrod2 on servo harm.
- Page 11 16.Installed one clip head of pushrod2 on rudder servo arm, fix on rudder with 18.Put and install the nose covering on the nose with screw. screw. 19.Put the ESC on the battery renforcement plate,fix with velcro strap. 17.Fix the motor on the motor mount with screw. 20.Connect the three thread power line to ESC three thread, after connection,please check if the motor positive inversion, if by reversal way, pull up arbitrary two thread of them, reconnect after exchanging,ensure the right direction of motor rotation.
- Page 12 21.Insert all servo wires and esc signal lines to correspoding channel of radio in turn. 24.Insert the connected plug on the right and left wing to socket on PCB of fuselage. 22.Insert the radio into the fuselage. 25.Fix the wing on fuselage with screw. 23.Fix the propeller on the motor with screw,and then fix the spinner with screw.
- Page 13 2.Connect the flight battery to the aircraft 2.Immobile for 5 seconds. Series of tones. CAUTION: Always keep hands away from the propeller. When armed, the motor will 26.Put the battery on battery plate and fix with velcro strap. turn the propeller in response to any throttle movement. CAUTION: Always disconnect the Li-Po flight battery from the aircraft receiver when not flying to avoid over discharging the battery.
-
Page 14: Centre Of Gravity
·Test your rudder control by moving your rudder stick left and right. Make sure ·Test your Elevator control by moving your elevator stick down and up. Make that the rudder responds according to the illustrations. sure that the elevator responds according to the illustrations. Test the flap Test the Aileron Make sure that the rudder responds according to the illustrations. - Page 15 Make use of all sensible safety systems and precautions which are advised for your system. An excellent source of practical accessories is the main catalogue, as our products are designed and Techone Hobby manufactured exclusively by practising modellers for other practising modellers.
- Page 16 Notes Motor:3520 KV680 Servo: 17g micro servo 9g micro servo Battery: 14.8V 4S 3300mAh Li-po 25C ESC : 50Amp Propeller: 14*7 SF prop 2.4G Radio Charger...
Need help?
Do you have a question about the Air Titan EPO and is the answer not in the manual?
Questions and answers