Table of Contents
Advertisement
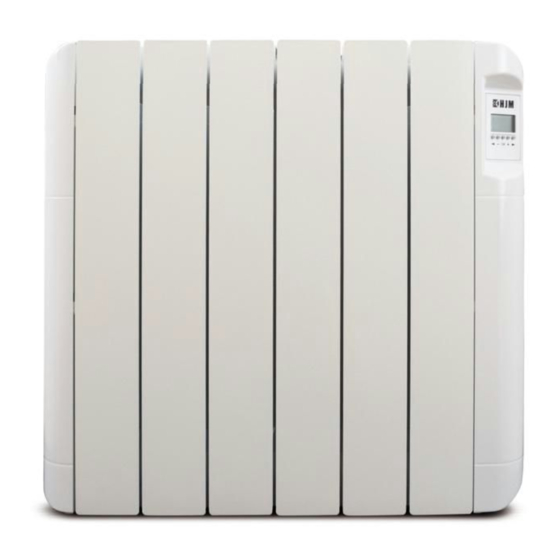
Installation and user manual
Please read carefully and retain for future reference
C3, C5, C6, C8, C9, C11, C12
Rev.1_09-07-15
Models EcoHeat:
Page 1
Advertisement
Table of Contents
Troubleshooting

Related Manuals for VeriSmart EcoHeat C3

Summary of Contents for VeriSmart EcoHeat C3
- Page 1 Installation and user manual Please read carefully and retain for future reference Models EcoHeat: C3, C5, C6, C8, C9, C11, C12 Rev.1_09-07-15 Page 1...
-
Page 3: Troubleshooting
Table of Contents IMPORTANT: WARNINGS 1.1 GENERAL SAFETY CONDITIONS 1.2 SPECIFIC SAFETY INSTRUCTIONS FOR THIS DEVICE INSTALLATION WALLMOUNTING DIGITAL PROGRAMMABLE THERMOSTAT 4.1 Operation 4.2 Screen 4.3 Keypad 4.4 First use 4.4.1 Turning the radiator On / Off 4.4.2 Setting the Time and Date 4.5 Operation Modes 4.5.1 Timer Mode: 4.5.2 Manual Comfort Mode ... - Page 5 IMPORTANT: WARNINGS Thank you for purchasing this radiator. These appliances are extremely safe, easy to install and do not require specific maintenance.
- Page 7 trades person. Failure to comply may danger your safety and voids your warranty. 8. Children under the age of three should not be allowed to touch or play with the radiator and should be ...
- Page 9 16. Keep all the packaging elements out of the reach of children, as they can cause potentially dangerous situations. 17. Keep these instructions, as well as the guarantee, your ...
- Page 11 ● Always install the device so that it cannot enter into contact with any combustible material such as curtains or towels (take into account the gusts of wind). ● Do not insert any object through the grille or inside the ...
- Page 13 • WARNING: If this appliance is installed in a bathroom, it must be installed only within zones 2 or 3, according to the ...
- Page 15 ● Make the holes and insert the plugs included in the fixing kit. Place the support and tighten the screws until the piece is ...
- Page 17 Rev.1_09-07-15 Page 9...
- Page 19 Screen Operation Mode. The active operation mode is displayed in the box. “ ” Programme Number (P1 to P9), (U1 to U4) or System ...
- Page 21 Rev.1_09-07-15 Page 11...
- Page 23 Keypad Radiator Start / Stop key " " Minus key ( ) V alidation Key ( OK) Plus key ( +) Right Navigation Key ( ►) Rev.1_09-07-15 Page 12...
- Page 25 First use This section will guide you when putting the device into operation for the first time. NOTE: To restore the factory settings, consult section 5 ...
- Page 27 Operation Modes Press ► to move along the display and select the different operation modes “ ”, selecting the one required and press ...
- Page 29 Rev.1_09-07-15 Page 15...
- Page 31 Automatic Mode 4.5.3 By selecting the Automatic operation mode “ ”, the device will work with the preset programme “P1”, as explained in the ...
- Page 33 = Reduced Temperature spaces without bars = Comfort Temperature, spaces with bars ECO mode: 4.5.4 In E CO mode “ ” , the reduced temperature will be maintained throughout the day. You can set your own E CO temperature by ...
- Page 35 In Programme mode “ ” , after programme “P9”, there are four programmes (U1 to U4). These are programmes that you can ...
- Page 37 USER Programmes from U1 to U4: 4.5.7 You can modify the programme according to your needs. You can also store upto 4 of your own programmes (U1 to U4). To modify a user programme, press ( OK) . The following symbols will be shown when making your own ...
- Page 39 The ( OK) key confirms the programme you have entered for that day. After confirming the seventh day, the system automatically ...
- Page 41 The consumption control mode enables you to check and control the consumption of your radiator: Rev.1_09-07-15 Page 21...
- Page 43 IMPORTANT: T he consumption control is only for checking the consumption of your radiator. Making alterations in this menu may inhibit the performance of your radiator . The ...
- Page 45 Consumption: Indicated in kW/h. Hundredths are shown for one hour and one day durations. Rev.1_09-07-15 Page 23...
- Page 47 Special Functions Keypad lock: “ ” Use this function to prevent any change in the thermostat setting. This is useful in areas such as childrens’ bedrooms or public ...
- Page 49 If the system detects a temperature drop of around 3ºC, the heating will stop for approximately one hour. The icon will ...
- Page 51 Preset Values and options : Types of Degrees on Screen 01 : Celsius Degrees : Fahrenheit Degrees Time selection 02 (24:00) (12:00 AM (Antemeridian) / PM (Post meridian) : Automatic summer⬄winter time change : The time will change automatically. 03 : The time must be changed manually. * You must correctly set the date for this to work. : Internal Probe Calibration The calibration cannot be completed until the radiator has ...
- Page 53 Rev.1_09-07-15 Page 27...
- Page 55 Preset Values and options : S mart temperature control system This feature allows the radiator to calculate the time required to meet the comfort temperature set within your programme. ...
- Page 57 Troubleshooting The d evice d oes not turn on. Supply Check the power supply The device's screen shows the text " Err" The symbol and the message “ E rr ” are flickering. There is an error in the ...
- Page 59 THERMAL SAFETY In the case of overheating, a safety device automatically cuts the radiators operation. After cooling the radiator will automatically reset. If the failure persists, the safety cut off would permanently stop ...
- Page 61 Preset Programmes (P1 to P9) Rev.1_09-07-15 Page 31...
- Page 63 Rev.1_09-07-15 Page 32...
- Page 65 Rev.1_09-07-15 Page 33...
- Page 67 RECYCLING (Disposal of the product at the end of its useful life) According to European Directive 2 012/19/UE , on waste electrical and electronic equipment (WEEE), old electrical household appliances cannot be ...
Need help?
Do you have a question about the EcoHeat C3 and is the answer not in the manual?
Questions and answers