Advertisement
Advertisement
Table of Contents

Related Manuals for MDS 18 FS Pro

Summary of Contents for MDS 18 FS Pro
- Page 1 ™ Engine Operating I n s t ru c t i o n s Pro Series...
- Page 2 ™ Congratulations on your purchase of an MDS engine. MDS engines are noted for their excellent power, rugged reliability, and efficient operation. All MDS engines are precision machines and should be handled with care. The following information and recommendations are presented to help you become...
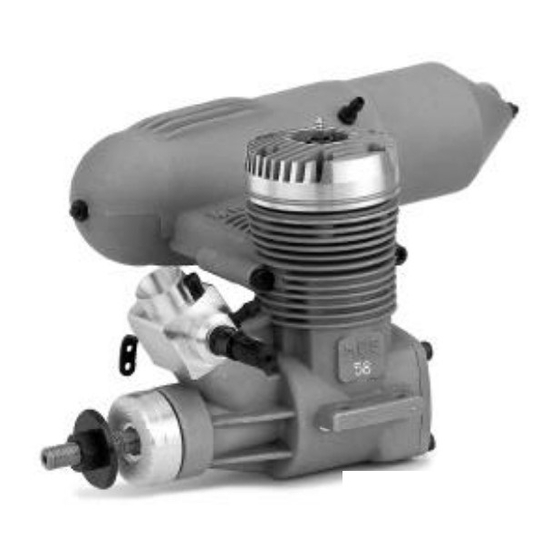
- Page 3 Step 1. Assembly Inside the MDS engine box you should find the following items: 1. Engine 2. Aeromix carburetor with O-rings (may be pre-installed) ™ 3. Muffler (style may vary depending on engine) 4. Complete accessory and tool set with muffler mounting hardware (included tools may vary with different engines) •...
-
Page 4: Very Important
1. Remove the individual plastic bags from the box and place them on a table or workbench. Remove the engine from its plastic wrapper. Note: Some engines may already have the carburetor installed, but make sure that the carb retaining bolt is tightened. -
Page 5: Step 2. Break-In Procedures
Step 2. Break-In Procedures Prior to starting your new MDS ringed or ABC engine, it’s important that you first understand the break-in procedure for your type of engine. Most modelers prefer to do this while the engine is installed in the aircraft or heli. - Page 6 begin leaning the high-speed needle a few clicks at a time for best performance, keeping in mind that a too lean setting at any time can damage the ring and cylinder. ABC Engine Break-In Breaking-in your ABC engine requires the same basic procedure as with the Ringed engine, except for a couple of minor differences.
- Page 7 Engine Recommended Propeller Sizes Engine Recommended Propeller Sizes .18 FS Pro 7 x 4 .58 FS Pro 11 x 7 — Break-in 7 x 6 — Break-in 11 x 8...
- Page 8 Step 2E. Starting the Engine To start the engine, you need the following items: • We recommend a high-quality, 2-cycle fuel containing 10–15% nitromethane, such as Hangar 9 Aeroblend, Cool Power or Powermaster fuels. • Fuel pump • A chicken stick, such as Hangar 9 Start Stick, or electric engine starter •...
- Page 9 5. Connect the glow plug battery to the glow plug at this time. 6. Using the chicken stick, turn the propeller counterclockwise through the compression stroke of the engine. If the engine has fuel and a good glow plug, you should feel a pronounced bump against this movement.
- Page 10 Step 3. Low-Speed Needle Settings The Pinch Test You may find it necessary to make low-speed needle adjustments for your particular application. The low-speed needle is located on the throttle arm side of the carburetor and requires a small screw- driver to make adjustments.
-
Page 11: Troubleshooting
engine rpm increases more than 200 – 300 rpm, the low-speed needle is too rich. To adjust, screw in the needle to 1/16 of a turn and re-test. To achieve the correct setting, always adjust the needle a few clicks at a time. After you’ve attained the correct needle settings, the engine will have a very quick throttle response from idle to full throttle, and throughout the mid-range. -
Page 12: Glow Plug
Glow Plug Your MDS engine comes complete with a long reach glow plug with idle bar. These plugs are designed for break-in only, and it’s common for these plugs to burn out within several runs of the engine. -
Page 13: Step 6. Service And Warranty
Step 5. MDS Safety Instructions and Warnings See the enclosed safety instruction card for details. Step 6. Service and Warranty See the enclosed registration card for details. - Page 18 Dimensions (mm) .18 FS Pro 63.5 10/32 .28 FS Pro x 28 .38 FS Pro x 28 .40 FS-1 17.5 x 28 .48 FS Pro 17.5 x 28 .58 FS Pro 17.5 x 28 .68 FS Pro x 24 .78 FS Pro Ring x 24 1.48 FS Pro Ring...
- Page 20 MDSMAN3 Version 1.4 5 x 6.5...
Need help?
Do you have a question about the 18 FS Pro and is the answer not in the manual?
Questions and answers