Table of Contents
Advertisement
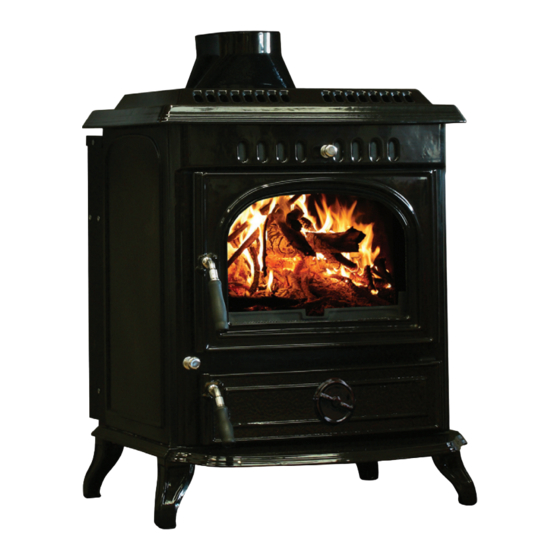
Henley Blasket 21kW
Boiler Stove Installation and Operating Instructions
Please hand these instructions to the stove user when the installation is complete.
Leave the stove ready for operation and instruct the user in the correct use of
the appliance and operation of controls.
Important: – This product must be installed by a suitably qualified installer.
PLEASE READ ALL THESE INSTRUCTIONS CAREFULLY!
For safety reasons it is essential that your stove is correctly installed and operated. Henley Stoves cannot
accept responsibility for any fault or consequential problems arising through incorrect installation or operation.
Henley Stoves, Curraheen, Tralee, Co. Kerry | www.henleystoves.com
Advertisement
Table of Contents

Summary of Contents for Henley BLASKET
- Page 1 Important: – This product must be installed by a suitably qualified installer. PLEASE READ ALL THESE INSTRUCTIONS CAREFULLY! For safety reasons it is essential that your stove is correctly installed and operated. Henley Stoves cannot accept responsibility for any fault or consequential problems arising through incorrect installation or operation.
-
Page 2: Table Of Contents
Do not use aerosol sprays or any other flammable materials near the appliance under fire. Fire cement is caustic, hand and eye protection should always be worn, prolonged contact with the skin should be avoided. Henley Stoves will not be responsible for any consequential or incidental loss or injury however caused. Before continuing any further with theinstalla- tion of this appliance please read the following guide to manual handling. -
Page 3: Technical Specification
Technical Specification Henley Blasket Power 21kw (71,655BTU) Power to Water 15kw (51,182BTU) Power to Room 6kw (20,473BTU) All sizes are correct at time of publish but are subject to change without prior notice. Pleae ensure you confrim all measurements before commencing any installation works. -
Page 4: Stove Commissioning Checklist
Stove Commissioning Checklist Please complete the form below as it will be of great assistance in the unlikely event that there is a problem with the stove or a warranty claim needs to be made. Please contact the installer or dealer if there is a problem. Dealer appliance was purchased from ............................ -
Page 5: Installation Instructions
Installation Instructions 1. Before installation and/or use of this appliance please read these instructions carefully to ensure that all requirements are fully understood. The appliance must be fitted by a registered installer*, or approved by your local building control officer. 2. -
Page 6: Flue Outlet Positions
Installation Instructions • If it is necessary to fit a register plate it must conform to the Building Regulations. • The minimum height of the flue or chimney must be 4.5m from the hearth to the top of the flue, with no horizontal sections and a maximum of 4 bends. -
Page 7: Connecting A Chimney To A Flue
Installation Instructions Each installation is unique to the property so it is not possible to give details to suit every setting. The installation must comply with Building Regulations and be made using best practice construction methods. Many fireplace openings have a supporting lintel. Do not remove without supporting the remaining structure of the building. -
Page 8: Domestic Heating Systems
Installation Instructions Domestic Heating Systems Central Heating and Domestic Hot Water System using four boiler tapings. 22mm Open Vent Feed and Expansion Tank Cold Water Tank Radiators Indirect Hot Domestic Hot Water Water Tank Gravity Radiator Gravity Flow Drain Cock 28mm Pipe Pipe Stat Radiators... - Page 9 Installation Instructions Central Heating Without Domestic Hot Water System using four boiler tapings. 22mm Open Vent Feed and Expansion Tank Radiators Gravity Flow 28mm Pipe Gravity Radiator Pipe Stat Radiators Gravity Return 28mm Pipe Central Heating Return 22mm Pipe Circulating Pump Drain Cock at Lowest Point Central Heating Without Domestic Hot Water System using three boiler tapings.
-
Page 10: Combustible Materials
1.5x the flue diameter to non-combustible surfaces. Air Controls Henley Stoves appliances have air systems providing cleaner burning, and greater efficiency and control, please see the diagram to view where the various air controls are located on your Henley Stove. -
Page 11: Thermostat
Thermostat The Henley BLASKET has 2 air vents which allow air into the stove to help ingite the fire in your stove and also has a Thermostat. The Thermostat, also known as a Thermostatically Controlled Damper Valve, regulates the temperature of the stove by controlling the primary air intake. -
Page 12: Door Handle
User Instructions Door handle Please ensure you use a protective glove when opening the the door on this applicance as it may become hot while in use. DO NOT USE YOUR BARE HAND TO OPEN DOOR WHILE THE STOVE IS IN USE Properly installed, operated and maintained, this appliance will not emit fumes into the room. -
Page 13: Shutting Down
User Instructions Shutting Down The stove will normally shut down by itself as the fuel is consumed. In order to shut down the stove for other reasons, close the primary air controls (if open), then close the secondary air control. If the controls are left in this position, the fire will eventually burn out. If you want to revive the fire open the secondary air controls fully. -
Page 14: Removing The Fuel Retainer
Maintenance Removing the fuel retainer • Lift fuel retainer clear of the supporting brackets. • Rotate to clear the sides of the door opening. Do not use appliance without the fuel retainer in position. Replacing the glass in your stove door In the event of the door glass being broken it can easily be replaced using the following procedure: •... -
Page 15: Stove Finish (Paint)
Regulations to be valid. In the event you require a service engineer to inspect the appliance, a standard charge of €120 is payable prior to any inspection. In the event the engineer find a defect in the stove which warranted the service call, Henley Stoves will reimburse you the €120. -
Page 16: Frequently Asked Questions
We suggest installing a chimney cowl or anti-downdraught cowl if you are experiencing issues with draught in your chimney. Please note issues with flue draught is out of the control of Henley Stoves and does not warrant a service call. -
Page 17: Parts
Parts Over time you may require replacement parts for your Henley Stove. Replacement parts are available through your local stockist. Please use the below diagram to establish the part you require for your stove. Please ensure you quote the model name and also the serial number of the stove when orderig your spare parts. -
Page 18: Warranty Registration Form
The service engineer will provide a detailed report outlining any issues (if any) at a cost to you for €350 (this fee may vary depending on location) which is prior to any inspection. If the report deems the stove at fault, Henley Stoves will refund you the cost. We strongly recommend only qualified HETAS approved plumber installers as unqualified installers will void your warranty. -
Page 19: Servicing
Vacuum clean any remaining ash and debris from the inside of the appliance. • Check the parts for any damage. Replace any damaged parts using genuine Henley Stoves replacements parts. • Check and clean the firebricks with a soft brush. Some surface damage will occur during use. The life of the bricks will depend on the type of fuels burnt and the level of use. - Page 20 Henley Stoves, Curraheen, Tralee, Co. Kerry, Ireland Tel: 066 7119788 Fax: 066 7124200 Email: info@henleystoves.com www.henleystoves.com...
Need help?
Do you have a question about the BLASKET and is the answer not in the manual?
Questions and answers