
Summary of Contents for Macco ILC-200
- Page 1 TECHNI ECHNICAL INSTRUCTIONS INSTRUCTIONS EN ENG LB-0 5061 5061 -02.EN EDITION EDITION October 2013 www.ebg.com.au Pag.1 27/03/2014...
-
Page 2: Table Of Contents
TABLE OF CONTENTS GENERAL CHARACTERISTICS ..................................... 5 TEST REPORT ON ENERGY CONSUMPTION ................................6 MACHINE KEYPAD ........................................... 7 ELECTRIC - HYDRAULIC CONNECTION ..................................8 STARTING UP ............................................. 9 ACCESS THE MAIN SETTING MENUS WITH PASSWORD OR SMART-CARD ....................14 PROGRAMMABLE PARAMETERS IN ACCORDING WITH SMART CARD OR PASSWORD ................16 INFO-RESET ............................................ - Page 3 INTRODUCTION AND GENERAL NOTES Thoroughly read the instructions contained in this booklet because it gives important information regarding safety for installation, use and maintenance. Keep this booklet in a safe and accessible place for further consultation. This machine must be used only for the purpose it was designed: dispensing coffee, cappuccino, pouring hot water.
- Page 4 1. Essential operational requirements 1.1 The machine shall be supplied with water for human consumption, in compliance with the laws in force where the installation is performed. The installer shall check with the owner or manager of the machine if the water complies with the requirements above. 1.2 The components and materials to be used during the installation are those supplied with the machine.
-
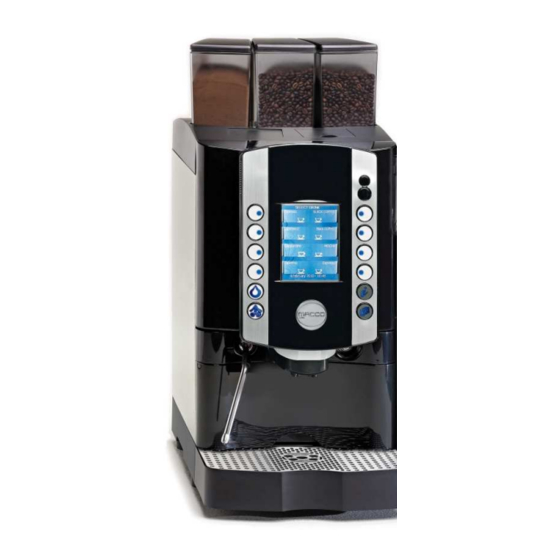
Page 5: General Characteristics
GENERAL CHARACTERISTICS MACHINES VERSION EASY Number of coffee dispensing groups Number of milk frother Number of grinders 1 or 2 Number of product containers/mixer 1 or 2 Hot water dispenser Maximum quantity of dispensable 2 Espressos - 1 Coffee - 1 Cappuccino - 1 Choco drinks per minute Maximum quantity of dispensable hot water per hour (lt) -
Page 6: Test Report On Energy Consumption
TEST REPORT ON ENERGY CONSUMPTION Machine type: ILC-200 Coffee boiler 1.0 litre heating element 1.8 KW (single phase) Steam boiler 1.0 litre heating element 1.2 KW (single phase) MEASUREMENT Machine load 3,15 KW Environment temperature: 22°C HEAT UP PHASE Consumption 0.1 KWh To reach operational coffee boiler temperature, 90°C, in 2’.30”... -
Page 7: Machine Keypad
MACHINE KEYPAD EXIT SCROLL / DEL ALL ENTER ON / OFF ESC KEY REFERENCE FUNCTION EXIT ( edit ) / Espresso INS ( Insert blank ) / Black coffee DEL ( Delete character ) / Cappuccino SCROLL / Latte macchiato / Choco Mocha ENTER... -
Page 8: Electric - Hydraulic Connection
ELECTRIC - HYDRAULIC CONNECTION H2O IN H2O OUT (1-6 Bar) WATER FILTRE WATER SOFTNER Pag.8 27/03/2014... -
Page 9: Starting Up
STARTING UP WARNING : ALL PARAMETERS THAT CONCERN THE STEAM BOILER WILL NOT BE DISPLAYED IN ILC-200 EASY MACHINES. After having connected the machine to the water and electric networks, turn the switch on (see diagram). The display shows: X.XX : Indicate the Software release inserted in the display p.c.board. - Page 10 Press the key n°8 to switch ON the machine . , the display shows: Filling - up steam boiler During this stage the steam boiler is being filled up. WARNING: The solenoid valve of the steam nozzle automatically opens to release the air inside the boiler. When the steam boiler has been filled up, the display shows: Filling - up coffee boiler Press T 1...
- Page 11 Select drink For machine configurations: Self. The display shows: Position the cup Select drink Alternated with the message: For machine configurations: waiters’ card The display shows: Insert card For machine configurations: Self + credit card The display shows: Insert card For machine configuration: Self with coin box.
- Page 12 WARNING: For Self with coin box configuration the selections doses are enabled only when the set-up temperature of both boilers ( Coffee- Steam ) have been reached. b) To switch ON the machine on every type of Self – configuration, press key n°8, the display shows: INSERT PASSWORD TO TURN ON - - - - -...
- Page 13 SCHEMATIC SUMMARY OF STEAM AND COFFEE BOILER HEATING PHASE Heating element ON Temperature sensor Please Wait ) Steam boiler Heating element OFF Set-up ( Select Drink ) °C 0°C Steam nozzle solenoid valve Solenoid valve open Solenoid valve close °C 95°C 50°C Milk frother...
-
Page 14: Access The Main Setting Menus With Password Or Smart-Card
ACCESS THE MAIN SETTING MENUS WITH PASSWORD OR SMART-CARD A) ACCESS THE MAIN SETTING MENUS WITH PASSWORD To enter the programming environments, a password is required which define the access rights to the different environments. The password must be composed with 5 numbers. To insert the passwords proceed as follows: Turn the machine OFF Keep N°12 “SHIFT”... - Page 15 B) ACCESS THE MAIN SETTING MENUS WITH SMART CARD. ( ONLY FOR MACHINES WITH TRANSPONDER INSTALLED ) To enter the programming environments , place one of the following smart cards above the proper reader with the led light on and the machine in off : - WAITER SMART CARD - ROASTER- SMART CARD - OWNER SMART CARD...
-
Page 16: Programmable Parameters In According With Smart Card Or Password
PROGRAMMABLE PARAMETERS IN ACCORDING WITH SMART CARD OR PASSWORD WAITER ROASTER OWNER SERVICE TECHNICIAN INFO - RESET Reard dose data Douse counter A Douse counter B System data Group cleaning Mixer cleaning Milker cleaning Grinder cycles Water filter Group cycles Total group cycles Total machine cycles DOSE PROGRAMMING... - Page 17 Gsm: Sim card pin Gsm: Service phone number Modem set-up parameters Remote password User message Serial N° Installation date SYSTEM CLOCK PROGRAMMING YY-MM-DD Day HH:MM X° X° X° Clock display Auto start -up On - Off Day Off DISPLAY REGULATION Contrast Display mode Default colour...
-
Page 18: Info-Reset
INFO-RESET A1) READ DOSES DATA ( Doses counter A/B ) Pag.18 27/03/2014... - Page 19 A2) READ DOSES DATA ( Reset doses counter A/B ) Pag.19 27/03/2014...
- Page 20 B) INFO RESET SYSTEM DATA Pag.20 27/03/2014...
- Page 21 THE FOLLOWING INFO ARE DISPLAYED ONLY WHEN THE CLOCK IS PROGRAMMED Enter Water filter Water filter + / - Enter XXXX YY - ZZZZ Confirm reset Water filter Enter XXXX YY - ZZZZ XXXX : Indicates the n° of water filter liters left. If the programmed n°...
-
Page 22: Doses Programming
DOSES PROGRAMMING PLEASE NOTE : TO ACCESS TO THE DOSES PROGRAMMING THE MACHINE MUST BE AT THE SET-UP TEMPERATURE. Press the key No 5 (-) and No 6 (+) to select the parameter and then press the key No 7 (Enter) to confirm the selection. A) SET DOSES = Selected n°... - Page 23 Press Enter key to go to the next programming doses level . ( SEE FOLLOWING TABLE ) Pag.23 27/03/2014...
- Page 24 Coffee Coffee+ Soluble Coffee Milk Milk + Coffee+ DOSE Drink Soluble Drink Drink Soluble Milk + Water Steam PARAMETERS type Drink type Milk type Drink Soluble drink type Drink type Drink type type type PRODUCT A : PRE PRODUCT A : POST PRODUCT B : PRE PRODUCT B : POST DECAFFEINATED Enabled/Disabled...
-
Page 25: Set Doses
B ) PRICE SET-UP SELECT - Set doses Price set-up Enter - Calibration - Instant product calibration Price set-up - Doses price - Free drinks - Token value B1) Doses price Price set-up Doses price Enter - Free drinks Doses price - Token value BX XXXXXXXXX XXXXXXXXX... - Page 26 B2) Free drinks Price set-up - Doses price Free drinks Free drinks Enter Desable - Token value Press the +/ - keys to insert Enable or Desable the Free drink. Enter B3) Token value Price set-up - Doses price - Free drinks Price set-up Token value Enter...
- Page 27 C ) CALIBRATION ( Grinder-Milker ) SELECT - Set doses - Price set-up Calibration Enter - Instant product calibration Calibration GRINDER G1- B2 G2 - B4 MILKER Steamed - B1 Foamed - B3 Press key B1 Steamed Milk Press key B2 Grinder 1 The calibration menù...
- Page 28 D) INSTANT DISPENSER CALIBRATION SELECT - Set doses - Price set-up - Calibration Instant product calibration Enter Instant product calibration - Product A - Default density D1) Product A Instant product calibration Product A Enter - Default density Instant Product Calibration MIXER : A TEST: 1...
- Page 29 Pag.29 27/03/2014...
-
Page 30: System Manager
SYSTEM MANAGER Select - Info reset - Dose programming System manager Enter System manager - Machine configuration - Machine parameter - System clock programming - Display regulation - Service - Smart card manager - Change password - Group manual movements - Test actuactors - Boiler draining - Alarm history... -
Page 31: Machine Configuration
MACHINE CONFIGURATION System manager Machine configuration - Machine parameter - System clock programming - Display regulation - Service - Smart card manager - Change password - Group manual movements - Test actuactors - Boiler draining - Alarm history Enter - Preset configuration data - System backup Machine configuration Use: + / - keys to select the main... -
Page 32: Steam Boiler Cleaning Frequency
Use: + / - keys to program the daily frequency. Once the frequency Machine configuration elapsed, the machine will require to Steam boiler clean the boiler at the next cleaning Cleaning frequency procedure Enter Machine configuration Use: + / - keys to enable or disable Sequential Heater the sequential heater. - Page 33 Pag.33 27/03/2014...
-
Page 34: Machine Parameters
MACHINE PARAMETERS PLEASE NOTE : some of the following parameters may not be displayed depending to the machine configuration previously programmed. System manager Machine configuration Machine parameter - System clock programming - Display regulation - Service - Smart card manager - Change password - Group manual movements - Test actuactors... -
Page 35: Milk Pump Position
PLEASE NOTE : some of the following parameters may not be displayed depending to the machine configuration previously programmed. Select “Internal” if the milk pump is Variable Value : + / - positioned inside the machine and “External” when the milk pump is Milk pump position Internal positioned outside... - Page 36 lb-05061-02-EN Pag.36 27/03/2014...
- Page 37 Please note: for machines without GSM it is possible to carry out a Local data download by setting the Serial number and the Remote password only. ( For more information see the Wizard manual ). lb-05061-02-EN Pag.37 27/03/2014...
-
Page 38: System Clock Set-Up
SYSTEM CLOCK SET-UP System manager Machine configuration Machine parameters System clock programming - Display regulation - Service - Smart card manager - Change password - Group manual movements - Test actuactors - Boiler draining - Alarm history - Preset configuration data - Usb/trasponder manager Enter Press the key +/- to program the date ( YY-MM-DD) -
Page 39: Display Regulation
DISPLAY REGULATION Pag.39 27/03/2014... -
Page 40: Service
SERVICE System manager Machine configuration Machine parameters - System clock programming - Display regulation Service Enter - Smart card manager - Change password - Group manual movements - Test actuactors - Boiler draining - Alarm history - Preset configuration data - Usb/trasponder manager Service Clean/Rinse... - Page 41 Cycle cleaning alarm Press the keys + / - to program after how many cups the machine will show the message Clean/Rinse PLEASE CLEAN - Cleaning time Cycle cleaning alarm Enter - Group cleaning program - Group auto rinsing Variable Value : - Mixer cleaning program + / - - Mixer auto rinsing...
- Page 42 Pag.42 27/03/2014...
- Page 43 Pag.43 27/03/2014...
- Page 44 Pag.44 27/03/2014...
-
Page 45: Smart Card Manager
SMART CARD MANAGER PLEASE NOTE: -THE SMART CARD MANAGER IS DISPLAYED ONLY FOR COFFEE MACHINE WITH TRANSPONDER INSTALLED. B -TO CREATE A NEW CARD (TECHNICIAN – SERVICE – OWNER – ROASTER AND WAITER ) ITS NECESSARY USE AN EXTERNAL PC TOOL. Pag.45 27/03/2014... - Page 46 Pag.46 27/03/2014...
-
Page 47: Change Password
CHANGE PASSWORD Please note : If the TURN ON PASSWORD is enabled , to turn on the machine is necessary insert the password. KEY REFERENCE FOR PASSWORD Following Password can be modify Waiter Roaster Owner Service Technician Waiter Entered Roaster Password Owner Service... -
Page 48: Group Manual Movements
GROUP MANUAL MOVEMENTS System manager Where: XXX indicates the pulses of the upper and lower motor. Machine configuration Press the key : Machine parameters N° 1 and N° 2 to move the upper piston N° 3 and N° 4 to move the expeller motor - System clock programming N°... -
Page 49: Test Actuators
TEST ACTUATORS System manager Machine configuration Test actuators Machine parameters - System clock programming - Actuators 1 - Display regulation - Actuators 2 - Service - Actuators 3 - Smart card manager Milk pump - Change password Mixer A Enter - Group manual movements - Dispenser A Test actuators... - Page 50 Λ lb-05061-02-EN Pag.50 27/03/2014...
- Page 51 Mixer A Keep pressed the + key to Test actuators increase the speed of the Mixer A motor . Keep pressed the – Key to - Actuators 1 decrase the speed. - Actuators 2 variable value - Actuators 3 + / - - Milk pump Mixer A Enter...
- Page 52 WARNING: a) You can activate more than one actuator at the same time. b) Once a time-out of 5 seconds has elapsed, the activated actuators will be automatically interrupted. c) The “Milk pump speed” parameter will be displayed only for machine with milk pump installed. lb-05061-02-EN Pag.52 27/03/2014...
-
Page 53: Boiler Draining
BOILER DRAINING WARNING: A) After the boiler draining procedure, when the machine is turned back on, the boilers charge will be carried out according to the procedure described in the chapter “Starting up procedure”. lb-05061-02-EN Pag.53 27/03/2014... -
Page 54: Alarm History
ALARM HISTORY ALARM DETAILS ALARM CODE NO H. MOTOR PULS NO L. MOTOR PULS H. MOTOR ERROR L. MOTOR ERROR FILLING UP T.O. COFFEE HEAT T.O. STEAM HEAT T.O. CHECK FLOW LINE COFFEE TEMPERATURE STEAM TEMPERATURE INFUSION T.O. CORRUPTED DATA CLOCK ERROR MOTOR BLOCK TRASPONDER PCB... -
Page 55: Preset Parameters
PRESET PARAMETERS System manager - Machine configuration - Machine parameters The Technician or Factory preset can be carried out only with Technician - System clock programming password or smart card . - Display regulation With Service password or smart card - Service can be carried out only the Service - Smart card manager... -
Page 56: Usb/Trasponder Manager Using The Usb Key
USB/TRASPONDER MANAGER USING THE USB KEY This function, can be used to load a configuration data ( setting machine) from a coffee machine to USB key , or to upload a customized GUI for the display. The data saved on the USB key can be loaded to another coffee machine. You can choose to load the complete data “... - Page 57 Enter one of the following passwords: Owner 2 2 2 2 2 Service 3 3 3 3 3 ( for Technician password contact the Essential Brands Group Technician The display shows: Technical Service ). GUI up-to-date - (this function can be used to upload a customized GUI) Use the key no.
- Page 58 Setting machine to USB Key SETTING MACHINE TO USB KEY : to load the data, from coffee machine to USB key Usb/trasponder manager Setting machine to USB key Enter key to machine - Setting USB Load from Setting machine to USB key Insert file name file 1 >...
- Page 59 Pag.59 27/03/2014...
-
Page 60: Cleaning Process Abort
CLEANING PROCESS ABORT If you want to interrupt the cleaning procedure for group or whisk or milk frother follow the procedure: ( ONLY WITH THE TECHNICIAN OR SERVICE PASSWORD ) Pag.60 27/03/2014... -
Page 61: Trouble Shooting
TROUBLE SHOOTING 1) N°10 Time out pulses, upper piston motor. H. Motor puls 10 This alarm is visualised on display by code 10 Causes: the upper motor encoder has not received pulses for 3 seconds, since the motor is not running Result: the machine is switched OFF. - Page 62 5) N° 15 Alarm of too much coffee in the brewing chamber. Too much coffee 15 This alarm is visualised on display by code 15 Causes: the upper piston has positioned itself where the wet seal of the piston gasket in the brewing chamber is not guaranteed.
- Page 63 8) N° 34 Steam boiler time-out temperature alarm . Select drink Steam not ready This alarm is visualised on display by code 34 Cause: the steam boiler temperature has reached the minimum value of 105°C Result: boiler heating is interrupted and the buttons of coffee-based, milk-based and filter drinks are disabled. Solution: turn off the machine and then turn it back on.
- Page 64 11) N° 38 Steam boiler temperature alarm. Steam temperat. 38 This alarm is visualised on display by code 38 First case: the temperature inside the steam boiler has reached the limit value of 129°C (264.2°F) or more. Result: boiler heating is interrupted and all dose buttons are disabled. Solution: turn OFF the machine.
- Page 65 14) N° 63 Clock error. Clock error 63 This alarm is visualised on display by code 63 Solution: check the following: run down battery faulty master board 15) N° 65 Motor block alarm. Motor block 65 This alarm is visualised on display by code 65 Causes: a mechanical block occurred to the Mixer.
- Page 66 This alarm is visualised on display by code 81 Solution: check the following : check the power supply of the gsm modem installed in the coffee machine. check that the serial cable is properly connected in the gsm modem and in the master board (CN 16). N°82 PIN of the modem gsm alarm ( only for machine with GSM Modem kit ) PIN ERROR 82 This alarm is visualised on display by code 82...
- Page 67 Safety valve operation. No messages on the display Cause: overpressure in steam boiler Result: the safety valve opened at 1.7-1.9 bars, the steam is conveyed to the drip tray by means of a silicone tube. Cause: overpressure in the steam boiler or faulty safety valve. Solution: carry out the following controls.
-
Page 68: Special Functions For Machine Calibration
SPECIAL FUNCTIONS FOR MACHINE CALIBRATION 1) Calibrating the coffee dispensing pressure (pump pressure). To calibrate the coffee dispensing pressure use the device code A 0128 ( Pic. A ). The procedure is the following : - replace the upper piston with the one equipped with pressure gauge (Pic. B) - push a coffee dose key and rotate the pump adjusting screw to adjust the coffee dispensing pressure ( 8-9 Bar max.) clockwise to increase it, and anti-clockwise to decrease it. - Page 69 IF THE ADJUSTING RANGE IS NOT WIDE ENOUGH TO GET THE NEEDED GRINDING DEGREE, YOU CAN DO THE FOLLOWING: • Remove the hoppers and/or product containers • Remove the top cover from the machine (unscrew the 2 rear and 2 front screws) •...
-
Page 70: Recommendations For A Correct Preventive Maintenance
RECOMMENDATIONS FOR A CORRECT PREVENTIVE MAINTENANCE The aim of this schedule is to prevent as far as possible equipment from breaking down, through the periodical check-up and replacement of components subject to fair wear and tear, thus reducing service calls and relevant cost in working hours. This schedule is based on the suppliers recommendations along with previous service history on equipment currently out in the field. -
Page 71: Control Unit Legend
D. Check at 12 months’ intervals Same as points C1-22, plus replace the following: steam boiler safety valve coffee boiler expansion valve replace flat burrs grinder after having grounded approximately 300-500 Kg of coffee For grinder with conical burrs, check and/or replace the complete grinder after 50000 cycles if the group has delivered 75.000 cycles replace the motors group upper piston micro screen group lower piston screen... - Page 72 The Essential Brands Group product you have purchased is subject to Directive 2002/96/EC of the European Parliament and the Council of the European Union on waste electrical and electronic equipment (WEEE) and, in jurisdictions adopting that Directive, is marked as being put on the market after August 13, 2005, and should not be disposed of as unsorted municipal waste.
Need help?
Do you have a question about the ILC-200 and is the answer not in the manual?
Questions and answers
how do i increase temperature of coffee
The Macco ILC-200 manual does not provide explicit instructions for increasing the coffee temperature. However, you can try the following general adjustments:
1. Check the Boiler Temperature – Ensure the coffee boiler is heating properly. The machine has a 1.0-litre coffee boiler with a 1.8 kW heating element.
2. Adjust the Grinding Degree – A finer grind may improve extraction temperature. Turn the screw on top of the machine to the left for finer coffee.
3. Preheat the Cups – Use warm cups to reduce heat loss.
4. Ensure Proper Calibration – If temperature settings are adjustable in the programming menu, check and increase accordingly.
If further adjustments are needed, refer to the machine's programming options or consult a technician.
This answer is automatically generated