
Subscribe to Our Youtube Channel
Summary of Contents for Alpha Digital LD353
- Page 1 Vehicle Blackbox DVR User's Manual For ongoing product improvement, this manual is subject to modification without prior notice. MODEL: LD353...
- Page 2 Foreword Thank you for purchasing, this product is for today's lifestyle. It is designed to provide hard evidence of a situation. It can be applied to meeting records, monitoring evidence, location shooting, video and other evidence where proof is required. This product combines the industry-leading HDR high dynamic camera, WDR wide dynamic camera never missing second.
- Page 3 The following is a list of standard and optional list. If there are any missing or damaged items, please contact your dealer immediately. Standard Vehicle Blackbox DVR User's Manual For ongoing product improvement, this manual is subject to modification without prior notice. MODEL: LD353 Car charger cable USB Cable User's manual Optional High-speed microSD card...
-
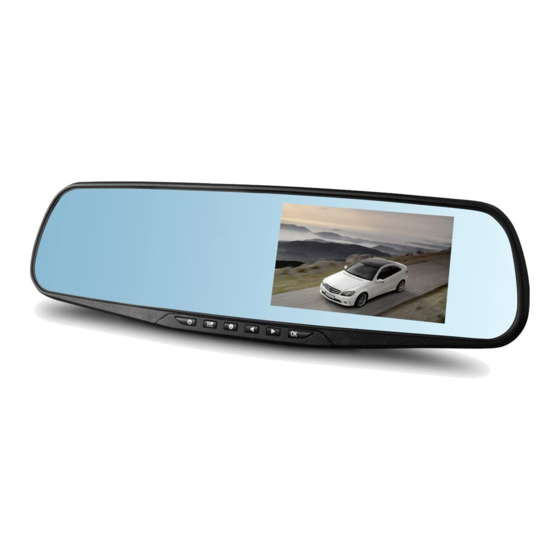
Page 4: Product Overview
Product Overview The structure of FIG 1112 8 9 10 1 2 3 4 5 6 Host keys and interface description Number Icon Operating instructions Name Switch button Turn on or turn off the system Under the standby mode, press the menu key Menu Key/ to bring up the feature set;... - Page 5 Product Overview Host keys and interface description Number Icon Operating instructions Name Camera/camera/confirm the short press to start the camera down key, camera mode, press Ok button again to stop recording; Short press to camera mode to take picture; the menu mode to confirm the key Display 4.3 inch TFT with HD display screen For connecting a PC to transfer data;...
-
Page 6: Memory Installation
Memory Installation 1. Insert a memory card Insert the memory card on the device memory card correctly in accordance with the direction of the gap prompt, press the card until a click is heard. Use a high-speed card (CLASS6 above). Note: The first time you use your new card with this unit to format the card to. -
Page 7: Connect The Power
Memory Installation 4. Connect the power Please use the original factory standard charger, the boot device as well as the built-in battery. The end of the car charger is connected to the device's USB port and the other end of the card charger is plugged into the car port, car engine once launched the device automatically boot. -
Page 8: Initial User Settings
Initial user settings Set the date and time: 1. Because the machine has switched the camera's automatic functions, you need to press the OK button click, the device enters the standby state. 2. Then press the M button twice, at <time/date>by pressing select <date/time>, then press the ok button to enter the setting. - Page 9 Recorder camera operate 1. Short press M to switch to camera mode, camera icon in the upper left corner of the screen display. 2. Press the OK button to take pictures, take pictures of the screen flashes once to indicate camera complete. Video/photo playback operations. A.
-
Page 10: Special Features
Special features 1. Gravity sensor function When the gravity acceleration starts, the machine will automatically save the video when the incident occurred and will not delete the file. Gravity sensor can be adjusted in the menu high-medium-low-off, the factory default is medium. 2. - Page 11 Special features 5. The battery instructions Battery level indicator, refer to diagram: Full charged Lower power consumption Low power consumption Lack of electricity After switching on the car power, the red charging indicator lights up in charge of the process, the whole charging time is approximately 180 minutes, the red charging indicator light will automatically turn off after charging is completed.
- Page 12 Menu setting operating : Camera icon indicates camera mode. : Flashing red indicates that the device in the camera work. : Video file icon to open the lock. When the G-sensor gravity sensor starts, the key icon appears on the screen, indicating that the current videos is locked video;...
-
Page 13: Settings Menu
Settings Menu Explanation Available options Menu Options Set the video resolution 1080P HD, 1080P, 720P,WVGA, VGA Resolution 1 minute, 2 minutes, 3 minutes, 5 When setting up each minutes, 10 minutes, off, if you choose Loop recording video file length to close the case, the card will not automatically cycle full coverage Underexposed, dim... - Page 14 Settings Menu Explanation Available options Menu Options No automatic shutdown Automatic 1 minute, 3 minutes operating state shutdown Recorder automatically 10 seconds, 30 seconds, 1 minute Screen Saver turns off the display work During operation, the Beep On, Off key is with sound Traditional, Simplified Chinese, Language Language operation...
-
Page 15: Product Specifications
Product Specifications Product name HD tachograph Extremely wide angle of 170 degrees, Product features 1080P full HD Built-in ( under the car accident case of G-sensor emergency save, not to be deleted) 4.3inch high-resolution LCD screen LCD screen size A+ grade high-resolution 170 degree Shot ultra-wide-angle lens Language... -
Page 16: Troubleshooting
Troubleshooting Under normal operating conditions, such as abnormal products, please refer to the solution: Unable to boot: Check the recorder and car charger connected correctly, if you manually turned on, check the battery level is too low needs recharging. As a result of procedural questions by pressing the RESET button to restore to factory settings.
Need help?
Do you have a question about the LD353 and is the answer not in the manual?
Questions and answers