Table of Contents
Advertisement
Advertisement
Table of Contents

Subscribe to Our Youtube Channel
Related Manuals for Ferguson F1915LVD

Summary of Contents for Ferguson F1915LVD
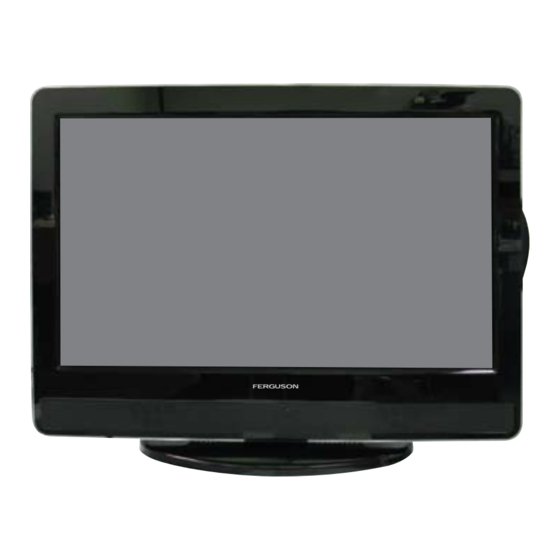
- Page 1 F1915LVD 19” HD READY DIGITAL LCD TV Instruction Manual...
-
Page 2: Safety Precautions
SAFETY PRECAUTIONS The lightning flash with an arrowhead within CAUTION a triangle alerts you to uninsulated dangerous RISK OF ELECTRIC SHOCK voltage within the product’s enclosure that DO NOT OPEN could cause an electric shock. WaRNING: tO RedUCe tHe RISK Of eLeCtRIC The exclamation point within a triangle alerts you to the presence of important operating, SHOCK, dO NOt ReMOVe COVeR (OR BaCK). -
Page 3: Important Safety Instructions
IMPORTANT SAFETY INSTRUCTIONS this unit is designed to operate from a 230V aC ~ 50Hz mains supply. MaINS PLUG UNItS SUPPLIed WItH MOULded MaINS PLUG 1. If the mains plug fitted to the AC cord supplied is not suitable for your mains outlet it may be necessary to cut it off. -
Page 4: Table Of Contents
TABLE OF CONTENTS CD/DVD OPERATION ....... 23 - 24 SAFETY PRECAUTIONS ......2 Playing a disc ..........23 IMPORTANT SAFETY INSTRUCTIONS ..3 Playing a picture file disc ......23 TABLE OF CONTENTS ........ 4 Pausing playback (still mode) ....23 DISC FORMATS ......... -
Page 5: Disc Formats
DISC FORMATS This unit can playback: dVdS CD-R/CD-RW aUdIO CdS [8CM/12CM dISC] [8CM/12CM dISC] Compatible ReGION MaNaGeMeNt INfORMatION Region Management Information: This unit is designed and manufactured to respond to the Region Management Information that is encoded on DVD discs. If the Region number printed on the DVD disc does not correspond to the Region number of this unit, this unit cannot play that disc. -
Page 6: Installation
INSTALLATION INStaLLING / ReMOVING tHe StaNd WARNING: The LCD Display is very fragile, and must be protected at all times when installing / removing the stand. Be sure that no hard or sharp object, or anything that could scratch or damage the LCD display, comes into contact with it. -
Page 7: Getting Started
GETTING STARTED USING tHe ReMOte CONtROL • Point the remote control at the REMOTE SENSOR located on the unit. • When using this unit in a very brightly lit area, the infrared REMOTE CONTROL SENSOR may not work properly. • The recommended effective distance for using the remote control is about 16 feet (5 metres). tO CHaNGe tHe ReMOte CONtROL BatteRIeS 1. -
Page 8: Remote Control Reference Guide
REMOTE CONTROL REFERENCE GUIDE 9) MIX button Press to select Teletext with a TV programme. eXIt button Press to exit the menu and return directly to normal viewing. buttons : Fast reverse playback. : Fast forward playback. 10) HOLd button Press to stop the automatic page change from Teletext. -
Page 9: Remote Control Reference Guide
REMOTE CONTROL REFERENCE GUIDE NeXt button Press to select next title, chapter or track on a disc. StOP button Press to stop playing a disc. LISt button Press to display the channel list in TV/DTV mode. PLay button Press to start and resume playback of a disc. GUIde button Press to display the PROGRAMME Guide in DTV mode. -
Page 10: Reference Guide
REFERENCE GUIDE fRONt, tOP & SIdeS VIeW 2 3 4 5 1) – VOLUMe + controls 8) aUdIO IN jacks (Left/Right) / VIdeO IN jack Adjust the volume level. (aV IN 1) 2) CH buttons 9) tV aerial - Coaxial tV antenna input Press to change the TV channels and highlight 10) HeadPHONeS jack selections (Up &... -
Page 11: Connecting A Tv Antenna
CONNECTING A TV ANTENNA CONNeCtING a tV aNteNNa/CaBLe/SateLLIte To view television channels correctly, a signal must be received from one of the following sources: - An indoor or outdoor aerial antenna - RF output of a cable system - RF output of a satellite system Note: For receiving over-the-air TV broadcasts, we recommend that you use an external fixed antenna. -
Page 12: Unit Operation
UNIT OPERATION tURNING tHe UNIt ON When the AC power cord is connected, press the button on the unit to turn it on. Press the fUNCtION button to select the desired mode (DTV, TV, AV1, AV2/SCART, YUV/SCART, DVD or HDMI). If you select DVD, the DVD logo will appear on the screen. -
Page 13: Electronic Programme Guide (Epg) For Dtv
UNIT OPERATION eLeCtRONIC PROGRaMMe GUIde (ePG) fOR dtV While watching a DTV programme, you can press the GUIde button to display the PROGRAMME GUIDE menu, and check for programme information. current date and time current channel name channel name channel no. to View Programme Information •... -
Page 14: Audio Language For Dtv
UNIT OPERATION aUdIO LaNGUaGe fOR dtV While watching a DTV programme, you can press the button to display the Audio Language menu, and select audio language, audio format and sound track. sound track audio format audio language • Use the button to select an audio language or audio format if available, press the button to select soud track between L/R (Stereo), L/L (Mono Left) and R/R (Mono Right). -
Page 15: Analogue Tv / Dtv Setup
ANALOGUE TV / DTV SETUP tV SettING (only in atV or dtV mode) 1. Press the tV MeNU button. 2. Use the button to select Auto Tuning 3. Use the or button to select the options (auto tuning, DTV Manual Tuning dtV Manual tuning, atV Manual tuning, Programme ATV Manual Tuning edit, Signal Information), adjust them using the... -
Page 16: Picture Menu
ANALOGUE TV / DTV SETUP PICtURe MeNU 1. Press the tV MeNU button. 2. Use the button to select the options (Picture Mode, Contrast, Brightness, Colour, Sharpness, tint, Colour temperature), adjust them using the button. 3. Press the tV MeNU button to return to previous menu. 4. -
Page 17: Time Menu
ANALOGUE TV/ DTV SETUP tIMe MeNU 1. Press the tV MeNU button. 2. Use the button to select the 3. Use the button to select the options (Clock, Sleep timer, time Zone), adjust them using the button. 4. Press the tV MeNU button to return to previous menu. 5. -
Page 18: Lock Menu
ANALOGUE TV / DTV SETUP LOCK MeNU 1. Press the tV MeNU button. 2. Use the button to select the 3. Press the eNteR/OK or button to enter, enter password to proceed. (The default password is 0000.) 4. Use the button to select the options (Lock System, Change Password, Block Programme, Parental Guidance), press the eNteR/OK or... -
Page 19: Teletext
TELETEXT Teletext is an information system that displays text on your TV screen. Using the Teletext control buttons you can view pages of information that are listed in the teletext index. Please Note On Screen Display is not available in text mode. The contrast, brightness and colour cannot be changed but the volume control is still available. -
Page 20: Connections
CONNECTIONS COMMON INteRfaCe The unit is equipped with a CI slot. The CI slot allows you to insert a CAM (Conditional Access Module) with an appropriate subscription card for some pay for view services. It is required to subscribe to a pay channel company to view the pay channels of the Digital Terrestrial broadcasting. -
Page 21: Connecting A High-Definition (Hd) Source (Yuv)
CONNECTIONS CONNeCtING a HIGH-defINItION (Hd) SOURCe (yUV) High-Definition (HD) Devices with component video output must be connected to the YUV input. Connect the component video cable and audio cable (not included) as shown. Make sure you connect the YUV Scart adaptor to this unit, then connect component video cable and audio cable from the other equipment (COMPONeNt VIdeO OUt and aUdIO OUt) to this unit (SCaRt and aUdIO IN). -
Page 22: Connecting Hdmi
CONNECTIONS CONNeCtING HdMI HDMI (High Definition Multimedia Interface) supports both video and audio on a single digital connection for use with DVD players, DTV, set-top boxes and other digital AV devices. HDMI was developed to provide the technologies of High Bandwidth Digital Content Protection (HDCP) as well as Digital Visual Interface (DVI) in one specification. -
Page 23: Cd/Dvd Operation
CD / DVD OPERATION this instruction manual explains the basic instructions of this unit. Some dVds are produced with limited operation during playback. for example, many dVds do not allow users to skip government warnings, or in some cases previews or other features. this is not a defect in the unit. Refer to the instruction notes of discs. -
Page 24: Fast Forward/Fast Reverse
CD / DVD OPERATION faSt fORWaRd / faSt ReVeRSe 1. Press the SeaRCH or SeaRCH button when a disc is playing. • The disc begins a fast scan at two times normal (x2) speed. • Each time the SeaRCH button is pressed, the speed of the fast scan changes. 2. -
Page 25: Special Functions
SPECIAL FUNCTIONS dISPLay While the disc is playing, press the dISPLay button repeatedly to display information on operation status. LOCatING a SPeCIfIC tItLe (dVd) If a DVD disc contains title numbers, you can locate a specific title by directly selecting its title number. -
Page 26: Repeat Playback
REPEAT PLAYBACK You can play a specific title or chapter repeatedly. (Title repeat, chapter repeat, Repeat all, A-B repeat) Repeating a chapter (dVd) You can play the same chapter repeatedly. 1. While the disc is playing, press the RePeat dISC button until the “ ”... -
Page 27: Dvd Programmable Playback
DVD PROGRAMMABLE PLAYBACK PROGRaMMaBLe MeMORy The two types of programmed playback provided by this unit is title/chapter programmed playback. tItLe/CHaPteR PROGRaMMed PLayBaCK 1. Press the MeMORy button. A screen will be shown as right. Select Play Clear 2. Press the button to highlight the Title. -
Page 28: Video Setup
CUSTOMISING THE FUNCTION SETTINGS VIdeO SetUP 1. In Stop mode, press the SetUP button. 2. Use the button to select the Video Setup. 3. Press the button to highlight the TV TYPE. 4. Use the button to select the desired TV type. -
Page 29: Maintenance
CUSTOMISING THE FUNCTION SETTINGS Parental Control DVDs are rated according to their content and some are equipped with a password function. The contents allowed by parental lock level and the way a DVD is controlled may vary from disc to disc. For example, if the disc allows, you could lockout violent scenes unsuitable for children or you could lock out playback of the disc altogether. -
Page 30: Troubleshooting Guide
TROUBLESHOOTING GUIDE SyMPtOM CaUSe (aNd ReMedy) No power. • Check that the AC power cord is connected. • The unit is not turned on. The remote does • Remove any obstacles between the remote and the unit. not function. • Use the remote near the unit. •... - Page 31 TROUBLESHOOTING GUIDE SyMPtOM CaUSe (aNd ReMedy) Bad Picture (snow, • Check the location of the antenna and adjust it if necessary. multiple images, • Make sure the antenna cable is firmly connected. distortion, blurry) • Make sure all input cables are firmly connected. Black and white •...
- Page 32 dISPOSaL Of tHe BatteRIeS Waste electrical and electronic products must not be disposed of with household waste. Please refer to the retailer from whom you purchased this item for disposal instructions. WaRNING: Never dispose of batteries in a fire, danger of explosion. Kesa Electricals 08-11-2010 811-611891Wxxx...
Need help?
Do you have a question about the F1915LVD and is the answer not in the manual?
Questions and answers