Table of Contents
Advertisement
Welcome
Please take a few minutes to review this User Manual to become familiar
with your new Visteon In-Dash Six CD Radio features and operation of
controls.
For any information about your Visteon In-Dash Six CD Radio, please
call 1-800-367-3333.
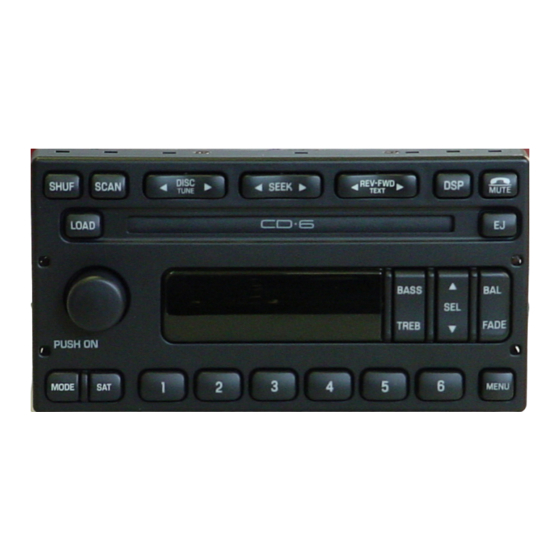
AUDIOPHILE AM/FM STEREO IN–DASH SIX CD RADIO
(CD CHANGER COMPATIBLE)
SHUF
SCAN
LOAD
PUSH
ON
AM
1
CD
FM
PREMIUM AM/FM STEREO IN – DASH SIX CD RADIO
(CD CHANGER COMPATIBLE)
SHUF
SCAN
LOAD
PUSH
ON
AM
1
CD
FM
DISC
SEEK
TUNE
2
3
DISC
SEEK
TUNE
2
3
1
DSP
REW
FF
BASS
SEL
TREB
4
5
6
REW
FF
COMP
BASS
SEL
TREB
4
5
6
MUTE
EJ
BAL
FADE
MENU
MUTE
EJ
BAL
FADE
MENU
Advertisement
Table of Contents

Related Manuals for VISTEON CD6


Summary of Contents for VISTEON CD6
-
Page 1: Welcome
Welcome Please take a few minutes to review this User Manual to become familiar with your new Visteon In-Dash Six CD Radio features and operation of controls. For any information about your Visteon In-Dash Six CD Radio, please call 1-800-367-3333. -
Page 2: Limited Warranty
Limited Warranty The CD 6 Audio System Limited Warranty is provided by Visteon. Visteon will provide at no cost for the repair or replacement of covered components during the Limited Warranty Period in accordance with the following terms, conditions, and limitations. -
Page 3: Parts And Services
• If the CD 6 Audio System is installed after the first 90 days after new vehicle delivery: one (1) year from the date of installation. Used Vehicle • If the CD 6 Audio System is installed on a used vehicle: one (1) year from the date of installation. - Page 4 50 states and Canada. • Any CD 6 Audio System installed or repaired by any entity other than an authorized VISTEON Sales and Service Center or Sales Center. • There are no express warranties except as listed above.
-
Page 5: Procedures For Obtaining Repair
During the applicable Limited Warranty Period, call the Visteon Global Customer Service Operations Call Center at 1-800-367-3333 to locate the Visteon Sales and Service Center or Sales Center in the area. Proof of the CD 6 Audio System installation date, vehicle delivery... - Page 6 WARRANTOR: VISTEON Global Customer Service PO Box 532290 STE 400C Livonia, MI 48153-2290 USA...
-
Page 7: Table Of Contents
Welcome ..................1 Warranty and Service Limited Warranty ....................2 Parts and Services .................... 3 Procedures For Obtaining Repair ..............5 Controls and Features Volume/power control ..................9 AM/FM select AM/FM select in radio mode ................. 9 AM/FM select in CD mode ................9 Tune adjust Tune adjust in radio mode ................ - Page 8 Treble adjust ...................... 18 Speaker balance adjust ..................18 Speaker fade adjust ..................18 Radio Data System (RDS) ................19 Traffic announcements .................. 19 Find type ......................20 Show in display ....................20 Menu mode ...................... 21 Digital signal processing (if equipped) ............22 Phone mode ......................
-
Page 9: Volume/Power Control
Volume/power control Press the control to turn the audio system on or off. PUSH Turn the control to raise or lower volume. If the volume is set above a certain level and the ignition is turned off, PUSH the volume will come back on at a “nominal”... -
Page 10: Tune Adjust For Cd Mode
frequency down the band (whether or not a listenable station is located there). Hold the control to move through the frequencies quickly. • Press to move to the next frequency up the band (whether or not a listenable station is located there). -
Page 11: Scan Function
track of the current disc. If the beginning of the disc is reached, the CD player seeks to the beginning of the last track on the current disc and begins playing. • Press to advance to the next track of the current disc. After the last SEEK track has been completed, the first track of the current disc will automati-... -
Page 12: Setting Memory Preset Stations
Autostore, six in FM1, six in FM2, and six in FM Autostore). There are a total possible of 30 preset stations. Setting memory preset stations • Select the frequency band with the AM/FM select control. Press the AM/ FM control to toggle between AM, FM1, or FM2. -
Page 13: Starting Autostore
Starting autostore • Press and momentarily hold the AM/FM control. • AUTOSTORE will flash in the display as the frequency band is scrolled through. • When the six strongest stations are filled, the station stored in memory preset control 1 will start playing. If there are less than six strong stations available on the frequency band, the remaining... -
Page 14: Display Description
particular slot is empty, NO CD will display and the system will begin to play the next available disc. If your vehicle is equipped with a CD changer, pressing the CD control again will allow you to toggle between accessing the multi–disc system and the CD changer. -
Page 15: Auto Load
will choose the next available one.) Wait until the CD door opens. • Load the CD into the player. LOADING CD# will be displayed. When the CD has been loaded, the door will close and that CD will begin to play. For example, to load a CD into slot #2, press the LOAD control and then press preset #2. -
Page 16: Auto Eject
control and the desired preset number (1– 6). For example, to eject CD#2, press the EJ control and then press the preset #2 control. If you do not choose a specific CD, the player will eject the current CD. If a CD is ejected and not removed from the door of the CD player, the player will automatically reload the CD. -
Page 17: Fast Forward
Fast forward The fast forward control works in CD mode. • Press and hold the FF control until the desired selection is reached. If the end of the disc is reached, the CD will return to the first track on the first disc. -
Page 18: Bass Adjust
control to enable the compression feature when COMP OFF is displayed. • Press the SEL control again to disable the feature when COMP ON is displayed. On Premium audios, press the COMP COMP control until COMP ON is displayed. Bass adjust The bass adjust control allows you to increase or decrease the audio system’s bass output. -
Page 19: Radio Data System (Rds)
• Press the FADE control. Use the SEL control to adjust the sound between the front and rear speakers. FADE Radio Data System (RDS) This feature allows your audio system to receive text information from RDS- equipped FM radio stations. To activate: •... -
Page 20: Find Type
the volume control to the desired level. The volume level will show at the bottom of the display. Interrupt- ing traffic announcements will be at the selected volume level. Find type This feature allows you to search for RDS stations selectively by their program type. -
Page 21: Menu Mode
To activate: • With RDS activated, press the MENU control until SHOW is dis- played. MENU • Use the SEL control to select TYPE, NAME or NONE. NAME will display the radio station’s name (WABL, WCSX-FM, etc.) TYPE will display the radio station’s RDS program type (rock, jazz, etc.) NONE deactivates the RDS display. -
Page 22: Digital Signal Processing (If Equipped)
SELECT HOURS– See Setting the clock. SELECT MINUTES– See Setting the clock. In CD mode, you can access: COMPRESSION STATUS– See Compression feature. SELECT HOURS– See Setting the clock. SELECT MINUTES– See Setting the clock. Digital signal processing (if equipped) The digital signal processing (DSP) feature allows you to change the signal mode to suit your listening... -
Page 23: Phone Mode
• JAZZ CLUB– jazz club with clearly reflected sounds • HALL– rectangular concert hall capacity of about 2 000 CHURCH– church with a high vault STADIUM– outdoor stadium with a capacity of about 30 000 Phone mode This feature allows you to control the factory-installed cellular phone (if equipped) through the radio controls. -
Page 24: Troubleshooting The Cd Changer (If Equipped)
• Press to decrease hours/ minutes. Troubleshooting the CD changer (if equipped) The laser beam used in the compact disc player is harmful to the eyes. Do not attempt to disassemble the case. If sound skips: • You may be traveling on a rough road, playing badly scratched discs, or the disc may be dirty. -
Page 25: Cd And Cd Changer Care
to the edge. Do not use circular motion. CD and CD changer care • Handle discs by their edges only. Never touch the playing surface. • Do not expose discs to direct sunlight or heat sources for extended periods of time. •... - Page 26 “signal modulation.” Signal modulation is a process radio stations use to increase their strength/volume relative to other stations. • Terrain. Hills, mountains and tall buildings between your vehicle’s antenna and the radio station signal can cause FM reception problems. Static can be caused on AM stations by power lines, electric fences, traffic lights and thunderstorms.
Need help?
Do you have a question about the CD6 and is the answer not in the manual?
Questions and answers
Whar type of screws to remove from ford lightning
What type of screws are used to install