Table of Contents
Advertisement
Advertisement
Table of Contents

Summary of Contents for Ironton 45998
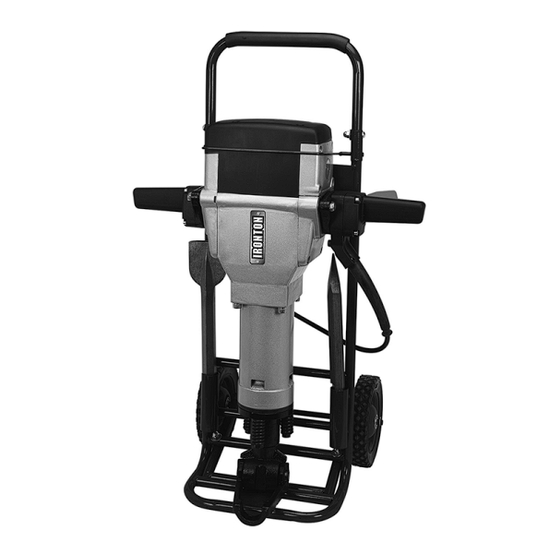
- Page 1 HEAVY-DUTY BREAKER HAMMER KIT WITH CART OWNER’S MANUAL WARNING: Read carefully and understand all ASSEMBLY AND OPERATION INSTRUCTIONS before operating. Failure to follow the safety rules and other basic safety precautions may result in serious personal injury. Item# 45998...
-
Page 2: Intended Use
Thank you very much for choosing an Ironton product! For future reference, please complete the owner’s record below: Model: _______________ Purchase Date: _______________ Save the receipt, warranty and these instructions. It is important that you read the entire manual to become familiar with this product before you begin using it. -
Page 3: Important Safety Considerations
IMPORTANT SAFETY CONSIDERATIONS WARNING: Read all safety warnings and all instructions. Failure to follow the warnings and instructions may result in electric shock, fire and/or serious injury. Save all warnings and instructions for future reference. The term “power tool” in the warnings refers to your corded power tool. - Page 4 e. Do not overreach. Keep proper footing and balance at all times. This enables better control of the power tool in unexpected situations. f. Dress properly. Do not wear loose clothing or jewelry. Keep your hair, clothing and gloves away from moving parts.
- Page 5 unless they have been given supervision or instruction concerning use of the appliance by a person responsible for their safety. Always use an approved extension cord suitable for the power input of this tool. Before use, • inspect the extension cord for signs of damage, wear and ageing. Replace the extension cord if damaged or defective.
- Page 6 With a Collar: Pull the retaining ring open about 30-40º to the second engaging position as shown in Figure 2. Insert the collared chisel. Return the retaining ring to close to its original position to lock the chisel in place. Physically check that the chisel is secure before operating.
- Page 7 Assembly of Cart a. Attach the wheels 1) Insert the axle into the bottom bracket as shown. 2) Attach the wheels to the axle. 3) Place the appropriate washer (Φ15, as shown), then insert cotter pin. 4) Bend cotter pin into place as shown; the wheel is now attached. Page of 17...
- Page 8 b. Assemble the cart frame 1) Turn over the frame, so that it lies flat on the floor. 2) Install the screw M8 x 50 with nut as shown, 3) Attach the frame and the wheel axle together by bolt M8 x 40 as shown Page of 17...
- Page 9 4) Install the plastic cap, 5) Assemble the handle onto the frame and fixed them together by screw M8 x 35, use wrench M5. c. Assemble the machine holder Align the screwed hole of the machine holder with the through-hole on the frame, then attach them together with screw M6 x 35.
-
Page 10: Operation
The cart is now assembled. OPERATION WARNING: Always wear ANSI approved impact safety goggles. Wear a full face shield if you are producing metal fillings or wood chips. Wear an ANSI approved dust mask or respirator when working around metal, wood, and chemical dusts and mists. Always wear ear protection. Ear protection is required fro any other persons in the work area. -
Page 11: Maintenance
WARNING: If the Breaker Hammer ever gets out of your control, immediately release the Switch Knob (87) Note: Use the weight of Breaker Hammer to help you break up concrete. Use the tool in the vertical position whenever possible. This tool was intended to break up larger pieces of concrete. Chipping a Straight Line 1. - Page 12 by adopting a program of conscientious repair and maintenance. Have necessary repairs made by qualified service personnel. WARNING: Make sure the Breaker Hammer is unplugged before doing any maintenance. 1. Wipe the tool with a lint free cloth after each use. Remove all dust and grit from the tool. 2.
-
Page 13: Diagram & Parts List
DIAGRAM & PARTS LIST Demolition Breaker Page of 17... - Page 14 Page of 17...
-
Page 15: Cart Parts List
Cart Parts List Page of 17... - Page 16 Page of 17...
- Page 17 WARNING Some dust created by power sanding, sawing, grinding, drilling, and other construction activities contains chemicals known to the State of California to cause cancer, birth defects or other reproductive harm. Some examples of these chemicals are: • lead from lead-based paints, •...

Need help?
Do you have a question about the 45998 and is the answer not in the manual?
Questions and answers