Table of Contents
Advertisement
Advertisement
Table of Contents

Related Manuals for REDCAT MPX-70


Summary of Contents for REDCAT MPX-70
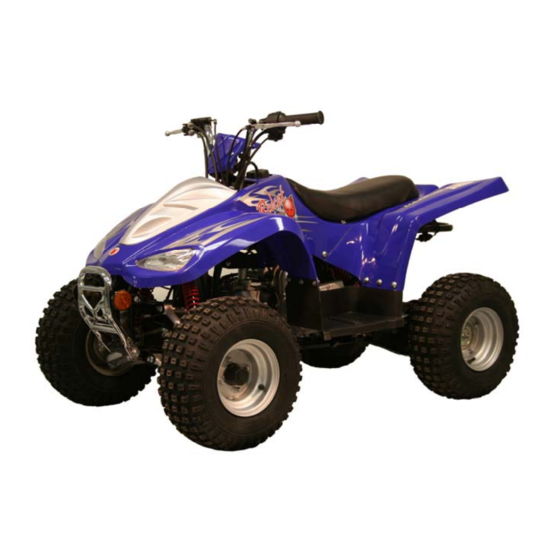
- Page 1 MPX-70/90 Assembly Guide...
-
Page 2: Table Of Contents
Table of Contents Tool List…………………..…………………………..…………………….Page 3 Removal From Crate…………..……………………...…………………..Page 4 Parts Inventory………………..……………………………….…………..Page 8 Assembly………………………………………………………………..Page 10 Oil Change……………………………..……………………..…………..Page 20 Initial Start-Up……………………………….………………………...…Page 23 Other Information…………………………………….…..……………...Page 26... -
Page 3: Tool List
Tool List - Ratchet handle -Sockets -8mm -10mm -12mm -15mm -17mm -21mm - #3 Phillips head screwdriver ( + ) - ¼ Slotted screwdriver ( - ) - Wire cutters - Drain pan - Funnel... -
Page 4: Removal From Crate
Removal From Crate NOTE: All pictures are of an MPX-90. Any MPX-70 differences are noted. 1) Remove (4) white straps from crate. 2) Cut side of cardboard box and discard. 3) Remove plastic wrap covering top of ATV. 4) Cut blue ties from handlebars and wheels and tires to cage. - Page 5 5) Remove (10) 12mm hex head bolts from bottom of cage. 6) Remove (2) 12mm hex head bolts from steering stem cross brace. 7) Cut tape holding hardware box and rear fenders to cage.
- Page 6 8) Remove top portion of cage. 9) Cut remaining blue ties. 10) Remove hardware box, front bumper, handlebar cover and wheels and tires.
- Page 7 11) Remove (4) 12mm hex head bolts from rear axle clamps. 12) Inspect entire ATV for any shipping damage. File any shipping damage claim at http://www.redcatmotors.com/dealer_warranty.asp?stepid=2&sel=freight...
-
Page 8: Parts Inventory
Parts Inventory 1) After setting parts aside, ensure none are missing. 1 – Front Wheel and Tire – PN 101276 (MPX-90) PN 101277 (MPX-70) 2 – Rear Wheel and Tire – PN 101278 (MPX-90) PN 101325 (MPX-70) 3 – Front Panel – PN 101225 (Silver) PN 101226 (Pink) 4 –... - Page 9 Hardware Box 1 – Tool Kit – PN 100093 2 – Rubber Hub Cap – PN 101202 3 – Gas Cap – PN 100650 4 – Handlebar Cover Bracket – PN 101327 5 – Wire Tie – PN 101097 6 – Handlebar Clamps – PN 100147 7 –...
-
Page 10: Assembly
Assembly 1) With assistance, remove ATV from crate bottom and place on ATV jack. 2) Front Brakes a. Remove blue ties holding front brake plate to ATV. b. Remove 21mm hex castle nut and washer from front steering knuckle. c. Line up slot in brake plate with locating tab on steering knuckle. d. - Page 11 3) Front Wheels and Tires a. Slide front wheel onto steering knuckle. i. IMPORTANT – Ensure wheel spacer is in place. b. Install washer and 21mm hex castle nut. c. Install 1.5” cotter pin. d. Install rubber hub cap. e. Repeat for other side.
- Page 12 4) Rear Wheels and Tires a. Install and tighten (4) 15mm hex lock nuts on inside of rear wheels. b. Remove 21mm hex castle nut and washer from rear axle. c. Slide rear wheel onto rear axle. d. Install washer onto rear axle. e.
- Page 13 4) Rear Wheels and Tires (cont.) g. Install rubber hub cap. h. Ensure tightness of (4) lug nuts. i. Repeat for other side. 5) Lower ATV and remove jack.
- Page 14 6) Handlebars a. Place lower clamp on steering stem and position handlebars. b. Install (2) upper handlebar clamps, handlebar cover mount and (4) 10mm hex head bolts. c. Position handlebars to desired angle. d. Tighten (4) 10mm hex head bolts.
- Page 15 7) Grill Insert a. Remove packing material from grill. b. Remove (2) chrome Phillips head screws from top of front fender. c. Install grill insert. d. Install (2) chrome Phillips head screws through grill insert, into fender.
- Page 16 8) Front Bumper a. Remove packing material from bumper and front of frame. b. Align bumper with (4) mounting holes in frame. c. Secure bumper to frame with (4) 13mm hex head bolts, lock washers and flat washers.
- Page 17 9) Handlebar Cover a. Place handlebar cover on handlebar cover bracket. b. Install (2) chrome Phillips head screws through cover into mount. 10) Battery a. Remove rear kill plug.
- Page 18 10) Battery (cont.) b. Remove (2) 8mm hex head bolts holding seat to frame. c. Remove seat. d. Remove battery. e. Place battery on a trickle charger and let charge overnight. f. Replace battery under seat. g. Connect battery. i. Red wires to positive, ( + ) green wires to negative ( - ) h.
- Page 19 10) Battery (cont.) i. Connect battery strap over battery. j. Replace seat. k. Install (2) 8mm hex head bolts through seat into frame.
-
Page 20: Oil Change
Oil Change 1) Locate oil drain plug on bottom of engine. a. NOTE: ATV has been lifted onto it’s rear wheels for picture taking purposes only. b. IMPORTANT: Bolt in the right side of the picture/left side of the bike is not the oil drain plug. - Page 21 3) Remove 17mm hex head oil drain bolt. 4) Allow oil to drain completely. 5) Replace 17mm hex head oil drain bolt.
- Page 22 6) Locate oil fill on right side of engine. 7) Remove oil fill plug and fill engine with 950ml of 5w30 engine oil. 8) Replace oil fill plug.
-
Page 23: Initial Start-Up
Initial Start-Up 1) Remove tape from gas tank neck. 2) Fill gas tank with standard pump gas. 3) Install gas cap. 4) Replace rear pull kill plug. 5) Turn petcock valve to “on” position (arrow pointing up). - Page 24 6) Move choke lever to full on position (left) 7) Move engine stop switch to “run” (right). 8) Pull rear brake lever (left side) and engage parking brake. 9) Press and hold engine start button until engine starts. a. NOTE: If engine does not start within five seconds, release start button to prevent starter damage.
- Page 25 12) Check tire pressure in all four tires. a. Tire pressure should be 5 PSI. 13) Remove all remaining packaging material. 14) Congratulations! Your RedCat MPX-70/90 is ready to ride.
-
Page 26: Other Information
Other Information Website – www.redcatmotors.com Phone number – (602) 256-2282 Address – 1002 E. University Dr. Suite 103 Phoenix AZ, 85034...
Need help?
Do you have a question about the MPX-70 and is the answer not in the manual?
Questions and answers