Advertisement
Quick Links
Installation Instructions
Supertop NX
Installation Tips
Before you begin installing your new Supertop NX, please read all
the instructions thoroughly.
For a smooth fit:
For easier installation, the top should be installed at a temperature above 72° F.
Below this temperature, the fabric may contract an inch or more, making it
difficult to fit the vehicle.
It is normal for the fabric to contract and wrinkle when stored in the shipping
carton. Within a few days after installation, the fabric will relax and the wrinkles
will disappear.
Tools
#2 Phillips
Drill-Driver &
Screwdriver
#2 Phillips Bit
Adjustable
Wrench
P1 - 54722 - Rev. I 0213
T30 Torx
Vise-Grips
Driver
Safety
Glasses
Installation Instructions - Supertop NX
Installation Time
4 Hours
Skill Level
3 - Moderately Difficult
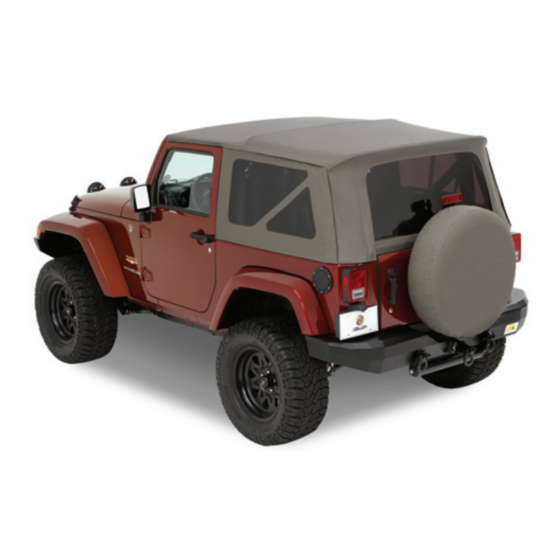
Vehicle Application:
Jeep Wrangler
2007-current
Part Number 54722
Support
We're here to help!
Go to www.Bestop.com and
click "Contact Us"
See a video showing
installation of this top at
www.bestop.com/video
© 2013 Bestop, Inc.
Advertisement

Related Manuals for Bestop Supertop NX

Summary of Contents for Bestop Supertop NX
- Page 1 2007-current Supertop NX Part Number 54722 Installation Tips Before you begin installing your new Supertop NX, please read all the instructions thoroughly. For a smooth fit: For easier installation, the top should be installed at a temperature above 72° F.
- Page 2 Vehicle Application: Jeep Wrangler Installation Instructions 2007-current Supertop NX Part Number 54722 P1B - 54722 - Rev. I 0213 Installation Instructions - Supertop NX © 2013 Bestop, Inc.
-
Page 3: Parts List
Page 6 of Guide Bow Mount Bracket Bow Mount Bracket Qty. 1 Qty. 1 Part # 482.89 - Left Part # 482.88 - Right P2 - 54722 - Rev. I 0213 Installation Instructions - Supertop NX © 2013 Bestop, Inc. - Page 4 Tailgate Bar Mount Tailgate Bar Mount Qty. 1 Qty. 1 Qty. 1 Part #486.55 Part # 488.47 - Left Part # 488.46 - Right P3 - 54722 - Rev. I 0213 Installation Instructions - Supertop NX © 2013 Bestop, Inc.
- Page 5 Foam Seals Qty. 1 (3 pieces) Qty. 2 Qty. 1 per side Part # 417.43 Part # 457.76 (R) & 457.77(L) Part # 486.54 P4 - 54722 - Rev. I 0213 Installation Instructions - Supertop NX © 2013 Bestop, Inc.
- Page 6 Deck, Header Assembly, & Fabric Top Left Side Window Right Side Window Rear Window Strap Kit Tailgate Bar Qty. 1 Qty. 1 Part #386.90 Part #489.46 P5 - 54722 - Rev. I 0213 Installation Instructions - Supertop NX © 2013 Bestop, Inc.
- Page 7 Screw the Right Bow-Mount Bracket to the right-side sport bar down-tube using (2) Bow-Mount Screws. Screw the Left Bow-Mount Bracket to the left-side sport bar down-tube using (2) Bow-Mount Screws. P6 - 54722 - Rev. I 0213 Installation Instructions - Supertop NX © 2013 Bestop, Inc.
- Page 8 Door Rail, and screw into the Door Rail assembly into the hole in the threaded holes. top of the belt rail. Repeat for left side. P7 - 54722 - Rev. I 0213 Installation Instructions - Supertop NX © 2013 Bestop, Inc.
-
Page 9: Table Of Contents
Top Arch. bow to insert the other end into the tabbed slot on the opposite side of the Jeep. P8 - 54722 - Rev. I 0213 Installation Instructions - Supertop NX © 2013 Bestop, Inc. -
Page 10: Right Side
P9 - 54722 - Rev. I 0213 Installation Instructions - Supertop NX © 2013 Bestop, Inc. - Page 11 Fold the protective flap back to expose the screw holes used for attaching the Right Side Bow. Repeat on left side of Header/Fabric Assembly. P10 - 54722 - Rev. I 0213 Installation Instructions - Supertop NX © 2013 Bestop, Inc.
- Page 12 Repeat on left side, using Left Side Bow. Step 3 Replace the protective flaps on both sides, and re-insert the screws you set aside, two for each side. P11 - 54722 - Rev. I 0213 Installation Instructions - Supertop NX © 2013 Bestop, Inc.
-
Page 13: Right Side
Repeat on the left side. Extend the Side Bows out straight and lay the Side Bows on top of the Door Rails. P12 - 54722 - Rev. I 0213 Installation Instructions - Supertop NX © 2013 Bestop, Inc. - Page 14 Align the holes in the end of each #2 Bow leg with the holes in the Repeat on the left side. side bows. P13 - 54722 - Rev. I 0213 Installation Instructions - Supertop NX © 2013 Bestop, Inc.
- Page 15 Release the latch lever so that the locking pin engages the brass bushing. Repeat on the left side. P14 - 54722 - Rev. I 0213 Installation Instructions - Supertop NX © 2013 Bestop, Inc.
- Page 16 Be sure to attach the spring catch to the side. hole in the bracket as shown in the diagran above. Repeat for the left side. P15 - 54722 - Rev. I 0213 Installation Instructions - Supertop NX © 2013 Bestop, Inc.
- Page 17 Rear Bow, using (3) #8 x1/2” Pan Head Washer Screws, and the pre-drilled holes in the Rear Bow. Repeat for left side Stay Strap. P16 - 54722 - Rev. I 0213 Installation Instructions - Supertop NX © 2013 Bestop, Inc.
- Page 18 (5) #8x1/2” Pan Head Washer Screws in the pre-drilled holes in the rear-facing side of the #2 Bow. P17 - 54722 - Rev. I 0213 Installation Instructions - Supertop NX © 2013 Bestop, Inc.
- Page 19 Rear Bow and Stay Strap connecting to the Bow from underneath, and secure to the #2 Bow. Rear Bow, using (4) #8 x1/2” Pan Head Washer Screws. P18 - 54722 - Rev. I 0213 Installation Instructions - Supertop NX © 2013 Bestop, Inc.
- Page 20 Crimp the end of the spring where it passes through the hole in the corner bracket, to prevent it from coming loose. Repeat on left side. P19 - 54722 - Rev. I 0213 Installation Instructions - Supertop NX © 2013 Bestop, Inc.
- Page 21 Remove protective liner from the back side of the Foam Tape Strip and place the Foam Tape Strip in the location shown in the diagram. Repeat for the left side. P20 - 54722 - Rev. I 0213 Installation Instructions - Supertop NX © 2013 Bestop, Inc.
- Page 22 Repeat for the left side. P21 - 54722 - Rev. I 0213 Installation Instructions - Supertop NX © 2013 Bestop, Inc.
- Page 23 Now pivot the hook forward to engage the windshield loop. P22 - 54722 - Rev. I 0213 Installation Instructions - Supertop NX © 2013 Bestop, Inc.
- Page 24 Make sure that the two zipper pulls are next to each other at the bottom left corner of the Rear Window. P23 - 54722 - Rev. I 0213 Installation Instructions - Supertop NX © 2013 Bestop, Inc.
- Page 25 The plastic angle strip and attached fabric must be rolled into place in the channel. Repeat for left side. Repeat for left side. P24 - 54722 - Rev. I 0213 Installation Instructions - Supertop NX © 2013 Bestop, Inc.
- Page 26 Right Side Window under the Jeep belt rail, by rolling it up underneath the belt rail. Repeat for the Left Side Window. P25 - 54722 - Rev. I 0213 Installation Instructions - Supertop NX © 2013 Bestop, Inc.
- Page 27 The round channel on the side of the tubing attached to the bottom inside of the Tailgate Bar slides over the tubing. Rear Window. P26 - 54722 - Rev. I 0213 Installation Instructions - Supertop NX © 2013 Bestop, Inc.
- Page 28 Rear Window under the Jeep belt rail, by rolling it up underneath Repeat for the left side. the belt rail. Repeat for the left side. P27 - 54722 - Rev. I 0213 Installation Instructions - Supertop NX © 2013 Bestop, Inc.
- Page 29 Secure the rolled up and Rear Bows under the fabric. Tuck window in place with the elastic straps at fabric in around the edges. the top. P28 - 54722 - Rev. I 0213 Installation Instructions - Supertop NX © 2013 Bestop, Inc.
-
Page 30: Limited Warranty
Your Bestop product is made of the finest materials available. To keep it looking new and for the maximum possible wear, it will need periodic cleaning and maintenance. Fabric: The fabric should be washed often using soap, warm water and a soft bristle brush Rinse with clear water to remove all traces of soap. Bestop recommends using Bestop Cleaner (part no. - Page 31 Soin et entretien de votre produit Bestop Votre produit Bestop est fabriqué des meilleurs matériaux disponibles. Il devra être nettoyé et entretenu régulièrement afin de maintenir son apparence neuve et pour une durée d’utilisation maximale. Tissu: Le tissu doit être lavé régulièrement à l’aide de savon, d’eau chaude et d’une brosse à soies douces. Rincer à l’eau claire afi n d’éliminer Glissière normale -...
- Page 32 Cuidado y mantenimiento de su producto Bestop Su producto Bestop está hecho con materiales de la más alta calidad. Para mantener su apariencia nueva y alargar su uso al máximo posible, necesitará limpieza y mantenimiento periódicos. Tela: debe lavar la tela con frecuencia usando jabón, agua tibia y un cepillo de cerdas suaves. Enjuague con agua limpia para Corredera normal - eliminar todos los residuos de jabón.
Need help?
Do you have a question about the Supertop NX and is the answer not in the manual?
Questions and answers