Table of Contents
Advertisement
Advertisement
Table of Contents

Related Manuals for DOD Champion SP1

Summary of Contents for DOD Champion SP1
- Page 2 Copyright ©2015 DOD Tech All Rights Reserved...
-
Page 3: Table Of Contents
Photo Settings ....................25 Transferring Files ....................26 Video Output ...................... 26 Firmware Update ....................26 DOD Video Player ....................27 DOD Tech reserves the right to change specification of the products and discontinue products without notice and without further obligation. -
Page 4: Safety Precautions
Other power adapters may create a safety hazard or damage the unit. Do not use damaged power adapters or cords. If damaged, please disconnect the power adapter and contact DOD Tech Support for assistance. Do not pull, insert, or bend the power cable using excessive force. -
Page 5: Package Contents
Package Contents DOD Champion SP1 Dash Camera User Manual Suction Mount DOD Player Installation CD Power Adapter Adhesive Tape Mount Note: Supplied accessories may vary by region. -
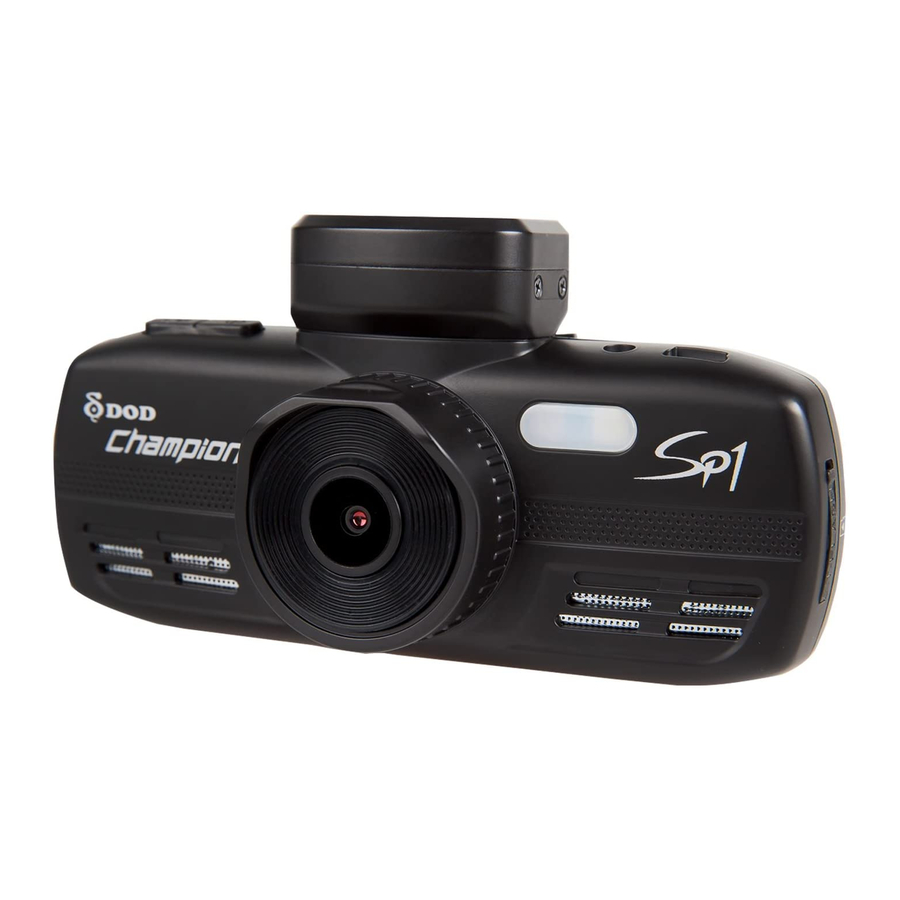
Page 6: Camera Controls
Camera Controls... - Page 7 Camera Controls ● Arrow Key [ ● Record/Shutter/Confirm [ Used to navigate through menus and select videos Video Recording- Starts/Stops recording. for playback. Photo- Takes a photo. Arrow Key(Red) [ ] Shortcut Setup Used to set up the shortcut button for Racing Video Playback- Plays/Pauses video.
- Page 8 Camera Controls ● ● Mutes Microphone[ Micro SD Slot To turn off the audio recording, press [ ] and hold A Micro SDHC card rated at class 10 or above is it until the icon appears. required. ● Mode[ Supports up to 32GB. ●...
-
Page 9: Getting Started
Note: After formatting the SD card, all of your data will be lost. Be sure that you have backed up the important files. 2. Connect the Power Adapter. Plug the DOD power adapter into your vehicle’s power outlet. Insert the USB plug into the USB port. - Page 10 Getting Started 3. Turn on Your Vehicle. In most vehicles, this will send power to the outlet and automatically turn on your camera. In some vehicles, the power outlet is continuously powered even when the vehicle is off. 4. Turn on/off Your Camera. Press [ ] to turn on or turn off the unit.
- Page 11 Getting Started 5. Select Language→Set the Time Zone→Select the Speed Unit of Your Choice Upon powering up the camera for the first time or after upgrading the firmware on the device, you will need to go through the Settings below. Select Language Select the language of your choice by pressing Press [...
-
Page 12: Installing Your Camera
3. Prepare the Camera for Installation Peel off the protective mount cover. Find a location which does not obstruct your view when driving. DOD Tech recommends placing the camera behind the rear view mirror without obstructing either lenses or camera functions. - Page 13 Blots may worsen the recording quality or may cause the bracket to be unstable. Do not turn on Motion Detection unless your vehicle is parked. If Motion Detection is enabled while driving, the camera may not continuously record. DOD Tech recommends setting the G-Sensor to low.
-
Page 14: Basic Operation
Basic Camera Operation Everyday Operation Your dash camera will automatically turn on and start recording when it starts receiving power. By default, the camera will record over the oldest videos when the memory card is full (loop recording). Continuously Powered Electrical Outlet If your camera is continuously powered, the camera will not automatically shut down when your vehicle is turned off. -
Page 15: Camera Modes
Camera Modes When the camera is not recording video, you can switch between three modes by pressing the 1. Video Recording 2. Photo 3. Video Playback 1. Video Recording Mode The camera defaults to video recording when the camera is first turned on. Recording Mode: Press to stop recording. -
Page 16: Photo Mode
Camera Modes 2. Photo Mode • Press [ ] once to enter the Photo Mode during the Standby Mode. • Press [ ] to take a photo. Note: Photo Mode is only accessible during the Standby Mode. Self-Timer (2s) Shake Reduction (on) Image Resolution Exposure Value (Auto) Camera Mode... -
Page 17: Playback Mode
Camera Modes 3. Playback Mode You can watch previously recorded videos in Playback Mode. Press [ ] twice to enter the Playback Mode during the Standby Mode. • Play the Video Press [ ] to play and pause. Press to move or back forwards and press [ ] to enter the Playback Mode. -
Page 18: Camera Settings
Camera Settings Each mode has a unique set of settings. See the description below. Three Camera Settings pages are accessible: Video Recording Settings Racing Mode Settings System Settings The menu settings can be switched by pressing If you move the cursor before pressing , you must exit and try again. - Page 19 Camera Settings Video Recording: First Settings Page Accessed by pressing once. Motion Detection Plate Stamp For use when parked not when driving. Saves memory Imprints a customized set of 8 digits to the recorded space by only recording when motion is detected. video.
- Page 20 Camera Settings Video Recording: First Settings Page Accessed by pressing once. Path Analysis Head Up Display Calculates the total distance, travel time, and After a customized period of time a new screen will average speed of your journey. The data will be appear showing speed and direction.
-
Page 21: Racing Mode Settings
Camera Settings Racing Mode: Second Settings Page Accessed by pressing twice during the Standby Mode. Racing Mode Settings Measures the performance of your vehicle: Acceleration Times Lap Timers 0-400m Timer Braking Test Press to perform the test once the desired function was chosen. Note: The Racing Mode is only enabled when it locks onto GPS signals. - Page 22 Camera Settings Racing Mode: Second Settings Page Accessed by pressing twice during the Standby Mode. 0-100km/h Timer 100-200km/h Timer Perform your 0-100km/h acceleration run. Begun when it reaches 100km/h. As your vehicle goes over 100km, the time The figures will be shown when the speed is taken will be instantly shown, and you can up to 200km/h, and you can hear the “Beep”.
- Page 23 Camera Settings Racing Mode: Second Settings Page Accessed by pressing [ ] twice during the Standby Mode. Lap Timer Allows the recording of the individual lap times. As soon as the start/finish line is crossed, lap timing will begin. Upon entering this function, the screen shows the last lap time and current lap time recorded. Lap Count: A count of the number of completed laps, shown on the top right corner.
- Page 24 Camera Settings Racing Mode: Second Settings Page Accessed by pressing [ ] twice during the Standby Mode. 0-400m Timer Function Allows you to view 0-400m result in seconds. Perform your 0-400m acceleration run. As your vehicle goes over 100km, the time and driving distance taken will be instantly shown, and you can hear the “Beep”...
- Page 25 Camera Settings Racing Mode: Second Settings Page Accessed by pressing [ ] twice during the Standby Mode. Braking Test A deceleration test carried out between two speeds to examine the braking performance of your vehicle. Scroll up and down by using to the speed range you prefer.
-
Page 26: System Settings
Camera Settings System Settings: Third Setting Page Accessed by pressing [ ] three times. Format Language Completely deletes all files including locked footage on Sets the language. the Memory Card and optimizes the card for recording. Date/Time Frequency Sets Year/Date/Time format. Adjusts the camera's frequency setting to minimize flickering and banding in the recorded video. -
Page 27: Photo Settings
Camera Settings Photo Settings Accessed in “Photo Mode”. WDR (Wide Dynamic Range) Image Size Cannot be changed. Shows WDR processing is Adjusts the size of the image. Higher megapixels enabled. increases file size and details. Color Anti-Shaking Apply a color filter to the photo. Helps reduce the effects of shaking when taking a photo. -
Page 28: Transferring Files
Using a 3.5mm AV cable, plug the 3.5mm connector into the camera’s AV port. Plug the RCA end into a compatible port on your television or monitor. Firmware Update See the support section on DOD-Tech’s website for any available firmware updates and instructions. -
Page 29: Dod Video Player
DOD Video Player The DOD Video Player is a user-friendly program to playback videos and to visualize your position and speed on your PC or Mac. Please see the “Transferring Files” section to find out how to view or transfer your video files. - Page 30 DOD Video Player Preview Add Video to Playlist Remove Video from Playlist Video Display Export Multi-Clips into One Video Max Speed Acceleration Times Average Speed G-Force Strength & Graph Total Distance Speed Settings Open/Close Location Map G-Force Indicator Open Video Folder...
Need help?
Do you have a question about the Champion SP1 and is the answer not in the manual?
Questions and answers