Table of Contents
Advertisement
Table of Contents
Introduction ........................................................................................................................................................... 3
An Important Message To You From GenZe .......................................................................................... 3
General Information ...................................................................................................................................... 3
Safety Information .............................................................................................................................................. 4
General Safety Precautions ......................................................................................................................... 4
Features and Components .................................................................................................................................. 5
Front Features ................................................................................................................................................. 5
Handlebar Controls ........................................................................................................................................ 6
Side Feature Locations .................................................................................................................................. 8
Cruise Connect Touch Screen Overview .................................................................................................. 9
Home Screen ............................................................................................................................................... 9
Menu Screen ........................................................................................................................................................ 12
Settings Screen .............................................................................................................................................. 14
PIN Screen ................................................................................................................................................ 16
Entering Your PIN .................................................................................................................................. 18
OM.V.1.1
Advertisement
Table of Contents

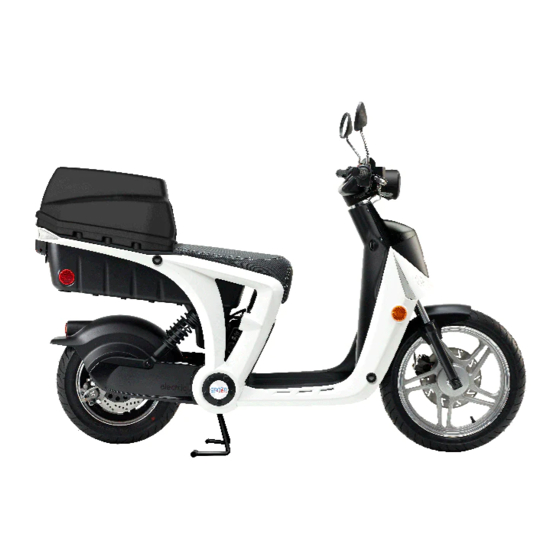
Summary of Contents for GENZE 2.0
-
Page 1: Table Of Contents
OM.V.1.1 Table of Contents Introduction ................................3 An Important Message To You From GenZe ..................3 General Information ............................3 Safety Information .............................. 4 General Safety Precautions ......................... 4 Features and Components ..........................5 Front Features ..............................5 Handlebar Controls ............................6 Side Feature Locations .......................... - Page 2 Off-Vehicle Charging ..........................31 Recycling Your Battery ..........................32 Storage Areas ..............................32 Maintaining Your GenZe 2.0 .......................... 34 Basic Care of Your GenZe 2.0 ........................34 Washing ................................34 Wheels and Tires ............................34 Tire Inflation ..............................34 Long Term Storage ............................35 General Troubleshooting ..........................
-
Page 3: Introduction
Congratulations and thank you for purchasing the GenZe 2.0. The GenZe 2.0, designed to help make your busy life easier and more fun, is the smart way to get around town. The GenZe gives you the power to set your own pace and your own course, outsmart traffic, and untether from transit schedules. -
Page 4: Safety Information
Regular inspections and proper maintenance, along with good riding skills, help you safely enjoy the capabilities and the reliability of the GenZe 2.0. Disregarding the above information may render the warranty invalid. -
Page 5: Features And Components
The 7-inch Cruise Connect™ touch screen display provides easy access to everything you need while on the road. It shows your speed, range, and charge level, as well as energy consumption and CO reduction. GenZe 2.0 Cruise-Connect™ even lets you customize the ride to fit your needs. Whether you need more speed or... -
Page 6: Handlebar Controls
Always signal your turns and other maneuvers as required by law. Unlike an automobile, the turn signals must always be canceled manually on the GenZe 2.0. Push in on the switch and it returns to the center or OFF position. Horn... - Page 7 Back to Top Run/Stop Switch This switch is used to turn off the GenZe 2.0. Once it is turned on, using the Start button, you must put the Run/Stop Switch into the run position (if it isn’t already).
-
Page 8: Side Feature Locations
fault will be set until either the kickstand is up or the Forward/Reverse Switch is put back in neutral. E. Throttle At first, gently twist the throttle towards you (A) to energize the motor and begin moving. The direction of travel is determined by the position of the Forward/Reverse Switch. -
Page 9: Cruise Connect Touch Screen Overview
Back to Top Cruise Connect Touch Screen Overview NEVER attempt to adjust or press the touch screen while the GenZe 2.0 is in motion. ALWAYS keep both hands on the handlebar any time the GenZe 2.0 is in motion. Home Screen... - Page 10 Back to Top Mode Specific Display: By touching and holding the ECO Tree for 1 second, you can toggle between the ECO Tree image and the % Power Bar Graph. By default, the ECO Tree will be shown. More leaves will appear on the tree as you drive more efficiently.
-
Page 11: Turn Signal Indicators
The speedometer displays the current speed of the GenZe 2.0 in MPH. The center of the meter displays the digital value, while a needle will point to the speed indicated on the touch screen. Gear: The gear indicator will display the current gear position as selected by the forward/reverse switch. There are 3 indicated positions “F”... -
Page 12: Menu Screen
Range (Real): This will display the ‘Real’ range the GenZe 2.0 can be ridden before battery power is depleted. The ‘Real’ range is a range estimation that is calculated using present available energy and average energy efficiency, based on how the user rides the GenZe 2.0. - Page 13 Home Screen: Touching this button will return you to the Main Screen. It will also return to the Main Screen when your speed reaches 3 mph. Back to Top Battery Screen: Touching the battery button on the menu screen, or the battery button on any other screen, will allow you to see the status of the battery.
-
Page 14: Settings Screen
In this screen, you can set the time and date, as well as see the power settings. You can also view and customize the performance settings for the GenZe 2.0. The performance settings can be changed by adjusting the gauges using a finger to slide along the gauge graphic. - Page 15 Touching the Leaf button on the menu screen or Eco Impact button on any other screen, will allow you to view the ecological impact of your trip. You can view the Eco-score over the last trip or over the lifetime of your GenZe 2.0...
-
Page 16: Pin Screen
Owner Manual You enter this screen after touching the Book button on the Menu Screen. In this screen, you can view the GenZe 2.0 Owner Information. - Page 17 The Run/Stop Switch, battery lock, and kickstand (A) each have two indicator lights. In order for you to operate your GenZe 2.0, all indicators must be green. When the Run/Stop Switch is in the stop (off) position, its indicator is red. If the battery lock is in the unlocked position, the indicator is red.
-
Page 18: Entering Your Pin
Run/Stop Switch Kickstand Entering Your PIN 1. With the main screen powered up, you will be prompted for your PIN number. 2. Enter your PIN number by touching the number on the display screen. If an incorrect PIN has been entered, pressing the clear button will clear the entire PIN. -
Page 19: Changing Your Pin
PIN message. You can now re-enter your PIN. You have 50 attempts before the system will be locked. If the system is locked, you will need to contact GenZe for assistance. Pressing the Forgot Your PIN button will take you to the GenZe help screen, which includes contact information for your assistance. - Page 20 2. Once your current PIN has been verified, you will be prompted to put in your new PIN. 3. You will then be prompted to put in the new PIN again. This must be the same as the PIN entered in step 2. ...
-
Page 21: Starting And Operating
GenZe 2.0 until the problem has been addressed. • Brakes. Squeeze the brake levers individually while pushing the GenZe 2.0 to see if it rolls. You should be able to lock-up the wheels completely by applying the brakes. -
Page 22: Starting
Back to Top Starting 1. Grip the handlebar, and place the kickstand in the up position. NOTE: The GenZe 2.0 will not move if the kickstand is down. 2. Sit on the GenZe 2.0 with at least one foot firmly on the ground. -
Page 23: Regenerative Braking
Always turn the Run/Stop Switch to the Stop position, and put the GenZe 2.0 Direction Switch in neutral when not actively riding. It is very easy to forget that the GenZe 2.0 is powered up because it is silent when inactive. An... -
Page 24: General Battery Pack Information
Back to Top General Battery Pack Information Your battery pack is sealed. Never attempt to open your battery. Doing so will void your warranty and could cause serious injury. Please be aware that incorrect handling of the battery pack can be dangerous. Features of the battery pack include carry handle (B) and shoulder strap eyelets (A). -
Page 25: Battery Pack Replacement
The battery pack (A) is located under the front of the seat. The battery pack also features an integrated charger, so it can be charged while installed or removed from your GenZe 2.0. Back to Top Battery Pack Replacement... - Page 26 2. Push the top latch (A) to the side to release the battery. Back to Top 3. Using the carry handle, pull the battery pack straight out at the top towards the front of the GenZe 2.0.
-
Page 27: Installing The Battery Pack
4. Slide the battery pack out of the tracks at the bottom of the frame. Back to Top Installing the Battery Pack 1. Set the two bottom battery pack pegs (A) into the tracks in the frame. Continue to slide the battery pack backwards until the pegs are at the bottom of the tracks. - Page 28 Location of Tracks Back to Top 2. Rotate the battery pack upward, and push on the handle until battery pack latch post has engaged latch. You will hear an audible click. 3. Turn the key lock to the lock position (A) to fully secure the key deadbolt into the battery pack.
-
Page 29: Battery Pack Charging
B attery Charge Status Indicator Screen The green indicator bar shows the State of Charge (SOC) of the battery while it is connected to the GenZe 2.0 and charging. Note: Do not remove the battery from the GenZe 2.0 while it is charging. -
Page 30: After Charging And Operation
After charging your GenZe 2.0, you need to wait 25-30 seconds before turning it on. This is true whether the battery pack is installed in the GenZe 2.0 and charging or is outside of the GenZe 2.0 and charging. As a visual cue, you will know the 25-30 seconds time period has passed and the GenZe 2.0 is OK to ride when the green LED charge indicator is... -
Page 31: Off-Vehicle Charging
1. Plug the supplied AC power cord (A) into the charger connector. Always keep the power cord with the GenZe 2.0. Always connect the charger to a GROUNDED outlet. 2. If the battery is charged outside, it should be plugged into a Ground Fault Current Interrupter (GFCI) outlet. -
Page 32: Recycling Your Battery
Storage Areas Ample storage areas make the GenZe 2.0 very versatile. Storage areas are located in front of the handlebar, and a rear storage area is located behind and under the seat. Always secure your cargo prior to riding. To fully access the... - Page 33 seat. The seat will lock into the raised position. To lower the seat, pull up on the seat and the lever, and lower the seat. The rear storage area also features a charge outlet (A) that will charge your personal 12 volt electronics up to 7 amps.
-
Page 34: Maintaining Your Genze 2.0
Maintaining Your GenZe 2.0 Basic Care of Your GenZe 2.0 Your GenZe 2.0 is meant to operate in all kinds of weather conditions and is basically maintenance free. Washing A quality automotive soap works best in getting off road dirt and grime. Avoid brushes and abrasive scrub pads. All of these will scratch the finish. -
Page 35: Long Term Storage
Back to Top Long Term Storage The GenZe 2.0 should be stored in a clean dry space. Extreme moisture and dampness should be avoided. Remove the battery pack, and store it in a climate controlled area. General Troubleshooting Symptom... -
Page 36: Reporting Safety Defects
If you believe that your vehicle has a defect which could cause a crash or could cause injury or death, you should immediately inform the National Highway Traffic Safety Administration (NHTSA) in addition to notifying GenZe. If NHTSA receives similar complaints, it may open an investigation, and if it finds that a safety defect exists in a group of vehicles, it may order a recall and remedy campaign.
Need help?
Do you have a question about the 2.0 and is the answer not in the manual?
Questions and answers