Table of Contents
Advertisement
Advertisement
Table of Contents

Summary of Contents for Valach VM 120 B2-4T
- Page 1 Instructions Toni Clark practical scale GmbH...
-
Page 2: Table Of Contents
Installation of the fuel tank Fuel tank connections Fuel tubing Installation of the ignition Carburetor linkage VM 120 B2-4T rear view, Scale 1:1 Last revision: November 13th, 2015 ©2015 Toni Clark practical scale GmbH Zeiss-Str.10 D-32312 Lübbecke Tel. 0049 5741/5035 Fax. 05741/40338 www.toni-clark.com... -
Page 3: Specifications Valach Vm 120 B2-4T
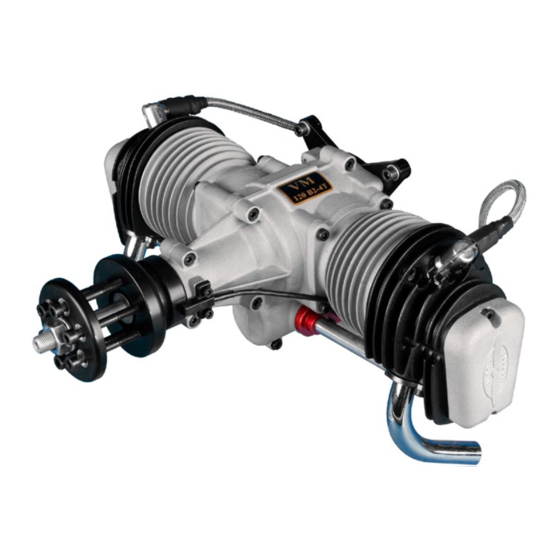
Valach VM 120 B2-4T Instructions Specifications Valach VM 120 B2-4T Design: Four-stroke flat twin engine OHV, 2 valves per cylinder, petroil lubrication. Capacity: 120 ccm Power: approx. 10 hp Bore: 47 mm Stroke: 35 mm Width over valve cover: 310 mm Length: 168 mm (engine mount to front side of prop hub) -
Page 4: Engine Application
Instructions Valach VM 120 B2-4T Engine application The VM 120 B2-4T is intended to be used in model airplanes. Other applications are not permitted! Description of the engine The VM 120 B2-4T is a gasoline powered four-stroke flat twin engine, working on the OHV principle with two valves per cylinder and petroil lubrication. -
Page 5: Mounting Of The Intake Ram Tube
Fuel tank The fuel consumption of the VM 120 B2-4T is very low, compared to two-stroke engines. A 500 ml fuel tank is enough for 15 minutes of flying. We recommend the use of a felt clunk filter! Secure the Tygon®... -
Page 6: Exhaust Header
Instructions Valach VM 120 B2-4T Mount the ignition protected against vibration into your model. Do not wrap the ignition cables with spiral tubing. This makes the cables heavier and as a result more prone for vibration, especially where the spiral tubing ends at the spark plug connector. -
Page 7: Silencer
Valach VM 120 B2-4T Instructions Silencers The version with the Y-intake and rear ex- haust develops the most power. Because of the optimized gas flow, the engine turns about 400 RPM more compared to other silencers. The advantage of using only one silencer... -
Page 8: Crankcase Venting
Instructions Valach VM 120 B2-4T Crankcase venting The tube on the crankcase venting is used to remove the surplus oil out of the engine. Do not extend the tube or reduce the diameter. Hint: I guide the rests of the oil into a plastic container, that is filled with absorbent cotton wads (from the dentist). -
Page 9: Carburetor
Valach VM 120 B2-4T Instructions Carburetor The loosely supplied intake RAM tube , has to be mounted to the engine in any case! Without it, the engine runs too lean, also with wider opened jet needles! The correct tuning of the engine can only be achieved, with a mounted intake RAM tube. - Page 10 Instructions Valach VM 120 B2-4T Throttle valve completly closed Full throttle It is a good idea to make a throttle linkage like the one showed above. The throttle valve will move slower on idle than on full throttle. As a result the engine will accelerate faster and more reliable from low idle.
-
Page 11: Propeller
Valach VM 120 B2-4T Instructions Propeller The best RPM range for the VM-120 is 4500 to 5000 RPM on the ground. Suitable Fiala-2-blade Propellers are: Suitable Fiala-3-blade Propellers: 28x14“ 30x12“ 30x14“ 32x12“ 27x14” 28x12” With the smooth power stroke of the VM-120, it usually is not required to use 3-blade propellers. -
Page 12: Starting The Engine
Instructions Valach VM 120 B2-4T Starting the engine To start the engine, pull on some working gloves. Never start the engine alone! Ask a reliable and strong person to hold your model. Do not trust mechanical anchorage in the ground, on fences or something similar. Approx. 20 kp of thrust is an enormous... -
Page 13: Breaking-In The Engine
Valach VM 120 B2-4T Instructions Breaking-in the engine The engine is factory tested and pre adjusted. While breaking-in the engine the level of wear is increased. While breaking-in use a mixture of 1:25. We recommend for the first 30 Minutes a maximum of 3000 RPM. Afterwards you can increase up to 5.000 RPM for a few seconds. -
Page 14: Changing The Spark Plugs
Instructions Valach VM 120 B2-4T Changing the spark plugs Never tighten the spark plugs on a hot engine! The tension caused by the different cooling can damage the threat in the cylinder head. Screw the spark plugs in by hand until the gasket makes contact with the cylinder head, and tighten them with a wrench a 1/4 turn. -
Page 15: Lubrication
Valach VM 120 B2-4T Instructions Lubrication It makes sense to lubricate the engine when adjusting the valve gap. Use a Off-Road chain lube with a temperature range of at least 150°C. After many tests, we use the Würth „HHS 5000“, it contains PTFE and has a temperature range up to 250°C. -
Page 16: Appendix Basics Of Petrol Engines
Instructions Valach VM 120 B2-4T Appendix Basics of petrol engines Engine cooling To cool the engine, it is not necessary to cut big holes into the cowling, but you have to ensure, that the air flows around the cylinders before it leaves the cowl. Do not forget: The air finds the way with the least resistance, unfortunately this is mostly not the way through the cooling fins. -
Page 17: Installation Of The Fuel Tank
Valach VM 120 B2-4T Instructions Here you can see the cooling air ducting into the giant Pitts cowling. The baffles consisting of 4 mm balsa, glued in with thick cyano. Then I coated them with a layer of dope. Afterwards I painted them grey with a two component paint. -
Page 18: Fuel Tank Connections
Instructions Valach VM 120 B2-4T Fuel tank connections Make two air vents made with fuel tubing, fitted to two single sided nipples in the tanks topside, central at the rear end. These two air vent lines must be led forward over the tank and then down into the fuselage floor at the cooling air outlet of the engine cowling. -
Page 19: Fuel Tubing
Valach VM 120 B2-4T Instructions Fuel tubing Do not use transparent PVC-fuel tubing! This clear fuel tubing often fits neatly onto the nipples and seals nicely for a short while, but after a fairly short period, this clear tubing becomes hard and expands a little in the process, due to the action of the petrol. This tub- ing then moves due to engine vibration, allowing air to enter the fuel line. - Page 20 Instructions Valach VM 120 B2-4T The microprocessor Ignition is protected with a tough case and the electronics inside are encapsulated to protect against vibration. In spite of this it is not a good idea to simply mount the ignition box onto the firewall with a couple of cable ties. I screw the ignition on a sheet of plywood.
-
Page 21: Carburetor Linkage
Valach VM 120 B2-4T Instructions Carburetor linkage To link the throttle valve, I drilled a 2mm hole into the existing arm and attached a M2 ball joint. The pushrods are made from 3 mm carbon rods. The ball joints are bored out to 3mm and glued on with Araldite 2011. - Page 22 Instructions Valach VM 120 B2-4T ©2015 Toni Clark practical scale GmbH Zeiss-Str.10 D-32312 Lübbecke Tel. 0049 5741/5035 Fax. 05741/40338 www.toni-clark.com...
- Page 23 Valach VM 120 B2-4T Instructions...
- Page 24 Instructions Valach VM 120 B2-4T Toni Clark practical scale GmbH Zeiss-Str.10 D-32312 Lübbecke E-Mail: reinsch@toni-clark.com Tel. 0049 (0) 5741/5035 Fax. 0049 (0) 5741/40338 www.toni-clark.com...
Need help?
Do you have a question about the VM 120 B2-4T and is the answer not in the manual?
Questions and answers