Table of Contents
Advertisement
Advertisement
Table of Contents

Summary of Contents for Acom M47
- Page 1 User’s Guide www.acom.com...
-
Page 2: Table Of Contents
Configuration\ Supplies Life Menu ....... . . 44 M47 User’s Guide - Page 2... - Page 3 Poster Printing............76 M47 User’s Guide - Page 3...
- Page 4 PCL Emulation Symbol Sets ........135 M47 User’s Guide - Page 4...
-
Page 5: Copyright Information
Copyright Information Copyright © 2011 by ACOM Solutions Inc.. All Rights Reserved Document Information M47 User’s Guide Disclaimer Every effort has been made to ensure that the information in this document is complete, accurate, and up-to-date. The manufacturer assumes no responsibility for the results of errors beyond its control. - Page 6 ACOM is not responsible for such data loss and any consequence caused by such data loss.
- Page 7 • Indicates additional information on operations or features. CautIoN • Indicates instructions which you should follow to avoid damage to the printer. WaRNING • Indicates instructions which you should follow to avoid possible injury. M47 User’s Guide - Page 7...
-
Page 8: Illegal Copies And Printouts
■ Copyright material or trademarks without the consent of the owner ■ Postage stamps and other negotiable instruments This list is not inclusive and no liability is assumed for either its completeness or accuracy. In case of doubt, contact your legal counsel. M47 User’s Guide - Page 8... -
Page 9: Basic Operations
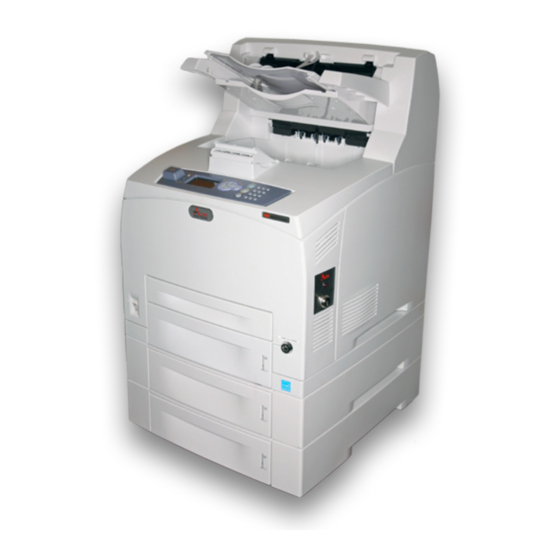
Ventilation hole (do not block) Tray 1, 150 sheets Tray 2, 550 sheets Paper meter (amount of paper left in Tray 2) Power switch Paper stopper for letter or A4 paper Host USB Port M47 User’s Guide - Page 9... -
Page 10: Rear View
Rear View Power cord connector Parallel connector Network connector USB connector Serial connector Duplex unit connector Ventilation holes M47 User’s Guide - Page 10... -
Page 11: Internal View
Transfers the toner image on the surface of the cartridge photosensitive drum to the paper. Fuser unit Fixes the toner on the paper. Do not touch this when using the printer as it is hot. M47 User’s Guide - Page 11... -
Page 12: Control Panel Buttons
<Cancel> Print mode: press to cancel printing. Menu mode: press to exit Menu Mode. <Help> Press for more information regarding error messages on line 5 of the display. Keypad, for making alphanumeric entries. M47 User’s Guide - Page 12... -
Page 13: Control Panel Display/Lights
■ Driver (PCL, PS or XL) ■ Toner Status bar. Menu Mode For configuring settings related to the printer. This screen appears when you press the <Enter> button. For more information on the menu mode, see page M47 User’s Guide - Page 13... -
Page 14: Power Save Mode
At the Computer Double-click the printer icon at the bottom right of the taskbar in Windows. In the window which appears, click the document name that you wish to delete, and press <Delete> on your keyboard. M47 User’s Guide - Page 14... -
Page 15: Print Media
Paper Exit Paths Before sending a job to the printer, make sure you have the correct exit path engaged. Top Exit Path The default path is the top exit bin (1). Printed pages exit face down. M47 User’s Guide - Page 15... -
Page 16: The Rear Exit Path
Printed documents exit face up. To use the rear exit, be sure the exit lever (1) is pushed up and the extension tray (2) is pulled out. See page 24 for more information. M47 User’s Guide - Page 16... -
Page 17: Loading Standard Paper
20 lb. US Bond (75 g/m , or 80 g/m Plain Xerox 4200 20 lb. US Bond (75 g/m Plain Pull the tray out and place it on a flat surface. If installed, remove the lid. M47 User’s Guide - Page 17... - Page 18 If the base plate of the paper tray is raised, push it down. When loading paper longer than A4 size, slide the left and right lock tabs in the paper tray outwards to unlock them. M47 User’s Guide - Page 18...
- Page 19 Hold the grip of the paper tray and pull its extendable part to the front until it reaches its maximum. Squeeze the length guide and slide it to the desired paper size (1). Squeeze the right width guide and slide it to the desired paper size (2). M47 User’s Guide - Page 19...
- Page 20 • Do not load paper exceeding the maximum fill line or the maximum capacity allowed. Firmly close the lid of the paper tray and push the tray completely into the printer. Important! • If the lid is not firmly closed, the paper can become misaligned. M47 User’s Guide - Page 20...
-
Page 21: Usable Media
Important! • To avoid paper jams, select the correct paper size, type, and tray. • The printed image may fade due to moisture such as water, rain or vapor. For details, contact service. M47 User’s Guide - Page 21... -
Page 22: Custom Sizes
-Minimum: 3.9 x 5.8 inches (98 x 148 mm) -Maximum: 8.5 x 14 inches (216 x 356 mm). ■ Minimum for duplexing or output to Offset Catch Tray: 3.5 x 5.5 inches (89 x 140 mm). M47 User’s Guide - Page 22... -
Page 23: Configuring Custom Sizes
Note • To return to standard paper size settings, select [Auto]. The printer will automatically detect the size and orientation of the loaded paper. M47 User’s Guide - Page 23... -
Page 24: Special Media Types
** If you do not get satisfactory results using Thick1 or Thick2, try using Thick3 for better results. Note • The fuser temperature progression (lowest to highest) is: Transparency > Thin > Thick3 > Normal > Thick1 > Thick2 M47 User’s Guide - Page 24... -
Page 25: Transparencies
Transparency Size Xerox 3R2780 Letter Xerox 3R98202 3M CG3300 Letter Note • Transparencies with white frames and full-color transparencies cannot be used. Loading Transparencies Make sure the rear exit (1) is open and selected. M47 User’s Guide - Page 25... - Page 26 Remove the tray from the printer. If installed, remove the lid. M47 User’s Guide - Page 26...
- Page 27 Remove all paper from a tray before loading transparencies. Fan the stack of new transparencies before putting them in the tray. M47 User’s Guide - Page 27...
- Page 28 Adjust the paper guides to fit the transparencies. Insert the transparencies into the tray. M47 User’s Guide - Page 28...
-
Page 29: Envelopes
20 sheets, and then fan them to lower their temperature. Envelopes Envelopes that are supported by this printer. Paper name Size Paper type Columbia 3B1183 COM10 Envelope Monroe 3B1039 Monarch Envelope River Series 3B1041 Envelope River Series 3B1042 Envelope M47 User’s Guide - Page 29... -
Page 30: Loading Envelopes
Usable standard sizes: ■ COM10 ■ COM9 ■ C5 ■ Monarch ■ DL All other envelope sizes must be defined as custom size. Loading envelopes Make sure the rear exit (1) is open and selected. M47 User’s Guide - Page 30... - Page 31 Remove the tray from the printer. If installed, remove the lid. Remove all paper from a tray. Adjust the guides to fit the envelopes and place the envelopes face up in the center of the tray as shown. M47 User’s Guide - Page 31...
- Page 32 Media Type and correct Media Size for the tray to be used. In the printer driver or the computer application program, select Envelope as the paper type you wish to use, and select the size and orientation of the image to be printed. M47 User’s Guide - Page 32...
-
Page 33: Labels
• Use labels that were designed for use in laser printers. The heat from the fuser can melt some adhesives and possibly damage your printer. Make sure the rear exit (1) is open and selected. M47 User’s Guide - Page 33... - Page 34 Remove the tray from the printer. If installed, remove the lid. Remove all paper from the tray before loading labels. If needed, adjust the guides to fit the label sheets. M47 User’s Guide - Page 34...
- Page 35 Insert the label sheets in the tray. M47 User’s Guide - Page 35...
- Page 36 Reinstall the lid and insert the tray firmly into the printer. Use the Operator Panel Menu to select the Label Media Type and size for the tray in use. Then use your computer’s application software to print the labels. M47 User’s Guide - Page 36...
-
Page 37: Unusable Media
■ Paper with rough surfaces such as pulp paper or fibrous paper ■ If acid paper is used, the characters might appear fuzzy. Replace it with alkaline paper. ■ Labels that do not fully cover the adhesive backing M47 User’s Guide - Page 37... -
Page 38: Automatic Tray Selection
• If you prefer, you can configure the printer to automatically select a tray with media of the nearest or larger size instead. To do this, enable Auto Resize in the printer menu under Admin Setup > Print Menu. M47 User’s Guide - Page 38... -
Page 39: Advanced Media Control
This allows you to switch between paper sizes easily without configuring custom paper sizes at the printer. It is up you to load the correct media in the designated tray. M47 User’s Guide - Page 39... -
Page 40: Storing And Handling Media
■ After opening a ream of paper, use the original cover sheets to wrap up the paper not used. To Prevent Paper Curling when Printing it is important to follow the manufactures orientation instruction to “Print this side first ” Example: M47 User’s Guide - Page 40... -
Page 41: Menu Mode
Press <Enter> to go into the menu mode. Press the Down Arrow button until Information Menu is highlighted. Press <Enter>. Press the Down Arrow button until Print Menu Map is highlighted. Press <Enter> twice. The Menu Map prints. Basic Menu Structure M47 User’s Guide - Page 41... -
Page 42: Explanation Of Menu Items
Print Jobs Menu Configuration • Page Counts • Supplies Life • Network • System Information Menus Menus • Tray Configuration • Sys Config Menu Admin Setup • Network Menu • Print Menu • PCL Emulation • FX Emulation • Parallel Menu • Serial Menu • USB Menu • Date/Time Menu • Flash Menu • Disk Menu • Compact Flash Menu • Spooling Menu • Job Accounting • Change Password • Maintenance Menu Explanation of Menu Items M47 User’s Guide - Page 42... -
Page 43: Usb Drive Menu
To print a PDF file form a USB flash drive, see page 61. Print Jobs Menu This menu is used to access print jobs stored in the printer. For information on printing stored jobs, see page 63. M47 User’s Guide - Page 43... -
Page 44: Configuration\ Page Counts Menu
Toner 0% to 100% (percentage of toner remaining.) Configuration\ Network Menu For setting printer network parameters. ■ Printer Name ■ IP Address ■ Subnet Mask ■ Gateway Address ■ Network Address ■ Network Version M47 User’s Guide - Page 44... -
Page 45: Configuration\ System Menu
Network Summary Prints a report of the current Network settings. Print PCL Fonts Prints the PCL font list. Print PS Fonts Prints the Postscript font list. Print FX Fonts Prints the FX80 font list. M47 User’s Guide - Page 45... -
Page 46: Menus\ Tray Configuration Menu
Tray2 Paper size Letter, B5, A5, A6, Statement, Executive, C5 Envelope DL Envelope, Com10 Envelope, Monarch Envelope, Com9 Envelope, Oficio, Legal13, Legal14, A4, Custom Note: Tray2 Auto-Sense must be off to use this feature. M47 User’s Guide - Page 46... - Page 47 Note: Tray3 Paper Size must set to Custom to use this feature. 5.83 - 11�00 - 14.00 inches (148 - 356 mm) Tray3 Y Dimen Note: Tray3 Paper Size must set to Custom to use this feature Tray4 Auto-sense M47 User’s Guide - Page 47...
- Page 48 Note: Tray4 Paper Size must set to Custom to use this feature Tray4 Y Dimen 5.83 - 11.00 - 14.00 inches (148 - 356 mm) Note: Tray4 Paper Size must set to Custom to use this feature M47 User’s Guide - Page 48...
-
Page 49: Menus\ Sys Config Menu
0 to 15, Default is 8 Tray4 Y Adjust 0 to 15, Default is 8 Duplex X Adjust 0 to 15, Default is 8 Duplex Y Adjust 0 to 15, Default is 8 Hex Dump Enable, Disable M47 User’s Guide - Page 49... -
Page 50: Admin Menus
3 times in rapid succession. To enter a “2”, press the numeric <2> button 4 times in rapid succession. To go back a digit, press <Back>. When all desired characters have been entered, press <Enter>. M47 User’s Guide - Page 50... -
Page 51: Admin\ Network Menu
Hub Link Setting 100 Base-T Full, 100 Base-T Half, 1000 Base-T Full, 1000 Base-T Half ASCII, RAW PS Protocol HTTP Port 1 - 9999, Default is 80 Netware Frame Auto-Sense, 802.3, Ethernet II, 802.2 SNAP, 802.2 M47 User’s Guide - Page 51... -
Page 52: Admin\ Print Menu
600 dpi, 1200 dpi Toner Save Mode ON, OFF Orientation Portrait, Landscape Lines Per Page 5 to 128, Default is 60 Separator Page Off, Tray 1, Tray 2, Tray 3, Tray 4 White Page Skip Enable, Disable M47 User’s Guide - Page 52... -
Page 53: Admin\ Pcl Emulation Menu
PCL Tray2 ID# 0000 to 9999, Default is 0004 PCL Tray3 ID# 0000 to 9999, Default is 0005 PCL Tray4 ID# 0000 to 9999, Default is 0006 PCL Auto ID# 0000 to 9999, Default is 0007 M47 User’s Guide - Page 53... -
Page 54: Admin\ Fx Emulation Menu
0 inch, 0.1 inch, 0.2 inch ...1.0 inch Fit To Letter Disable, Enable Same, Diff Text Height Admin\ Parallel Menu Default settings are in bold face type. Submenus Available Settings Parallel Enable, Disable Enable, Disable Bi-Direction PS Protocol ASCII, RAW M47 User’s Guide - Page 54... -
Page 55: Admin\ Serial Menu
Off, On Off, On RTS Error Off, On XON Ready/Busy XON On/Off Off, On XON Error Off, On DTR Polarity High, Low High, Low RTS Polarity Off, On Robust XON PS Protocol ASCII, RAW M47 User’s Guide - Page 55... -
Page 56: Admin\ Usb Menu
Midnight, 1 AM to 11 AM, Noon, 1 PM to 11 PM, Default is current hour Minute 0 - 59, Default is current minute 0 - 59 Second GMT Offset/Hours -12 through + 12, Default is 0 0, 30 GMT Offset/Mins Daylight Savings On, Off M47 User’s Guide - Page 56... -
Page 57: Admin\ User Flash Menu
Reformats the User Flash. Flash Summary Prints a page containing information about the installed User Flash. Important! • All files on the User Flash will be deleted if the Format User Flash function is selected. M47 User’s Guide - Page 57... -
Page 58: Admin\ Disk Menu
This selection will reformat the hard disk. Disk Summary Prints a page containing information about the installed hard disk. Important! • All files on the hard disk will be deleted if the Format Disk function is selected. M47 User’s Guide - Page 58... -
Page 59: Admin\ Compact Flash Menu
Default settings are in bold face type. SubMenu Available Settings Spool and Print, Spool Only, Off Start Spooling Stop Spooling Yes, No Playback USB, Parallel, Serial, Network Delete User Flash, Disk, Compact Flash Destination User Flash, Disk, Compact Flash M47 User’s Guide - Page 59... -
Page 60: Admin\ Job Accounting Menu
Restores the saved Menu setting Panel Security Enable, Disable If enabled, all configuration changes require the password. Enable, Disable USB Drive If enabled, gives the printer the ability to read and print files from a connected USB drive. M47 User’s Guide - Page 60... -
Page 61: Print Features
Put the PDF to be printed on any USB flash drive in either the root directory or a subdirectory. Press <On Line> to make sure the printer is not in “Power Save” mode. Plug the flash drive into the Host USB connector on the operator panel. M47 User’s Guide - Page 61... - Page 62 When ready, press <ENTER> to process the file for printing. After printing is complete, the printer will return to the [Ready to Print] state and you may remove the USB flash drive. M47 User’s Guide - Page 62...
-
Page 63: Printing A Job Stored In Memory
Used to store a document in the printer for printing at a later time which you specify. See the Help screens in the printer driver for information on using it to store documents in the printer. M47 User’s Guide - Page 63... -
Page 64: Storing A Job In The Printer
Stored jobs associated with the PIN value appear on the display. Note • If there are no stored jobs associated with the PIN value entered, the display will read “Select Jobs PIN has no jobs”. M47 User’s Guide - Page 64... -
Page 65: Deleting A Stored Document
Use the up and down arrow keys to highlight the job you wish to delete. Press <Cancel>. The display changes to: Delete the Job, Enter and Cancel. Press <Enter> delete the job, or press <Cancel> to abort the delete. M47 User’s Guide - Page 65... -
Page 66: Printing On Banners
Banners up to 35.4 inches (900 mm) long by up to 8.5 inches (216 mm) wide can be printed from Tray 1. Loading Banner Paper Pull out Tray 1 and place it on a flat surface. If installed, remove the lid. M47 User’s Guide - Page 66... - Page 67 If the base plate of the paper tray is raised, push it down. Slide the left and right lock tabs in the paper tray outwards to unlock them. M47 User’s Guide - Page 67...
- Page 68 Hold the grip of the paper tray and pull its extendable part to the front until it reaches its maximum. Squeeze the right width guide (1) and slide it to the banner width. M47 User’s Guide - Page 68...
-
Page 69: Direct Printing Of Pdf Files
To print PDF files directly, you can send the PDF using any method of file transmission such as DOS Copy or using a utility to send it directly to Port 9100 on a TCP connected printer. You can also use the ACOM PC based utility for printing PDF files directly to the printer. -
Page 70: Printing Via Electronic Mail / E-Mail Printing
To use the E-mail Printing feature, you need to configure server settings (such as SMTP and POP3 servers) on your network environment. Note • Wrong e-mail environment settings may cause disruptions in your network. Always ask your network administrator to configure e-mail environment settings. M47 User’s Guide - Page 70... -
Page 71: Attachments That Can Be Sent
• If the extension of the attached file is not “tif” or “pdf”, it may not print correctly. • A maximum 31 documents can be attached. Enter the printer’s e-mail address in the address column. Send the e-mail. The printer will print the e-mail automatically after receiving M47 User’s Guide - Page 71... -
Page 72: Points To Note When Sending E-Mails
■ There are also providers that allow reception of e-mails via SMTP. Detailed adjustments with the provider are required in such cases. ■ When setting up the e-mail configuration in an environment where MTA support is set up in private segments, match the operating configuration. M47 User’s Guide - Page 72... -
Page 73: Barcode Printing
■ Interleaved 2 of 5 ■ UPC/EAN ■ Postnet Supported Software-Generated Bar Codes ■ UPC/EAN ■ Code 128 ■ EAN/UCC 128 ■ PostNet ■ Interleaved 2 of 5 ■ Code 39 ■ Codabar ■ Code93. M47 User’s Guide - Page 73... -
Page 74: Driver-Set Print Features
Without collating selected, the unit will print the total number of copies of each page before proceeding to the next page. M47 User’s Guide - Page 74... -
Page 75: 2-Sided Printing/Duplex
Fit to Page This allows you to scale the document to fit the paper size being used. Note • This setting is unavailable if you have chosen a document style of N-Up or Pamphlet. M47 User’s Guide - Page 75... -
Page 76: N-Up Printing (Multiple Pages To A Single Sheet)
The pages can then be placed together, edge- toedge, to create a large version of the printed page. M47 User’s Guide - Page 76... -
Page 77: Job Offset
■ Resolution: Select 600 dpi for normal printing or 1200 dpi for high quality mode. ■ Toner Save: This prints everything with less print density. Font Substitution This feature allows you to substitute TrueType fonts with printer fonts. You can also set the TrueType font output type. M47 User’s Guide - Page 77... -
Page 78: Watermark
You can view these by clicking on their name in the Watermark Pane of the Watermark Window. You can edit their settings or the settings of any configured watermark by clicking the Edit button. M47 User’s Guide - Page 78... -
Page 79: Troubleshooting
Doing so can cause injuries or burns. Turn off the printer immediately, and contact your dealer for service. Top Cover Back Cover (Optional) Duplex Unit Cover (Optional) Offset Catch Tray Cover M47 User’s Guide - Page 79... -
Page 80: Paper Jams Inside Cover A
Paper Jams Inside Cover A If the optional offset catch tray is installed, lift it out of the way. M47 User’s Guide - Page 80... - Page 81 Open Cover A. Holding the drum/toner cartridge by the grip, remove it from the printer (1). M47 User’s Guide - Page 81...
- Page 82 Turn the roll (2) and remove any jammed paper inside. Put the drum/toner cartridge back in the printer. M47 User’s Guide - Page 82...
- Page 83 If installed, lower the offset catch tray to its original position. CautIoN • If you continue to print with the offset catch tray folded, this may cause a paper jam. Always use the printer with the tray open. M47 User’s Guide - Page 83...
-
Page 84: Removing Jams Inside The Paper Tray(S)
Removing Jams Inside the Paper Tray(s) Pull out all paper trays and remove any wrinkled paper. M47 User’s Guide - Page 84... - Page 85 Examine the inside of the printer and remove any jammed pieces of paper. Push the paper tray(s) completely back into the printer. M47 User’s Guide - Page 85...
- Page 86 Open and close cover A. Doing this will clear the error message. M47 User’s Guide - Page 86...
-
Page 87: Paper Jams Inside Cover B
Paper Jams Inside Cover B Remove the rear tray. WaRNING • The fuser unit is hot. You may get burned if you touch it directly. M47 User’s Guide - Page 87... - Page 88 Raise the lever as shown in the diagram and open the cover B (1). Then open the cover of the fuser unit (2),indicated by a small green label with a black star, and remove any jammed paper. Close the fuser unit and Cover B. Replace the rear tray. M47 User’s Guide - Page 88...
-
Page 89: Paper Jams Inside Cover C: Duplex Unit
Paper Jams Inside Cover C: Duplex Unit Remove the rear tray. M47 User’s Guide - Page 89... - Page 90 Push up the lever shown in the diagram to open the cover. Then remove the jammed paper. Close the cover and replace the rear tray. M47 User’s Guide - Page 90...
-
Page 91: Paper Jams Inside Cover D: Offset Catch Tray
Paper Jams Inside Cover D: Offset Catch Tray Open the Offset Catch Tray cover and pull out the jammed paper. Close the cover. M47 User’s Guide - Page 91... -
Page 92: When Problems Occur
Then, turn on the printer. The power cord is Connect the printer to a power connected to a power outlet with a suitable voltage and outlet with incorrect current rating. See the label on the voltage. printer. M47 User’s Guide - Page 92... - Page 93 READY light is disconnected. not on. Is the interface Check the port status of the interface. configured? The computer Check the computer environment, environment is not such as the printer driver. correctly set up. M47 User’s Guide - Page 93...
- Page 94 TrueType font settings printing for [Font Substitution] is displayed on the to printer fonts? on the [Setup] tab of the printer screen. driver. See the Online Help for the printer driver M47 User’s Guide - Page 94...
- Page 95 Are the paper tray Set the length guide and the right of printed guides set in the width guide in the correct positions. document is correct positions? missing. See page 19. Text is reduced. M47 User’s Guide - Page 95...
- Page 96 Paper is fed in Remove the paper in the feed tray, fan more than 1 sheet it, then load it again. Replenish paper at a time. only when all the sheets in the tray are used up. M47 User’s Guide - Page 96...
- Page 97 Are there foreign Turn off the power and remove any objects inside the foreign objects inside the printer. printer? If the object cannot be removed unless the printer is disassembled, contact service. M47 User’s Guide - Page 97...
-
Page 98: When The Print Quality Is Poor
The paper feed rout contains excess toner. Print a few at equal pages to remove the excess toner. intervals. The drum/toner cartridge is defective or damaged. Replace with a new drum/toner cartridge. See page 115. M47 User’s Guide - Page 98... - Page 99 This may be due to breakdown of high voltage power. text. Contact service. The paper is damp. Replace with paper from a new ream. The paper used is not suitable. Load the correct type of paper. See pages 21 and 37. M47 User’s Guide - Page 99...
- Page 100 Load the correct type. printed clearly. See pages 25 and 29. Check that the paper type on the printer driver or the control panel is correctly set. M47 User’s Guide - Page 100...
-
Page 101: Error Messages (Alphabetical Order)
Recovery message displayed when top cover is open. Code FLASH Error Defective Code Flash - user forced into Firmware Upgrade. Command Format Bad command format. Completed Display for the files status. Cover Open Recovery action displayed when cover is open M47 User’s Guide - Page 101... - Page 102 Recovery action displayed when tray needs to be inserted Install/Reset Recovery message displayed for ROS failure. Call for service. Load Paper Un-specific “Load Paper” prompt. Load Paper Tray 1 A user prompt that paper needs to be put into Tray 1. M47 User’s Guide - Page 102...
- Page 103 Paper Low Tray 4 Tray 4 is low on paper. Paper Out Tray 1 Tray 1 has no paper Paper Out Tray 2 Tray 2 has no paper Paper Out Tray 3 Tray 3 has no paper M47 User’s Guide - Page 103...
- Page 104 The file format used on the installed USB Flash Not Supported Drive is not supported. User FLASH String used to describe FLASH used for USER storage. Waiting Printer has completed processing data, but has not detected end-of-job. M47 User’s Guide - Page 104...
- Page 105 Message Condition/Reason/Action Warming Up Displayed when printer is “Warming Up”. Write Status display for file status “Write xx” (where xx is percentage received). M47 User’s Guide - Page 105...
-
Page 106: Network Related Problems
Print instructions from “Unable to print None (Printing will be multiple computers are (NetworkError)” is resumed automatically). sent to the printer at the displayed. same time. M47 User’s Guide - Page 106... - Page 107 [Documents] disk (example: C drive) menu of the [Printers] with Windows< Select window to enable [Properties] from the printing to restart. menu displayed and then check available free space. M47 User’s Guide - Page 107...
-
Page 108: For Windows Nt 4. 0/Windows 2000/Windows Xp
The transport protocol is Check the selected Select the same different from that of the transport protocol. transport protocol as computer. that of the computer. M47 User’s Guide - Page 108... -
Page 109: Using Printer Web Page
The new settings were not Is the entered value correct? If an invalid value reflected by clicking the is entered, it will be automatically changed to a [Submit] button. value within the range. M47 User’s Guide - Page 109... - Page 110 Are the user name and password correct? prompts messages such as “no data” or “the server Enter the correct user name and password. has returned invalid or unrecognizable response”. Turn the printer off, then on. g M47 User’s Guide - Page 110...
-
Page 111: E-Mail Related Problems
■ Are the POP user name and password specified correctly? ■ Are the items to be notified set correctly? ■ Are the destination e-mail addresses entered correctly? Are the SMTP server and POP server working correctly? Check with your network administrator. M47 User’s Guide - Page 111... -
Page 112: Routine Maintenance
• If you continue to print with a worn-out drum/toner cartridge, it may affect the functions of this printer, such as the print quality. • You can set whether to stop printing when the drum/toner cartridge is due for replacement. M47 User’s Guide - Page 112... -
Page 113: Replacing The Drum/Toner Cartridge
• It is recommended to use the drum/toner cartridge within 1 year after opening it. Replacing the Drum/Toner Cartridge If the optional offset catch tray is installed, lift it out of the way. Turn the printer off. M47 User’s Guide - Page 113... - Page 114 Remove any output paper and open cover A. CautIoNs! • Do not touch any parts inside the printer. Hold the drum/toner cartridge by the grip and pull it out slowly. Discard it in accordance with local regulations. M47 User’s Guide - Page 114...
- Page 115 • If the toner is not evenly spread out, the print quality may be reduced. Also, there may be operating noise or the interior of the cartridge may be damaged during operation. • Do not touch the surface of the photosensitive drum. M47 User’s Guide - Page 115...
- Page 116 • Pull out the seal horizontally. The tape might break if it is pulled out diagonally. • After the seal has been pulled out, do not shake or bump the drum/toner cartridge. Hold the drum/toner cartridge by the grip and insert it into the slot inside the printer. M47 User’s Guide - Page 116...
- Page 117 If installed, lower the offset catch tray to its original position. CautIoN • If you continue to print with the offset catch tray up, this may cause a paper jam. Always use the printer with the tray down. 10. Turn the printer back on. M47 User’s Guide - Page 117...
-
Page 118: Printing Reports/Lists
■ Print PCL Fonts ■ Print PS Fonts ■ Print FX Fonts With the report highlighted, press <Enter>. Execute appears. Press <Enter> to print the report. The printer returns to the Ready to Print state. M47 User’s Guide - Page 118... -
Page 119: Checking The Printer Status Via E-Mail
Recoverable error Service call required Settings for Mail Notice Service To use the Mail Notice Service, settings on the network and e-mail environment are required. Check with your network administrator whether these settings are completed. M47 User’s Guide - Page 119... -
Page 120: Setting The E-Mail Environment (At This Printer)
Receiving Protocol, For details, refer to Settings POP3 Server Address, “Environment Settings POP3 Server Check for E-mail Printing” on Interval, POP User page 70. Name, POP User Password, SMTP Sending Authentication, SMTP Server Address M47 User’s Guide - Page 120... -
Page 121: Cleaning The Printer's Exterior
• Do not spray the detergent directly on the printer. The liquid detergent may enter the printer through a gap and cause problems. • Never use cleaning agents other than water or neutral detergent. M47 User’s Guide - Page 121... - Page 122 Wipe the parts with a wet but well-wrung soft cloth, then wipe it dry with another soft cloth. For stubborn stains, moisten a soft cloth with a small amount of neural detergent, and gently wipe the stain off. M47 User’s Guide - Page 122...
-
Page 123: Cleaning The Printer's Interior
If you start to encounter difficulties with paper feed, you should clean the feed rollers. Generally, this should be done about every 100,000 impressions, but may need to be done more often if you are using paper which gives off a lot of paper dust. M47 User’s Guide - Page 123... -
Page 124: Procedure For Removing And Cleaning The Feed Rollers
(2) and then slowly remove the feed roll from the shaft (3). Wipe the rubber parts with a wet but well-wrung soft cloth. Hold the roller with the short tab (1) to the right and slowly push it back onto the shaft. M47 User’s Guide - Page 124... -
Page 125: First, Clean The Rollers Inside Of Printer
First, Clean the Rollers Inside of Printer If the optional offset catch tray is installed, lift it out of the way. Turn the printer off. M47 User’s Guide - Page 125... - Page 126 Open Cover A. Hold the drum/toner cartridge by the grip and remove it. Set it on a piece of paper to keep it from dirtying the tabletop . M47 User’s Guide - Page 126...
- Page 127 Locate and clean the feed rollers (see cleaning procedure on page 126 ). Hold the drum/toner cartridge by the grip and insert it into the printer . M47 User’s Guide - Page 127...
-
Page 128: Next, Clean The Tray Rollers
Close cover A securely. If installed, lower the offset catch tray to its original position. Next, Clean the Tray Rollers Pull the paper trays out of the printer. M47 User’s Guide - Page 128... - Page 129 If you have optional paper trays installed, leave the trays outside the printer and proceed to the next section. If you do NOT have any optional paper trays installed, push the paper trays back into the printer and turn the printer back on. M47 User’s Guide - Page 129...
-
Page 130: If You Have Optional Tray(S) Installed, Clean
(at the back) for cleaning. Illustration 1 below is a view of the optional tray module removed from the printer to illustrate the location of the feed rollers. Follow the procedure on page 126 to remove and clean the feed roller for each optional tray installed. M47 User’s Guide - Page 130... - Page 131 Push the paper trays back into the printer and turn the printer back on. M47 User’s Guide - Page 131...
-
Page 132: When Moving The Printer
• If these are not fixed securely to the printer, they may fall to the ground and cause injuries. Press the power switch of this printer to the <O> position to switch the power off. M47 User’s Guide - Page 132... - Page 133 • Keep the paper wrapped and away from humidity and dirt. Push the paper tray completely into the printer. Open cover A. Important! • Do not touch parts inside the printer. Hold the drum/toner cartridge by the grip and pull it out slowly. M47 User’s Guide - Page 133...
- Page 134 Close cover A securely. Lift the printer and move it gently. Note • If the printer is to be moved over a long distance, pack it inside a box. M47 User’s Guide - Page 134...
-
Page 135: Pcl Emulation Symbol Sets
1F:ISO69 French 6N:ISO L6 2019Z:WIN3.1 HEB 9U:WIN3.0 Latin1 15Y:HP ZIP 2U:ISO2 IRV 9R:WIN3.1 CYR 3S:ISO10 S/F 3R:PC-866 0K:ISO14 JASCII 2042Z:WIN3.1GRK 4S:ISO16 PORTUG 2041Z:PC-869 0F:ISO25 FRENCH 2031Z:PC-855 2K:ISO57 CHINESE 579L:WINGDINGS 1D:ISO61 NOR.V2 19M:SYMBOL 5S:ISO84 PORTUG M47 User’s Guide - Page 135... - Page 136 2850 East 29 Street Long Beach, CA 90806 (800) 347-3638 (562) 424-7899 www.acom.com...
Need help?
Do you have a question about the M47 and is the answer not in the manual?
Questions and answers