
Related Manuals for TViX M-7000A


Summary of Contents for TViX M-7000A
-
Page 1: User Manual
User Manual TViX HD M-7000A All specifications and information are subject to changes without further notices. -
Page 2: Safety Notice
Ensure that a free airflow is maintained around the appliance. Do not set the TViX up in places that are exposed to oil, water, dust, humidity or rain and wind. Place all magnetized devices. Such as speakers away from the TViX Kit .It may erase or cause damage to the data... -
Page 3: Usage Precautions
(In this state, there is no video/audio output displayed on the TV Screen a USB ON icon will be displayed on the center of the TV screen and on the VFD. it will be display as USB ON). For normal TViX play mode, disconnect the USB cable connected between computer and TViX When detaching the HDD, Power off the TViX Kit. -
Page 4: Table Of Contents
TViX HD Setup Menu ................16 Audio/Video Setting ......................16 MISC Setting ........................18 Network Setting ........................19 Easy Usage of TViX HD ................20 Making an HDD Folder ......................20 Play Video Files ........................21 Play Audio Files ........................22 Play Image Files ........................ -
Page 5: Introduction
The TViX HD can be networked with a PC system using its built-in LAN port. You are able to navigate to a PC file through TViX HD’s wired or wireless network and play the file from its original destination without having to copy it into the TViX first. We’re supporting the file copy via LAN. -
Page 6: Audio Player
Audio and picture images). External Storage If you connect to a USB 1.1 port, the TViX HD will work at USB 1.1 speed, so we strongly recommend that you use USB 2.0. It can be used as an external device by connecting it to the System, to save video, audio, image files, data, program backups etc. -
Page 7: Specifications
Specifications Main Sigma Design SMP8635 Chipset 7 Alpha-Numeric Character Display 5 Digit Numeric Display Format :.wmv, .avi, .mpg, .vob, .mp4, .asf, .tp, .trp , .IFO, .ISO, .m2t,.m2ts ,.mov(H.264) Codec : MPEG 1 / 2 / 4, AVI, XVID, WMV9(MP@HL), H.264/ AVC(HD) , VC-1(MP@HL, Video AP@L3), MKV Resolutions up to 1920*1080P... -
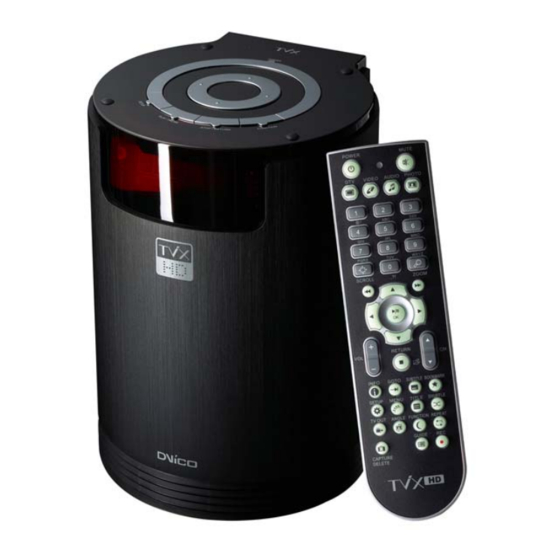
Page 8: Name Of Each Part
2 Name of Each Part Unit Control Basic functions can be done without the remote control. POWER button Function button STOP button HDD COVER PLAY button SETUP button Front VFD Information will be displayed on the VFD. Video out mode Play mode and information VFD displays current Folder/Filename while navigation. -
Page 9: Cable Connection
Cable Connection You can connect the TViX kit to a TV display or audio Amplifier using the A/V cable. There is detail instruction for tuner box on the quick guide of optional tuner box package. Package Contents TViX HD M-7000A... -
Page 10: Installation And Connection
Connect the TViX kit along with the HD and your TV. Composite (yellow) video cable. By using the HDMI cables. Turn on the TViX kit and the TV. On the SET UP TViX plays back high definition video (up to Menu. Select Video input mode as composite on 1920x1080P) by using HDMI cables. - Page 11 After you connect the video cable to your TV, press the TV Out button repeatedly on your remote control until you get the initial TViX screen. * The component or S-Video cable is not included in the TViX and must be purchased separately.
-
Page 12: Audio Connection
Connect the audio cables from the left (white) and If you have a multi-channel decoder/amplifier with an right (red) of TViX to the appropriate terminal of your optical/coaxial input, you can enjoy 5.1 CH high TV or Hi - Fi system for sound output. -
Page 13: Hdd Installation/Exchange
HDD Installation/Exchange Warning: If you change the HDD of a TViX with another HDD, the warranty will be voided. Assembling the TViX HD is very easy. Just follow the instructions below: Use a Screwdriver and Tighten the Bolts by attaching the guide board to the Hard disk. - Page 14 Connect the power cable and the DATA cable. When inserting the HDD, take precautions to protect the DATA cable from being damaged. Connect the cable to cross direction Close the case by pushing the cover towards the direction of the arrow and then lock it. LOCK OPEN...
-
Page 15: Initial Setting
Initial Setting Connect the TViX Kit with HD to your TV using the Cable and then turn on the TViX HD. On the TV Display . Press OK button then user can see the TViX Logo as shown below. Then User can Select the preferred language from the Screen displayed as shown below... -
Page 16: Tvix Hd Setup Menu
* Digital : Select this when you connect the audio with an optical or coaxial cable for digital audio connection to the Decoder/Amplifier. There will be no analog audio out from the analog audio port of the TViX HD. * TV Standard : The default video setting of the TViX HD is COMPOSITE (NTSC/S-VIDEO or PAL C/S- VIDEO). - Page 17 * 16:9 can adjust any ratio of the multimedia file to the TV screen with the original image. * Video Port : If you fail to see the initial TViX HD screen after turning the unit and TV on, make sure you have chosen the right TV out option by repeatedly pressing the TV Out button on the remote control.
-
Page 18: Misc Setting
When the pause status or playback of audio(without slide show), Screen saver will work. * Remote Controller : You can select your remote type. We recommend the common setting. If there is collusion between other device and TViX remote, you’d better Choose A or B type referring to remote image displayed. -
Page 19: Network Setting
- SAMBA mode : You can play the file via network without any special software program, but the speed is lower than NFS mode. Particular folder need to be shared - NFS mode : You must install the TViX NetShare utility in to your PC, and you can play the TP or DVD jukebox without any stutter. -
Page 20: Easy Usage Of Tvix Hd
Making an HDD Folder As shown in the picture below, one end of the USB cable should be connected to the USB connector of the TViX and the other end to the computer. CAUTION! The USB cable has a different shape on both ends. -
Page 21: Play Video Files
Play Video Files When installation is successfully finished, you will see screen A. You can copy a video file into the VIDEO folder in advance. SETUP, VIDEO, AUDIO, PHOTO icons is shown. Select the Video menu by using the Left/Right arrow button. If you want to change the partition of the HDD, press the Jump/Repeat button. -
Page 22: Play Audio Files
Play Audio Files You can copy an audio file into the AUDIO folder in advance and play music files. If you cannot see screen A, press the MENU button on the remote control. Select the Audio menu on screen A and press the OK button. -
Page 23: Play Image Files
Play Image Files You may copy image files into the PHOTO folder in advance and play the image or photo files. You can press the PHOTO button on the remote control without selecting from the menu screen. Press the PHOTO button. You can see the image files that you just copied. -
Page 24: Using The Remote Control
TV Guide button Numeric Keys 1, 2, 3, 4 : used to change the partition (partition 1/ partition 2/ partition 3/ partition 4) in the TVIX Kit internal Hard disk Numeric Keys 6, 7, 8, 9: used to change the Partition (Local/Network/Usb1/Usb2) <... -
Page 25: Descriptions Of Each Buttons
When you press the VIDEO button on the remote control, only the VIDEO folder Contents available on the TViX HD will be displayed on the TV Screen. This only applies to the active partition if you have more than one partition. - Page 26 Brightness Saturation Hue. DELETE Button : is used to delete the file or folder from the TViX Local hard disk. If you configure the remote controller lock up option on the SETUP menu, You must press the password (“1111”) if you want to delete the file.
- Page 27 With Pause mode - Right button : Slow Motion playback. UP/Down Button : 15 seconds skip or 15 seconds backward * Press the VIDEO button and you can filter video files among those stored in the TViX HD. TIPS * Improved to save up to eight bookmarks on eight individual files. (It cannot save eight bookmarks on a single file.)
-
Page 28: Audio Playback
6.2.2 Audio Playback When you press the AUDIO button on the remote control, Only the contents available on the Audio folder of TVIX HD will be displayed. It applies only to the active partition(first partition) if you have more than one partition. - Page 29 - OGG also displays basic Tag information m4a extension is also supported. You can change the audio tracks on WMV files. Just press Audio key on the remote. When playing the DTS wav, adjust the TViX volume to 25 level.
-
Page 30: Image Playback
6.2.3 Image Playback When you press the PHOTO button on the remote control, only the contents available on the PHOTO folder of TVIX HD will be displayed. It applies only to the active partition(first partition) if you have more than one partition. - Page 31 Support browsing by icon mode Make a empty file named as "icon.tvix" on the folder that you want to browse by icon. The file name for the file used for the icon files is case sensitive, it must be the exact same name as the media file except the extension must be jpg or png(if you want to use transparency, set the transparency color as 0xC8C8C8.)
-
Page 32: Extra Features
If you select ‘Shuffle,’ files will play randomly. After setting the configuration, turn off the TViX Kit and then turn it on again. The TViX kit will play back the media file Contents automatically available in the Autorun folder of TVIX HDD. - Page 33 6.3.2 Using Wallpaper If you put a JEPG file named "TViX.jpg" under the folder, which you want to change the wallpaper, the wallpaper of the folder will be changed. You can select any wallpaper, you want by using the various JPEG files of resolution 1280*720 pixels only for different folders.
- Page 34 Be sure to select your connection speed and then what kind of music you're looking for over on the right hand side for optimal listening pleasure. Right click Content you want to play--> select Save Target As... And save the .pls file into TViX HD or share folder.
- Page 35 TViX supports File Copy functionality without Using PC. You can now copy Contents from external USB hard disk to the internal hard disk of TViX and also Copy the contents within the internal hard disk of TViX.. (Currently, move function is not supported) TViX internal HDD <...
- Page 36 - If you insert a wrong password, TViX automatically goes to the file-selecting page. - If you forget the password, please remove tvix.pss file after connecting the TViX Kit to your PC. - The password should consist of numbers only.
-
Page 37: Lan Connection
SAMBA mode : You can play the file via network without special Software program, but the speed is lower than NFS mode. ( Currently, do not Support in Vista ) NFS mode : You must install the TViX NetShare utility on to your PC, but you can play the TP or DVD jukebox without stutter. - Page 38 6.4.2 TViX NetShare Installation Most likely there will be an updated version of the files on our web site(www.tvix.co.kr/eng) You should download the latest TViX Netshare installer in advance. Run TViX Netshare installer and follow the on-screen prompts to install software.
- Page 39 Press YES button if you want to run the TViX Net Share automatically. By clicking the Finish button, the software installation is done. Press “Unblock” for the Windows Security Alert.
- Page 40 CAUTION If you press the stop sharing when the network is connected, you can see “TViX Sharing closed.” On the setting feature. You must again Press the “start sharing” on the tray window again for network Sharing to start.
- Page 41 6.4.4 Sharing of Multi folders ACTION ON SYSTEM DISPLAY After the Launch of Netshare software Application on the system. Right click on the ICON. Click on Setting. Click on Browse, Corresponding to Folder 1 to Share. A window POPs UP as shown. Select the Appropriate folder, Containing Media Files from desired Drive and Click OK.
- Page 42 After clicking the Support tab, press details, and you can see the Network connection details. Write IP address, Subnet Mask, default gateway and DNS server. You must write different Host address like below Figure for TVIX IP and Server IP. (Ex: 192.168.001.106 and 192.168.001.104). Write DNS Server address Similar to Gateway address.
- Page 43 Default Network : Wi-Fi Wired IP Setting : DHCP Wi-Fi IP Setting : DHCP Search Wi-Fi Network TViX Network Info Network Disk1 : Normal(NFS) Slow(SAMBA) Normal(NFS) Network Disk2 : Slow(SAMBA) Network Disk3 : Slow(SAMBA) Network Disk4 : Slow(SAMBA) Restart FTP server FTP: ID - tvixftp, PW –...
- Page 44 6.4.6 Set Network Configurations Under Windows XP (SAMBA mode) Select the folder you want to share. Right-click that folder and click ‘Sharing and Security’ in the popup menu. Check ‘Share this folder’ on the network and type in the share name ‘tvixhd1 (this is the only available one at the moment)’.
- Page 45 Move to 'Settings' > 'Control Panel' > 'Administrative Tools' > 'Computer Management' > 'Local Users and Groups' > 'Users', and double click ‘Guest’. CAUTION This is for Windows XP Professional. Windows XP Home users cannot see this window. If you cannot find ‘Administrative Tools’...
- Page 46 ‘GUEST’ must be shown as the following image (a red X mark should not be shown on ‘Guest’). Move to 'Control Panel' > 'Network connections', and select 'Properties' s by right click on the mouse. Remove “Guest” from the ‘User Rights Assignment’ > ‘Deny access to this computer from the network’ option.
- Page 47 10) Move to ‘Access this computer from the network’, and then select ‘Properties’ by right clicking the mouse or double clicking it. 11) Click on ‘Add User or Group’ 12) Type in “Guest” and then click on “OK” button. 13) Press OK, and Guest will be registered.
- Page 48 < When connecting Computer to TViX directly > In this case, you have to use Cross LAN cable type generally.. If the computer’s LAN card was connected to Internet line, you can mount additional LAN card to your PC and connect that additional LAN card to TViX.
- Page 49 < When connecting with IP Router or Hub > If you have already been assigned dynamic IP address from a DHCP Server or IP Router in your local area network, then no need to write a static IP address. Then obtain the automatically assigned IP address or write an IP address &...
- Page 50 When the setting is successfully finished, you will be able to see the 4 PC Tray Icons. Network Disk is supported up to 4 PC Tray system. You can see the partition on the network icon like below image. You may check for detailed usage at the TViX website (www.tvix.co.kr/Eng)
- Page 51 [ Connect USB wireless module ] Connect the USB module into enclosed cradle after connecting the AP Router to a PC. You should not connect the USB module to TViX without cradle. If you connect it by force, the TViX can be damaged.
- Page 52 6.4.9 Using SAMBA Server Using SAMBA Server, You can copy/move/delete files from PC to TViX box via LAN. SAMBA is supporting the internal hard disk only. Press the TViX Network Info on the TViX- SETUP-NETWORK. And note down the TViX IP Click on Internet explorer, And then type the TViX IP as shown \\172.28.1.10.
- Page 53 With Vista, you should configure the Network Security to use the SAMBA sever. Open a console by clicking on "Start->Accessories->Command Prompt". Type in following command "secpol.msc". Move to 'Security setting' > 'Local Policies' > 'Security Options' > 'Network Security: LAN Manager Authentication level' and double click this option.
-
Page 54: Firmware Upgrade
Your system will recognize the TViX HD as an external hard drive. Copy the latest firmware files into the root of the TVIX HD hard drive or USB memory kit. Turn off the TViX HD and bring it to your TV for firmware upgrading. - Page 55 * If the firmware cannot be upgraded under normal mode, safe upgrade method can be followed. < CAUTIONS: Safe Mode Upgrading > Even if the TViX accidentally turns off during the firmware upgrade, the safe mode will enable the TViX to be re-upgraded.
-
Page 56: Using Usb Connection With The Pc
TViX Kit along with its internal Hard disk can be connected to the PC. It acts as External device and works just like an external USB 2.0 hard drive when you connect it to your PC. And from the PC its TVIX HD content can be accessed. - Page 57 After rebooting the system, connect the TViX HD. Add New Hardware Wizard will automatically pop up. Select “Search for the best driver for your device” menu and then press the Next button. Do not change any of the menus. Just click “Next”.
- Page 58 Press the “Finish” button and the driver installation will be finished. You will be able to see the disk drive inside the TViX HD in the Device Manager tab. < TIPS > Windows ME/2000/ XP will automatically provide the driver, so you do not have to install any extra software.
-
Page 59: Making A Partition And Formatting The Hdds Under Windows 98Se / Me
The following DOS window will appear for the partition program. To make a new partition, choose number 5 to select the HDD in TViX HD. To make the partition for the HDD, choose the partition type and size. After selecting, make the partition. - Page 60 After making partitions, do not reboot the system. Instead turn off the power of the TViX and then turn it back on. By doing so your system will reinitialize the TViX HD. Run Window explorer and you will find the new disk created. Right click the new disk and choose...
-
Page 61: Making A Partition And Formatting The Hdds Under Windows 2000 / Xp/Vista
“Disk Management” folder. The disk list will appear on the right side of the “Computer Management” windows. Right click the TViX HDD from the list, and from the pop up menu choose “make partition” to create partitions on the chosen disk. - Page 62 Select the Drive Letter. Then press the “Next>” button. Select the partition Format. If you want FAT32, it is limited to 32GBs. When completed, detailed information will appear as shown below. Click the “OK” button to finish.
-
Page 63: Unplug Or Eject Hardware
8.4 Unplug or Eject Hardware On the windows tray, double click the hot swap icon. The “Unplug or Eject Hardware” window will appear. Press the Stop button if you want to unplug the device. Press OK on “Stop a Hardware device” window. Press OK and unplug the device. -
Page 64: Appendix - Technical Terms
9 Appendix - Technical Terms HDMI -------------------------------------------------------------------------------- The High-Definition Multimedia Interface (HDMI) is an all-digital audio/video interface capable of transmitting uncompressed streams. HDMI is compatible with High-bandwidth Digital Content Protection (HDCP) Digital Rights Management technology. HDMI provides an interface between any compatible digital audio/video source, such as a set-top box, a DVD player, a PC, a video game console, or an AV receiver and a compatible digital audio and/or video monitor, such as a digital television (DTV). - Page 65 By supplying film studios with outstanding techniques for delivering soundtracks to an attentive audience, DTS digital sound is now featured on virtually 100% of major Hollywood releases. Although the technology used for motion pictures differs from that featured in consumer and professional audio music and home theater systems, their DTS heritage means end users can enjoy sound that closely matches the original.
-
Page 66: Gnu General Public License
DVICO Co., Ltd is using a part of Free Software code under the GNU General Public License in operating TViX player. This General Public License applies to most of the Free Software Foundation’s code and to any other program whose authors commit by using it. The Free Software is copyrighted by Free Software Foundation, Inc. - Page 67 TERMS AND CONDITIONS FOR COPYING, DISTRIBUTION AND MODIFICATION 0. This License applies to any program or other work which contains a notice placed by the copyright holder saying it may be distributed under the terms of this General Public License. The "Program", below, refers to any such program or work, and a "work based on the Program"...
- Page 68 b) Accompany it with a written offer, valid for at least three years, to give any third party, for a charge no more than your cost of physically performing source distribution, a complete machine-readable copy of the corresponding source code, to be distributed under the terms of Sections 1 and 2 above on a medium customarily used for software interchange;...
- Page 69 explicit geographical distribution limitation excluding those countries, so that distribution is permitted only in or among countries not thus excluded. In such case, this License incorporates the limitation as if written in the body of this License. 9. The Free Software Foundation may publish revised and/or new versions of the General Public License from time to time.
Need help?
Do you have a question about the M-7000A and is the answer not in the manual?
Questions and answers