
Subscribe to Our Youtube Channel
Related Manuals for ZMIN X1

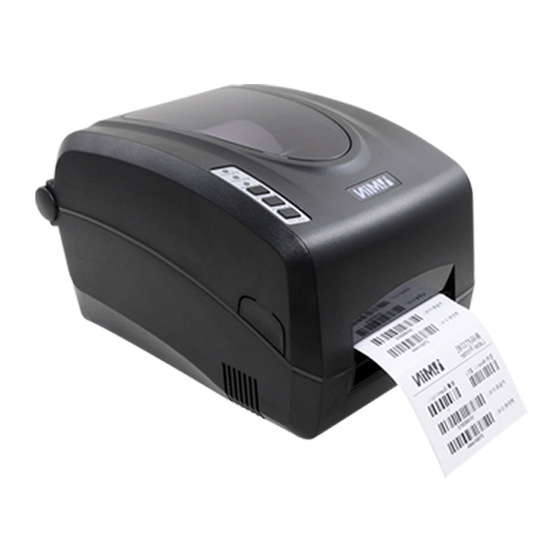
Summary of Contents for ZMIN X1
- Page 1 X Series Label Printer User’s Manual ZMIN TECHNOLOGIES 2015-4-8 Version 1.5 Part Number: 8010001002...
- Page 2 Limitation of Liability In no event shall ZMIN Technologies or anyone else involved in the creation, production,or delivery of the accompanying product (including hardware and software) be liable for any damages whatsoever (including, without limitation, consequential damages including loss of business profits, business interruption, or loss of business information) arising out of the use of, the results of use of, or inability to use such product.
- Page 3 X Series User’s Manual Caution Only qualified and trained service technicians should attempt to repair the printer. To avoid getting an electric shock, do not use a worn or damaged power cord. If the power cord becomes damaged or frayed, replace it immediately. Be sure that the output of the power adapter is 24VDC and your power source matches the rating listed on the power adapter.
-
Page 4: Table Of Contents
X Series User’s Manual Contents Preface ............................. 4 Important Notice ..........................5 Chapter 1 Introduction ........................6 Specifications ............................6 Specifications for Printer ......................... 6 Specifications for Power Adapter ....................7 Unpacking & Inspection ......................... 7 Chapter 2 Installation & Operation ....................9 Setting up ............................... -
Page 5: Preface
X Series User’s Manual Preface Thank you for choosing ZMIN X series printer. ZMIN Technologies Will offer you high quality products and services. This manual contains information on how to set up and operate your X series printer. It also provides detailed information on configuration and maintenance procedures that can be performed by the operator. -
Page 6: Important Notice
X Series User’s Manual Important Notice Thermal printhead can be easily damaged due to its precision construction. A printhead damaged by misuse is not covered under the terms of the warranty. To ensure longevity of the printhead, please note the following: 1. -
Page 7: Chapter 1 Introduction
Chapter 1 Introduction X Series User’s Manual Chapter 1 Introduction Specifications Specifications for Printer Model Printing method Direct thermal & Thermal transfer Resolution 203 DPI (8 dots/mm) 300 DPI (11.8 dots/mm) Maximum print speed 6 IPS(152.4 mm/s) 4 IPS(101.6 mm/s) Maximum print width 4.09″(104 mm) 4.15″... -
Page 8: Specifications For Power Adapter
X Series User’s Manual Chapter 1 Introduction Specifications for Power Adapter Input AC 100~240 V, 47~63 Hz Output DC 24 V, 2.5 A Environment 0° C ~ 40° C Unpacking & Inspection When unpacking the X Series Printer, make sure you save all packing materials. Inspect the shipping carton(s) for possible shipping damage, if damage is discovered, notify the shipping company to report the nature and extent of the damage. - Page 9 Chapter 1 Introduction X Series User’s Manual Printer Power Adapter Ribbon Spindle Media Spindle CD Rom Media Roll Guide Figure 1:Printer and accessories 8010001002...
-
Page 10: Chapter 2 Installation & Operation
X Series User’s Manual Chapter 2 Installation & Operation Chapter 2 Installation & Operation Setting up Before setting up the printer you should consider the following: 1. Make sure there is adequate space around the printer for loading consumables and proper ventilation. 2. - Page 11 Chapter 2 Installation & Operation X Series User’s Manual Figure 3 1. Printhead Module 2. Printhead Holder 3. Printhead 4. Reflective Media Sensor 5. Transmissive Media Sensor 6. Printhead Latch Levers 7. Media Guide 8. Ribbon release lever 9. Ribbon Supply Compartment 10.
- Page 12 X Series User’s Manual Chapter 2 Installation & Operation Figure 4 1. RS232 Serial Interface 2. DIP Switches 3. USB Interface 4. DC Jack 5. Power Switch 6. Rear Media Supply Window 8010001002...
-
Page 13: Connecting The Printer
Attaching Power Caution: (1) Use of the wrong power adapter could damage your printer. ZMIN Technologies assumes no liability for any damage in such case. The rating for the printer is 24VDC. (2) Make sure the AC voltage which you using is accorded with power adapter requirements. -
Page 14: Consumables Installation
X Series User’s Manual Chapter 2 Installation & Operation Consumables installation The Direct Thermal print method or Thermal Transfer print method can be used in the X Series printer. The Ribbon and Media should be load into the printer while the Thermal Transfer print method is configured. -
Page 15: Loading The Ribbon
Chapter 2 Installation & Operation X Series User’s Manual Loading the Ribbon Notice: (1) Make sure the ink side of your ribbon faces outwards. Always make sure the ink side of the ribbon faces the media and NOT the printhead. (2) The maximum width of the ribbon is 110mm. - Page 16 X Series User’s Manual Chapter 2 Installation & Operation Top Cover’s Latch Button Top Cover’s Latch Button Figure 5-1 8010001002...
- Page 17 Chapter 2 Installation & Operation X Series User’s Manual Right Printhead Latch Lever Left Printhead Latch Lever Pull Pull Figure 5-2 8010001002...
- Page 18 X Series User’s Manual Chapter 2 Installation & Operation Figure 5-3 8010001002...
- Page 19 Chapter 2 Installation & Operation X Series User’s Manual Ribbon Supply Wheel’s bulges Ribbon Spindle’s notches Figure 5-4 8010001002...
- Page 20 X Series User’s Manual Chapter 2 Installation & Operation Ribbon Rewind Wheel’s bugles Ribbon Spindle’s notches Use adhesive tape to stick with the ribbon Figure 5-5 8010001002...
- Page 21 Chapter 2 Installation & Operation X Series User’s Manual Rotate the Ribbon Rewind Wheel, until the ribbon is pulled tight across the printhead. Click Figure 5-6 8010001002...
-
Page 22: Loading The Media
X Series User’s Manual Chapter 2 Installation & Operation Loading the Media X Series printers can be operated in three different modes: Standard mode, Peel-off mode, or Cutting mode. In Standard mode, each printed label remains on the backing liner. In Peel-off mode, each printed label is peeled away from the backing liner automatically. - Page 23 Chapter 2 Installation & Operation X Series User’s Manual Top Cover’s Latch Button Top Cover’s Latch Button Figure 6-1 8010001002...
- Page 24 X Series User’s Manual Chapter 2 Installation & Operation Figure 6-2 8010001002...
- Page 25 Chapter 2 Installation & Operation X Series User’s Manual Transmissive Media Sensor Media Guide Media Guide Platen Roller Figure 6-3 8010001002...
- Page 26 X Series User’s Manual Chapter 2 Installation & Operation Click Figure 6-4 8010001002...
-
Page 27: Adjusting The Position Of Media Sensor
Chapter 2 Installation & Operation X Series User’s Manual Adjusting the Position of Media Sensor Notice: Only the Reflective Media Sensor can’t be moved, the Transmissive Media Senor is fixed installed. 1. Push the left and right Top Cover’s Latch Button to lift the top cover. 2. - Page 28 X Series User’s Manual Chapter 2 Installation & Operation Media 2 - 5mm Feed Direction Figure 7-3 Media Feed Direction Figure 7-4 Media Feed Direction Figure 7-5 8010001002...
-
Page 29: Operation
Chapter 2 Installation & Operation X Series User’s Manual Operation Power Switch The power switch is on the rear of the printer. The symbols on the switch are defined as follows: “━” —— ON position. “〇” —— OFF position. Front Panel The Front Panel of the printer consists of: - Three Indicator Lights: MEDIA, READY and RIBBON - Three function Keys: PAUSE, FEED and CANCEL... - Page 30 X Series User’s Manual Chapter 2 Installation & Operation Indicator Lights The three Lights indicate the status of the printer (please refer to Chapter4 for error indications) - On: Indicates the printer is in the normal state; READY - Flashing: Indicates the printer is in the ‘PAUSE’ state. - On: Indicates the printer is in the normal state;...
- Page 31 Chapter 2 Installation & Operation X Series User’s Manual In Thermal Transfer Mode: Media Out In Direct Thermal Mode: Media Out In Thermal Transfer Mode: Ribbon is Out Enter Advance Function Mode Keys The three keys have different functions based on the mode of the operation is performed. Advanced Functions Key Name Basic Functions...
-
Page 32: Advanced Functions
X Series User’s Manual Chapter 2 Installation & Operation Advanced Functions Media Sensor Calibration It is necessary to accomplish Media Sensor Calibration after a new roll of media has been loaded. 1. Press and hold the FEED key for about 4 seconds. 2. -
Page 33: Dip Switches At The Rear Of The Printer
Chapter 2 Installation & Operation X Series User’s Manual DIP Switches at the rear of the printer 2 3 4 6 7 8 Note: Please turn off the printer before setting the DIP switches. DIP Bit Functions Remarks ON: Direct thermal print mode Printing method setting OFF: Thermal transfer print mode Default: OFF... - Page 34 CD-ROM shipped with the product. If you do not have the manufacturer’s CD-ROM or wish to upgrade your current software, it is available for download from: www.zmin.com.cn. Note: If you need to update the driver, please remove any old versions of the driver before continuing.
-
Page 35: Chapter 3 Maintenance
2. The printhead becomes hot while printing, be careful when performing maintenance on the printhead. 3. Use only the cleaning agents indicated. ZMIN Technologies will not be responsible for damage caused by any other cleaning materials used on the printer. -
Page 36: Cleaning The Printer Interior
X Series User’s Manual Chapter 3 Maintenance Cleaning the Printer Interior With a brush or a vacuum cleaner, as needed. 8010001002... -
Page 37: Chapter 4 Troubleshooting
Chapter 4 Troubleshooting X Series User’s Manual Chapter 4 Troubleshooting Occasionally situations occur that require some troubleshooting. Possible issues and potential solutions are listed in this section. While not every situation is addressed, you may find some of these tips useful. Error Indications Typically, when the printer is not functioning, one or two of the three indicator lights will begin flashing. - Page 38 X Series User’s Manual Chapter 4 Troubleshooting READY and RIBBON lights flash simultaneously Possible Cause Recommend Solutions Remarks Run out of ribbon Load a roll ribbon Ribbon jam Clear the jam Ribbon Sensor error Service Ribbon Sensor To be serviced only by qualified personnel Only READY light flash Please confirm whether you have pressed the PAUSE key or not, force the print enter print pause...
-
Page 39: Miscellaneous
After the corrective action is taken press the CANCEL key to clear the alarm, the printer will get back to work automatically. Others Contact a qualified Service Engineer from your reseller or ZMIN Technologies for troubles that persist or are not covered in this section. 8010001002... -
Page 40: Appendix A: Interface Specifications
X Series User’s Manual Appendix A: Interface Specifications Appendix A: Interface Specifications RS232 Serial The RS232 connector on the printer is a DB9F: Direction Definition Ground Connection with host: Host 25S Printer 9P Host 9S Printer 9P TX 2 ……… 3 RX RX 2 ………... - Page 41 Appendix A: Interface Specifications X Series User’s Manual pin 20 pin 8 Baud rate: 9600, 19200, 38400, 57600 (Baud Rate set by DIP switches 7–8) Data format: always 8 data bits, 1 start bit and 1 stop bit. Parity : always non parity. Flow control: RTS/CTS (Hardware flow control).
-
Page 42: Appendix B: Ascii Table
X Series User’s Manual Appendix B: ASCII Table Appendix B: ASCII Table “ XOFF # & ‘ < > Remark: The € sign is included in the embedded table at DEC128 (HEX 80). 8010001002... - Page 43 SHENZHEN ZMIN TECHNOLOGIES CO.,LTD. *8010001002*...
Need help?
Do you have a question about the X1 and is the answer not in the manual?
Questions and answers