Table of Contents
Advertisement
Siamonie 01 (TS)
415 67 020 00
Index 01
Date: 20/10/2014
Sielaff GmbH & Co. KG
Automatenbau
Postfach 20
GB
D-91565 Herrieden
Münchener Straße 20
D-91567 Herrieden
Original operating instructions
Telephone: +49 (0) 9825 180
Telefax: +49 (0) 9825 18111
Firmware:
VMC ≥ MSAEs402.pat
Email:
info@sielaff.de
HMI ≥ r2827
Internet: http://www.sielaff.de
Advertisement
Table of Contents

Summary of Contents for Sielaff Siamonie 01 TS
- Page 1 Siamonie 01 (TS) 415 67 020 00 Index 01 Date: 20/10/2014 Sielaff GmbH & Co. KG Automatenbau Postfach 20 D-91565 Herrieden Münchener Straße 20 D-91567 Herrieden Original operating instructions Telephone: +49 (0) 9825 180 Telefax: +49 (0) 9825 18111 Firmware: VMC ≥...
-
Page 2: Table Of Contents
3.7 Cup warmer ......................................22 3.8 Payment modules ....................................23 3.9 Operating Principle / Module Overview ............................23 3.10 Siamonie 01 TS: Start screen / Service menu ......................... 24 4 Transport, Setup, Startup ....................... 25 4.1 Transport ........................................25 4.2 Setup conditions ....................................26 4.3 Startup ........................................ - Page 3 5.3 Adjusting Cup Tray ....................................44 5.4 Preparing brewed products with ground coffee (optional) ....................44 5.5 Dispense hot water ....................................44 6 Menu description (Siamonie 01 TS only) ................45 6.1 Touch Screen ......................................45 6.2 Opening Door ......................................45 6.3 Start Screen ......................................
- Page 4 6.4.5.4 [Calibration] ..............................59 6.4.6 [Machine configuration] ................................59 6.4.6.1 [Date/Time/Vend times] ..........................59 6.4.6.2 [General settings] ............................60 6.4.6.3 [Sensor settings] ............................60 6.4.6.4 [Heating/water system] ..........................60 6.4.6.5 [Payment system] ............................61 6.4.6.6 [Special settings] ............................61 6.4.7 [Service functions] ................................... 61 6.4.7.1 [Direct input] ..............................61 6.4.7.2 [Credit system] ..............................61 6.4.7.3 [Valves] ................................61 6.4.7.4 [Motors] ................................61...
- Page 5 8.2.1.4 Drip tray and drip grill ..........................84 8.2.1.5 Cup tray ................................84 8.2.1.6 Beverage discharge ............................85 8.2.1.7 Coffee chute ..............................85 8.2.1.8 Milk container (fresh milk versions only) ....................85 8.2.2 Weekly work ....................................86 8.2.2.1 Milk frother ..............................86 8.2.2.2 Instant container and instant chutes .....................86 8.2.2.3 Bean container ..............................87 8.2.2.4 Mixer unit ...............................87 8.2.3 Monthly work .....................................89...
- Page 6 SIELAFF does not assume any liability or guarantees for the contents of these operating instructions and expressly dis- claims any responsibility for any implied warranties for defects contained therein.
-
Page 7: Ec Declaration Of Conformity
The objectives of the low voltage directive 2006/95/EC will be fulfilled in accordance with Appendix I, no. 1.5.1 of machine directive 2006/42/EC. Authorised representative responsible for the documentation: Mr. Dipl.-Ing. (FH) Jürgen Utschig, Managing Director of Sielaff GmbH & Co. KG, Münchener Str. 20, D-91567 Herrieden. Herrieden, 03.01.2013 Place, Date Mr. - Page 8 Versions Please note that these instructions apply for different versions of the vending machine. ▪ Siamonie with Touchscreen: Described in these instructions as "Siamonie 01 TS" ▪ Siamonie with foil keyboard: Described in these instructions as "Siamonie 01" It is possible that these instructions describe details not included on your vending machine.
-
Page 9: Software Version
Changes The text, images and data correspond to the technical state of the vending machine at the time these operating instruc- tions were printed. We reserve all rights to make modifications for the purpose of improvement. Index Date Remarks Page(s) 10/06/2014 Instructions completed 20/10/2014... - Page 10 The objectives of the low voltage directive 2006/95/EC will be fulfilled in accordance with Appendix I, no. 1.5.1 of machine directive 2006/42/EC. Authorised representative responsible for the documentation: Mr. Dipl.-Ing. (FH) Jürgen Utschig, Managing Director of Sielaff GmbH & Co. KG, Münchener Str. 20, D-91567 Herrieden. Herrieden, 03.01.2013 Place, Date Mr.
- Page 11 Hotline Please forward questions and orders to the following address for processing: SIELAFF GmbH & Co. KG Automatenbau Münchener Straße 20 D - 91567 Herrieden Telephone:...
-
Page 12: Technical Data
1 Technical Data Dimensions Siamonie 01 (H x W x D) 710 x 450 x 570 mm Refrigerator (H x W x D) 600 x 215 x 425 mm Cup warmer (H x W x D) 600 x 330 x 430 mm Payment module (H x W x D) 600 x 175 x 425 mm Weight... -
Page 13: Safety
▪ Use only products approved by SIELAFF. ▪ All modifications to or conversion work on the vending machine is prohibited. In such cases SIELAFF cannot be held liable for any damage! 2.2 Intended Use The vending machine is intended exclusively for dispensing hot beverages in the commercial sector. Any other type of use is not intended. -
Page 14: Key To Symbols And Messages
2.3 Key to Symbols and Messages This beverage vending machine was produced in keeping with the state of the art. Nevertheless even the optimum de- sign cannot exclude all risks. To ensure adequate safety for users, additional safety precautions are marked in the text below. Adequate safety during operation is ensured only when these safety precautions are observed. -
Page 15: Service Key
2.5 Service key CAUTION! Danger of pinching! When the door switch is bypassed, the brewing unit can cause pinching injuries! Never reach into the brewing unit when the door contract switch is bypassed! CAUTION! Use of the service key is reserved exclusively for trained service technicians. When the service key is inserted a protective device is bypassed. -
Page 16: Appliance Illustrations
3 Appliance illustrations 3.1 Siamonie 01 3.1.1 Outer view Coffee bean container Product label Espresso bean container Drip tray Ground coffee / tablet opening Cup tray (height adjustable) Door lock Hot water outlet Short service menu key Display Product selection Cover for instant and cocoa container 16/105 415 67 020 00 _ 011... -
Page 17: Inner View
3.1.2 Inner view Figure: Version with fresh milk module Slide feed for bean container Grounds container Ground coffee / tablet opening Surplus water tank Grinders Mixer outlet Service switch Service keyboard Coffee chute Mixer Brewer with brewer cover Milk frother Brewer outlet Instant chute Beverage discharge... -
Page 18: Siamonie 01 Ts
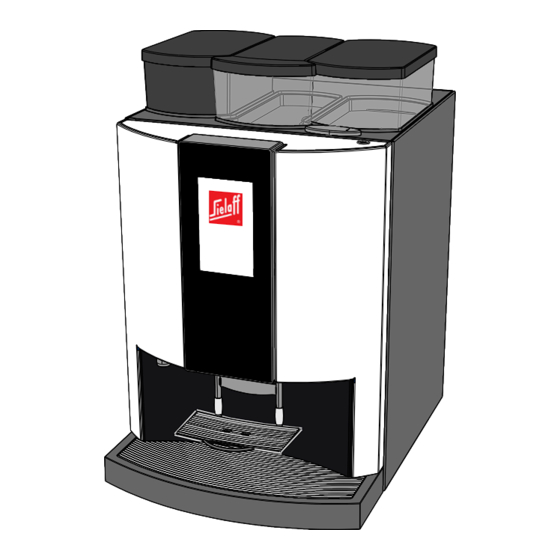
3.2 Siamonie 01 TS 3.2.1 Outer view Cup tray (height adjustable) Coffee bean container Hot water outlet Espresso bean container Touch screen Ground coffee / tablet opening Cover for instant and cocoa container Door lock Drip tray 18/105 415 67 020 00 _ 011... -
Page 19: Inner View
3.2.2 Inner view Figure: Version with milk module/fresh milk Slide feed for bean container Grounds container Ground coffee / tablet opening Surplus water tank Grinders Mixer outlet Service switch USB stick slot Coffee chute Mixer Brewer with brewer cover Milk frother Brewer outlet Instant chute Beverage discharge... -
Page 20: Rear
3.3 Rear Bean and instant container Partial desalination filter Hook for refrigeration module Power cord Air grate Water inlet from partial desalination filter Water outlet from partial desalination filter Milk intake hose Preparation for water container Passage for milk intake hose optional) Primary water connection 20/105 415 67 020 00 _ 011... -
Page 21: Side View (Left)
3.4 Side view (left) Instant container Mixer driver motor Brewing valve Waste water hose Flow meter Pump Espresso boiler Instant motor 3.5 Side view (right) Bean container Main switch Grinder motor MDB connector Brewer motor Brewer Power supply Steam boiler 415 67 020 00 _ 011 21/105... -
Page 22: Refrigeration Box
3.6 Refrigeration box Repository for cups Attachment socket on Siamonie 01 Temperature controller Opening for milk hose Milk container Door lock 3.7 Cup warmer ON/OFF switch for top 3 hot plates / LED illumination ON/OFF switch for bottom hot plate Hot plate for café... -
Page 23: Payment Modules
3.8 Payment modules Lock Coin return button Coin return chute Coin/token slot Key switch here Payment module ST01 Further information on installation and setup of a payment module is given in the operating instructions for the pay- ment module 3.9 Operating Principle / Module Overview Power connection 230V Water Power connection 230V... -
Page 24: Siamonie 01 Ts: Start Screen / Service Menu
3.10 Siamonie 01 TS: Start screen / Service menu Appears when vending machine door is open Product selections Service work Information Access rights ▪ Warnings/error messages Ingredients ▪ Warnings Important information at a glance ▪ Information on HMI/VMC Language Status line Short service menu ▪... -
Page 25: Transport, Setup, Startup
Emptying the boilers Interrupt the water supply to the vending machine. Place an appropriately large container below the beverage discharge. Proceed as follows: Siamonie 01 Siamonie 01 TS [Technician] - [Service functions] - [Direct input] - [87M] CHECK <-L SEL. M->... -
Page 26: Setup Conditions
4.2 Setup conditions CAUTION! Short-circuit from water Lethal hazard! Damage to vending machine! ▪ Do not place vending machine on a surface cleaned with a water jet. ▪ Never clean vending machine with water from a hose. NOTE: An insufficient power supply can damage the vending machine ▪... - Page 27 Setup conditions: Intervals ▪ Lateral distance to objects on left and right: 50mm; except for Sielaff attachments or modules (refrigeration box, cup warmed, payment module) ▪ A minimum of 80 mm are required behind the vending machine for the utility lines.
-
Page 28: Startup
4.3 Startup NOTE: Ensure that trained personnel install the appliance and put it into service. Before installing and putting the appliance into service it is necessary to thoroughly read and understand the operating instructions. 4.3.1 Flush water line on customer side Before connecting the water hose to the vending machine, flush the line for approx. -
Page 29: Filling Boiler
The vending machine was emptied at the factory to prevent damage from freezing. After opening the water line it is necessary to fill the vending machine boiler with water. Siamonie 01 Siamonie 01 TS 1. Open door 1. Open door 2. -
Page 30: Set Back Pressure
Adjust pressure only when pump is running! Siamonie 01 Siamonie 01 TS 1. Open door 1. Open door 2. Turn the grounds container 90 degrees, so that the 2. -
Page 31: Switch On Heater
For safety reasons the heater is deactivated when the vending machine is shipped. It is necessary to activate the heater initially. Siamonie 01 Siamonie 01 TS 1. Open door 1. Open door 2. Enter [ M ] - [ 7 ] - [ E ] on the service keyboard 2. -
Page 32: Checking Fresh Milk Operation
It is necessary to activate this function in the service menu when operating a Siamonie 01 (TS) with a fresh milk mod- ule. Check whether your vending machine is configured correctly. Siamonie 01 Siamonie 01 TS 1. Open door 1. Open door 2. -
Page 33: Checking Steam Pressure
->Espresso NOTE: More information on creating products is given in the Chapter "Menu Description": “6 Menu description (Siamonie 01 TS only)” on Page 45 “7 Menu description (Siamonie 01 only)” on Page 63 415 67 020 00 _ 011 33/105... -
Page 34: Filling Bean Container
When so doing leave the covers on the two powder containers on the left closed, to keep any beans from getting into the instant containers inadvertently. Siamonie 01 Siamonie 01 TS 1. Press the service key to open the short service menu 1. Press at the bottom right of the start screen 2. -
Page 35: Filling Instant Container
4.3.12 Filling instant container Fill both left product containers with instant powder. When so doing leave the covers on the two bean containers on the right closed, to keep any instant power from getting into the bean containers inadvertently. NOTE: Never put liquids in these containers! Cocoa Topping... -
Page 36: Enable Milk Products (Only With Fresh Milk Module)
4.3.14 Enable milk products (only with fresh milk module) Siamonie 01 Siamonie 01 TS Selections containing fresh milk are display as "not avail- Short service menu key 1. fill able". In addition the Selection Labels are gray. To enable 2. maintenance milk products, pump in milk. -
Page 37: Set Grinding Fineness
→ for finer powder Turn to left → for coarser powder → shorter brewing time You can complete a grinding operation to check the grinding fineness Siamonie 01 Siamonie 01 TS CHECK SEL. M SERVICE MODE SEL. M SERVICE NUMBER... -
Page 38: Calibrating Container
Since the conveying worms for the instant container are not yet full allow the instant motors to run for a few seconds before performing the calibration operation. Siamonie 01 Siamonie 01 TS 1. Open door 1. Open door 2. Insert the service key 2. - Page 39 CHECK SEL. M BEVERAGE ALLOC. SEL. M DOSAGES SEL. M CALIBRATE SEL. M Chose container Calibrate Choc 20.0g check? (1-9) Choccalibr. check? (1-9) ** PLEASE WAIT * check? (1-9) act. amount40.0 45.2 check? (1-9) act. amount45.2 Calibrate Topping 16.0g NOTE: Calibrate all containers (coffee grinder, espresso grinder, topping container, cocoa container, milk pump)
-
Page 40: Cup Settings
4.3.17 Cup Settings You can adapt the quantities output to your own cups. This does not change the product concentration. Siamonie 01 Siamonie 01 TS 1. Open door 1. Open door 2. Press [ M ] - [ 2 ] - [ E ] - [ E ] - [ E ] 2. -
Page 41: Test Sales
You can perform test sales to check the settings. The selected beverage is dispensed at no cost and saved in the statistics as a test sale. Siamonie 01 Siamonie 01 TS 1. Open door Test vends can be performed in the [Cup set- tings] menu. -
Page 42: Operation Of Vending Machine
The Siamonie 01 (TS) is a fully automatic hot beverage vending machine. This means that it is only necessary to simply press a product selection key (Siamonie 01) or press on the touch screen (Siamonie 01 TS) to dis- pense a product. The beverage is then prepared fully automatically. - Page 43 Siamonie 01 Siamonie 01 TS After product selection, the product is dispensed. However Depending on the programming the product is dispensed optional extras can be set on the selection keys, for ex- immediately after pressing the product (for example hot ample, switch-over between large/small products.
-
Page 44: Adjusting Cup Tray
5.3 Adjusting Cup Tray The cup tray can be adjusted to the size of the cups with two hands (see figure) or with one hand in the middle of the cup tray. The cup tray has two circular recesses. These recesses symbolize the dispensing position for the double discharge for brewed prod- ucts 5.4 Preparing brewed products with ground coffee (optional) -
Page 45: Menu Description (Siamonie 01 Ts Only)
6 Menu description (Siamonie 01 TS only) 6.1 Touch Screen A touch screen with context-dependent display and menu guidance ensure convenient oper- ation of the vending machine. Selections can be made by simply touching the touch screen with your finger. -
Page 46: Select Beverage
6.3.1 Select beverage Press a beverage on the start screen to proceed to the beverage submenu Beverage concentration The concentration (strength) of certain beverag- es can be set to the purchaser's individual taste. Press [Weaker] to reduce the strength, press [Stronger] to increase the concentration. -
Page 47: Info
6.3.2 Info The [Info] menu consist of the menu subpoints [Ingredients], [Warnings] and [Info] Ingredients The ingredients for each product can be saved here. Warnings The operating state of the vending machine can be checked here. If errors or warnings are present they can be displayed here. -
Page 48: Status Line
6.3.4 Status line The current operating state is display on the 'outside' in the status line. The following states can be displayed: ▪ Show mode: The vending machine can be switched to a demonstration mode with service number 222M. This imitates a ready-to-operate state. - Page 49 [Cleaning] Individual components or the entire vending machine can be cleaned with the aid of the cleaning menu [Start full cleaning] The vending machine starts a fully automatic cleaning cycle for the complete machine. This operation cleans all components in the machine ▪...
- Page 50 [Milk...] You can enter the quantity of milk added to the vending machine's refrigeration box with the aid of the [Milk...] menu Moreover milk can be pumped out of the refrigeration box. This is necessary to fill the milk intake hose with milk up to the milk frother.
-
Page 51: Service Menu
6.4 Service menu 6.4.1 Display with door open Cleaning The vending machine switches to the cleaning menu. This menu is the same as the contents in the Chap. “6.3.5 Short service menu” on Page 48, Section [Cleaning]. Statistics to USB flash drive When the USB stick is inserted, the short-term statis- tics can be transferred to a mobile data carrier with this function. - Page 52 Summary of access rights using a technician as an example (all rights) General Version information Journal HMI settings HMI data transfer Access codes Statistics Tube levels Short statistics Total statistics Products/Test sale Cup settings Dosage Prices/Assignment Calibration Machine configuration Date/Time/Vend times General settings Sensor settings Heating/Water system...
-
Page 53: General]
6.4.3 [General] 6.4.3.1 [Version information] This menu point shows various information on the software status (HMI, hardware, kernel, control), cleaning and rinsing operations performed as well as active network connections. 6.4.3.2 [Journal] The journal data can be read out in this menu point. The journal records all operations performed by the vending ma- chine. -
Page 54: Hmi Data Transfer]
6.4.3.4 [HMI data transfer] This menu point allows statistics, journals and HMI data to be written on an external data carrier. This information can then be conveniently evaluated on a PC. Moreover this menu allows the HMI and control software to be updated and configurations loaded. -
Page 55: Statistics]
6.4.4 [Statistics] [Tube levels] The statuses of the individual coin tubes can be called in this menu [Short statistics] First a summary appears showing all vends, fixed vends and free vends, as well as the value of all vends. The data for each individ- ual selection is then displayed. -
Page 56: Dosage]
6.4.5.2 [Dosage] This menu point allows the dosage quantities to be set for each individual product. Upon dosage the menu enter the product for which the dosage quantity is to be changed. The program then switches to the first sub-level in the dosage menu [Brewer pre-rinsing] Pre-rinsing the brewer serves for preliminary heatup of the brew-... - Page 57 Subproduct settings Various settings are possible depending on the sub-product, e.g. [Motor], [Water], [Mixer], [Brewer], [Mill], [Preinfu- sion], [Milk], [Air valve] etc. [Mill] Here you can enter the quantity of coffee to be ground. The quantity values are absolute values [Brewer] The following can be set here ▪...
-
Page 58: Price/Assignment]
[Water] The following can be set here ▪ Quantity of water for instant product ▪ Waiting time after selection of product until water is dispensed ▪ Shutoff delay time for instant motor The running time for mixer motor is calculated automatically by the vending machine [Mixer] The following can be set here ▪... -
Page 59: Calibration]
6.4.5.4 [Calibration] It is necessary to calibrate the grinders, the instant motors and the peristaltic pump to guarantee uniform dispensing quantities. NOTE: When the type of beans is changed, we recommend recalibrating the grinders. Calibrating mill/instant motor Select the grinder or instant motor to be calibrated. You are then requested to enter the number of steps. -
Page 60: General Settings]
6.4.6.2 [General settings] Machine number: Here it is possible to enter a unique number for identification of the vending machine Variant: It is absolutely necessary to enter the vending machine variant here. An overview of all versions is given on Page 7 VMC-addition: This function must be active on DUO versions Digits after comma: Setting indicating number of digits following the decimal point... -
Page 61: Payment System]
6.4.6.5 [Payment system] The vending machine can be operated in the free vend or MDB mode. Waiting time: Time between time coin is inserted and product selection. After expiration of this time the payment module returns the money. Sales option: Multiple vends = When more money is inserted than required, the vending machine anticipates selection of another beverage. -
Page 62: Sensors]
6.4.7.5 [Sensors] This menu allows all sensors in the vending machine to be actuated and their function tested 6.4.7.6 [Misc.] All other vending machine functions can be actuated and read out in this submenu 62/105 415 67 020 00 _ 011... -
Page 63: Menu Description (Siamonie 01 Only)
7 Menu description (Siamonie 01 only) 7.1 Foil keyboard The vending machine can be operated and the products selected on a foil keyboard. 7.2 Opening Door To open the door turn the key in the lock counter-clockwise to the left stop. The door must always be closed for operation of the vending machine. -
Page 64: Service Keyboard
7.4 Service keyboard The service keyboard serves for navigation in the service menu. It can also be used instead of the selection keys in the short service menu. Main menu; Submenu Memory aid Menu M0, M1, M2 ...M8, ML C - Clear Deletes entry Calls menus in sequence, Back Moves backward in menu... - Page 65 NOTE: Please note that changes in the program change basic parameters which can have a significant effect on the function of the appliance. Before changing always note the values set, or read them out with the SIELECTOR. This allows the old values to be entered again, if required.
-
Page 66: Check]
7.5.1 [CHECK] Current machine malfunctions are displayed in clear text in this menu The current count status is shown for each mal- function. Display and delete errors ▪ Remedy any malfunctions indicated ▪ Then delete the error memory on the service keyboard: CHECK SEL. -
Page 67: Programming Mode]
7.5.2 [PROGRAMMING MODE] The functions can be assigned to the selection keys in this menu. All vending machine selection keys can be assigned and programmed. Each selection key can be assigned to any desired beverage or beverage combination, a beverage and function combi- nation or only a preselection and option function. -
Page 68: Beverage Alloc.]
CHECK SEL. M PROGRAMMING MODE SEL. M 1:€ 0.50/0.80 ST+CAF1 PRODUCT 1 ->Coffee 1:€ 0.50/0.80 Selection number Price A Price B ST+CAF1 PRODUCT 1 ->Coffee Recipe 1: EUR 0.50/0.80 1:€ 0.50/0.80 ST+CAF1 ST+CAF1 PRODUCT 1 PRODUCT 1 ->Coffee ->Coffee 1:€ 0.50/0.80 ST+CAF1 PRODUCT 1... -
Page 69: Calibrate
NOTE: CHECK Before calibrating the product container you should allow each prod- SEL. M uct motor to run a few seconds in the service menu to ensure that the conveyor worms in the containers are completely filled with the prod- ucts. -
Page 70: Dosages]
Calibration operation for peristaltic pump (only for fresh milk version) ATTENTION! During calibration the quantity of milk dispensed increases from step to step. The MILK QUANTITIES do NOT remain the same! NOTE: If the peristaltic pump is not displayed for calibration, check the vending machine model set. 7.5.3.2 [DOSAGES] NOTE: These operating instructions contain only an explanation of the short menu. -
Page 71: Test Vends]
7.5.4 [TEST VENDS] This menu allows the beverage preparation to be checked. The selected beverage is dispensed at no cost and saved in the statistics as a test sale. CHECK SEL. M CAUTION! The beverage is dispensed immediately Danger of scalding!!! Place a suitable basin below the beverage discharge TEST VENDS SEL. -
Page 72: Show Full Stat]
The sales statistics are shown in this menu. The sales statistics provide a reliable basis for stocking the products. When inhibit codes have been entered, the statistics can be deleted by the operator with Code A. NOTE: All values not equal to zero are displayed. Therefore the display in the vending machine may deviate from that shown above. -
Page 73: Prog. Time/Locks]
7.5.7 [PROG. TIME/LOCKS] The system clock and the local time can be set with this menu. The boiler temperature and operating times (heating times, vending days, price changes and illumination times) can be adapted to meet the specific requirements of the operator. - Page 74 [BOILER TEMP. OVERHEAT] The boiler temperature is increased by the programmed number of degrees upon reach- PROG. TIME/LOCKS ing the standby time after dispensing the last beverage. This increase in temperature BOILER TEMPER.(E) compensates for the temperature loss in the beverage resulting from the hoses cooling OVERHEAT 4°C down.
-
Page 75: Installing Mode]
7.5.8 [INSTALLING MODE] The vending machine parameters, country, currency, machine type, machine number (see rating plate), inhibit codes, payment module, sales mode, coin changer parameters, appliance options and service telephone number can be set in this menu. In the selection fields [SELECT WITH 1] the next possibility can be selected in each case by pressing the number key [ 1 ]. - Page 76 [COUNTRY], [CURRENCY] When the language is changed the following values are set from the program data: ▪ Text messages (errors, information, menus ...) are displayed in the desired language from the time the setting is changed. ▪ Select with key [ 1 ]. ▪...
- Page 77 [EXEC VEND RETRY] Not used [PRESEL. TIME] The waiting time is the maximum time in seconds (selection keys illuminated) which the vending machine waits for selection of a beverage after inserting coins [CREDIT SYSTEM] Here the credit system used can be selected (BDV; EXECUTIVE; MDB; free vend) [CRED.CONFIG.] Options: [CRED.CONFIG.
- Page 78 [Grout prompt] Default setting [With grounds sens.] The grounds sensor (grounds container contact recognizes whether the grounds container is in place. You can activate/ deactivate the grounds sensor prompt here. When this is deactivated and the grounds container placed beneath the discharge, it can overflow.
-
Page 79: Service Mode]
[Standybytime milk] Here you can enter up to 9 hours. After expiration of this time without dispensing any fresh milk, all beverages with fresh milk are disabled. The standby time continues to count when the vending machine is set to the [Sleep mode] in the short service menu [Compul.clean.] Default setting [wth compul.clean.]... -
Page 80: Cleaning
All work on beverage vending machines is subject to general hygienic requirements. ▪ Aways wash and thoroughly disinfect hands before handling foodstuffs. ▪ Use only cleaning agents approved by Sielaff for cleaning the vending machine: ▪ Cleaning tablets, Art.No.: 402 00 919 00, Index 1 ▪... -
Page 81: Cleaning List
Component Work required Chapter Aids Milk frother (fresh milk versions only) Disassemble and clean more 8.2.2.1 on Page 86 Sielaff milk cleaner frequently, if required Instant container Clean all individual parts 8.2.2.2 on Page 86 Detergent, rag Bean container Clean 8.2.2.3 on Page 87... -
Page 82: Daily Work
If the cleaning program is interrupted or terminated prematurely, a message appears. It is then necessary to start the cleaning program again. Use only cleaning agents approved by Sielaff to clean the vending machine: 402 00 919 00 - Cleaning tablets... - Page 83 Siamonie 01 Siamonie 01 TS 1. Remove the cup tray by pushing the two sleeves 1. Remove the cup tray by pushing the two sleeves up- upward ward 2. Place the black cleaning container below the bever- 2. Place the black cleaning container below the bever-...
-
Page 84: Grounds Container And Surplus Water Tank
Fresh milk versions only Fresh milk versions only 9. Remove the milk intake hose from the handle vessel. 12. Remove the milk intake hose from the vessel with Clean the hose with a rag and detergent handle. Clean the hose with a rag and detergent 10. -
Page 85: Beverage Discharge
8.2.1.6 Beverage discharge 1. Pull off all hoses installed on the beverage discharge. Pay attention to the position of the hoses 2. The beverage discharge can be pushed up out of the guide. Simultaneously press the suspension down with a finger to allow it to be pried out of the guide. -
Page 86: Weekly Work
3. Remove cover C and sleeve B from milk frother 4. Recommendation: Place the individual parts in cleaning solu- tion for approx. 20 minutes (Sielaff milk cleaner) 5. Rinse all parts thoroughly with clear water. Reassembly: Align recess D on cover C with vertical fitting. Press cover uniformly into mixer body. -
Page 87: Bean Container
8.2.2.3 Bean container The bean container should be cleaned once a week. 1. Open the door. Insert the service key into the door contact switch CAUTION: Moving parts on inside of vending machine 2. Remove the covers on the bean containers 3. - Page 88 Flange Mixer vane Mixer housing Mixer vent Baffle plate Marking, mixer vane/ flat spot Vent Installation of mixer housing ATTENTION! When installing the mixer housing ensure that the vent for the mixer housing reaches the vent duct for the vending machine 88/105 415 67 020 00 _ 011...
-
Page 89: Monthly Work
8.2.3 Monthly work 8.2.3.1 Rinse steam boiler Siamonie 01 Siamonie 01 TS Short service menu key 1. fill 2. maintenance 3. counter 4. sleep 2.1 Rinse Mix/Brew 2.2 Clean Brewer 2.3 Flush Steamb. 2.4 Full Milk clean CLEAN/RINSE please place cup... -
Page 90: Baffle Plate
8.2.3.2 Baffle plate 1. Remove all hoses from the mixer housing 2. Remove the mixer housing 3. Slide the instant chutes upward Remove the instant containers 4. Pull the baffle plate out toward the front 5. Open the baffle plate and clean it thoroughly 6. -
Page 91: Trouble Shooting / Faq
9 Trouble Shooting / FAQ ▪ Frothed milk not as desired? ► Good frothed milk is highly dependent on the milk itself (butter fat, temperature, etc.) You can change the air setting for frothing the milk on the regulating valve. ▪... - Page 92 Coffee / espresso does not taste good ▪ Was a new type of beans used? Are the beans oil? Use a different type of beans / fresh beans. ▪ Check the settings in the data record! Standard coffee 8.0g of beans 180ml of water Set grinding fineness so that running time is between 15 and 25 sec.
- Page 93 Is coffee or instant powder scattered over the entire inside of the vending ma- chine? ▪ Are the flappers present in the grinding tube and are they okay? ▪ If the coffee chute hooked in correctly? ▪ Is coffee chute clogged? See also "Is coffee chute clogged with coffee grounds?“ Does the display indicate a brewer position error? ▪...
- Page 94 ▪ The milk must be precooled to between 4 and 8°C. ▪ The steam pressure should be set to 1.2 bars. See right pressure gage behind grounds container. ▪ Set the milk pump speed so that the milk has a discharge temperature of 63-68°C at a steam pressure of 1.2 bars ▪...
-
Page 95: Error Codes
10 Error codes Clear wording: Telemetry memory full DTS: EIO Group: 1 No.: 1 Please read out Cause: Telemetry memory is full Measures: Read out telemetry memory (from external location, cannot be deleted internally!?) DTS: ECM Group: 1 No.: 81 Clear wording: Data error 81 Request service Cause:... - Page 96 Clear wording: Lack of water DTS: EDP Group: 6 No.: 32 Cause: Too few / no impulses from flowmeter Actions: Check water connection Flowmeter is defective Brewing time is too long, grind level may be too fine Inlet valve is blocked Brewing valve is blocked Hot water valve is blocked Instant mix valve is blocked...
- Page 97 Clear wording: Steam boiler filling failed DTS: EFC Group: 11 No.: 1 Cause: Steam boiler filling level not reached / not detected Water supply to the steam boiler was interrupted. Please check the water supply and Measures: switch the machine off and on again. Check filling level sensor of steam boiler Service 15L.
- Page 98 Steam pressure was not Clear wording: achieved DTS: EXA Group: 18 No.: 32 Please start the machine manually anew “Pressure sensor” on the Cause: display Update control board to index 23; Check steam boiler for damage; Measures: Check distribution block for damage Clear wording: Motorized coin return malfunctioning DTS: EAB Group: 19...
- Page 99 Clear wording: Cleaning should be performed DTS: OAJ Group: 29 No.: 2 Cause: Product counter expired, cleaning should be started (250) Please start a machine cleaning. Place the cleaning container and follow the instructions Measures: on the screen. Clear wording: It is essential that cleaning be performed DTS: OAJ_2 Group: 29 No.: 32...
-
Page 100: Temporary Shut-Down
1. Run the automatic cleaning program (see “8.2.1.2 Run cleaning program” on Page 82) 2. Empty bean container (Caution: Ensure that slide feed is closed) Siamonie 01 Siamonie 01 TS 3. Open brewer: 3. Open brewer ▪ [Technician] - [Service functions] - [Motors] -... -
Page 101: Shut Down And Dispose
12 Shut down and dispose CAUTION! Hot boiler / hot water! Danger of scalding! ▪ Allow boiler to cool down first ▪ Do not touch water ▪ Do not spill water When vending machine has reached the end of its service life, put out of service. 1. -
Page 102: Dimensions
13 Dimensions All specifications in mm 229,5 54,5 85° R437 102/105 415 67 020 00 _ 011... -
Page 103: Index
14 Index NOTE Index entries on Pages 43 to 60 refer only the the Siamonie 01 TS Index entries on Pages 61 to 77 refer only the the Siamonie 01 Cleaning timer 53 Filling bean container 34 Cleanliness 80 Filling boiler 29... - Page 104 Shutting down 100, 101 PREM 56 Siamonie 01 8, 16 Language selection 24 Line voltage 27 Prerinsing 70 Siamonie 01 TS 8 Pressure gage 30 Side view (left) 21 Price A 68 Side view (right) 21 Machine configuration 59 Price B 68, 74...
- Page 105 Unpacking vending machine 27 Valves 61 Vending products 42 Version: 60 Version information 53 Versions 8 VMC 1, 9, 24 VSI 56 Waiting time 61 WAITING TIME 77 Warnings 24, 47 Water 58 Water connection 12 Water hardness 12 Water hose 28 Water pressure 12 Weight 12 415 67 020 00 _ 011...
Need help?
Do you have a question about the Siamonie 01 TS and is the answer not in the manual?
Questions and answers