Sony Xperia Z4 Basic Manual
Hide thumbs
Also See for Xperia Z4:
- User manual (206 pages) ,
- Settings manual (2 pages) ,
- Basic manual (2 pages)
Advertisement
Quick Links
Download this manual
See also:
User Manual
Preface
Thank you for buying "Xperia
from here on).
Before using the product, read "Basic Manual" (this manual)
and "取扱説明書(詳細版) (Full Instruction Manual)"
(Japanese) to ensure safe use and handling.
Packaged items
Before your start using the product, make sure that you have
all the following packaged with the product.
SOV31
*1
・ Xperia
™
Z4
Basic Manual
・ 取扱説明書 (Instruction Manual) (Japanese)
・ Xperia
™
Z4のご利用にあたっての注意事項 (Cautions on using
™
Xperia
Z4) (Japanese)
・ 設定ガイド (Setting Guide) (Japanese)
The following items are not included in the package.
・ microSD memory card
・ AC adapter
・ Earphones
*3
q Nameplate
r au Nano IC Card 04
Getting Ready
®
*2
s Wi-Fi
antenna
t Back cover
*4
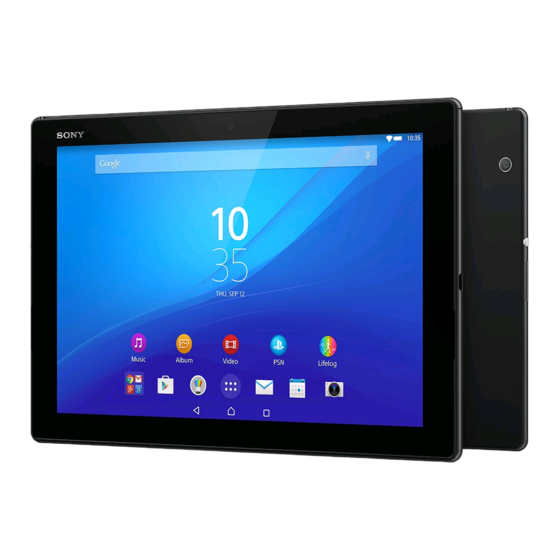
Names and functions of parts
u Built-in antenna
*2
v microSD memory
a Headset connection
a
b
card/au Nano IC Card
terminal
04 slot
b Second microphone
*1
:
w Strap hole
c
d
e f
Reduces noise to make
x microUSB connection
easy to listen
terminal
c Notification LED
d Front camera
e Earpiece/Speaker
f Proximity sensor:
Switches touch panel on
i
and off to prevent from
g
erroneous operation
j
during a call/Auto-control
for display brightness
g Display (Touch panel)
*1 Do not jab with a sharp object such as a needle. Doing so may
cause a fault.
h Microphone/speaker
k
*2 The antenna is built in. Covering around the antenna by the
i PPower key/Screen
hand may affect the quality of call/communication.
lock key
j Volume key/Zoom key
*3 Do not remove the nameplate with stickers of CE mark, FCC ID
h
k kCamera key
and IMEI information printed.
l Camera lens
*4 Back cover is not removable. Removing so forcibly might cause
*2
damage or a fault. Also, battery is built into the main unit and
m GPS/Built-in antenna
®
®
*2
n Wi-Fi
not removable by customers.
/Bluetooth
/antenna part
o Flash/Photo light
p
mark
g
3
■ Charging with the AC Adapter
When charging is complete, remove the microUSB plug of
Charging with Common AC Adapter 05 (sold separately) is
Common AC Adapter 05 (sold separately) from the product
4
explained.
Remove Common AC Adapter 05 (sold separately) from
the outlet
Notification
LED
■ Charging with the DC Adapter
You can charge from cigarette lighter socket in a car by using
Common DC Adapter 03 (sold separately). For details, refer to
instruction manual of Common DC Adapter 03 (sold
separately).
■ Charging with a PC
The followings describe charging procedure by connecting
the product to chargeable USB port on a PC using the
microUSB cable of Sony Mobile AC adapter 05 (sold
separately).
1
Insert the microUSB plug of the microUSB cable, with
the engraved side (
microUSB plug
microUSB connection terminal of the product
2
AC 100V
Insert the USB plug of the microUSB cable into the USB
outlet
port of a PC
Notification LED lights on the product.
Common AC adapter 05
When a confirmation screen for software installation
(sold separately)
appears on the product, tap "Skip" or "Cancel".
1
3
Insert the microUSB plug of Common AC Adapter 05 (sold
When charging is complete, remove the microUSB plug
separately), with the engraved side (▲) facing up, straight
of the microUSB cable from the product and close the
into the microUSB connection terminal of the product
microUSB connection terminal cover firmly
2
4
Insert the power plug of Common AC Adapter 05 (sold
Remove the USB plug of the microUSB cable from the
separately) into an outlet
USB port of the PC
Notification LED lights on the product.
n
❖Information
・ Purchase a specified charger (sold separately).
™
Z4" (simply called the "product"
・ The battery is built into the product.
・ Illustrations used in this manual are just images for explanations.
They may be different from actual ones.
About Operating Instructions
■ Basic Manual (this manual)
Handles only basic operations for main features.
For detailed descriptions on various functions, refer to the
"Basic Manual" (Japanese) app installed on the product or "取
・ Sony Mobile TV antenna cable 02
扱説明書(詳細版) (Full Instruction Manual) (Japanese)"
(02SOHSA)
available on the au homepage.
http://www.au.kddi.com/support/mobile/guide/manual/
・ Company names and product names referred to in this
*1 Including warranty
manual are trademarks or registered trademarks of
respective companies. The TM, ® marks may be omitted in
this manual.
■ "Basic Manual" (Japanese) app
This product allows you to use the "Basic Manual" (Japanese)
app on the product to confirm detailed operational
procedures.
Certain functions can be directly activated from the app
screens on which their operations are described.
From the Home screen, [
] [お客さまサポート
(Customer support)] [Basic Manual] (Japanese)
・ When you activate for the first time, follow the onscreen
instructions to download and install app.
・ Desktop holder
・ microUSB cable
a
au Nano IC Card 04
l
m
Your phone number etc. is recorded in the au Nano IC Card 04.
n
The product is compatible only
au Nano IC Card 04
q
v
with au Nano IC Card 04. You
o
IC (metal) part
cannot use the product with an IC
p
r
card other than au Nano IC Card
s
04.
Front
t
Attaching/removing the au Nano IC Card 04
Before attaching/removing the miroSD memory card, make
sure to turn off the product.
■ Attaching the au Nano IC Card 04
u
1
Open the microSD memory card/au Nano IC Card 04 slot
cover while hooking the groove with your fingernail
w
x
2
Hook the projection of the tray (
) with your fingernail
to slide the tray straight out, then remove the tray from
the product
Tray
h
Turning on (Initial settings)
Turning the power on
1
P (over 1 sec)
The product vibrates and after a while the lock screen
appears.
When you turn on the product for the first time, follow the
onscreen instructions to set the initial settings.
2
Swipe (flick) the screen up
■ Turning the power off
1
P (over 1 sec)
2
[Power off]
) facing up, straight into the
❖Information
・ Press P (over 1 sec) u Long-touch "Power off" u [OK] to
restart the product in safe mode (a function that enables to
start the product in a status equivalent to the status at the
time of purchase).
o
■ For Those Requiring an English Instruction Manual
害用音声お届けサービス (Disaster Voice Messaging Service), and
災害関連情報 (Disaster related information).
You can download the English version of the instruction
manual from the au homepage (available in approximately
1
From the Home screen, [
one month after the product is released).
support)] [au災害対策 (au Disaster Countermeasure)]
Download URL:
au災害対策 (au Disaster Countermeasure) menu appears.
http://www.au.kddi.com/support/mobile/guide/manual/
An agreement screen regarding the use or an initial setting
screen appears for the first time you activate this program.
Regarding notations used in this document
Follow the onscreen instructions.
■ Using 災害用伝言板 (Disaster Message Board)
・ In this manual, keys (key icons) are represented by
simplified illustrations such as b, h, n, P,
Disaster Message Board service enables you to register information of
k.
well-being from an area of distress via LTE NET in case of large-scale
disaster such as earthquake with a seismic intensity of over 6 lower.
・ Operations of tapping menu items/icons/buttons on the
1
screen etc. are indicated as [(name of the item etc.)].
au災害対策 (au Disaster Countermeasure) menu [災害
・ Screen illustrations shown in this manual may look different
用伝言板 (Disaster Message Board)]
from the actual screens. In some cases, minor details or a
❖Information
part of a screen may be omitted.
・ To register information of well-being, E-mail address
・ In this manual, "microSD
™
memory card", "microSDHC
™
(∼ezweb.ne.jp) is required. Set up E-mail address beforehand.
™
memory card" and "microSDXC
memory card" are
abbreviated as "microSD memory card" or "microSD".
■ Using 緊急速報メール (Emergency Rapid Mail)
・ All of the indicated amounts exclude tax unless otherwise
Emergency Rapid Mail is a service that distributes Earthquake
specified.
Early Warning or Tsunami Warning delivered from the
・ "The Company" as appears in the manual refers to the
meteorological bureau or Disaster and Evacuation Information
following companies:
delivered from the government or local public organization to all
Sold by: KDDI CORPORATION, OKINAWA CELLULAR
au cell phones in specified areas simultaneously.
TELEPHONE COMPANY
When you receive Earthquake Early Warning, ensure your
Manufactured by: Sony Mobile Communications Inc.
safety and take proper action according to the situation
Using au 災害対策 (au Disaster Countermeasure)
around you. When you receive a Tsunami Warning, draw away
from sea coast immediately and evacuate to safe place such
You can use 災害用伝言板 (Disaster Message Board) service, 緊
as upland or well-built high building.
急速報メール (Emergency Rapid Mail) service that distributes 緊
1
au災害対策 (au Disaster Countermeasure) menu [緊急
急地震速報 (Earthquake Early Warning), 災害・避難情報 (Disaster
速報メール (Emergency Rapid Mail)]
and Evacuation Information) and 津波警報 (Tsunami Warning), 災
b
c
3
Set au Nano IC Card 04 into the tray with IC (metal) part
4
Close the microSD memory card/au Nano IC Card 04
facing up (
), insert the tray with the card into the
slot cover, press it firmly to ensure that there are no
main unit and press it all the way
gaps between the cover and the main unit
Pay attention to the orientation of the notch and pressing tray.
❖Information
Notch
・ Note the following points, otherwise handling the au Nano IC
Card 04 may cause malfunction or damage.
・ Do not touch the IC (metal) part of the au Nano IC Card 04.
IC
・ Insert in the correct direction.
Back
・ Do not use force to attach or remove.
・ Do not lose the au Nano IC Card 04 after it has been
removed.
・ Do not insert au Nano IC Card 04 with conversion adapter
Tray
attached. Doing so may cause a fault.
Attaching/Removing microSD memory card
Before attaching/removing the miroSD memory card, make
4
Close the microSD memory card/au Nano IC Card 04
sure to turn off the product.
slot cover, press it firmly to ensure that there are no
gaps between the cover and the main unit
■ Attaching microSD memory card
1
■ Removing au Nano IC Card 04
Open the microSD memory card/au Nano IC Card 04 slot
cover while hooking the groove with your fingernail
1
Open the cover while hooking the groove of microSD
2
Hook the projection of the tray with your fingernail to
memory card/au Nano IC Card 04 slot cover with your
slide the tray straight out, then remove the tray from the
fingernail
product
2
Hook the projection of the tray with your fingernail to
slide the tray straight out, then remove the tray from the
main unit
3
Remove au Nano IC Card 04 out of the tray, insert the
tray into the main unit and then press it all the way
Pay attention to the direction of pushing the tray.
i
j
❖Information
■ Force-quitting
・ To change the language later, from the Home screen, [
1
Open the microSD memory card/au Nano IC Card 04 slot
[設定 (Settings)] [言語と入力 (Language & input)] [地域
cover while hooking the groove with your fingernail,
/言語 (Language)]. To make settings, from the Home
press the OFF button (YELLOW) with a fine-tipped object
screen, [
for approximately three seconds, and release your finger
for au service etc., from the Home screen, [
after it vibrates three times
[au Settings Menu] [au Easy Setting].
Setting Screen lock
When the screen lock is set, the backlight turns off to avoid
the keys and touch panel from false operations.
Groove
When the specified time elapses, the product's screen
backlight turns off automatically and screen lock is activated.
OFF button (YELLOW)
1
While the screen is displayed, P
❖Information
・ Pressing the OFF button (YELLOW) by a sharp object such
■ Unlocking screen
as needle may cause malfunction.
The lock screen appears when turning the power on or the
・ Alternatively, press and hold P and upper part of the
backlight on by pressing P.
volume key at the same time for approximately three
1
Swipe (flick) the screen up on the lock screen
seconds, and release your finger after it vibrates three times.
❖Information
Initial settings
・ On the lock screen, swipe "
app or "Camera" app, respectively.
When you turn on the product for the first time, follow the
onscreen instructions to set language, functions, service, etc.
For details, refer to "Setting Guide".
p
q
❖Information
・ Reception of Emergency Rapid Mail is notified by a special warning
tone and vibration. It is not possible to change the warning tone.
] [お客さまサポート (Customer
*Earthquake Early Warning is notified by warning tone and voice
sound ("地震です" (It is an earthquake)), and vibration.
・ The warning tone does not sound when receiving
Emergency Rapid Mail during a call.
・ Earthquake Early Warning may not arrive before strong
tremors in areas near the epicenter.
・ Tsunami Warning is a major tidal wave/seismic sea wave
notification delivered from the meteorological bureau to the
area including target coast.
・ Disaster and Evacuation Information is a service that
distributes bulletins concerning residents' safety including
evacuation advisories, evacuation orders and other
warnings issued by the national and local governments.
・ The service is available only in Japan (it cannot be used overseas).
・ No information fee or communication charge is required for
receiving Emergency Rapid Mail.
・ KDDI is not liable for damages suffered by customers
resulting from the service's information, lack or delay in the
information caused by transmission or system breakdowns,
or other events that are outside the responsibility of KDDI.
・ Refer to the Japan Meteorological Agency web page for details
about distribution of Earthquake Early Warning.
http://www.jma.go.jp/
・ You cannot receive Emergency Rapid Mail when your cell
phone is turned off.
・ Emergency Rapid Mail may not be received if you are in a
place where signal does not reach even in the service area
(e.g. in a tunnel, basement) or in a place with a poor
reception.
・ You cannot receive the Emergency Rapid Mail that the
reception is failed.
d
3
Set microSD memory card into the tray with IC (metal)
part facing up (
), insert the tray with the card into the
main unit and press it all the way
Pay attention to the direction of pushing the tray.
microSD memory card
Tray
4
Close the microSD memory card/au Nano IC Card 04
slot cover, press it firmly to ensure that there are no
gaps between the cover and the main unit
❖Information
・ Insert a microSD memory card in the appropriate direction.
Inserting a microSD memory card forcefully into the slot
could result in failure to remove the microSD memory card
or damage.
・ Do not touch the terminal of the microSD memory card.
k
]
Basic Operation
] [Settings] [Setup guide]. To make settings
Key icons
] [Settings]
The followings are the main functions of b, h, n
keys located at the bottom of the screen.
b
h
b
Return to the previous screen. Close a dialog
box, menu, or the Notifications panel.
Back
h
Display the Home screen.
Home
Long-touch and drag it to "
"Google" app.
n
Display recently used apps on a list and
activate or end them from the list. Also, you can
Recently
used apps
use small apps.
" or "
" to activate "Phone"
r
・ This delivery system is different from Earthquake Early
Warning provided through TV, radio, or other communication
procedures, which means that the time the Earthquake Early
Warning arrives may vary.
・ Information from someplace other than your current location
may be received.
■ Using 災害用音声お届けサービス (Disaster Voice
Messaging Service)
Disaster Voice Messaging Service is a service which allows
you to record your voice and send someone you want to
inform your well-being in case of a large-scale disaster.
1
au災害対策 (au Disaster Countermeasure) menu [災害用
音声お届けサービス (Disaster Voice Messaging Service)]
❖Information
®
・ To use Wi-Fi
, initial settings via 4G (LTE/WiMAX 2+) network
is required.
・ Voice message can be recorded for up to 30 seconds.
・ Voice messages cannot be saved or played if the product
does not have available memory.
■ Using 災害関連情報 (Disaster related information)
You can check history of Disaster and Evacuation Information
delivered by local government, disaster related information
portal, etc.
1
au災害対策 (au Disaster Countermeasure) menu [災害関
連情報 (Disaster related information)] Follow the
onscreen instructions
e
f
■ Removing microSD memory card
1
Open the microSD memory card/au Nano IC Card 04
slot cover while hooking the groove with your finger
2
Hook the projection of the tray with your fingernail to
slide the tray straight out, then remove the tray from the
product
3
Remove the microSD memory card out of the tray,
insert the tray into the main unit and then press it all the
way
Pay attention to the direction of pushing the tray.
4
Close the microSD memory card/au Nano IC Card 04
slot cover, press it firmly to ensure that there are no
gaps between the cover and the main unit
Charging
When you purchase your product, the internal battery is not
fully charged. Charge the battery before use.
❖Information
・ When the charging starts, notification LED lights according to
the battery level. To check the battery level, see the status bar in
the top of the Home screen. Alternatively, from the Home screen,
[
] [Settings] [About phone] [Status] and see "Battery
level".
・ When you start charging with the product powered off, the
power turns on even though operation is not available. Follow
the instructions of each airline or medical facility for the use of
cell phones on their premises.
・ It may take longer to complete for charging with a PC or
while using the camera function.
l
m
Using the touch panel
The display of the product is a touch panel operated by
touching it with your finger.
■ Tap/Double-tap
Tap: Gently touch a screen and then immediately release your
finger. Double tap: Touch the same position twice.
■ Long-touch
Keep touching an item with your finger.
■ Slide
n
While your finger is gently touching the screen, trace it to the
desired direction to move over.
■ Flick (swipe)
Operate the screen by quickly moving (flicking) your finger
up/down or left/right.
" to activate
■ Pinch
Touch the screen with two fingers and widen (pinch-out) or
narrow (pinch-in) the fingers' distance.
■ Drag
Keep touching an item or icon, trace it to the desired direction
to move.
Slide
Flick (swipe)
Pinch
s
t
Advertisement

Related Manuals for Sony Xperia Z4


Summary of Contents for Sony Xperia Z4
- Page 1 OFF button (YELLOW) Return to the previous screen. Close a dialog microUSB cable of Sony Mobile AC adapter 05 (sold ■ Turning the power off While the screen is displayed, P ■ Flick (swipe) ❖Information...
- Page 2 Is "Screen lock" set? slow when you tap in the product or transferring large- ・ Sony Mobile AC adapter 05 (EP880) (sold separately) may apply communication fees. To display the software keyboard, tap a character input box phones for replacement after repairs. Also replaced parts...
Need help?
Do you have a question about the Xperia Z4 and is the answer not in the manual?
Questions and answers