Table of Contents
Advertisement
Quick Links
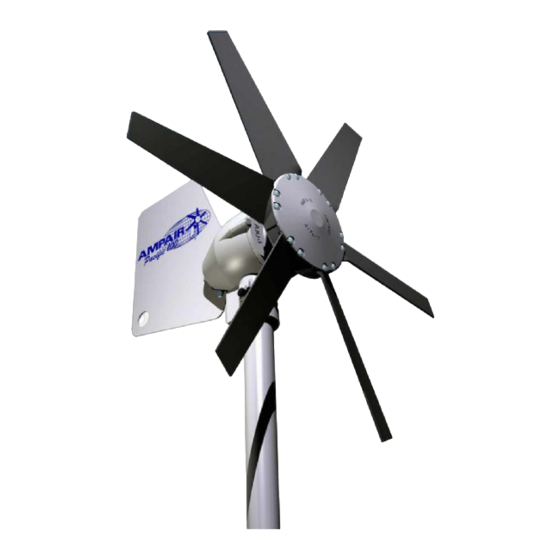
Ampair Pacific
INDEX
SAFETY:
AMPAIR PACIFIC 100 SAFETY
Read before assembling or using
Note. Do not assemble the generator, vane and turbine
until the electrical installation is complete.
ASSEMBLY
Fit the tail vane first.
If you fit the wind turbine first, the machine will turn out
of control & be a danger to approach.
MOUNTING
Very careful attention must be given to the strength and
integrity of the mounting.
This should be capable of withstanding a peak horizontal
load of 120kg (250lbs).
Note. The mounting pole should be vertical. The space
between the blade tips and the mounting pole must be left
clear. i.e. no clamps or other items should diminish this
clearance. The pole base should have a rigid mounting.
(The mounting should not rest on a resonant surface such
as the centre of a cabin roof since this may transmit any
vibration making the machine audible inside).
ELECTRICAL
© This Manual is the Copyright of Ampair Jan. 2001
Owners Manual
Installation & Maintenance
Page
1
1
1
1/2
2
2
3
4
4
5
5
3-6
6
7
8
1
100
MAINTENANCE & SPARES
Key to Component Parts Drawing
It is important to fit a fuse. The fuse should be next to
the battery terminal since, in the event of a fault or
damage to the cable. the battery will supply the fault
current.
CORRECT POLARITY
When wiring the system be aware that if the Pacific is
connected to the wrong battery terminals, giving
REVERSE POLARITY the output rectifiers may be
destroyed or the internal soldered connections to the brush
holders may melt.
Check and double-check polarity before final connection.
CABLE COLOURS
BROWN = (+) Positive.
CHARGE CONNECTION POINT
The Pacific Output must go straight to the batteries.If
the Pacific is connected on the DOWNSTREAM (loads
side) of the battery isolator switch. it leaves scope for
damage to electrical equipment.
Under these conditions it is possible to run the Pacific
whilst the battery is isolated. This can subject the system
to excess voltage. Take care when disconnecting the
Generator in a high wind as the terminal voltage is enough
to give a mild electric shock.
9
9
9
9
9
10
10/11
11
12
12
12
13
13
14
14
14
14
BLUE =(-) Negative.
Advertisement
Table of Contents

Summary of Contents for Ampair Pacific 100
-
Page 1: Table Of Contents
Generator in a high wind as the terminal voltage is enough vibration making the machine audible inside). to give a mild electric shock. ELECTRICAL © This Manual is the Copyright of Ampair Jan. 2001... -
Page 2: System Description
INTRODUCTION dowel pin is located to prevent relative rotation and The Ampair Pacific 100 is a wind driven generator. retained by an M10 plain washer and nyloc nut with a left- capable of supplying up to l00 Watts of electrical power handed thread. -
Page 3: Packing List
MIZZEN BRACKET (P1032) PACKING LIST – Pre-Installation Check AMPAIR PACIFIC 100 GENERATOR Check that a complete and undamaged set of parts has been received. Have you received the voltage ordered 12V or 24V? Carton Contains :- Generator, complete with assembled hub and pivot. -
Page 4: Installation
INSTALLATION The Wind Generator should be sited as high as practicable, clear of windbreaks or buildings and away from sources of turbulence. CHOICE OF MOUNTING POSITION These conditions are shown diagrammatically below. (Land based siting and installation) Good Fig 1. Warning: intermediary guying. -
Page 5: Boat Based
the eye should be visible above ground. screws and shakeproof washers, assemble the poles . Avoid waterlogged soils which have poor holding and A thread locking solution (e.g. Loctite 222) will stop anchor below the frost level. screws shaking loose due to long term vibration. It may be easier to feed the cable through the poles as they Low Temperature Operation: Plastic materials do not are assembled. -
Page 6: Mizzen Bracket
c) Installation: Wiring between the generator Figure 2. Stern Mount Kit (or junction box, connector etc.) and the battery area should be clipped at regular intervals to the structure for safety and a neat job. d) Protecting the System: The simplest possible arrangement feeds the power from the Pacific directly to the battery via an in-line fuse rated at 10 Amps (5 Amps 24V System) in the positive line next to the battery. -
Page 7: Charge Control Regulator
MODEL (12V) S-MOB S-M3B D-M1B REGULATORS Source AMPAIR manufacture 3 Charge Control Regulators to Source Power W 2 x 100 protect lead acid batteries from overcharge. Programme These are not "shunt" type regulators, which dissipate Battery Banks excess charge as heat, but an electronic power switch Setpoint V (low) 13.6... -
Page 8: Regulator Wiring Diagrams
All multistage regulators are internally protected by an SAE cartridge fuse. These are not substitutes for battery protection fuses. The fuses must be next to the battery S-M1B terminals since, in the event of a fault, the batteries would source the fault current. Check and double-check polarities before making connections, insert the fuses in the fuse carriers last of all. -
Page 9: Final Assembly
Tail Vane: Clamp the tail vane using the M8 x 25 that the pairs are placed opposite. screws washers and lock nuts. If they are correctly assembled, contact Ampair . d) Wind turbine: Assemble the blades to the hub with To confirm correct blade performance, firstly weigh the the concave or hollow side facing the wind. -
Page 10: Component Parts Drawing
Fig 8... -
Page 11: Dimensions
PACIFIC 100 COMPONENT PARTS KEY TO CUTAWAY DRAWING Tail vane M8 x 25 screw, plain washer x 2, & nyloc nut (3 of each) After-body Rear ball bearing: Type 6202. 15 x 35 x 11mm with frictionless cover Six pole stator (2 off) Shaft "O"... -
Page 12: Inspection
Caution: To avoid personal injury wear sturdy gloves as a necessary. If difficulty is encountered in removing the hub precaution. from the shaft, avoid hammering on the shaft-end. Ampair The wind turbine blades are capable of causing offer a purpose made puller. -
Page 13: Electrical Section
If your multimeter has a diode check feature, select this (if not select the highest resistance range) and having removed the brush caps and brushes, apply the red meter Figure 10. Pacific 100 Internal Wiring... -
Page 14: Alternator Section
Stator to body - Loctite 648 Bearings to body - Loctite 641 The Ampair Pacific 100 is warranted for one year from Shaft to bearings - Loctite 641 the date of purchase. Any faulty part will be replaced free of charge and any When replacing the fore-body, make sure that the "O"...
Need help?
Do you have a question about the Pacific 100 and is the answer not in the manual?
Questions and answers