Acer P1303W Series User Manual
Hide thumbs
Also See for P1303W Series:
- Quick start manual (19 pages) ,
- User manual (63 pages) ,
- User manual (75 pages)

Related Manuals for Acer P1303W Series


Summary of Contents for Acer P1303W Series
- Page 1 Acer Projector P1100/P1200/P1203/P1206/ P1303W Series User's Guide Downloaded From projector-manual.com Acer Manuals...
- Page 2 Serial number: ___________________________________ Date of purchase: ________________________________ Place of purchase: ________________________________ Acer and the Acer logo are registered trademarks of Acer Incorporated. Other companies' product names or trademarks are used herein for identification purposes only and belong to their respective companies.
- Page 3 Never push objects of any kind into this product through cabinet slots as they may touch dangerous voltage points or short-out parts that could result in a fire or electric shock. Never spill liquid of any kind onto or into the product. Downloaded From projector-manual.com Acer Manuals...
- Page 4 Use the product only with the supplied power supply cord set. If you need to replace the power cord set, make sure that the new power cord meets the following requirements: detachable type, UL listed/CSA certified, VDE approved or its equivalent, 4.6 meters (15 feet) maximum length. Downloaded From projector-manual.com Acer Manuals...
- Page 5 Locations where the altitudes are higher than 10000 feet. • Unplug immediately if there is something wrong with your projector. Do not operate if smoke, strange noise or odor comes out of your projector. It Downloaded From projector-manual.com Acer Manuals...
- Page 6 • This product is capable of displaying inverted images for ceiling mount installation. Only use acer ceiling mount kit for mounting the projector and ensure it is securely installed. Downloaded From projector-manual.com Acer Manuals...
- Page 7 Do not throw this electronic device into the trash when discarding. To minimize pollution and ensure utmost protection of the global environment, please recycle. For more information on the Waste from Electrical and Electronics Equipment (WEEE) regulations, visit http://www.acer-group.com/public/ Sustainability/sustainability01.htm Mercury advisory For projectors or electronic products containing an LCD/CRT monitor or display: “Lamp(s) contain Mercury,...
-
Page 8: Precautions
When the lamp reaches the end of its life, it will burn out and may make a loud popping sound. If this happens, the projector will not turn back on until the lamp module has been replaced. To replace the lamp, follow the procedures listed under "Replacing the Lamp". Downloaded From projector-manual.com Acer Manuals... -
Page 9: Table Of Contents
How to optimize image size and distance How to get a preferred image size by adjusting distance and zoom User Controls Installation menu Acer Empowering Technology Onscreen Display (OSD) Menus Color Image Management Setting Audio Timer Language Appendices Downloaded From projector-manual.com Acer Manuals... - Page 10 Troubleshooting LED & Alarm Definition Listing Replacing the Lamp Ceiling Mount Installation Specifications Compatibility modes Regulations and safety notices Downloaded From projector-manual.com Acer Manuals...
-
Page 11: Introduction
P1200/P1203/P1206 series : Native 1024 x 768 XGA resolution P1303W: Native 1280 x 800 WXGA resolution 4:3 / 16:9 aspect ratio supported (P1100/P1200/P1203/P1206) Full/4:3/16:9/L.Box aspect ratio supported (P1303W) • Acer ColorBoost technology delivers nature’s true colors for vivid, life-like images • High brightness and contrast ratio •... -
Page 12: Package Overview
Contact your dealer immediately if any thing is missing. Projector with lens cap Power cord VGA cable Compostive video cable 2 x Batteries Carrying case PgUp PgDn Security card User's Guide Remote control Acer Projector Quick Start Guide Quick start guide Downloaded From projector-manual.com Acer Manuals... -
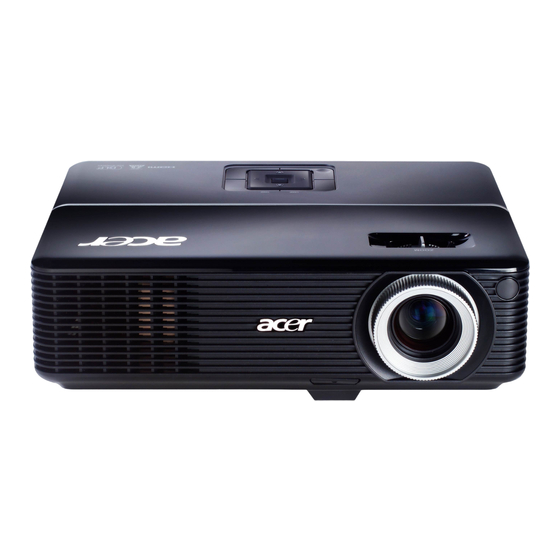
Page 13: Projector Overview
Front / upper side Description Description Control panel Zoom lever Ventilation (inlet) Remote control receiver Ventilation (outlet) Focus ring Elevator button Zoom lens Elevator foot 10 Lens cap Rear side P1100/P1200/ P1203/P1206/ P1303W P1203/P1303W/ P1206 P1100/P1200 Downloaded From projector-manual.com Acer Manuals... -
Page 14: Control Panel
(OSD) menu, back to the previous step for the OSD menu operation or exit the OSD menu. • Confirm your selection of items. POWER See the contents in "Turning the Projector On/Off" section. TEMP Temp Indicator LED Downloaded From projector-manual.com Acer Manuals... - Page 15 Icon Function Description Four directional select to select items or make keys adjustments to your selection. SOURCE Changes the active source. Empowering key Unique Acer functions: eOpening, eView, eTimer, ePower Management. Downloaded From projector-manual.com Acer Manuals...
-
Page 16: Remote Control Layout
Aim the remote at the viewing screen, press and hold this button to activate the laser pointer. This function is not supported in Japanese market. Empowering Unique Acer functions: eOpening, eView, eTimer, ePower Management. KEYSTONE Adjusts the image to compensate for distortion caused by tilting the projector (±... - Page 17 HDMI™ To change source to HDMI™. (for the model if with HDMI™ connector) MUTE To turn on/off the volume. WIRELESS No function. KeyPad 0~9 Press "0~9" to input a password in the "Security settings". Note: Downloaded From projector-manual.com Acer Manuals...
-
Page 18: Getting Started
11 Audio cable jack/RCA 3 RCA component cable 12 12V DC cable Note: To ensure the projector works well with your computer, please make sure the timing of the display mode is compatible with the projector. Downloaded From projector-manual.com Acer Manuals... -
Page 19: Turning The Projector On/Off
If you connect to multiple sources at the same time, use the "Source" button on either control panel or the remote control or direct source key on the remote control to switch between inputs. Power button Lens cap Downloaded From projector-manual.com Acer Manuals... -
Page 20: Turning The Projector Off
LED temp indicator will blink. Contact your local dealer or service center. Note: Whenever the projector automatically shuts down and the LED lamp indicator turns solid red, contact your local reseller or service center. Downloaded From projector-manual.com Acer Manuals... -
Page 21: Adjusting The Projected Image
Lower the image to the desired height angle (Illustration #2) , then release the button to lock the elevator foot into position. Use Tilt adjusting wheel (Illustration #3) to fine-tune the display angle. Elevator foot release button Elevator foot Tilt adjusting wheel Downloaded From projector-manual.com Acer Manuals... -
Page 22: How To Optimize Image Size And Distance
Note: Remind as below figure, the space of 133 cm height is required when located at 3m distance. Height: 133cm Form base to top of image Height: 120cm Desired Distance Figure: Fixed distance with different zoom and screen size. Downloaded From projector-manual.com Acer Manuals... - Page 23 359 x 269 372 x 279 410 x 308 419 x 314 462 x 346 465 x 349 513 x 385 512 x 384 564 x 423 558 x 419 615 x 462 Zoom Ratio: 1.1x Downloaded From projector-manual.com Acer Manuals...
- Page 24 • P1303W series Example: If the projector is 3 m from the screen, good image quality is possible for image sizes between 82" and 90". P1303W series Note: Remind as below figure, the space of 135 cm height is required when located at 3m distance.
- Page 25 323 x 202 353 x 221 387 x 242 412 x 257 452 x 282 471 x 294 516 x 323 529 x 331 581 x 363 588 x 368 645 x 403 Zoom Ratio: 1.1x Downloaded From projector-manual.com Acer Manuals...
-
Page 26: How To Get A Preferred Image Size By Adjusting Distance And Zoom
For example: to obtain an image size of 50" set the projector at a distance 2 m and 2.2 m from the screen and adjust the zoom level accordingly. Downloaded From projector-manual.com Acer Manuals... - Page 27 142 x 107 163 x 122 183 x 137 203 x 152 244 x 183 305 x 229 366 x 274 406 x 305 508 x 381 10.9 610 x 457 11.9 Zoom Ratio: 1.1x Downloaded From projector-manual.com Acer Manuals...
- Page 28 For example: to obtain an image size of 50" set the projector at a distance 1.7 m and 1.8 m from the screen and adjust the zoom level accordingly. Downloaded From projector-manual.com Acer Manuals...
- Page 29 129 x 81 151 x 94 172 x 108 194 x 121 215 x 135 258 x 162 323 x 202 388 x 242 431 x 269 538 x 337 646 x 404 10.0 Zoom Ratio: 1.1x Downloaded From projector-manual.com Acer Manuals...
-
Page 30: User Controls
The new settings will be saved automatically upon exiting the menu. Push the menu button anytime to exit the menu and return to the Acer welcome screen. Downloaded From projector-manual.com Acer Manuals... -
Page 31: Acer Empowering Technology
Acer Empowering Technology Acer Empowering Key provides four Empowering Acer unique functions, they are "Acer eView Management", "Acer eTimer Management" and "Acer eOpening Management" and "Acer ePower Management" respectively. Press " " key for more than one second to launch the Onscreen display main menu to modify its function. -
Page 32: Onscreen Display (Osd) Menus
• To exit OSD, press "MENU" on the remote control or control panel again. The OSD menu will close and the projector will automatically save the new settings. Main menu Setting Sub menu Downloaded From projector-manual.com Acer Manuals... -
Page 33: Color
Saturation Adjusts a video image from black and white to fully saturated color. • Press to decrease the amount of color in the image. • Press to increase the amount of color in the image. Downloaded From projector-manual.com Acer Manuals... -
Page 34: Image
Rear: Reverses the image so you can project from behind a translucent screen. Projection Location • Auto: Automatically adjusts projection location of image. • Desktop • Ceiling: Turns the image upside down for ceiling-mounted projection. Downloaded From projector-manual.com Acer Manuals... - Page 35 Note: "Sharpness" functions is not supported under HDMI and Computer mode. Note: 3D function is supported by VGA source only. Please see timing table for detail 3D timings. Note: It needs correct settings on graphic card 3D application program for Downloaded From projector-manual.com Acer Manuals...
- Page 36 - DDD TriDef Media Player (Trial): http://www.tridef.com/download/TriDef-3-D-Experience-4.0.2.html Note: "3D Sync L/R" is only available when DLP 3D is enabled. Note: There has reminder screen if 3D still enable when power on projector. Please adjust setting depended on your purpose. Downloaded From projector-manual.com Acer Manuals...
-
Page 37: Management
Use this function to select your desired startup screen. If you change the setting, the changes will take effect when you exit the OSD menu. • Acer: The default startup screen of your Acer projector. • User: Use memorize picture from "Screen Capture" function. Downloaded From projector-manual.com Acer Manuals... - Page 38 "Keystone" is set to the default value 0 and the aspect ratio is set to 4:3. For details, refer to the "Image" section. • Change the "Startup Screen" from the default setting "Acer" to "User". • Press "Screen Capture" to customize the startup screen.
- Page 39 VGA OUT (Standby) Default is "Off". Choose "On" to enable VGA OUT connection. Reset • Press the button and choose "Yes" to return the parameters on all menus to the factory default settings. Downloaded From projector-manual.com Acer Manuals...
-
Page 40: Audio
• Timer Volume Select this function to adjust the notification volume when the timer function is enabled and time is up. Timer Display • Press to which timer mode to display on the screen. Downloaded From projector-manual.com Acer Manuals... -
Page 41: Language
Language Language Choose the multilingual OSD menu. Use the key to select your preferred menu language. • Press to confirm the selection. Downloaded From projector-manual.com Acer Manuals... -
Page 42: Appendices
Appendices Troubleshooting If you experience a problem with your Acer projector, refer to the following troubleshooting guide. If the problem persists, please contact your local reseller or service center. Image Problems and Solutions Problem Solution No image appears • Connected as described in the "Getting Started"... - Page 43 3.3 to 39.4 feet (1.0 to 10.0 meters)(P1303W) from the projector. Refer to the "How to Get a Preferred Image Size by Adjusting Distance and Zoom" section for more information. Downloaded From projector-manual.com Acer Manuals...
- Page 44 -> Auto Keystone" and choose "Off" on the OSD, if "Keystone" button is not available on the remote control. Image is reversed • Select "Image --> Projection" on the OSD and adjust the projection direction. Downloaded From projector-manual.com Acer Manuals...
-
Page 45: Osd Messages
Projector Overheated - the projector has exceeded its recommended operating temperature and must be allowed to cool down before it may be used. Replace the lamp - the lamp is about to reach its maximum lifetime. Prepare to replace it soon. Downloaded From projector-manual.com Acer Manuals... -
Page 46: Problems With The Projector
If this happens, the projector will not turn on until the lamp module has been replaced. To replace the lamp, follow the procedures in the "Replacing the Lamp" section. Downloaded From projector-manual.com Acer Manuals... -
Page 47: Led & Alarm Definition Listing
Power button ON Lamp retry Quick flashing Turning off Quick (cooling state) flashing Turning off (cooling completed) Error (thermal failure) Error (fan lock failure) Quick flashing Error (lamp breakdown) Error (color Wheel fail) Quick flashing Downloaded From projector-manual.com Acer Manuals... -
Page 48: Replacing The Lamp
To replace the lamp module, reverse the previous step. Warning: To reduce the risk of personal injury, do not drop the lamp module or touch the lamp bulb. The bulb may shatter and cause injury if it is dropped. Downloaded From projector-manual.com Acer Manuals... -
Page 49: Ceiling Mount Installation
Secure the ceiling rod using the appropriate type of four-cylinder screws. Ceiling Mount Base - Attach to ceiling Short Rod Long Rod Extension Rod Long cylinder Cap Allen Key Screw Type A - For tightning/loosening 50 mm length/8 mm diameter - Tightening Screw Medium Rod Downloaded From projector-manual.com Acer Manuals... - Page 50 Use two washers for extra support, if deemed necessary. Attach the ceiling bracket to the ceiling rod. Large cylinder cap A llen K ey - For tightening/loosening Screw Type A Tightening Screw 50 mm length - 8 mm diameter Downloaded From projector-manual.com Acer Manuals...
- Page 51 3 mm diameter screws are enclosed in the screw pack. Models Screw Type B Washer Type Diameter (mm) Length (mm) Large Small P1100/P1200/ P1203/P1206/ P1303W SCREW SPEC. M3 x 10 mm 160.0 mm Downloaded From projector-manual.com Acer Manuals...
-
Page 52: Specifications
Projection lens P1100/P1200/P1203/P1206 series: F/ 2.41 - 2.55, f = 21.79 mm - 23.99 mm, 1.1X manual zoom lens P1303W series: F/ 2.5 - 2.67, f = 21.86 - 24.00 mm, 1.1X manual zoom lens Projection screen size (diagonal) P1100/P1200/P1203/P1206 series: 27.46" (0.70 m) - 302.8"... - Page 53 • 3.5 mm audio jack input x1 • RS232 x1 • USB x1: for remote computer control Below items are for P1203/P1206/P1303W series only: • VGA input x 2 • 3.5 mm audio jack output x1 • 12V DC out for screen control x1 Standard package contents •...
-
Page 54: Compatibility Modes
1280X1024 91.15 QuadVGA 1280x960 60.00 1280x960 75.00 SXGA+ 1400x1050 65.32 UXGA 1600x1200 75.00 Power Mac G4 640x480 31.50 640x480 66.6(67) 35.00 800x600 37.88 1024x768 48.36 1152x870 68.68 1280x960 75.20 i Mac DV (G3) 1024x768 60.30 Downloaded From projector-manual.com Acer Manuals... - Page 55 67.50 1080p 1920x1080 56.26 B. HDMI Digital HDMI - PC Signal Modes Resolution V.Frequency [Hz] H.Frequency [KHz] 640x480 31.47 640x480 37.86 640x480 37.50 640x480 43.27 640x480 119.51 61.61 SVGA 800x600 35.20 800x600 37.88 800x600 48.08 Downloaded From projector-manual.com Acer Manuals...
- Page 56 HDMI - Extended Wide timing (same as DVI) Modes Resolution V.Frequency [Hz] H.Frequency [KHz] WXGA 1280x768 47.78 1280x768 60.29 1280x768 68.63 1280x720 44.80 1280x800 49.60 1440x900 55.90 1680x1050 65.30 1366x768 47.71 1920x1080-EIA 66.60 1024x600 37.30 Downloaded From projector-manual.com Acer Manuals...
- Page 57 1280x720 37.50 1080i 1920x1080 60(30) 33.75 1080i 1920x1080 50(25) 33.75 1080p 1920x1080 67.50 1080p 1920x1080 56.26 31.5k - 100 kHz Horizontal scan rate: 25 - 85 Hz, Vertical scan rate: 120Hz (for 3D mode only) Downloaded From projector-manual.com Acer Manuals...
-
Page 58: Regulations And Safety Notices
(1) this device may not cause harmful interference, and (2) this device must accept any interference received, including interference that may cause undesired operation. Notice: Canadian users This Class B digital apparatus complies with Canadian ICES-003. Downloaded From projector-manual.com Acer Manuals... -
Page 59: Declaration Of Conformity For Eu Countries
Cet appareil numérique de la classe B est conforme a la norme NMB-003 du Canada. Declaration of Conformity for EU countries Acer hereby declares that this projector series is in compliance with the essential requirements and other relevant provisions of Directive 1999/5/EC. Compliant with Russian regulatory certification... - Page 60 Union, as well as Norway, Switzerland, Iceland and Liechtenstein. This device must be used in strict accordance with the regulations and constraints in the country of use. For further information, please contact local office in the country of use. Please see http:// ec.europa.eu/enterprise/rtte/implem.htm for the latest country list. Downloaded From projector-manual.com Acer Manuals...
-
Page 61: Declaration Of Conformity
Taipei Hsien 221, Taiwan Declaration of Conformity Acer Incorporated 8F, 88, Sec. 1, Hsin Tai Wu Rd., Hsichih, Taipei Hsien 221, Taiwan Contact Person: Mr. Easy Lai, e-mail:easy_lai@acer.com.tw And, Acer Europe SA Via Cantonale, Centro Galleria 2 6928 Manno Switzerland... - Page 62 Article 3.2 Spectrum Usages -. EN300 328 -. EN301 893 (Applicable to 5GHz high performance RLAN). Year to begin affixing CE marking 2009. Oct. 16, 2009 _______________________________ Easy Lai /Manager Date Regulation Center, Acer Inc. Downloaded From projector-manual.com Acer Manuals...
- Page 63 P1100/P1200/P1203/ P1206/P1303W series Name of Responsible Party: Acer America Corporation Address of Responsible Party: 333 West San Carlos St. San Jose, CA 95110 U. S. A. Contact Person: Acer Representative Phone No.: 254-298-4000 Fax No.: 254-298-4147 Downloaded From projector-manual.com Acer Manuals...
Need help?
Do you have a question about the P1303W Series and is the answer not in the manual?
Questions and answers