Table of Contents
Advertisement
Available languages
Available languages
Advertisement
Chapters
Table of Contents

Related Manuals for Bertazzoni PROCS30X


Summary of Contents for Bertazzoni PROCS30X
- Page 1 Instruction Manual Guide de l'utilisateur PROCS30X MASCS30X...
-
Page 2: Table Of Contents
Installation dimensions ........................66 Dear Customer, Before going any further, we want to thank you for preferring our BERTAZZONI product. We are sure that this modern, functional and practical steam oven, manufactured with top quality materials, will fully meet your expectations. -
Page 3: Grounding Instructions
Grounding Instructions This appliance must be connected to a grounded, metallic, permanent wiring system, or an equipment grounding conductor should be run with the circuit conductors and connected to the equipment grounding terminal or lead on the appliance. Warning! IMPROPER USE OF THE GROUNDING CAN RESULT IN A RISK OF ELECTRICAL SHOCK. -
Page 4: Safety Information
Safety Information Carefully read the instructions before installing and using the equipment. The manufacturer is not liable for improper installation and use of the equipment that may cause injuries and damage. Always keep the instructions at hand, so they can be easily referred to during use. - Page 5 Safety Information Safety of children and vulnerable adults WARNING! Risk of choking, injury or permanent disability. This appliance can be used by children aged 8 years and above and persons with reduced physical, sensory or mental capabilities or lack of experience and knowledge if they are given supervision or instructions concerning how to use the appliance in a safe way and understand the hazards involved.
-
Page 6: Safety Instructions
Safety Instructions may represent a danger to users’ safety and WARNING! prejudice the correct working of the appliance. Before connecting the appliance compare the power data (voltage and frequency) indicated on WARNING! the characteristics plate with those of the power Repairs and maintenance, especially of parts supply in question. -
Page 7: Description Of Your Oven
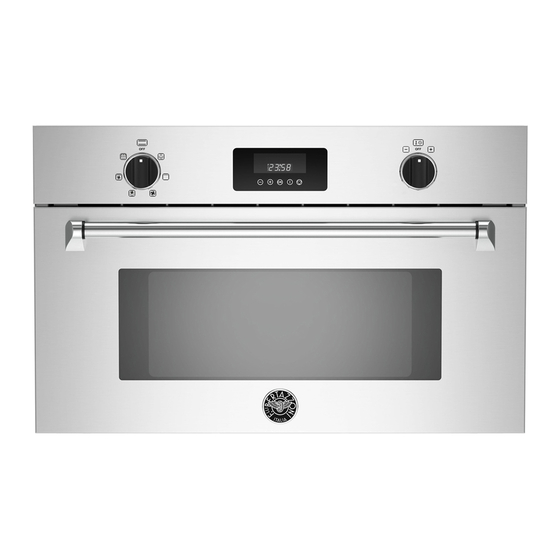
Description of your oven 1. – Door window glass 5. – Baking tray 2. – Safety catches 6. – Perforated baking tray 3. – Water tank 7. – Shelf guides 4. – Control panel 8. – Rack 9. – Lamp bulb Function Selector knob Delayed Start indicator “+”... - Page 8 Description of your oven Description of Functions Symbol Function Foods / Function Cooking vegetables and food. Steam Cooking and heating carefully. Heating and cooking small portions of food. Broiler Broiling food. Convection Roasting and baking. Cooking meals with hot damp circulating air. Steam + Cooking potatoes, rice.
-
Page 9: Basic Settings
Basic settings Initial Settings To set the clock and the water hardness After your steam oven is first plugged in or after a parameter value proceed as described in the power failure, the clock display will flash to following chapters: indicate that the time shown is not correct. -
Page 10: Showroom Mode
Basic settings Water hardness Ca + Mg English deg. French deg. German deg. Type Display (ppm) [°eH] [°dF] [°dH] Soft water 0 to 150 0 to 11 0 to 15 0 to 8 SOFT Medium water 151 to 350 12 to 25 16 to 35 9 to 20 Hard water... -
Page 11: Basic Functions
Basic Functions Steam function Use this function to cook all sorts of vegetables, rice, fish and meat. It is also suitable for extracting juice from berries and for simultaneous defrosting, cooking and regenerating. 4. Turn the “+”/ “-“ Selector Knob to the left 1. - Page 12 Basic Functions Convection Use this function to bake and roast. 4. Turn the “+”/ “-“ Selector Knob to the left 1. Rotate the Function Selector knob to the position corresponding to the Convection or right to set the desired duration. function.
- Page 13 Basic Functions Broiler + Fan Use this function to cook lasagne, poultry, baked potatoes and casseroles. 1. Rotate the Function Selector knob to the 3. Press the Start key. The oven will start to position corresponding to the Broiler + Fan operate.
-
Page 14: Special Functions
Special Functions Delayed Start Time Use this function to program the start of the cooking to a different time. you can delay the start of the programme up 1. Rotate the Function Selector knob to the 9:59 to 9 hours and 59 minutes - desired function position (This function works with: Steam... -
Page 15: Filling The Water Tank
Filling the water tank Filling the water tank Emptying the water tank All steam functions require the water tank to be When the appliance is switched off, the residual full. water is pumped back into the water tank. Fill the water tank up with cold, fresh drinking While the water is being pumped the display shows “PUMP”. -
Page 16: When The Oven Is Working
When the oven is working... Interrupting a cooking cycle Cancelling a cooking cycle You can stop the cooking process at any time by If you wish to cancel the cooking process, press pressing the Stop key once. the Stop key for 3 seconds. The oven incorporates a steam-reduction function You will then hear a beep and the clock will that is activated when the Start/Stop key is... -
Page 17: Usage, Tables And Tips
Usage, tables and tips The perforated container is suitable for The rack is used when cooking with small cooking fresh or deep frozen vegetables, meat containers, as for example, dessert bowls and and poultry. In this case it is important that the to regenerate plate dishes. - Page 18 Usage, tables and tips Steam cooking - Fish Fish Quantity Temperature ºF Time min. Container Level Gilthead sea bream 800-1200 g 30-40 Perforated Trout 4 x 250 g 20-25 Perforated Salmon filet 500-1000 g 15-25 Perforated Salmon trout 1000-1200 g 25-35 Perforated King prawns...
- Page 19 Usage, tables and tips Vegetables Temperature Time Vegetables Container Level ºF min. Eggplant/Aubergine in slices 15-20 Perforated Beans 35-45 Perforated Broccoli florets with stalk 25-30 Perforated Broccoli 15-20 Perforated florets without stalk Cauliflower 25-30 Perforated florets Cauliflower whole head 40-45 Perforated Peas 30-35...
- Page 20 Usage, tables and tips Desserts Desserts Quantity Temperature ºF Time min. Container Level Stewed apples 500-1500 g 15-25 Not perforated Stewed pears 500-1500 g 25-30 Not perforated Crème brûlée 20-25 Rack - bowl Crème caramel 25-30 Rack - bowl Yogurt 4-6 hrs.
- Page 21 Usage, tables and tips Defrost Time Vegetables / Side dish Temperature ºF Container Level min. Broccoli florets with stalk 15-20 Perforated Mixed vegetables 15-20 Perforated Spinach leaves 10-15 Not perforated portions Cauliflower 15-20 Perforated florets Peas 15-25 Perforated Curly kale bigger portion 25-35 Not perforated...
-
Page 22: Cooking With The Broiler
Cooking with the Broiler For good results with the Broiler, use the grid iron 4. If the Broiler is used for extended period of supplied with the oven. time it is normal to find that the elements will switch themselves off temporarily due to the Fit the grid iron in such a way that it doesn’t safety thermostat. -
Page 23: Cooking With Convection
Cooking with Convection Roasting and baking Quantity Power Time Standing Type Temperature ºF Comments (Watt) (min) Time (min) Do not put lid on Beef stew 1000 320/340 80/90 container Do not put lid on Pork loin 500/600 355/375 35/40 container Put lid on container. - Page 24 Cooking with Convection Cooking – Cakes Type Container Level Temperature ºF Time (min) Walnut cake Spring-form type tin 340/355 30/35 Fruit tart Spring-form type tin 300/320 35/45 Cake tin with central Fruit cakes 340/375 30/45 hole Savoury tarts Spring-form type tin 320/355 50/70 Simple cake (sponge cake)
-
Page 25: Care And Maintenance
Care and maintenance To put them back, insert the shelf guides into the Cleaning the cooking space knurled nuts 2 in the back and position on the Avoid using abrasive cleaners such as scouring screws in the front. Screw the knurled nuts 1 and pads, steel wool, etc. - Page 26 Care and maintenance Descaling Suitable descaling solutions For descaling, use the descaling solution “durgol Whenever steam is produced, irrespective of the ®”. hardness of the local water supply (i.e. the limescale content of the water), limescale is This solution allows a professional and careful deposited inside the steam generator.
- Page 27 Care and maintenance Descaling procedure Warning: For safety reasons, the descaling 8. The descaling process is silent and during process cannot be interrupted and it takes this process the display shows continuously about 45 minutes. "2 CUPS" (without blinking). 9. When the display shows “4 CUP” flashing The appliance must be in idle state prior to starting the descaling cycle.
-
Page 28: Oven Cleaning
Oven cleaning Warning! Cleaning should be done with the Oven interior oven power switched off. Take the plug out of After use, remove any water on the bottom of the the socket or switch off the oven’s power cooking space with a soft cloth. Leave the circuit. -
Page 29: What Should I Do If The Oven Doesn't Work
What should I do if the oven doesn’t work? WARNING! Any type of repair must only be done by a specialised technician. Any repair The appliance still makes a noise after the done by a person not authorised by the cooking process is finished! This is not a manufacturer is dangerous. -
Page 30: Technical Characteristics
Technical characteristics Displays Display Description Descaling SOFT Soft water. Medium water. HARD Hard water. Appliance must be descaled. / CAL Flashing – descaling starts. 2 CUP Feed 2 cups descaling solution into the water tank. 4 CUP Feed 4 cups cold water into the water tank for rinsing. Water tank Indication that water tank is missing. -
Page 31: Installation Instructions
Installation instructions Before installation For hook-up of the oven you will need to have an approved junction box installed where it will be Check that the input voltage indicated on the easily reached through the front of the cabinet rating plate is the same as the voltage of the where the oven will be located. -
Page 32: Electrical Connections
Installation instructions Use grounding terminal or lead to ground In Canada: unit; and Wiring must conform to Cana dian Electrical Connect neutral terminal or lead to branch Code C22.1- latest edition. You can obtain a circuit neutral in usual manner. copy of the Canadian Electrical Code by writing to: Canadian Standards Association 3-Wire branch circuit (for US only) - Page 33 Installation instructions 4-Wire branch circuit (for US and After installation CANADA) The oven only functions when the door is closed correctly. Refer to the following Figure: Disconnect ground from neutral at free end After the first use, clean the inside of the oven and accessories, following cleaning...
- Page 34 Instructions pour l'installation ......................63 Dimensions d’Installation ........................ 66 Cher client: Nous vous remercions d'avoir préféré notre produit BERTAZZONI. Nous sommes certains que ce four à vapeur moderne, fonctionnel et pratique, fabriqué avec des matériaux de première qualité, vous donnera toute satisfaction.
-
Page 35: Instructions Pour Lier À La Terre
Instructions pour lier à la terre L’appareil doit être lié à la terre. En cas de court-circuit électrique, la liaison à la terre réduit le risque de choc électrique grâce a la fuite permise par le fil de terre. L’appareil vient équipé avec un fil de terre ainsi que la prise de terre. La fiche doit être branchée dans une prise correctement installée et liée à... -
Page 36: Consignes De Sécurité
Consignes de sécurité Avant d'installer et d'utiliser cet appareil, lisez soigneusement les instructions fournies. Le fabricant ne peut être tenu pour responsable des dommages et blessures liés à une mauvaise installation ou utilisation. Conservez toujours cette notice avec votre appareil pour vous y référer ultérieurement. MESURES DE SÉCURITÉ... - Page 37 Consignes de sécurité 14. NE PAS TOUCHER LES ÉLÉMENTS CHAUFFANTS OU LES SURFACES INTÉRIEURES DU FOUR - Les éléments chauffants peuvent être chauds même si ils sont en couleur foncée. 15. Les surfaces intérieures d'un four deviennent assez chaudes pour causer des brûlures.
- Page 38 Consignes de sécurité Sécurité des enfants et des personnes vulnérables ADVERTISSEMENT! Risque d'asphyxie, de blessure ou d'invalidité permanente. Cet appareil peut être utilisé par des enfants de plus de 8 ans, ainsi que des personnes dont les capacités physiques, sensorielles et mentales sont réduites ou dont les connaissances et l'expérience sont insuffisantes, à...
-
Page 39: Instructions De Sécurité
Instructions de sécurité ou modifications des composants électriques ou mécaniques peuvent constituer un danger pour la ATTENTION! sécurité de l'utilisateur et perturber le bon Avant de brancher l'appareil, comparez-en les fonctionnement de l'appareil. données (tension et fréquen-ce) indiquées sur la plaque des caractéristi-ques avec celles de votre ATTENTION! réseau électrique. -
Page 40: Description Du Four
Description du four 1. – Vitre de la porte 5. – Plat perforé 2. – Charnières de sécurité 6. – Plat 3. – Réservoir d’eau 7. – Supports latéraux 4. – Panneau de contrôle 8. – Grille support 9. – Lampe Bouton de sélection des fonctions Indicateur de Démarrage différé... - Page 41 Description du four Description des fonctions Symbole Fonction Aliments Cuisson de toute sorte de légumes, riz, céréales et viande. Vapeur Extraction du jus des baies. Action conjointe de décongélation et de cuisson des légumes. Grill Griller des aliments. L’Air chaud Rôtir et cuire.
-
Page 42: Réglages De Base
Réglages de base Définitions préliminaires Lorsque le four à vapeur est allumé pour la première fois ou après une panne d'électricité, le cadran de l'horloge clignote pour indiquer que l'heure indiquée n'est pas correcte. Le four ne fonctionnera pas tant que l'heure, la dureté de l'eau et le calibrage ne sont pas définis. Pour définir l'heure et la dureté... - Page 43 Réglages de base Le tableau suivant indique les définitions des différents degrés de dureté de l'eau. Dureté de l’eau Degrés Ca + mg Degrés anglais Degrés français Type Affichage allemands (ppm) [°da] [°df] [°da] Douce 0 à 150 0 à 11 0 à...
-
Page 44: Fonctions De Base
Fonctions de base Fonction Vapeur Utilisez cette fonction pour cuire tous les types de légumes, le riz, les céréales et la viande. Elle est également utile pour obtenir des jus de baies et pour décongeler, cuire et réchauffer. 1. Tournez le bouton de sélection des 4. - Page 45 Fonctions de base Chaleur tournante Utilisez cette fonction pour cuire vos aliments. 1. Tournez le bouton de sélection des 4. Sélectionnez le temps souhaité en tournant le bouton « +/- » dans n’importe quelle fonctions fonction Chaleur Tournante. L’indicateur de la température direction.
- Page 46 Fonctions de base Grill ventilé Utilisez cette fonction pour cuisiner lasagnes, la volaille, les pommes de terre cuites au four et casseroles. 1. Tournez le bouton de sélection des 3. Appuyez sur la touche Start. Le four se met fonctions sur la fonction Grill ventilé. en marche.
-
Page 47: Fonctions Spéciales
Fonctions spéciales Début de cuisson programmé Utilisez cette fonction pour programmer le début de la cuisson à une heure différente. différé. (0:00 apparaît par défaut sur l'écran 1. Tournez le bouton Sélecteur de fonction et vous pouvez retarder le démarrage du sur la fonction souhaitée (Cette fonction programme jusqu'à... -
Page 48: Alimentation En Eau
Alimentation en eau Remplir le réservoir d’eau nouveau pompée dans le réservoir. RISQUE DE DÉBORDEMENT! Il est nécessaire que le réservoir d’eau soit plein pour que l’appareil fonctionne correctement. Remplissez le réservoir d’eau, en utilisant de l’eau Vider le réservoir d’eau potable froide (approximativement 4 verres/ 1ltr) Quand l’appareil est éteint, l’eau résiduelle est et introduisez le réservoir dans l’emplacement... -
Page 49: Pendant Le Fonctionnement Du Four
Pendant le fonctionnement du four... Interrompre un cycle de cuisson Annuler un cycle de cuisson Vous pouvez interrompre un la cuisson à n’importe Si vous souhaitez annuler le cycle de cuisson, quel moment en appuyant une seule fois sur la touche appuyez sur la touche Stop deux fois. -
Page 50: Tableaux Et Conseils
Tableaux et conseils La grille s’utilise pour étuver les récipients de Utilisation des accessoires cuisson plus petits que l’emplacement prévu Le bac de cuisson perforé sert à étuver des comme par exemple des coupes à dessert et légumes, de la viande ou de la volaille frais ou pour régénérer des assiettes. - Page 51 Tableaux et conseils Poisson Niveau des Température Temps de cuisson Poisson Quantité Récipient supports en en ºF en min. partant du bas Dorade 800-1200 g 30-40 bac perforé Truite 4 x 250 g 20-25 bac perforé Filet de saumon 500-1000 g 15-25 bac perforé...
- Page 52 Tableaux et conseils Œufs Température en Temps de cuisson Niveau des supports Œufs Récipient ºF en min. en partant du bas Œuf au plat 10-15 grille Œuf dur grille Œuf à la coque 10-12 grille Légumes Niveau des Température Temps de cuisson supports Légumes/ frais Récipient...
- Page 53 Tableaux et conseils Quenelles Température Temps de cuisson en Niveau des supports en Quenelles Récipient en ºF min. partant du bas Buchtel 20-30 bac non perforé Dampfnudel 15-20 bac non perforé Hefeklöße 15-25 bac non perforé Semmelknödel 20-25 bac non perforé Serviettenkloß...
- Page 54 Décongeler Niveau des Température Temps de supports Légumes/ garnitures Récipient en ºF cuisson en min en partant du bas Brocoli Fleurs avec tige 15-20 bac perforé Macédoine de 15-20 bac perforé légumes Feuilles d’épinards Portions 10-15 bac non perforé Chou-fleur Bouquets 15-20 bac perforé...
-
Page 55: Cuisiner Au Gril
Cuisiner au gril cavité atteignent des températures très Pour obtenir de bons résultats avec le gril, élevées. utilisez la grille fournie avec le four. 4. Le thermostat de sécurité fait que les Positionnez la grille de façon à ce qu'elle résistances s'éteignent temporairement lors n'entre pas en contact avec les surfaces d'une utilisation prolongée du gril. -
Page 56: Cuisiner Au L'air Chaud
Cuisiner au L’Air Chaud Préparation de viande Puissance Température Temps Temps de Aliment Quantité (g) Indications (Watt) ºF (mn) repos (mn) Récipient sans couvercle, Rôti 1000-1500 320/340 30-40 tourner 1x Filet de porc Côtelette ou os Récipient sans couvercle, 800-1000 355/375 50-60 Rôti de porc... - Page 57 Cuisiner au L’Air Chaud Préparation des gâteaux Aliment Récipient Niveau TempératureºF Temp (mn) Gâteau aux noix Moule creux 30/35 340/355 Tarte aux fruits Moule de Ø 28 cm 300/320 35/45 Gâteau anglais Moule creux 340/375 30/45 Tarte salée Moule rond en verre 50/70 320/355 Gâteau simple...
-
Page 58: Entretien
Entretien Nettoyage de l’enceinte de cuisson Pour remettre en place les supports, glissez-les dans l’écrou 2. N’utilisez jamais de produit nettoyant agressif Vissez l’écrou 1 dans le sens des aiguilles d’une comme des éponges à récurer, des éponges montre jusqu’à la butée, revissez fermement métalliques, etc. - Page 59 Entretien Détartrage Produits détartrants appropriés À chaque production de vapeur, du calcaire se Pour le détartrage, utilisez le produit détartrant “durgol®”. dépose dans le générateur de vapeur, quelle que soit la dureté de l’eau (c.-à-d. de la contenance en Ce produit vous permet de détartrer votre appareil calcaire de l'eau).
-
Page 60: Nettoyage Et Entretien
Nettoyage et entretien Procédure de détartrage 7. Lorsque l’écran affiche « 4 CUP » en Attention : Pour des raisons de sécurité, le clignotant et qu’un signal retentit, le réservoir processus de détartrage, ayant une durée d’environ 45 minutes, ne peut être interrompu. d’eau doit être retiré... -
Page 61: Nettoyage Et Maintenance De L'appareil
Nettoyage et maintenance de l’appareil Aire de cuisson Attention! Le nettoyage doit être effectué lorsque l’appareil est hors tension. Retirez la Nettoyez les surfaces intérieures après chaque utilisation à l’aide d’un torchon humide. Laissez la fiche de la prise ou bien débranchez le circuit électrique de l’appareil. -
Page 62: Que Faire En Cas De Disfonctionnement
Que faire en cas de disfonctionnement? Après la fin d'un processus de cuisson, un ATTENTION! Toute réparation ne doit être bruit retentit! Ce n’est pas un problème. effectuée technicien. Toute intervention effectuée par une personne autre - Le ventilateur de refroidissement fonctionne que la personne autorisée par le fabricant est encore un moment. -
Page 63: Caractéristiques Techniques
Caractéristiques techniques Affichages Affichages Description Détartrage SOFT Eau douce. MEDIUM Eau moyenne. HARD Eau dure. L’appareil doit être détartré. / CAL Clignotant - commencement du détartrage. Versez 2 verres de solution détartrante dans le réservoir 2 CUP d’eau. Versez 4 verres d’eau froide dans le réservoir d’eau pour 4 CUP le rinçage. -
Page 64: Instructions Pour L'installation
Instructions pour l'installation Avant l'installation Alimentation Electrique Avant d’installer le four avec un électricien Vérifiez que la tension de l'alimentation de l'appareil, indiquée plaque qualifié, vérifiez que votre maison est pourvue du système électrique approprié et qu’en plus le four caractéristiques correspond à... - Page 65 Instructions pour l'installation “AVERTISSEMENT” Risque d’électrocu-tion, 3. Aux Etats-Unis : cadre à la masse à une position neutre d’un Les fils doivent être conformes au code appareil par une liaison. électrique national, ANSI/NFPA dernière édition. Vous pouvez obtenir une Mettre à la masse par un conducteur neutre est copie du code électrique national en écrivant interdit pour les nouvelles installations de circuit à: National Fire Protection Association...
- Page 66 Instructions pour l'installation Avant la première utilisation, nettoyez l'intérieur du Connexion à 4 Fils (Pour des US four ainsi que les accessoires en suivant les ou CANADA) indications figurant au point «Nettoyage et entretien de votre four». Selon la Figure suivant : ...
-
Page 67: Installation Dimensions
Follow the cut-out requirements carefully for perfect installation. In order to avoid overheating of the cabinets bottom and for a perfect alignment with other Bertazzoni products, always install the sliding brackets supplied with the unit. These brackets will also make any after sale service operation easier. The upper oven can be placed directly over the warming drawer. - Page 69 Push oven completely into the cabinet and centre it. Open microwave door and fasten the appliance to the cabinet using the four screws provided. Insert the screws through the front holes. Introduisez le four dans le meuble jusqu'à...
- Page 72 BERTAZZONI Distributor List Distributor States ALMO Corporation Illinois, Indiana, Kentucky, Michigan, 2709 COMMERCE WAY Minnesota, North Dakota, Ohio, South Dakota, West Virginia, Wisconsin PHILADELPHIA, PA 19154 DOOLITTLE DISTRIBUTING INC. Arkansas, Illinois, Iowa, Kansas, Missouri, 13269 WEST 98TH STREET Nebraska, Oklahoma...
Need help?
Do you have a question about the PROCS30X and is the answer not in the manual?
Questions and answers
how to change power board on Bertozzoni PROCS30X and what light bulb I need in this unit?
The provided context does not contain instructions on how to change the power board on the Bertazzoni PROCS30X. However, it does mention that the unit requires a G9 230V / 25W halogen light bulb for replacement.
This answer is automatically generated