Table of Contents
Advertisement
Quick Links
Advertisement
Table of Contents

Summary of Contents for Mega Machine GX35
-
Page 2: Introduc
INTRODUCTION Thank you for purchasing a Honda engine. We want to help you to This manual should be considered a permanent part of the engine get the best results from your new engine and to operate it safely. and should remain with the engine if resold. This manual contains informa on on how to do that;... -
Page 3: Table Of Contents
HONDA BRUSHCUTTER CONTENTS OF BOOKLET Introduc on Page 2 Safety Messages Page 2 Safety Informa on Page 5 Safety Indica on Loca on Page 5 Component, Assembly and Control Loca on Page 6-8 Features Page 8 Before Opera on Checks Page 9 Opera on Page 9 Safety Opera ng Precau ons Page 9 Star ng The Engine Page 10-11... - Page 4 HONDA BRUSHCUTTER CONTENTS OF BOOKLET CONTINUED Inspec on Page 19 Cleaning Page 19 Spark Plug Page 20-21 Cooling Fins Page 21 Fuel Filter Amd Fuel Tank Page 22 Spark Arrester Page 23-25 Helpful Tips And Sugges ons Page 26 Storing Your Engine Page 26-27 Fuel Mixture 28 Taking Care Of Unexpected Problems Page 29...
-
Page 5: Safety Information
SAFETY INFORMATION • Understand the opera on of all controls and learn how to stop the engine quickly in case of emergency. Make sure the operator receives adequate instruc on before opera ng the equipment. • Do not allow children to operate the engine. Keep children and pets away from the area of opera on. •... -
Page 6: Component, Assembly And Control Loca
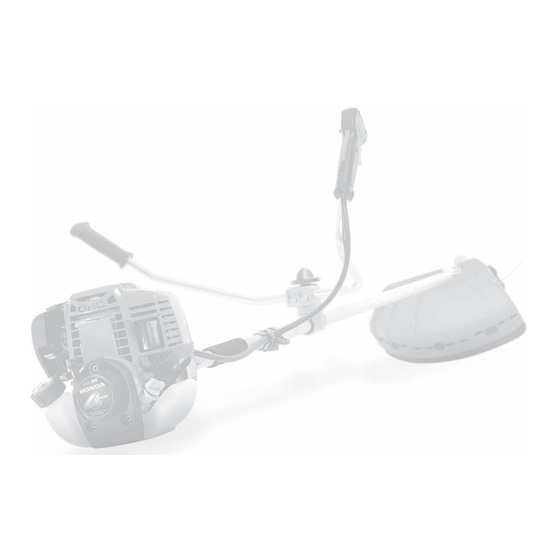
ASSEMBLY Please a ach the four providedHex Screws through the connecter cone of the sha and onto the main engine body. - Page 7 COMPONENT & CONTROL LOCATION...
-
Page 8: Features
Tiller type: FEATURES Centrifugal Clutch (Standard/Tiller type) The centrifugal clutch automa cally engages and transmits power when engine speed is increased above approximately 4,200 rpm. At idle speed, the clutch is disengaged. NOTICE DO NOT RUN THE ENGINE WITHOUT MOUNTING IT ON EQUIPMENT THAT INCLUDES THE CENTRIFUGAL CLUTCH DRUM AND HOUSING, OR CENTRIFUGAL FORCE WILL CAUSE THE CLUTCH SHOES TO CONTACT AND DAMAGE THE ENGINE CASE. -
Page 9: Before Opera On Checks
BEFORE OPERATION CHECKS IS YOUR ENGINE READY TO GO? For your safety, and to maximize the service life of your equipment, it is very important to take a few moments before you operate the engine to check its condi on. Be sure to take care of any problem you fi nd, or have your servicing dealer correct it before you operate the engine. IMPROPERLY MAINTAINING THIS ENGINE OR FAILURE TO CORRECT A PROBLEM BEFORE OPERATION CAN CAUSE A MALFUNCTION IN WHICH YOU CAN BE SERIOSULY HURT OR KILLED. -
Page 10: Star Ng The Engine
STARTING THE ENGINE 1. To start a cold engine, move the choke lever to the CLOSED posi on. To restart a warm engine, leave the choke lever in te OPEN posi on. 2. Press the priming bulb repeatedly un l fuel can be seen in the clear-plas c fuel-return tube. - Page 11 4. Pull the starter to grip lightly un l you feel resistance, then pull briskly. Return the starter grip gently. 5. If the choke lever was moved to the CLOSED posi on to start the engine, gradually move it to te OPEN posi on as the engine warms up. Hot Restart If the engine is operated at higher ambient temperatures, then turn it off...
-
Page 12: Se Ng Engine Speed
SETTING ENGINE SPEED Standard/Tiller type: Posi on the thro le lever for the desired engine speed. The thro le lever shown here will be connected to a remote control on the equipment powered by this engine. Refer to the instruc ons provided with the equipment for remote control informa on and for engine speed recommenda ons. -
Page 13: Servicing Your Engine
Pump type: To stop the engine in an emergency, simply turn the engine switch to the OFF posi on. Under normal condi ons, use the following procedure. For engine speed recommenda ons, refer to the instruc ons provided with the equipment powered by this engine. 1. -
Page 14: Maintenance Safety
MAINTENANCE SAFETY Some of the most important safety precau ons follow. However, we cannot warn you of every conceivable hazard that can arise in performing maintenance. Only you can decide whether or not you should perform a given task. FAILURE TO PROPERLY FOLLOW MAINTENANCE INSTRUCTIONS AND PRECAUTIONS CAN CAUSE YOU TO BE SERIOUSLY HURT OR KILLED. ALWAYS FOLLOW THE PROCEDURES AND PRECAUTIONS IN THIS OWNER’S MANUAL. -
Page 15: Refueling
REFUELING Recommended Fuel This engine is cer fi ed to operate on unleaded gasoline. Unleaded gasoline produces fewer engine and spark plug deposits and extends exhaust system life. GASOLINE IS HIGHLY FLAMMABLE AND EXPLOSIVE, AND YOU CAN BE BURNED OR SERIOUSLY INJURED WHEN REFUELING. •... -
Page 16: Engine Oil
To refuel, rest the engine on the ground with the fuel fi ller cap facing up, as shown. Remove the fuel fi ller cap, and fi ll the tank with gasoline to the bo om of the fi ller neck. Refuel carefully to avoid spilling fuel. -
Page 17: Oil Level Check
OIL LEVEL CHECK Check the engine oil level before each use, or every 10 hours if operated con nuously. Check the engine oil level with the engine stopped and in a level posi on. 1. Remove the oil fi ller cap/dips ck and wipe it clean. 2. - Page 18 OIL LEVEL CHECK 4. With the engine in a level posi on, fi ll to the bo om edge of the fi ll hole with the recommended oil. Some oil will remain in the engine a er draining. When refi lling with fresh oil, start with less than 80 cm ³...
-
Page 19: Air Cleaner
AIR CLEANER A dirty air cleaner will restrict air fl ow to the carburetor, reducing engine performance. If you operate the engine in very dusty areas, clean the air fi lter element more o en than the specifi ed in the MAINTENANCE SCHEDULE. -
Page 20: Spark Plug
SPARK PLUG Recommended Spark Plug: CM5H (NGK), CMR5H (NGK) The recommended spark plug is the correct heat range for normal engine opera on temperatures. For good performance, the spark plug must be properly gapped and free of deposits. 1. Remove the top cover. Loosen the 5 mm hex bolt with a hexagon wrench, then remove the top cover. -
Page 21: Cooling Fins
5. Measure the spark plug electrode gap with a wire-type feeler gauge. Correct the gap, if necessary, by carefully bending the side electrode. The gap should be: 0.60 - 0.70 mm (0.024 - 0.028 in) 6. Install the spark plug carefully, by hand, to avoid cross-threading. 7. -
Page 22: Fuel Filter Amd Fuel Tank
FUEL FILTER AND FUEL TANK Fuel fi lter inspec on and Fuel tank cleaning GASOLINE IS HIGHLY FLAMMABLE AND EXPLOSIVE AND YOU CAN BE BURNED OR SERIOUSLY INJURED WHEN HANDLING FUEL. • STOP ENGINE AND KEEP HEAT, SPARKS, AND FLAME AWAY. •... -
Page 23: Spark Arrester
SPARK ARRESTER APPLICABLE TYPES The spark arrester may be standard or an op onal part, depending on the engine type. In some areas, it is illegal to operate an engine without a spark arrester. Check local laws and regula ons. A spark arrester is available from authorized Honda servicing dealers. - Page 24 TILLER TYPE Spark Arrester Removal 1. Loosen the 5 mm hex bolt, then remove the top cover. 2. Remove the 3 x 6 mm self-tapping screws from the spark arrester and remove the spark arrester from the muffl er. Spark Arrester Cleaning & Inspec on 1.
- Page 25 GX35 Standard Type: Spark Arrester Removal 1. Loosen the 5 mm hex bolt, then remove the top cover. 2. Remove the 4 x 6 mm self-tapping screws from the spark arrester, and remove the spark arrester and exhaust fi lter from the muffl er.
-
Page 26: Helpful Tips And Sugges Ons
HELPFUL TIPS & SUGGESTIONS STORING YOUR ENGINE Storage Prepara on Cleaning Proper storage prepara on is essen al for keeping your engine If the engine has been running, allow it to cool for at least half trouble-free and looking good. The following steps will help to an hour before cleaning. -
Page 27: Removal From Storage
DRAINING THE FUEL TANK AND CARBURETOR GASOLINE IS HIGHLY FLAMMABLE AND EXPLOSIVE, AND YOU CAN BE BURNED OR SERIOUSLY INJURED WHEN HANDLING FUEL. • STOP ENGINE AND KEEP HEAT, SPARKS, AND FLAME AWAY. • HANDLE FUEL ONLY OUTDOORS. • WIPE UP SPILLS IMMEDIATELY. 1. -
Page 28: Fuel Mixture
PLEASE DO NOT MIX OIL AND PETROL TOGETHER! PETROL INPUT OIL INPUT USE 4 STROKE OIL THAT MEETS API SG SERVICE CLASSIFICATION OR EQUIVALENT, RECOMMENDED SAE 10W 30. RECOMMENDED FOR GENERAL USE. AT ALL TIMES PLEASE KEEP THE FUEL TANK FULL WHEN IN OPERATION, “AVOID HAVING THE YOUR ENGINE FINISHING OPERATION FROM FUEL STARVATION. -
Page 29: Taking Care Of Unexpected Problems
TAKING CARE OF UNEXPECTED PROBLEMS...
Need help?
Do you have a question about the GX35 and is the answer not in the manual?
Questions and answers