Table of Contents
Advertisement
Advertisement
Table of Contents

Related Manuals for forus FSV-510


Summary of Contents for forus FSV-510
- Page 1 MADE IN KOREA Version 2006.6...
- Page 2 Main Features High-quality Design Beep Sound Comfortable Grip & Dynamic Design Beep sound can be set to sound at every press of the button. Long Recording Time Vibration Mode on Recording In LP mode, 66 hours and 20 minutes(128MB), 133 hours and 20 minutes(256MB). Secret Recording with Vibration on Recording On &...
-
Page 3: Table Of Contents
Contents Preparing User-Friendly Functions Menu Structure Features Menu Setting Name of Each Part Package Contents Putting the Batteries Connecting to an External Device External Power Supply Setting Recording through an External Microphone Power ON/OFF Connecting to an Audio System HOLD Setting Listening through an Earphone Volume Adjustmen Recording a Telephone Message... -
Page 4: Preparing
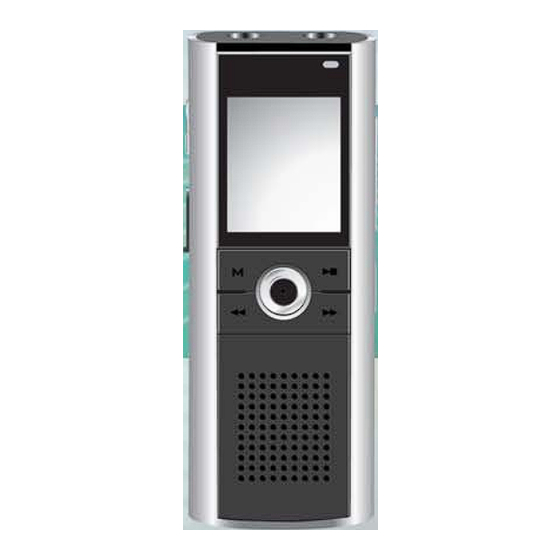
Preparing Preparing Name of Each Par Front View LCD Display Left View Back View Right View Folder Indicator Battery Level Indicator Hand Strap Ring Recording VOR Recording Indicator Indicator Mic. Sensitivity Section Repeat Indicator Hold Switch Indicator LCD Display File No. Recording Quality Indicator Volume... -
Page 5: Package Contents
Preparing Preparing External Power Supply Setting Package Contents Select DC at the menu of USB Mode in General. Connect the Recorder to PC by USB cable. Recorder operates with PC power supply. Recorder Battery(AAAX2) Earphone USB Connection Cable DVR-Manager Hand Strap Using Direct USB port from the PC is highly recommended Install CD rather than using USB hub due to weak voltage. -
Page 6: Hold Setting
Preparing Using Recording HOLD Setting HOLD function locks all the button functions to prevent unwanted use and the discharge In recording, please position the built-in microphone toward the sound source. of the batteries. Press REC/STOP button. To Set HOLD Recording begins with the red light on the recording Slide HOLD switch in the direction during recording or indicator. -
Page 7: Playback Speed Adjustment
Using Using Playback Playback Speed Adjustment To Start Playback To start play back Press Menu(M) Button and Select the folder which Press Play/Pause( ) button. contains the file to play. Play back starts. For folder selection, pls. refer to page 23 At stop mode, you can adjust play back speed also. -
Page 8: Section Repeat Playback
Using Using Section Repeat Playback Deleting the Recorded File To delete a recorded file Press A > B button at the starting point of the desired section ‘A’ appears and ‘B’ flickers. Press Menu(M) button and Select the folder that contains the file to be deleted. -
Page 9: Recovery Of Erased File
Using Using Recovery of Erased File This function enables to recovers the erased file by mistake of user. To delete all the files in the selected folder In case of recording after deleting a recorded file, Recovery is not available. Press Menu(M) button and Select a folder to be deleted. -
Page 10: Quick Format Setting
Using Using Quick Format Setting Low Format Setting In case of erasing the recorded file by using this function, the recorded file is erased This function is used to erase the recorded files quickly. completely and it s not possible to recover. Press MENU button over five seconds at STOP mode. - Page 11 Using Using User-Friendly Functions Press Play/Pause( ) button and No appears on the display. Menu function chart Press button and Select YES . Setting Menu Connecting to an Press Play/Pause( ) button and all files are External Device erased. Also memory format is proceeded. Others In case of erasing the recorded file by using this function, the recorded file is erased completely and it s not possible to recover.
-
Page 12: Menu Structure
Set Up Menu Set Up Menu Menu Structure SIGNAL MODE SM BEEP SM SIL SM VIB Setting Folder Selection PLAYBACK SPEED Setting Recording Quality Setting USB Mode UM USB UM DC Setting VOR Recording VOR ON VOR OF Listen & Repeat L REP ON L REP OFF Setting... - Page 13 Set Up Menu Set Up Menu Set Up Menu Menu(M) Menu At stop mode, press Menu(M) button to move into each menu mode. Set Up button Items Press button and Select each function on the mode. Lo : Select in case the sound source is close or the ambient noise level is high.
-
Page 14: Connecting To An External Device
Set Up Menu Connecting to an External Device Recording through an External Microphone Connect external microphone to Voice Menu(M) Menu Recorder. Set Up button Items Plug the external microphone into the By connecting Recorder to PC thru USB cable, USB connection or DC Power Microphone/Input terminal of the Recorder. -
Page 15: Connecting To An Audio System
Connecting to an External Device Connecting to an External Device Connecting to an Audio System Connecting to an Audio System (continued ) To Record Contents of the Recorder into an Audio To Record contents of the Audio into the System. Voice Recorder, Connect the Voice Recorder to the audio system. -
Page 16: Recording A Telephone Message
Connecting to an External Device Connecting to an External Device Recording a Telephone Message Connecting to a PC Telephone messages can be recorded on the Voice Recorder. DVR-Manager software provides various functions such as file uploading to PC, playback, recording, editing of recorded files and sending recorded files via email. Connect the Voice Recorder to the telephone. - Page 17 Connecting to an External Device Connecting to an External Device Click Click Click Click Click Type in your name and company name. Installation has been completed and the shortcut icon appears on the desktop. Click...
-
Page 18: Connecting To Pc
When you connect the voice recorder to computer first time after purchasing, you can find out "Found may cause the malfunction of the device. New Hardware". If you have connected USB cable while batteries are installed, you must Click the Pop-up Window and then check "Forus USB Controller-DVR008". first press REC/STOP button to power on Recorder. - Page 19 Trouble Shooting in Manager program for Win XP If "USB Device" on it, disconnect the Voice If you won't continuously find out "Forus USB Controller-DVR008" on The Found New reocrder from USB Cable and then try to Hardware Wizard when the Voice Recorde connects to PC, please check if you installed connect again.
- Page 20 Connecting to an External Device Connecting to an External Device Connecting to a PC Using online Help Instruction for using DVR-Manager is provided in detail in Help. If installation is finished, shortcut icon is displayed. Double click the shortcut icon. DVR-Manager is executed.
-
Page 21: Firmware Upgrade
Connecting to an External Device Connecting to an External Device Firmware Upgrade This unit provides the Firmware Upgrade function to improve the unit functions and Trouble shooting in case of error while upgrading firmware to correct errors. Please adopt temporary measures as follows when upgrading firmware did not be completed normally because of the batteries separation or shock to the unit. -
Page 22: Others
Others Others Precautions Important information on safe and efficient operation. Read this information before For the Battery using your voice recorder. 1. Do not short-circuit, disassemble or heat the battery, or do not put the battery into a fire. Electrolyte such as an alkaline solution may flow out, so you may get it in your eyes, or it may For the unit cause the generation of heat, or the breakdown of the battery. -
Page 23: Troubleshooting
Others Others Troubleshooting Adjust the volume. Is the volume set to '0'? No sound comes (Refer to page 9) from the speaker. Check the following items before asking a technical support. Is the earphone plugged in? Pull out the earphone completely. When using Voice Recorder Adjust the volume. -
Page 24: Specifications
FCC note : This equipment has been tested and found to comply with the limits for a Class B digital device, pursuant to part 15 of the FCC Rules. Specifications These limits are designed to provide reasonable protection against harmful interference in a residential installation.
Need help?
Do you have a question about the FSV-510 and is the answer not in the manual?
Questions and answers
Can’t increase voice speed
To increase the voice playback speed on the Forus FSV-510 Digital Voice Recorder, follow these steps:
1. Ensure the recorder is in stop mode.
2. Press the Menu (M) button seven times.
3. Use the FF (Fast Forward) / REW (Rewind) buttons to adjust the playback speed.
4. Playback speed can be set at 50%, 70%, 100% (normal), 130%, 150%, 170%, or 200%.
This will increase the playback speed as needed.
This answer is automatically generated
why does -C come up on the screen