
Subscribe to Our Youtube Channel
Related Manuals for ELBE HIFI 1007 BT

Summary of Contents for ELBE HIFI 1007 BT
- Page 1 HIFI_1007_BT_quark4.qxd 04/08/2008 16:14 Página 1 Manual de Instrucciones ELBE HIFI 1007 BT...
-
Page 2: Instrucciones De Seguridad Importantes
HIFI_1007_BT_quark4.qxd 04/08/2008 16:14 Página 2 INSTRUCCIONES IMPORTANTES DE SEGURIDAD Para prevenir posibles incendios o descargas eléctricas, no utilice este enchufe con un cable de extensión a menos que las clavijas queden perfectamente insertadas. Así mismo no exponga el equipo a humedad o llu- via. -
Page 3: Precauciones Para El Equipo
HIFI_1007_BT_quark4.qxd 04/08/2008 16:14 Página 3 17. SOBRECARGA - No sobrecargue los enchufes, cables de extensión, etc. Puesto que esto puede supo- ner un riesgo de descarga eléctrica. 18. ENTRADA DE OBJETOS O LÍQUIDOS - Nunca introduzca objetos de ningún tipo dentro del aparato a través de las aberturas puesto que podrían entrar en contacto con alto voltaje lo que ocasionaría descargas eléctricas. -
Page 4: Table Of Contents
HIFI_1007_BT_quark4.qxd 04/08/2008 16:14 Página 4 INDICE Instrucciones de seguridad importantes ..........2 Precauciones para el equipo . -
Page 5: Desembalaje Y Puesta En Marcha
HIFI_1007_BT_quark4.qxd 04/08/2008 16:14 Página 5 DESEMBALAR Y PONER EN MARCHA - Con cuidado extraiga el equipo de la caja y todos los materiales de embalaje. - Compruebe que tiene todos los siguientes elementos además de la unidad principal: - Antena AM (x1) - Mando a Distancia (x1) Si falta alguno de los elementos consulte a su distribuidor inmediatamente. -
Page 6: Ajuste Básico Del Sistema
HIFI_1007_BT_quark4.qxd 04/08/2008 16:14 Página 6 AJUSTES BÁSICOS DEL SISTEMA Siga estos 4 pasos para completar el ajuste básico del sistema. 1.- Ajustar y Conectar la Antena AM. Conectar y extender la antena FM. 2.- Conectar la unidad principal a la corriente. Este sistema esta diseñado para operar con corriente 230V 50Hz. - Page 7 HIFI_1007_BT_quark4.qxd 04/08/2008 16:14 Página 7 5.- Instale las baterías en el mando a distancia Inserte dos baterías AAA en el mando a distancia observando la correcta polaridad (+) y (-) tal como se muestra. 6. - Encender la Unidad Principal Pulse el botón STANDBY/ .
-
Page 8: Localización De Los Controles
HIFI_1007_BT_quark4.qxd 04/08/2008 16:14 Página 8 LOCALIZACIÓN DE LOS CONTROLES 1. Puerta del CD 11. Botón Play 2. Sensor Remoto 12. Botón Abrir puerta del CD 3. Botón Standby 13. Pantalla LCD 4. Botón Función 14. Toma USB 5. Botón PAIRING (emparejar)/Respuesta 15. -
Page 9: Mando A Distancia
HIFI_1007_BT_quark4.qxd 04/08/2008 16:14 Página 9 MANDO A DISTANCIA Botón abrir/cerrar 11. Botón Sleep botón memoria/reloj 12. Botón Standby Botón Función 13. Botón Mute Botón /Banda 14. botón Timer Botón saltar 15. botón Botón Pairing 16. Botón saltar Botón modo play 17. -
Page 10: Instrucciones De Funcionamiento
HIFI_1007_BT_quark4.qxd 04/08/2008 16:14 Página 10 INSTRUCCIONES DE FUNCIONAMIENTO - Asegúrese de que ha extendido totalmente el cable de la antena FM y conectado la antena AM. - Asegúrese de que ha instalado las baterías en el mando a distancia. - Asegúrese de que el equipo está conectado a un enchufe de la pared con corriente. - No conecte el equipo a un enchufe de la pared que esté... -
Page 11: Controles De Audio
HIFI_1007_BT_quark4.qxd 04/08/2008 16:14 Página 11 CONTROLES DE AUDIO Controles de Volumen Para subir o bajar el volumen del equipo - Pulse los botones SUBIR VOLUMEN o BAJAR VOLUMEN en el mando a distancia o en el panel frontal. El indicador del nivel del volumen aparecerá en la pantalla cuando usted cambie el nivel de volumen. El indi- cador va desde VOL MIN hasta VOL MAX. -
Page 12: Soportes De Almacenamiento Compatibles
HIFI_1007_BT_quark4.qxd 04/08/2008 16:14 Página 12 SOPORTE DE ALMACENAJE COMPATIBLES DISCO Este sistema soporta la reproducción de música de discos CD y también de USB y tarjetas de memoria Flash. Tipos de discos que soporta Formatos de tarjeta de memoria que soporta Digital TM Seguro (SD) CD de Audio MiniSD TM (sólo con adaptador) -
Page 13: Formatos De Audio Compatibles
HIFI_1007_BT_quark4.qxd 04/08/2008 16:14 Página 13 FORMATOS DE AUDIO COMPATIBLES Este sistema soporta la reproducción de canciones desde CD de Audio (Cds pre-grabados), MP3 y WMA. Este sistema no soporta DRM. Este sistema no podrá reproducir canciones compradas desde iTunes o otras canciones en formato AAC, canciones en formato ATRAC o cancions compradas en alguna tienda online. -
Page 14: Insertar Y Extraer Equipos De Flash
HIFI_1007_BT_quark4.qxd 04/08/2008 16:14 Página 14 INSERTAR Y EXTRAER MEMORIA FLASH TITULO Los equipos flash se insertan por el panel frontal del equipo. Insertar y Extraer dispositivos de Memoria Flash USB - Introduzca el conector USB en la ranura del equipo y presione ligeramente para insertarlo. -
Page 15: Funcionamiento Del Cd
HIFI_1007_BT_quark4.qxd 04/08/2008 16:14 Página 15 FUNCIONAMIENTO DEL CD Reproducción Normal - Pulse el botón FUNTION para seleccionar la función "DISCO". - Pulse el botón OPEN/CLOSE en el mando a distancia o desde el panel frontal para abrir la puerta del CD. - Cargue un disco en el reproductor con la etiqueta impresa hacia arriba. - Page 16 HIFI_1007_BT_quark4.qxd 04/08/2008 16:14 Página 16 - Pulse el botón PLAY/PAUSE para iniciar la reproducción. - La reproducción continuará hasta que hayan sonado todas las pistas del disco, después se detendrá y la pantalla mostrará el número total de pistas y el tiempo de reproducción. - Para detener la reproducción en cualquier momento pulse el botón /BAND Control Pausa...
- Page 17 HIFI_1007_BT_quark4.qxd 04/08/2008 16:14 Página 17 Reproducción Repetida (Sólo en el mando a distancia) La función Repetir en este sistema le permite repetir continuamente una sola pista, o el disco entero. La fun- ción Repetir se puede activar durante la reproducción o mientras el reproductor esté detenido. Repetición de Una Sola Pista - Seleccione la pista a repetir y empiece la reproducción.
- Page 18 HIFI_1007_BT_quark4.qxd 04/08/2008 16:14 Página 18 Reproducción Programada (sólo en el mando a distancia). La reproducción programada le permite programar un total de hasta 40 canciones en el orden que desee. Puede programar la misma pista varias veces en la secuencia programada si lo desea. Nota: No puede programar pistas durante la reproducción.
- Page 19 HIFI_1007_BT_quark4.qxd 04/08/2008 16:14 Página 19 6. Pulse el botón PLAY/PAUSE para iniciar la reproducción programada. El indicador "PROGRAM" se mantiene 5 segundos en pantalla. Sonarán todas las pistas que haya programado en la secuencia dese- ada. Después de que suene la última pista, el reproductor se detendrá, pero la secuencia programada se mantendrá...
-
Page 20: Reproducción De Cd Mp3 Y Wma
HIFI_1007_BT_quark4.qxd 04/08/2008 16:14 Página 20 REPRODUCCIÓN DE CD CON ARCHIVOS MP3 Y WMA La mayoría de las operación normales de CD descritas en este manual se aplican igualmente a Cds MP3/WMA. De todas maneras hay algunas diferencias en las funciones de reproducción de CD MP3/WMA y estas están descritas aquí: Tiempo de Lectura e Información en Pantalla de CDs MP3/WMA Después de cargar un disco CD MP3/WMA el reproductor leerá... - Page 21 HIFI_1007_BT_quark4.qxd 04/08/2008 16:14 Página 21 - Pulse el botón PLAY/PAUSA para iniciar la reproducción. Reproducción Repetida de CD MP3/WMA (sólo en el mando a distancia). Hay 3 opciones de Reproducción Repetida con los CDs MP3/WMA. Además de Repetir 1 Pista y Repetir Todas las Pistas que son las mismas opciones que hay para los CDs normales, puede seleccionar el Modo Repetir Todo el Directorio, para que se repitan todas las pistas que haya dentro de un Directorio.
- Page 22 HIFI_1007_BT_quark4.qxd 04/08/2008 16:14 Página 22 Modo Reproducción Aleatoria MP3/WMA (Sólo en mando a distancia). Esta función se pone en marcha de la misma manera para CDs MP3/WMA que para CDs normales. Reproducción Aleatoria - Cargue un CD MP3/WMA en el equipo. Espere a que se complete el proceso de lectura.
- Page 23 HIFI_1007_BT_quark4.qxd 04/08/2008 16:14 Página 23 Reproducción Programada de CD MP3/WMA (Sólo en el mando a distancia) - Cuando programe las pistas en un CD MP3/WMA deberá además seleccionar el número de Directorio de las pistas que desea programar. Solo podrá programar cuando el reproductor esté en modo Stop. Si el disco MP3/WMA está sonando antes /BAND pulse el botón para detener la reproducción, después siga los pasos de programación.
-
Page 24: Funcionamiento De La Tarjeta De Memoria
HIFI_1007_BT_quark4.qxd 04/08/2008 16:14 Página 24 FUNCIONAMIENTO DE LA TARJETA DE MEMORIA Reproducción de ficheros de Audio MP3/WMA en tarjetas de memoria SD/MMC NOTA: La ranura para tarjetas de memoria en esta unidad permite la reproducción de música sólo en for- matos MP3 y WMA (sin DRM). -
Page 25: Funcionamiento Usb
HIFI_1007_BT_quark4.qxd 04/08/2008 16:14 Página 25 FUNCIONAMIENTO DEL USB Reproducción de ficheros de Audio MP3/WMA en dispositivos de memoria portátiles USB NOTA: El puerto USB en esta unidad permite la reproducción de música sólo en formatos MP3 y WMA (sin DRM). No puede reproducir música adquirida en iTunes u otras canciones en formato AAC, canciones en for- mato ATRAC o música adquirida de distribuidores de música en internet. -
Page 26: Funcionamiento Bluetooth
HIFI_1007_BT_quark4.qxd 04/08/2008 16:14 Página 26 FUNCIONAMIENTO DEL BLUETOOTH Esta sección le guía a través de las funciones de operación Bluetooth del HIFI-1007-BT . Por favor, remítase a la Guía de Inicio Rápido incluida con este manual de usuario para una breve revisión de la configuración Bluetooth. - Page 27 HIFI_1007_BT_quark4.qxd 04/08/2008 16:14 Página 27 Mensajes Bluetooth MENSAJES DE CONEXIÓN BLUETOOTH Mensaje mostrado Audio Significa HIFI-1007-BT es visible para cualquier ---------------- aparato que quiera conectarse con él. Doble señal Un teléfono móvil ha sido conectado al HIFI-1007-BT usando perfiles de auricular o manos libres Bluetooth.
- Page 28 HIFI_1007_BT_quark4.qxd 04/08/2008 16:14 Página 28 Mensajes Bluetooth MENSAJES DE CONEXIÓN BLUETOOTH Mensaje mostrado Audio Significa Tono de llamada Tono de llamada saliente. (saliente). Tono, dependiendo Llamada entrante. del teléfono. ---------------- Identificación del número entrante. Llamada. Llamada iniciada. Pequeño sonido. Fin de llamada. ------------------ Transferencia de la unidad al móvil o viceversa.
-
Page 29: Ajustar La Conexión Bluetooth
HIFI_1007_BT_quark4.qxd 04/08/2008 16:14 Página 29 AJUSTE DE CONEXIONES BLUETOOTH IMPORTANTE: Asegúrese de que todos los aparatos con Bluetooth en un radio de 10 m. han sido desco- nectados. La presencia de otros aparatos Bluetooth funcionando durante la conexión puede llevar a dificul- tades en la operación y uso. - Page 30 HIFI_1007_BT_quark4.qxd 04/08/2008 16:14 Página 30 3) CONECTANDO UN TELÉFONO MÓVIL CON CAPACIDAD DE MUSICA ESTEREO (A2DP) IMPORTANTE: si está conectando un teléfono con capacidad A2DP y desea usar tanto las funciones de música (A2DP) como la del manos libres en su teléfono de forma simultánea, sólo un aparato que soporte A2DP puede estar conectado a la vez.
- Page 31 HIFI_1007_BT_quark4.qxd 04/08/2008 16:14 Página 31 4) Conexión Música Estereo a PC y PDA. Nota: Esta conexión requiere de un aparato que tenga disponible el perfil Bluetooth A2DP para conexión de música estereo. Por favor, asegúrese de que su aparato tenga la última versión de software que permita esta funcionalidad Bluetooth.
- Page 32 HIFI_1007_BT_quark4.qxd 04/08/2008 16:14 Página 32 6) Conectando otros aparatos Bluetooth El HIFI-1007-BT se puede conectar a algunos transmisores Bluetooth sencillos y "dongles" elaborados por otros fabricantes, que puedan proporcionar una contraseña tipo 0000. Aquellos aparatos que no puedan dar esta contraseña, o tengan una contraseña interna distinta de 0000 no podrán ser conectados al HIFI-1007-BT. A continuación se dan las instrucciones generales para conectar estos aparatos.
-
Page 33: Funcionamiento Del Manos Libres
HIFI_1007_BT_quark4.qxd 04/08/2008 16:14 Página 33 FUNCIONAMIENTO DEL MANOS LIBRES Las funciones de micrófono Bluetooth del HIFI-1007-BT permite realizar llamadas y hablar de forma sencilla, además de poder pasar sin cables de escuchar música a recibir o realizar llamadas. Cuando realiza o recibe una llamada, la reproducción de música entrará... - Page 34 HIFI_1007_BT_quark4.qxd 04/08/2008 16:14 Página 34 /BAND - Para finalizar la llamada, presione el botón de COLGAR en su teléfono móvil, o el botón en la unidad principal o en el mando a distancia. - La pantalla muestra la leyenda "END CALL". - La reproducción de música se reinicia de forma automática.
-
Page 35: Oír Música Del Stereo Del Teléfono Móvil (A2Dp)
HIFI_1007_BT_quark4.qxd 04/08/2008 16:14 Página 35 ESCUCHANDO MUSICA DESDE SU TELEFONO MOVIL ESTEREO (A2DP) HIFI-1007-BT le permite conectar su teléfono móvil compatible con A2DP, música de alta calidad con el Bluetooth y controlar la reproducción de música desde el mando a distancia. Conociendo el aparato - Asegúrese de que su teléfono móvil es compatible con A2DP y está... -
Page 36: Otras Funciones Bluetooth
HIFI_1007_BT_quark4.qxd 04/08/2008 16:14 Página 36 OTRAS FUNCIONES DEL BLUETOOTH Conexiones Bluetooth HIFI-1007-BT puede almacenar información de emparejado hasta para siete aparatos y buscar la conexión en cualquier momento, permitiendo que un aparato portátil se reconecte siempre que se encienda HIFI-1007-BT, o cuando un aparato entra en el rango de comunicación. Una vez que el emparejado inicial se completa, no es necesario repetir este proceso. - Page 37 HIFI_1007_BT_quark4.qxd 04/08/2008 16:14 Página 37 Sugerencias para una mejor recepción FM: La antena de cable de la parte posterior de la unidad debe estar extendida en su máxima longitud. Puede que tenga que modificar la orientación de esta antena hasta encontrar la posición que ofrezca la mejor recepción. AM: Inserte la clavija de la antena de AM en el enchufe previsto para ello en la unidad.
- Page 38 HIFI_1007_BT_quark4.qxd 04/08/2008 16:14 Página 38 Sintonizando emisoras en la Memoria del Sintonizador Puede almacenar hasta 40 de sus emisoras favoritas (30 FM / 10 AM) en la memoria del sintonizador para un más fácil acceso en cualquier momento. 1. Usando tanto el método de sintonización manual como el automático descritos en la página 36, sintonice la primera emisora que desea memorizar.
-
Page 39: Otras Funciones
HIFI_1007_BT_quark4.qxd 04/08/2008 16:14 Página 39 OTRAS FUNCIONES Ajustando el reloj (Sólo con el mando a distancia) Cuando la alimentación eléctrica está conectada, aparecerá la leyenda "AM 12:00" en la pantalla. El reloj sólo puede ajustarse mientras la unidad está apagada. - Presione el botón MEMORY/CLOCK en el mando a distancia, la pantalla mostra rá... - Page 40 HIFI_1007_BT_quark4.qxd 04/08/2008 16:14 Página 40 - Presione TIMER para confirmar. La pantalla mostrará "ON" y los dígitos de la hora comenzarán a parpadear. - Presione para elegir la hora. - Presione TIMER para confirmar. Los dígitos de minutos comenzarán a parpadear. - Presione para elegir los minutos.
-
Page 41: Cuidado Y Mantenimiento
HIFI_1007_BT_quark4.qxd 04/08/2008 16:14 Página 41 Toma de Auriculares Estereo Este sistema incluye una clavija de auriculares estereo en el panel frontal de la unidad principal. Puede conectar unos auriculares estereo, no incluídos, a esta toma para una audición privada sin molestar a otros. Los altavoces principales se desconectan automaticamente cuando los auriculares se conectan a esta toma. -
Page 42: Posibles Problemas
HIFI_1007_BT_quark4.qxd 04/08/2008 16:14 Página 42 SOLUCION DE PROBLEMAS General No se enciende. - La conexión de corriente alterna no está completa. Compruebe todos los cables y conexiones. El sistema no responde al presionar los botones. - El microprocesador incorporado puede funcionar defectuosamente debido a interferencias eléctricas externas. - Desenchufe el cable de conexión eléctrica y vuélvalo a enchufar. - Page 43 HIFI_1007_BT_quark4.qxd 04/08/2008 16:14 Página 43 Operativa del Micrófono La voz no es clara. - Acérquese al micro. - Hable más alto. - Elija una habitación con menos eco y/o menos ruido de fondo. Se escucha eco. - Reduzca el volumen del sistema. Una ajuste del 13 o por debajo proporcionará las mejores prestaciones. - Elija una habitación con menos eco.
-
Page 44: Especificaciones Técnicas
HIFI_1007_BT_quark4.qxd 04/08/2008 16:14 Página 44 ESPECIFICACIONES TÉCNICAS 1.General Requisitos de potencia 230 V CA, 50 Hz. Consumo de Energía 110 W (en operación) 27 W (en stand by) Dimensiones de la unidad principal 594 (Ancho) x 184 (Alto) x 98 (Profundo) mm. Peso de la unidad principal 3,06 kg. - Page 45 Para informarse del Servicio de Asistencia Técnica más próximo a su domicilio, consulte la adjunta lista de Servicios Oficiales de la marca ELBE o bien la lista actualizada de la página Web www.riverint.com En caso necesario diríjase a la Central de Servicios...
- Page 46 SATELBE_02_08_dinA6_q4.qxd 19/02/2005 22:16 Página 2 INFORMACIÓN SOBRE LA GARANTÍA Como Consumidor de este artículo goza Vd. de los derechos que le reconoce la Ley de Garantías en la Venta de Bienes de Consumo 23/2003 (B.O.E. 11-07- 03), en las condiciones que la misma establece. Recuerde que la fecha acreditada mediante el docu- mento de compra, inicia el período de dos años pre- visto en la Ley.
- Page 47 SATELBE_02_08_dinA6_q4.qxd 19/02/2005 22:16 Página 3 RED DE SERVICIOS CENTRAL DE RECAMBIOS C/ San Pedro Abanto, 16 - 08014 - BARCELONA - Telf: 93 432-00-06 SERVICIOS TÉCNICOS: ELBE-MELCHIONI I C A N Ó . P . L A I E R I I C C N Ó...
- Page 48 SATELBE_02_08_dinA6_q4.qxd 19/02/2005 22:16 Página 4 BADAJOZ A D I 0 0 8 O I N I T R A I V NCHE, 23 924300937 924300937 BADAJOZ VILLANUEVA DE LA SERENA 0 0 7 I V . A L L . B . .
- Page 49 SATELBE_02_08_dinA6_q4.qxd 19/02/2005 22:16 Página 5 CADIZ A I R 0 0 5 E D I . / C 1 , Z 6 5 9 2 7 8 7 1 0 CADIZ 0 6 3 , 1 0 C . / A F I 1 2 , 6 5 9...
- Page 50 SATELBE_02_08_dinA6_q4.qxd 19/02/2005 22:16 Página 6 GIRONA O R I 5 0 0 R I U R . / 0 4 , 2 7 9 8 3 2 8 2 1 GIRONA 0 0 2 . / C 1 2 , 2 7 9 1 1 6 2 5 9...
- Page 51 SATELBE_02_08_dinA6_q4.qxd 19/02/2005 22:16 Página 7 LUGO MONFORTE DE LEMOS 27400 ELECTRONICA LABARIÑAS SL C/. ORENSE, 4 BAJOS 982401307 982401307 MADRID 3 0 8 D I V E C I 0 0 0 E . / 8 1 9 2 0 8 7 8 7 8 1 9 1 0 8...
- Page 52 SATELBE_02_08_dinA6_q4.qxd 19/02/2005 22:16 Página 8 RIOJA, LA O Ñ 3 0 0 . / C A I B 0 1 , 1 4 9 2 4 2 1 1 6 1 4 9 0 5 2 2 1 3 SALAMANCA CIUDAD RODRIGO 37500 CANARIAS Y ELECTRONICA CR, CB C/.
- Page 53 SATELBE_02_08_dinA6_q4.qxd 19/02/2005 22:16 Página 9 VALENCIA L E I 0 0 3 PASCAUL PACHECO ORONES C/. DOS DE MAYO, 48 B 962171517 962171517 VALENCIA A I C 9 0 0 E L E . / C F L A A Ñ 0 1 , S O J 3 6 9...
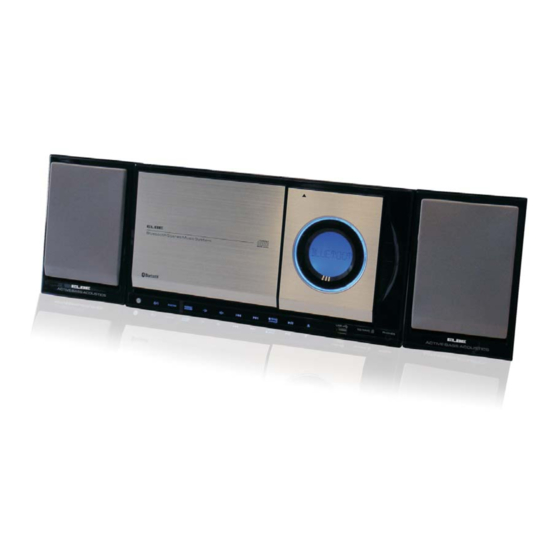
- Page 54 User Manual ELBE HIFI 1007 BT Bluetooth Stereo Music System Rev.4.021907...
-
Page 55: Important Safety Instructions
IMPORTANT SAFETY INSTRUCTIONS TO PREVENT FIRE OR SHOCK HAZARD, DO NOT USE THIS PLUG WITH AN EXTENSION CORD, RECEPTACLE OR OTHER OUTLET UNLESS THE BLADE SCAN BE FULLY INSERTED TO PREVENT BLADE EXPOSURE. TO PREVENT FIRE OR SHOCK HAZARD, DO NOT EXPOSE THIS APPLIANCE TO RAIN OR MOISTURE. -
Page 56: Precautions For Unit
17. OVERLOADING - Do not overload wall outlets, extension cords, or integral convenience receptacles as this can result in a risk of fire or electric shock. 18. OBJECT AND LIQUID ENTRY - Never push objects of any kind into this product through openings as they may touch dangerous voltage points or short-out parts that could result in a fire or electric shock. - Page 57 TABLE OF CONTENTS LOCATION OF CONTROLS REMOTE CONTROL AUDIO CONTROLS LOADING AND REMOVING A DISC INSERTING AND REMOVING FLASH DEVICES OTHER BLUETOOTH FUNCTIONS OTHER FUNCTIONS CARE AND MAINTENANCE TROUBLESHOOTING...
-
Page 58: Protect Your Furniture
UNPACKING AND SET-UP Carefully remove the unit from the carton and remove all packing material from the unit. Check to be sure that you have all the following items in addition to the main unit: If any item is missing, consult your dealer immediately. We suggest that you retain the original carton and packing materials in case it ever becomes necessary to return your unit for service. - Page 59 BASIC SYSTEM SET-UP Follow these steps to complete basic system set-up. Set-Up and Connect AM Antenna, Connect and Extend FM Antenna Connect the Main Unit to Power This system is designed to operate on 230V 50Hz AC house current. Connecting this system to any other power supply could result in damage to the unit which is not covered by your warranty.
-
Page 60: Power On The Main Unit
Install Batteries into Remote Insert two AAA batteries into the remote control while observing the correct (+) and (-) polarities as shown below Power on the Main Unit Press the STANDBY / button. The main display briefly shows “HELLO”. Please refer for setting the clock. -
Page 63: Operating Instructions
OPERATING INSTRUCTIONS Make sure that you have fully extended the FM antenna wire and connected the AM antenna. Make sure that you have installed batteries in the remote control handset. Make sure that the system is connected to an AC outlet that is always powered. Do not connect the system to an AC outlet controlled by a wall switch. -
Page 64: Audio Controls
AUDIO CONTROLS Volume Controls To increase or decrease the system volume Press the VOLUME UP or VOLUME DN buttons on the remote control on the front panel. The Volume Level Indicator will appear on the display when you change the volume level. The level indicator ranges from VOL MIN to VOL MAX. -
Page 65: Compatible Storage Devices
COMPATIBLE STORAGE DEVICES USB SD DISC This system supports playback of music from CD discs as well as USB and flash memory card devices. Supported DISC Types Supported Memory Card Formats Secure Digital™ (SD) miniSD™ (with adapter only) microSD™ (with adapter only) Multimedia Card (MMC) Where “with adapter only”... -
Page 66: Compatible Audio Formats
COMPATIBLE AUDIO FORMATS This system is compatible with MPEG1 Audio Layer 3 (MP3) 32, 44.1 or 48kHz formats. The recording format should be in accordance with ISO9660 CD-ROM file system. MP3 file name requires MP3 or mp3 as an extension. Chinese characters cannot be displayed, although files featuring them can be played. VBR (Variable Bit Rate) files can be played, but playing time may not be shown correctly. -
Page 67: Inserting And Removing Flash Devices
INSERTING AND REMOVING FLASH DEVICES Flash devices are inserted at the front panel of the unit. Inserting and Removing USB Flash Memory Devices Insert the USB connector into the socket on the unit and press gently to seat. The connector can only be inserted one way. Remove the device by gently pulling it out of the socket. -
Page 68: Normal Playback
CD OPERATION Normal Playback Press the FUNCTION button to select “DISC” function. Press the OPEN/CLOSE button on remote conrol or on front panel to open the CD door. Load a disc into the player with the printed label facing out. Press the OPEN/CLOSE button to close the CD door. - Page 69 Press the PLAY/PAUSE button to begin playback. Playback will continue until all tracks on the disc have been played, then the player stops and the display shows the total tracks number and playing time on the disc. To stop playback at any time, press the /BAND button.
- Page 70 Repeat Playback (On Remote Control Only) The Repeat function in this system allows you to continuously repeat a single track, or the entire disc. The Repeat function can be activated during playback or while the player is stopped. One Track Repeat Select the track to be repeated and begin playback.
- Page 71 Programmed Playback (Remote Control Only) Note: You cannot program tracks during playback. If a disc is playing press the /BAND button first to stop playback before beginning the programming steps below . 1. Load the disc in the player and wait until the player has read the Table of Contents of the disc.
- Page 72 6. Press the PLAY/PAUSE button to begin programmed playback . The “PROGRAM” indicator remains 5 seconds on display. The player will play all the tracks that you programmed in the desired sequence. After the last programmed track has played the player stops, but the programmed sequence remains in the memory.
- Page 73 PLAYING MP3 & WMA CDS Most of the normal CD operations described in this manual also apply to MP3/WMA CDs. However there are a few differences in MP3/WMA CD playback functions, and these are described on the following pages. MP3/WMA CD Reading Time and Display Information Because MP3/WMA CDs contain so much more information than normal CDs this CD player will take longer to read the table of contents information on an MP3/WMA disc.
- Page 74 Press the PLAY/PAUSE button to start playback. MP3/WMA CD Repeat Playback (On Remote Control Only) There are 3 Repeat Playback options with MP3/WMA CDs. In addition to the Repeat 1 Track and Repeat All Tracks options which are the same for normal CDs, you may also select Directory Repeat Mode to repeat all the tracks contained in a single Directory.
-
Page 75: Random Playback
MP3/WMA Random Playback Modes (On Remote Control Only) This function operate the same way for MP3/WMA CDs as they do for normal CDs. Random Playback Load an MP3/WMA CD in the player. Wait until the reading process is completed. Press the PLAY MODE button the “ ”... - Page 76 MP3/WMA CD Programmed Playback (On Remote Control Only) When programming the tracks on an MP3/WMA CD you must also select the Directory Number of the tracks being programmed. Programming can only be done while the player is in the Stop mode. If the MP3/WMA disc is playing, first press the /BAND button to stop playback, then follow the programming steps below.
-
Page 77: Memory Card Operation
MEMORY CARD OPERATION Playing MP3/WMA Audio Files Stored On SD/MMC Memory Cards NOTE: Press the FUNCTION button repeatedly until the main display shows "CARD". Insert the SD or MMC flash memory card containing MP3/ WMA audio files into the card slot by gently pressing into position until it locks in place. -
Page 78: Usb Operation
USB OPERATION Playing MP3/WMA Audio Files On Portable USB Storage Devices NOTE: Press the FUNCTION button repeatedly until the main display shows "USB ". Insert the USB flash containing MP3/ WMA audio files into the USB port by gently pressing into position until it locks in place. -
Page 79: Bluetooth Operation
BLUETOOTH OPERATION HIFI-1007-BT NOTE: Supported Bluetooth Profiles HIFI-1007-BT HIFI-1007-BT Description Application Mono audio connection Mobile phone speakerphone/ with controls such as redial hands-free operation and transfer Mono audio connection with Mobile phone speakerphone/ basic controls hands-free operation High-quality stereo audio Advanced Audio connection Distribution Profile (A2DP) - Page 80 Bluetooth Messages BLUETOOTH CONNECTION MESSAGES Display Message Audio Meaning HIFI-1007-BT is visible to any devices that wish to pair with it. Mobile phone has connected Double beep inkwg devices Bluetooth heads HIFI-1007-BT Capable device has connected HIFI-1007-BT Double beep using Bluetooth stereo profile Long beep Mobile phone disconnected Long beep...
- Page 81 BLUETOOTH SPEAKERPHONE MESSAGES Display Message Audio Meaning Ringing tone Dialing call (outgoing) (outgoing) Ringing, phone Incoming call dependent Caller ID incoming call l l a l l a Short beep Call ended Transfer from unit to handset or back Mute the microphone Bluetooth Performance Considerations...
- Page 82 BLUETOOTH CONNECTIONS SET-UP IMPORTANT - Ensure all Bluetooth devices within 30 feet have Bluetooth transmission disabled. The presence of other functioning Bluetooth devices during connection may lead to operational difficulties. Connecting a Mobile Phone (Headset profile, Hands free profile) NOTE: Ensure that Bluetooth radio on your mobile phone is powered on.
- Page 83 Connecting a Stereo Music (A2DP)-Capable Mobile Phone IMPORTANT: If you are connecting an A2DP-capable phone and you wish to use both the A2DP (music) and hands-free (speakerphone) functions of your phone together, only one device supporting A2DP may be connected at one time. NOTE: This connection requires a mobile phone supporting the Bluetooth A2DP profile for stereo music connection.
- Page 84 Stereo Music Connection to PCs and PDAs NOTE: This connection requires a device supporting the Bluetooth A2DP profile for stereo music connection. Please ensure your device has the latest versions of software drivers and/or firmware supporting Bluetooth functionality. Compatibility with all devices is not guaranteed. HIFI-1007-BT HIFI-1007-BT /ANSWER...
- Page 85 6 Connecting Other Bluetooth Devices HIFI-1007-BT HIFI-1007-BT are g 0000 HIFI1007-BT PAIRING/ANSWER " " on remote control PAIRING” STEREO CONNECTED PHONE CONNECTED...
-
Page 86: Getting Started
BLUETOOTH SPEAKERPHONE OPERATION The Bluetooth speakerphone functions of HIFI-1007-BT allow easy conference calling and seamless switching between music playback and making or receiving phone calls. When you make or receive a call, music playback will pause and restart again once the call is complete. Incoming calls are notified with a call alert tone and caller ID if available. -
Page 87: Receiving A Call
HANDUP bottun / BAND on END CALL To redial last number press and hold PAIRING/ANSWER or button for 5 seconds. The call will be placed automatically. Receiving a Call CALLING accept the call, PAIRING/ANSWER " " on IN CALL reject the call, /BAND transfer sound PAIRING/ANSWER or "... - Page 88 LISTENING TO MUSIC FROM YOUR STEREO (A2DP) MOBILE PHONE HIFI-1007-BT allows you to connect your A2DP-capable mobile phone, stream high-quality stereo music over Bluetooth and control music playback from the remote Getting Started BLUETOOTH Controlling Music Playback PLAY Control Location Function Main unit, remote Press to play, press again to pause...
-
Page 89: Other Bluetooth Functions
OTHER BLUETOOTH FUNCTIONS Resuming Bluetooth Connections HIFI-1007-BT can store pairing information for up to seven devices and recall it at any time, allowing a portable device to reconnect whenever HIFI-1007-BT is powered on, or when a device comes into communication range. Once initial pairing is completed, re-pairing of devices is not necessary. If an eighth device is paired, the pairing information for the first device is overwritten. - Page 90 Hints For Better Reception The FM lead wire antenna on the back panel should be extended to its full length. You may also have to vary the direction of this antenna until you find the position that provides the best reception. AM): Insert the socket of loop aerial into the AM antenna socket on the unit.
-
Page 91: Presetting Stations In The Tuner Memory
Presetting Stations In The Tuner Memory You can store up to 40 of your favorite stations (30 FM / 10 AM) in the tuner memory for easy recall at any time Using either the manual or automatic tuning method described on page 36, tune to the first station you wish to memorize. -
Page 92: Other Functions
OTHER FUNCTIONS Setting the Clock (On Remote Control Only) When the AC power is connected, “AM 12:00” will appear on the display. The clock can only be set while the unit is off. Press the MEMORY/CLOCK button on remote control, the display will show SET CLOCK. - Page 93 Press TIMER to confirm. Display shows “ON” and hour digits begin to flash. Press Press to set the on time hour. to set the on time hour. Press TIMER to confirm. Minute digits begin to flash. Press Press to set the on time minute. to set the on time minute.
-
Page 94: Care And Maintenance
Stereo Headphone Jack This system includes a stereo PHONES jack on the front panel of the main unit. You may connect a set of stereo headphones, not included, to this jack for private listening without disturbing others. The main speakers are automatically shut off when headphones are connected to the PHONES jack. Make sure that the plug from your headphones is fully inserted into the headphone jack. -
Page 95: Trouble Shooting
TROUBLE SHOOTING General No power System does not respond to key presses Unable to operate the System from the remote control No sound is heard Bluetooth Operations Audio quality is poor Mobile phone will not pair or connect to system HIFI-1007-BT Stereo A2DP mobile phone cannot pair or connect to system Mobile phone connects and disconnects constantly... - Page 96 Speakerphone Operations Voice is not clear Other party hears echo Radio Operations Hard to hear broadcasts because of noise Disc Playback Operations The disc does not play The disc skips...
-
Page 97: Technical Specifications
TECHNICAL SPECIFICATIONS 1. General Power requirements 230V AC, 50 Hz Power consumption 110W (operation) 27W (standby) Dimensions of main unit 594 (W) x 184 (H) x 98 (D) mm Weight of main unit 3.06 Kg 2. Amplifier section Power Output 3.
Need help?
Do you have a question about the HIFI 1007 BT and is the answer not in the manual?
Questions and answers