Table of Contents
Advertisement
Advertisement
Table of Contents

Related Manuals for Acorn A3010


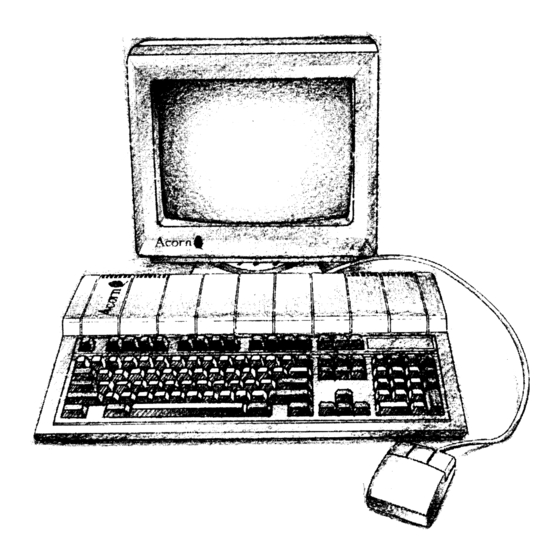
Summary of Contents for Acorn A3010
- Page 1 Acorn A3010 Welcome Guide...
- Page 3 Acorn A3010 Welcome Guide...
- Page 5 We value your comments and feedback, so please let your supplier know of any suggestions you have as to how we might improve our service to you — the Acorn A3010 incorporates many such suggestions from existing Acorn owners. Your supplier will also assist you should you ever feel dissatisfied with any aspect of our product or service —...
- Page 6 All maintenance and service on the product must be carried out by Acorn Computers' authorised dealers or Approved Service Centres.
- Page 7 Guidelines for safe operation The equipment described in this guide is designed and manufactured to comply with international safety standards EN60950 ( BS7002) and is intended for use only as a desktop computer It must not be used for other purposes. It is most important that unpacking and operation is carried out in accordance with the instructions given in this guide.
- Page 8 If ACORN agrees with the supplier that the equipment should be forwarded to ACORN for repair then ACORN will arrange for collection and return of the equipment at no charge. In all other cases the supplier will be responsible for effecting any necessary repairs in accordance with ACORN's service policy.
- Page 9 Documentation roadmap This roadmap will help you decide which tools and manuals you will need, as you start to use your computer and develop your skills.
-
Page 10: Table Of Contents
Contents Part 1 - Getting started The chapters in this part contain all the information you need to get started on your computer. The odd-numbered pages in this part are marked with a grey box on the top righthand side. Unpacking 1 Describes what you should find when you open the box containing your computer. - Page 11 Contents Part 2 - Hardware reference section This part contains technical reference information and more detailed installation instructions, along with some advice on looking after your computer. The odd-numbered pages in this part also have a grey block on the righthand edge, but lower down than those in Part 1.
-
Page 13: Unpacking
Unpacking his chapter tells you about unpacking your computer, and gives some hints on where to set it up. Unpacking Unpack your computer on a flat surface — either on the floor, or on a large table where there's plenty of room for the carton as well as for the computer. Take everything out of the carton, making sure you don't break the packaging material, as you may need this later (to transport your computer). -
Page 14: Computer
Choosing where to set up your computer Complete the Owner Registration Form and post it back to Acorn (purchasers outside the UK should send it to their local supplier or national distributor). This will enable us to inform you of new products and upgrades to your computer as they become available. -
Page 15: Setting Up The Computer
Guidelines for safe operation in the front of this guide. After you've checked the components against the checklist in the last chapter, you can connect them together and begin to use your Acorn A3010 computer. Follow these simple steps to set up your computer: Connect mouse to computer Take the mouse out of its plastic bag. - Page 16 Connect monitor (or TV) to computer Connect monitor (or TV) to computer Put the monitor or TV on the table, next to or behind the computer. Don't balance it on top of the computer. Colour monitor or colour TV with SCART cable If you have a colour monitor, push the plug on one end of the cable into the back of the monitor, and the other into the 15-way connector on the...
-
Page 17: Switching On
Switching on chapter tells power your computer the first time, and 1 describes what you see on the screen when you do. Equipment check First check that you have connected all parts of the computer together properly, as described in the previous chapter. Before switching on the mains supply Check that the monitor (or TV), printer and computer ON/OFF switches are set to OFF. - Page 18 Switch on the monitor or TV Switch on the monitor or TV Monitor The monitor has a separate switch. The manual for your monitor will explain how to turn it on and, if necessary, adjust the brightness control. If you're using a TV with a SCART connector, the TV's manual should explain how to switch your TV into the correct mode for displaying a picture generated by the computer.
-
Page 19: The Desktop
Switching on The desktop Depending on your monitor (and whether it has has warmed up yet) you might see the screen change colour while the computer performs some self-tests. The LED on the floppy disc drive will also flash once when the drive is being checked. Next, you will see an introductory screen: After a few seconds, you should have a picture on your screen, looking something like this:... -
Page 20: What Now
Now you're ready to begin using your computer. If this is the first time you've used a computer (or at least an Acorn computer) take the following route: I Use the rest of this guide to get used to the RISC OS desktop, and to learn how to use the computer efficiently. -
Page 21: The Risc Os Desktop
The RISC OS desktop n introduction to the desktop environment of RISC OS. The RISC OS desktop RISC OS is the name of the operating system of your computer, which controls the way the computer appears to you, and how it does other things. There's more on this subject in the RISC OS 3 User and Applications Guide, if you're interested. - Page 22 Device icons Device icons The icons on the left of the icon bar represent the devices which are available – that is, the discs and other places where you can load information from, and save it to. At least one will appear on the icon bar: Floppy disc drive.
-
Page 23: Using The Mouse
Using the mouse chapter tells mouse select move things displayed on the screen. Holding the mouse Hold the mouse with the cable away from you so that your fingers rest easily on the three buttons. If you are right-handed, you should hold it like this: Move the mouse around and watch the pointer move around the screen. - Page 24 The mouse buttons The mouse buttons The mouse has three buttons, known as Select, Menu and Adjust: The Select button is used most of the time to select icons displayed on the screen, or to choose from menus. The Menu button makes a menu appear. Menus are described in Menus on page 23. The Adjust button does a variety of things, mostly useful variants of what the Select button does.
- Page 25 Using the mouse Clicking 1 Point at the object Move the mouse so that the pointer is over the object you want to select. For example, point at the Apps icon on the icon bar. 2 Click Select Press and release the Select (lefthand) button of the mouse.
- Page 26 Dragging Dragging 1 Point at the object Move the mouse so that the pointer is over the object you want to move. For example, point at the title bar along the top of the Apps directory display. (The title bar is the part of the directory display containing the words Resources:$.Apps 2 Select it with the mouse...
-
Page 27: Windows
Windows his chapter describes windows and explains how they can be moved, resized hidden and closed. It describes how to move through the contents of a document too large to display in one window all at once. What is a window? A window is an area of the screen displaying an activity or application. - Page 28 Practising manipulating windows Back icon Clicking on the back icon has the effect of putting a window to the back of the pile of windows on the screen. If you click on this, the window will be hidden behind any windows which overlap the area it occupies.
- Page 29 Windows Changing a window's size 1 Point at the adjust size icon Move the pointer to the adjust size icon. 2 Drag the adjust size icon Press and hold the Select button down. Move the mouse and drag the icon to change the size of the window.
- Page 30 Toggling window size Toggling window size 1 Click on the toggle size icon Move the pointer over the toggle size icon and click the Select (lefthand) button. The window size will snap to nearly the width of the screen. 2 Click on the toggle size icon again Clicking on the icon again will reverse the process (note the changing toggle size icon).
- Page 31 Windows Closing windows Click on the close icon Position the pointer on the close icon and click the Select (lefthand) button. For example, close the Apps directory display. The window will disappear from the screen. If it's an application window, and has some unsaved work in it (some changes you've made to a letter, for example) the application will usually ask you whether you want to save the changes.
- Page 32 Scrolling The technique of moving the window around a large file is called scrolling. You move the window frame over the file, but because the window actually stays in the same position on the screen, it appears as though the file is scrolling past the window. This is not as complicated as it sounds.
- Page 33 Windows Practising scrolling Insert the Applications disc supplied with your computer and click on the floppy disc drive icon to show the directory display for this disc. Then double-click on the App I directory. If you're not sure about any of this, read the chapter Discs and disc drives first, then come back to this.
- Page 34 Moving through a file Moving through a file 1 Select the slider Position the pointer on the slider, press the Select (lefthand) button and keep it pressed down. 2 Drag the slider Drag the slider to display the part of the file you want to view.
-
Page 35: Menus
Menus his chapter tells you what menus are, how to display them and choose things from them, and how to type in answers when the computer asks you to be more specific about what you want. What is a menu? A menu in the desktop is similar to a menu in a restaurant —... - Page 36 Displaying a menu Displaying a menu 1 Point to the relevant icon Move the pointer over the window or icon you want to work on. For example, click on the Apps icon on the icon bar and move the pointer over the Apps directory display.
- Page 37 Menus Keeping a menu on the screen You'll notice that after you click Select to choose a menu option, the menu then disappears. If you click with the Adjust (righthand) button instead of Select, the menu will stay on the screen, and you can choose another option.
- Page 38 Writable menu boxes Writable menu boxes Some submenus include writable menu boxes. Two types of writable menu box They prompt you to type in information, such as a filename. Some boxes are blank. Others include a default name, which you can change if you want To erase the default name, press the Delete key until it has gone.
-
Page 39: Discs And Disc Drives
Discs and disc drives his chapter tells you how to use and take care of your discs and disc drives, and how to format and make backup copies of discs. Floppy discs and hard discs You store information and programs on hard or floppy discs. Floppy discs Your computer uses 3.5 inch floppy discs. - Page 40 Inserting and ejecting floppy discs Inserting and ejecting floppy discs The floppy disc drive is on the righthand side of the computer. Insert the disc into the floppy disc drive like this, with the label uppermost: The disc clicks into place when it is fully inserted. To eject a floppy disc from the computer, press the disc eject button below the disc slot, but only when the drive indicator light is off.
- Page 41 You can use the following sizes of floppy disc with your computer: • double density floppy discs, holding 800 kilobytes (800KB) when formatted ( Acorn ADFS 800K (E) format) • high density floppy discs, holding 1.6 megabytes (1.6MB) when formatted (Acorn ADFS 1.6M format).
- Page 42 Formatting a floppy disc Your computer can also format discs for filing systems other than ADFS, as shown in the following table: Unformatted size Filing system Formatted size Density ADFS 800KB double ADFS 1.6MB high ADFS 640KB double 1.44MB high 720KB double Atari...
- Page 43 Discs and disc drives 4 Decide on a name for your disc Move the pointer over the Name: box and press Ctrl U to delete the default name: Then type in the name you've decided on: (See Renaming a floppy disc on page 32 for more information on disc names).
- Page 44 Renaming a floppy disc Renaming a floppy disc As well as writing the disc's name on a sticky label so that you know what it's called, you can use the computer to name the disc electronically (so the computer knows the disc's name too): If you don't choose names for your floppy discs when you format them, the computer will give them default names of the form 12_4 3_Tues: It's a good idea to give your...
-
Page 45: Making Backup Copies
Discs and disc drives Making backup copies It is a good idea to make a backup copy of any valuable files or discs from time to time, in case a disc is damaged or a file is accidentally deleted. You should also make backup copies of your program discs, and use these rather than the originals, which you should keep safe: Backing up a floppy disc... - Page 46 Making backup copies Backing up files from a hard disc Obviously, this only applies if your computer has a hard disc fitted: If you have any files on your hard disc that you can't afford to lose, it's a good idea to keep backup copies of them on a floppy disc, in case your hard disc develops any errors: This can happen during the lifetime of a hard disc, but don't worry, it's not usually catastrophic! The RISC OS 3 User and Applications Guide tells you what to do...
-
Page 47: Using The Keyboard
Using the keyboard his chapter describes the keyboard and its functions. A quick tour of the keyboard This chapter describes the main features of the keyboard, and tells you how to use the different groups of keys: Note: Sometimes you need to press more than one key to perform an action. In such cases: 1. -
Page 48: The Keyboard
The keyboard The computer control keys have different functions, depending on the software with which they are being used: Useful keys to know about at the moment are: Delete deletes a character to the left of the caret (e:g: in Edit) or deletes a selected object (e.g. -
Page 49: Moving Around A Document
Using the keyboard When to use the keyboard You will need to use the keyboard for many tasks, such as • supplying answers to questions the computer asks in writable menu boxes ( including giving names for files and documents you create) •... - Page 50 Typing special characters Typing special characters Sometimes you need to be able to type special characters that are not apparently on the keyboard, such as accented characters, or symbols like ©: You can in fact get at lots of extra characters using the Alt key: The keyboard map at the bottom of this page shows all the characters that are available: Here's how to type them Typing accented characters Some of the keys on the figure below are marked with a black area in one corner:...
-
Page 51: Using Applications
Using applications chapter tells load applications your computer. It uses the application Edit as an example. What are applications? Applications, like Edit or Draw, are programs: They are the tools that you use to produce your letters, drawings, music and so on. You can always tell applications, because their directory names start with an exclamation mark (!): See the next chapter for more information on application directories. - Page 52 Using applications 2 Start the application Double-click on the application's icon: It will appear on the icon bar, ready for you to use: For example, double click on !Edit: Its icon will appear on the icon bar, indicating that it has been loaded into the computer's memory, and is waiting for you to use it: Some applications open their own windows as...
- Page 53 Using applications Using more than one application window Often you'll have more than one application window open on the desktop (this is the power of RISC OS — it lets you transfer data between different windows and applications): You can only enter information (e:g: write some text, or draw a picture) in one window at a time: To change the window you are working in, move the pointer over your chosen window and click Select: You'll notice that the title bar and other window icons will change to a lighter shade, indicating that the input focus is now in...
- Page 54 Getting the most out of applications Getting the most out of applications These are some tips to help you use applications efficiently: They're not essential reading now, and indeed they'll mean more to you after you've read the next chapter, so by all means come back to them later: System applications If you were writing a letter by hand, you would need to know where to find the resources to write it (paper, envelope, pen etc): The computer uses different types of...
-
Page 55: Files And Directories
Files and directories his chapter explains how you can store information in an organised way, copy it, and delete it when you no longer need it. Files and directories Everything you create using an application or programming language can be saved as a file, whether it consists of text, graphics or a program: Each file has a name–you have to provide one when you save a new file: File icons usually have a square box around them, but what's in the box depends on... - Page 56 Building a file structure Double-clicking on an application directory loads the application, usually onto the icon bar ready for use: See the previous chapter for more on this: Three refinements you might find useful later on: • Double-clicking Adjust on a sub-directory icon opens the sub-directory display and simultaneously closes the directory display it came from (the parent): This reduces the number of windows on the desktop: •...
- Page 57 Files and directories To create a structure like this, you will need to save files, create directories and copy files into them: These procedures are described on the following pages. To practise saving files, you'll need a work disc of your own. Create one by taking a new disc and formatting it, as described in Formatting a floppy disc on page 30.
- Page 58 Saving (and loading) a file Saving (and loading) a file 1 Open the directory display Decide which directory you want to save your file in, and double-click on its icon to open a display for it: For example, do this on the TestFiles1 directory you've just created: 2 Select Save Move the pointer over the work you want to...
- Page 59 Files and directories 4 Drag the file icon into the directory window Select the file icon in the dialogue box, drag it into the directory window, and release the button: For example, drag it to your TestFiles1 directory: You can load the file again by double-clicking on its icon (as long as the relevant application is in the Apps directory, or its icon has been displayed on the screen since you last switched off the...
- Page 60 Deleting files and directories 4 Release the button Release the Select (or Adjust) button and the file will be copied into the new window: A copy of the icon will appear in the window when this has been done: To move a file (so that the original is not retained in its original location), hold down the Shift key during steps 2 and 3: Deleting files and directories...
- Page 61 Files and directories 3 Delete the file or directory Click on Delete. Your selection will be deleted from the directory. Do this with the copy of file EditTest in directory TestFiles2. Note: deleting a directory also deletes all the files in that directory, so use this option with caution! If any files (or directories) have been locked against deletion, they will not, in fact, be deleted.
- Page 62 Pinboard You can remove the 'dropped' icon from the background as follows: 1 Display the Pinboard menu Move the pointer over the dropped icon and click Menu. 2 Remove the icon Choose Remove icon from the menu. If that option is greyed out, it means that the pointer wasn't quite over the icon when you clicked Menu.
-
Page 63: Printing
• connected your printer to the computer (using the parallel port, in the case of the Acorn JP-150) using the correct cable (see Setting up the computer on page 3 and Appendix C: Attaching peripheral devices on page 77 Note: Printer cables longer than about 5m can cause problems, with any computer. - Page 64 Problems with printing on page 56). In this case, load the driver called JP-150, which is specifically for the Acorn JP-150 printer. The Printer control window will change to include details of the printer driver you've just loaded, and so will the icon on the icon bar.
- Page 65 Printing Choose Configure... to display the configuration window. Change any settings that aren't correct (refer to the manual supplied with your printer). The only options you'll need to worry about for now in this window are Resolution, Paper feed.. . and Quality. For example, you can set Paper feed...
-
Page 66: Printing A File
Printing a file Printing a file 1 Load the program If its not there already, load the program or application you used to create the file. 2 Open the file you want to print Double-click on a file to open it. For example, open the TestFiles1 directory on your workdisc, that you created in the previous chapter. - Page 67 Printing Another way of printing You can often print a file by dragging its icon and dropping it on the printer icon on the icon bar. 1 Follow step 1 from the previous section For example, load Edit. 2 Open the directory containing the file's icon For example, open the TestFiles1 directory on your workdisc, that you created in the previous chapter.
- Page 68 Problems with printing Problems with printing The most common problems with printing occur in the setup stage. If your computer thinks it is connected to the wrong printer, you will have trouble. Take care with the following when you set up: •...
-
Page 69: Switching Off The Computer
Switching off the computer his chapter describes the correct procedure to follow before switching off your computer (do this at night, or if you're not intending to use the computer for a few days). Normal shutdown procedure When you've been doing some work on the computer and want to switch it off, you can simply switch off using the ON/OFF switch on the back of the computer. - Page 70 Normal shutdown procedure The computer will perform any 'tidying-up' operations necessary, such as quitting any applications you've been using. A window will appear when this has happened, telling you that the computer is ready to be switched off. 3 Switch off the computer and peripherals Remove any floppy discs from the disc drive.
-
Page 71: If Things Go Wrong
If things go wrong his chapter offers solutions to some problems you might encounter while you are getting started with your computer. If none of these help, consult your supplier. No picture Check that • the screen has not simply blanked as a result of the Blank delay set in !Configure ( if this is the case, moving the mouse or pressing the Shift key will restore the display) •... - Page 72 Flashing floppy drive LED If the floppy drive indicator light flashes more than once when you switch on, and the computer doesn't power up properly (you can't see the RISC OS desktop after a few seconds) consult your supplier. If the LED only flashes once, this is normal. It should happen every time you switch on or reset the computer.
- Page 73 If this doesn't cure the problem, the computer's internal CMOS RAM support battery may be faulty. Take the computer to your Acorn supplier, who will investigate. The self-test does not complete properly...
-
Page 75: Appendix A: Maintaining Your Computer
You can tell when this has happened by the fact that the computer will frequently ' forget' its configuration and the computer's clock will show the wrong time. You should then take the computer to your Acorn supplier, who will install a new battery. Cleaning the computer, monitor and keyboard First, remember to follow the Guidelines for safe operation at the very beginning of this guide. - Page 76 Cleaning the mouse Clean the mouse occasionally to keep it running smoothly. To clean the mouse, you need the following items: • some tape head cleaner • a cotton swab • a lint-free, dry cloth. To remove the ball and clean the mouse, take the following steps: 1.
- Page 77 Appendix A: Maintaining your computer 7. Wipe the ball with the clean, dry cloth. Do not use a cloth which may leave lint, and do not use cleaning liquid on the ball. To replace the ball and retainer, take the following steps: 8.
-
Page 79: Appendix B: Monitor Connections
Note: Various third party monitors and other peripheral equipment are described in this Guide. The description of these or any other third party equipment does not imply any recommendation or endorsement by Acorn Computers Limited, and users must satisfy themselves as to the suitability of any peripheral equipment (including monitors) on... - Page 80 Table 1: Monitor information Table 1: Monitor information Monitor family Examples Adaptor req'd VGA, or Multiscan with Acorn AFK18 None* 15-way connector NEC Multisync 3D None* NEC Multisync II (supplied) Taxan 795 None* Philips 3CM 3209 None* Panasonic TX-14H8BT None*...
- Page 81 Appendix B: Monitor connections Cables and adaptors This section gives you the pinouts on standard cables supplied with monitors, and tells you how to make adaptors if they are required. The pinout of the video connector on the back of the computer is illustrated in Appendix D: Hardware components and connectors on page 81.
- Page 82 Cables and adaptors Adaptor type B The cable supplied with some Multiscan monitors is terminated at the computer end with a 9-way D-type plug. You need a standard 15-way plug to 9-way socket adaptor: Most Multiscan monitors are now being designed to be VGA-compatible and will work satisfactorily when driven with separate horizontal and vertical sync signals.
- Page 83 Appendix B: Monitor connections Adaptor type D The cable supplied with some TV-type monitors is terminated at the computer end with a 9 pin D-type plug. You need a I 5-way plug to 9-way socket adaptor: Note: HSync (pin 13) linked back into ID<0>...
- Page 84 Cables and adaptors Cable type F You need this cable to use with monochrome monitors which have a phono input socket. You need a 15-way plug to phono socket adaptor with resistors, to mix the separate red, green and blue signals into a composite monochrome signal (you can fit these components into a 15-way connector shell).
- Page 85 Appendix B: Monitor connections Connecting a colour TV with a coaxial aerial cable You can connect an ordinary colour TV using the coaxial aerial cable. As well as the PAL colour video signal a mono sound channel is provided, so that the TV's loudspeaker can be used.
- Page 86 Connecting a colour TV with a coaxial aerial cable • Open the App2 directory display and double-click on !TVTest. You'll see the following testcard picture: • Adjust the TV's controls until you've got the best possible picture (consult the TV's manual). Things to look for are correct colours, centralisation of the picture, picture clarity (clear dividing lines between the colour bars) and so Note: There will be some colour fringing (a moving flicker on some of the vertical black and white bars) even when you've fine-tuned the TV.
- Page 87 Appendix B: Monitor connections MonitorType and screen modes Monito ype is a computer variable that controls which screen modes (described in the RISC OS 3 User and Applications Guide) your computer can display. The following monitor types are defined: MonitorType Description Screen modes available 0-17, 24, 33-36*...
-
Page 88: Changing The Screen Mode
MonitorType and screen modes Changing the screen mode To change the screen mode displayed on your monitor, proceed as follows: 1. Click Menu over the Palette icon. 2. Move the pointer to the right of the Mode menu option. 3. Click on one of the screen modes listed (or move the pointer to the bottom of the Mode box, type in your chosen mode number after the caret, then press Return). -
Page 89: Appendix C: Attaching Peripheral Devices
Acorn Computers Limited, and users must satisfy themselves as to the suitability of any peripheral equipment (including monitors) on advice from the equipment supplier. -
Page 90: Important Note
Serial port Important note Take great care when connecting serial devices that you connect them to the serial port. Don't connect serial devices to the joystick port by mistake, especially if the CTS and RTS connections are wired together, as this could blow the computer's internal joystick/mouse port fuse. -
Page 91: Parallel Port
Appendix C: Attaching peripheral devices Hardware connection You may need to ask your supplier for an adaptor cable to connect a modem or other standard RS232 DCE device. Here is the wiring guide for connecting to a standard RS232 25-way D-type connector: 1n practice you may leave out R1 and DSR. - Page 92 Parallel port Software connection Printing on page 51 tells you how to configure your computer to use a Acorn JP-150 printer. You'll find more information in Printing in the RISC OS 3 User and Applications Guide and the manual supplied with your printer.
-
Page 93: Appendix D: Hardware Components And Connectors
Appendix D: Hardware components and connectors chapter describes hardware components computer, and gives details about the connections of the different socket The front of the computer The drawing below shows the top of the computer. ON/OFF indicator light This light comes on when you turn the computer on. Floppy drive indicator light The indicator light comes on when the floppy disc drive is being accessed by the system. -
Page 94: Reset Button
The right side of the computer The right side of the computer 3.5 inch floppy disc drive The floppy disc drive is located on the righthand side of the computer. It includes a disc insertion slot and a disc eject button. Disc insertion slot This is where you insert floppy discs. - Page 95 Appendix D: Hardware components and connectors The back of the computer The drawing below shows the back of the computer. The following subsections describe the connectors on the back of the computer (an asterisk (*) after a signal name denotes active low). Parallel port A parallel printer needs a 25-way D-type plug to go into the 25-way D-type socket on the back of the computer.
- Page 96 The back of the computer Serial port The serial port on the back of the computer is a 9-way D-type plug. A serial device to be connected here needs a 9-way D-type socket on the end of its lead. Refer to the documentation accompanying your particular communications package for information on how to wire the lead to be used with the serial port.
-
Page 97: Mouse Connector
Appendix D: Hardware components and connectors Mouse connector The mouse has a 9-way mini-DIN plug that goes into the 9-way mini-DIN socket on the back of the computer. The pins on the socket are wired as follows: Headphones The headphones 32Ohm socket allows you to connect stereo headphones or your stereo amplifier system to the computer, through which you can hear sound produced by the computer. - Page 98 The back of the computer Analogue RGB This 15-way D-type socket is used to connect your monitor to the computer (it not suitable for TTL RGB monitors). The pins on the socket are as follows: See Appendix B: Monitor connections on page 67 for information on monitors that use this socket.
-
Page 99: Appendix E: Inside The Computer
Acorn Computers Limited cannot accept any liability for damage done to the product during the installation of internal upgrades whether or not carried out in accordance with the instructions in this chapter. -
Page 100: Removing The Top Cover
Removing the top cover Removing the top cover The top plastic cover is held in place by three small cross-head screws under the front edge of the computer: 1. Turn the computer over and remove the three screws. 2. Turn the computer the right way up again. 3. - Page 101 Appendix E: Inside the computer Finding the upgrade sockets Internal expansion card socket Below is a plan view of the computer with its top plastic cover removed. It shows the socket into which you plug an internal expansion card. Some expansion cards provide extra connectors on the back of the computer when they' re fitted.
- Page 102 Reassembly RAM upgrade sockets The drawing below shows how to get at the memory upgrade sockets if you want to add extra RAM to your computer. 1. Lift the keyboard up by its front edge. You'll see the RAM cover underneath. 2.
-
Page 103: Glossary
Glossary his glossary defines any new terms that you may have come across in the guide. Terms in italics have their own definitions in this glossary. adaptor — See power adaptor. ADFS — Advanced Disc Filing System (see the RISC OS 3 User Guide for more information). adjust button —... - Page 104 close icon — Click Select on this to close a window or directory display. Click Adjust to close the window and simultaneously open its parent. Press Shift and click Select on this to close a window and leave its icon on the Pinboard. Press Shift Adjust to open the parent without closing the window.
- Page 105 Econet — This is a means of connecting two or more computers together so that they can communicate with each other and share information. It is a type of Local Area Network (LAN) produced by Acorn. Contact your supplier for details. eject — Press the disc eject button to eject a floppy disc.
- Page 106 keyboard — Built in or attached to computer by a curly cable. You use it to input information to the computer. kilobytes (KB) — Unit of size relating to storage space in a computer. There are 2 (1024) bytes in a kilobyte. A formatted high density floppy disc can hold about 1600KB. A hard disc can hold much more.
- Page 107 Glossary parent directory — A parent directory contains subdirectories and files. The files and subdirectories you see in a directory display are "children" of this parent directory. peripheral — An item of hardware (e.g. a printer, monitor or modem) connected to your computer.
- Page 108 screen mode — Governs the physical appearance of the desktop on your monitor. scroll arrows — Arrows at either end of the scroll bars on windows that are not large enough to show all of a file. scroll bars — Shaded bars along the righthand (and sometimes lower) edge of a window. scrolling —...
-
Page 109: Index
Index Symbols !Fonts 42 back icon – see windows !Maestro 8, 43 backup – see floppy discs and hard discs $ (root directory) 42 battery, internal 63 access 49 CapsLock key 40 accessing discs 28 Caps Lock key – see keyboard Adjust button 12 caret 26 choosing a menu option 25... - Page 110 Index colour monitor 4 double-clicking 12, 13 mouse 3 loading a file 47 peripherals 4 opening files and directories 43 Copy key — see keyboard starting applications 39, 44 copying files 47 dragging 12, 14 copying text or objects 36 dragging windows off the screen 17 creating a new directory 45 dropping icons on the desktop —...
- Page 111 Index restrictions on filenames 46 structure in a directory 44 icon bar 9 files and directories bringing to the front 17 max number allowed 44 icons 9 naming 26, 45 directories 43 filing system 45 displaying large or small icons 25 fitting upgrades 87 files 43 flashing display —...
- Page 112 Index setting 75 mouse letterbox modes 75 buttons 12 loading connecting 3 application 61 dragging 14 loading a file 46 holding 11 moving the pointer II techniques 12 moving files 47 multiple keystrokes – see keyboard !Maestro 8, 43 multitasking (working in more than one window) – memory 61, 63, 94 see also input focus 41 memory allocation...
- Page 113 Index printing 51 parent 44 quitting applications 41 peripherals adding 77 connecting to computer 77 switching off 58 Pinboard 23 RAM (Random Access Memory) 95 dropping icons on the desktop 49 removing top cover 87 iconising files 49 renaming discs — see floppy discs problems 61 RESET button 60, 82 pointer 10...
- Page 114 Index printer connections 78 setting up unpacking the computer 1 computer 3-4 upgrades Shift F12 fitting 87 bringing the icon bar to the front 17 using applications on floppy discs — see Shift key applications typing upper-case letters 40 shuffling windows — see windows shutdown 57 slider —...
- Page 117 Reader's Comment Form Acorn A3010 Welcome Guide We would greatly appreciate your comments about this Manual, which will be taken into account for the next issue: Did you find the information you wanted? Do you like the way the information is presented? General comments: If there is not enough room for your comments.
- Page 120 AGJ01...
Need help?
Do you have a question about the A3010 and is the answer not in the manual?
Questions and answers