Advertisement
Advertisement
Table of Contents

Related Manuals for The Greenwich Masters Grand Complication

Summary of Contents for The Greenwich Masters Grand Complication
- Page 1 THE GRAND COMPLICATION INSTRUCTION MANUAL...
-
Page 2: Main Features
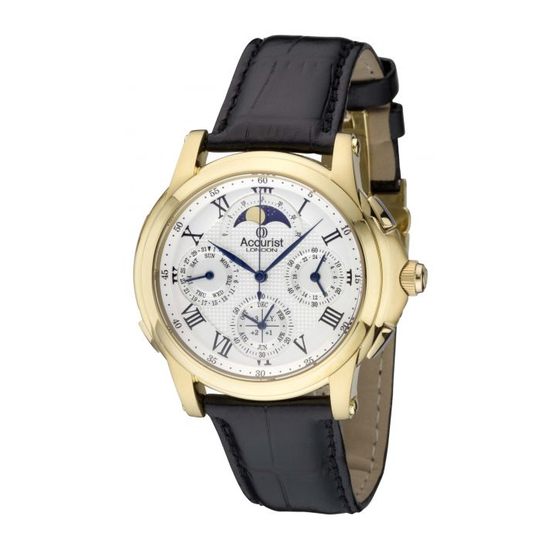
Main Features This watch is a multi-hand analogue watch equipped with numerous functions including a chime function using an electronic tone, fully automatic calendar function, which corrects the date for each month including leap years, moon age function and a chronograph function that is able to measure time for up to 12 hours. -
Page 3: Specifications
Specifications 1. Type - Multi-hand analogue quartz watch 2. Time Accuracy - Within +/- 20 seconds per month on average. ° ° 3. Operating temperature range: -10 C - +60 4. Display Functions: • Time: Hours, minutes, seconds, 24 hour clock •... -
Page 4: Names Of Components
Names of Components Chronograph Moon age Second hand Hour hand Minute hand Date hand Moon age Button correction button Day hand Crown Button Button Second hand 24 hour hand Year hand Month hand... - Page 5 Display Chronograph Time / Calendar Hand Hour hand Continuously indicates hours Continuously indicates minutes Minute hand Second hand Continuously indicates seconds Continuously indicates the 24 hour clock 24 hour hand Chronograph Chronograph seconds second hand Continuously indicates the date Date hand Continuously indicates the day Day hand Chronograph...
- Page 6 Normal Position Crown position display Time / Calendar Chronograph Zero position check Button A Split Reset Button B Chime Start / Stop To chronograph Button C To time / calendar display Crown Moon age correction (can be performed at any Moon age correction button time regardless of crown position).
- Page 7 1st Position 2nd Position Crown position display Setting the calendar Setting the time Yearly / Monthly Setting of chime; Button A Correction; Clockwise Clockwise direction Yearly / Monthly Setting of chime; Button B Correction; Counter clockwise Clockwise direction Button C Date correction Setting of hour, Crown...
-
Page 8: Before Use
Before Use Before using this watch, please check the reference positions of each hand using the following procedure to ensure that each function operates properly. (Reference position: The initial position of each hand to ensure that this watch functions properly). 1. - Page 9 Fig 1. Confirmation of Reference Position...
-
Page 10: Setting The Reference Position
Setting the Reference Position The hands of the watch will not indicate the correct positions unless the reference position is set properly. If the reference position has changed, reset it by following the procedure described below. (The reference position must also be reset when the battery has been replaced). - Page 11 Fig 2. Perform the All-Reset procedure...
- Page 12 2. Setting the reference position (see fig 3). (1) Press button A and set the year and month hands to 00.00 (2) Press button B and set the chronograph second hand to 00.00 seconds. (3) Press button C and set the date hand to the position.
- Page 13 Fig 3. Setting the reference position...
-
Page 14: Setting The Time
Setting the time 1. Setting the time and and day of the basic clock (see fig 4). Once the time has been set for the basic clock, always make sure to set the time of the chime clock according to the time of the basic clock. If the time is different between the basic clock and chime clock the chime will not sound at the correct time shown on the basic clock. - Page 15 Fig 4. Setting the time and day of the basic clock Hour hand Minute hand Day hand 24 hour hand Second hand...
- Page 16 2. Setting the time of the chime clock (see fig 5). (1) Pull out the crown to the 2nd position so that the second hand of the basic clock stops at 0 seconds. (2) Push button A or B and set the year and month hands to the time of the basic clock.
- Page 17 Fig 5. Setting the time of the chime clock Month hand Year hand...
- Page 18 3. Using the chime clock (see fig 6). The chime clock is a convenient function that lets you know the time (hours and minutes). (1) Pressing button B in the time and calendar display informs you of the current time with an electronic tone. •...
- Page 19 Fig 6. Using the chime clock...
-
Page 20: Setting The Calendar
Setting the calendar (see fig 8). (1) Pull out the crown to the 1st position. (2) Press button A or B to set the month and year (leap year for the number of years passed since the last leap year). •... - Page 21 Fig 8. Setting the calendar Moon age correction button...
- Page 22 (Leap Year Time Difference Chart) Time differences from Time differences from Year Year leap year (years) leap year (years) 2000 2004 Leap year Leap year 2001 2005 1st Year 1st Year 2002 2006 2nd Year 2nd Year 2003 2007 3rd Year 3rd Year (3) Press button C to set the date.
- Page 23 2. Setting the Moon Age The moon age can be corrected regardless of the position of the crown. (1) Press the moon age correction button to set the age of the moon (see fig 8). • Look in a newspaper to find out the moon age for the day, and then set the moon mark while referring to the moon age reference chart shown below.
-
Page 24: Using The Chronograph
Using the Chronograph The chronograph is able to measure time in 1/4 second units to a maximum of 12 hours. After 12 hours have elapsed, the chronograph returns to the chronograph reset display and stops. The chronograph can also be used to measure split time (intermediate elapsed time). - Page 25 Fig 9. Switching to the chronograph...
- Page 26 2. Simple Measurement (see Fig 10) (1) Press button B to start measuring time. (2) Press button B again to end measurement and display elapsed time. (3) Pressing button A resets the chronograph and returns each chronograph hand to zero. 3.
- Page 27 Fig 10. Simple & Integrated Measurements...
- Page 28 4. Measurement of Split Time (Intermediate Elapsed Time) (1) Press button B to start measuring time. (2) Pressing button A stops each chronograph hand to display the split time. • Measurement of time continues even though the hands are not moving. (3) Pressing button A again cancels the display of split time after which measurement continues with the time elapsed during display of split time added to the measured time (the chronograph hands begin to move again).
- Page 29 5. Simultaneous Measurement of 1st Place and 2nd Place Times (1) Press button B to start measuring time. (2) Press button A when 1st place competitor crosses the finish line. The time of the 1st place competitor is displayed. • Measurement of the time of the 2nd place competitor continues even while the time of the 1st place competitor is being displayed.
-
Page 30: Troubleshooting
Troubleshooting 1. The date hand is moving backward (in 1 second intervals) • This indicates that the Reference Position Failure Alarm has been activated a result of not setting the reference position. Perform the All-Reset and Reference Position Setting procedures by referring to “5. - Page 31 After replacing a battery • Always make sure to perform the All-Reset and Reference Position Setting procedures by referring to “5. Setting the Reference Position” after replacing the battery. If these procedures are not performed, the watch may not operate properly.
-
Page 32: Precautionary Items And Usage Limitations
Precautionary Items and Usage Limitations Water Resistance WARNING Water Resistance Water-resistance for daily use (to 3 atmospheres) means that the watch may be worn while washing your face or in the rain but it is not to be immersed in water. Indication Dial Case (Case back) - Page 33 Precautionary Items and Usage Limitations continued... Water Resistance Refer to the watch dial and the case back for the indication of the water resistance of your watch. The following list provides examples of use for reference to ensure that your watch is used properly. (The unit “bar” is roughly equal to 1 atmosphere).
- Page 34 Precautionary Items and Usage Limitations continued... Before using this watch, read this instruction manual carefully to ensure correct use. After reading this manual store it in a safe place for future reference. Safety precautions (Instructions to be followed at all times) This manual contains the following instructions that should be strictly followed at all times to prevent injury to yourself and other persons as well as damage to property.
- Page 35 CAUTION Always keep your watch clean Small amounts of dirt may become trapped in the tiny gap between the crown and case making it difficult to pull out the crown. It is recommended to occasionally turn the crown in its normal position to remove any dirt. The case and band of the watch come into direct contact with the skin in the same manner as undergarments.
- Page 36 Caring for your watch Wipe any dirt or moisture such as perspiration from the case and crystal with a soft cloth. Remove any dirt from a leather band with a dry cloth. For a metallic, plastic or rubber watchband wipe with a damp cloth. Remove the small amounts of dirt trapped between the crevices of the metallic band with a soft brush.
-
Page 37: Static Electricity
Temperature The function of the watch may be impaired or the watch may even stop if ° ° the ambient temperature is outside the range of -10 C to +60 If the watch is left for an extended period under temperatures outside the °... - Page 38 Chemicals, Corrosive Gasses and Mercury If paint thinner, benzene or other solvents or products containing these solvents (including gasoline, nail polish remover, bathroom cleaner and adhesives) are allowed to come into contact with the watch they may discolour, dissolve or crack the materials. Be careful when handling these chemicals.
Need help?
Do you have a question about the Grand Complication and is the answer not in the manual?
Questions and answers