Sign In
Upload
Manuals
Brands
Sony Manuals
Camcorder
Handycam DCR-TRV940E
Sony Handycam DCR-TRV940E Manuals
Manuals and User Guides for Sony Handycam DCR-TRV940E. We have
6
Sony Handycam DCR-TRV940E manuals available for free PDF download: Operating Instructions Manual, Service Manual, Adjustment Manual
Sony Handycam DCR-TRV940E Operating Instructions Manual (348 pages)
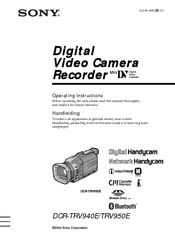
Sony Digital Video Camera Recorder Operating Instructions
Brand:
Sony
| Category:
Camcorder
| Size: 7.91 MB
Table of Contents
English
2
Memory Stick
2
Main Features
4
Recording on a Tape
12
Getting Started
20
Using this Manual
20
Checking Supplied Accessories
23
Step 1 Preparing the Power Supply
24
Installing the Battery Pack
24
Charging the Battery Pack
25
Connecting to a Wall Socket
29
Step 2 Setting the Date and Time
30
Step 3 Inserting a Cassette
33
Step 4 Using the Touch Panel
35
Recording - Basics
37
Recording a Picture
37
Shooting Backlit Subjects - BACK LIGHT
47
Shooting Subjects Lit by Strong Light - SPOT LIGHT
48
Self-Timer Recording
49
Checking Recordings - END SEARCH/ Editsearch/Rec Review
51
Playback - Basics
53
Playing Back a Tape
53
To Display the Screen Indicators - Display Function
54
Viewing the Recording on TV
60
Advanced Recording Operations Recording Still Images on a "Memory Stick" During Tape Recording
62
Recording Still Images on a Tape - Tape Photo Recording
69
Using the Wide Mode
71
Using the Fader
73
Using Special Effects - Picture Effect
76
Using Special Effects - Digital Effect
78
Presetting the Adjustment for Picture Quality - Custom Preset
81
Using the Guide Frame
83
Shooting with the Zebra Pattern
84
Using the Colour Bar
85
Shooting with Manual Adjustment
86
Using the PROGRAM AE
87
Adjusting the Shutter Speed
90
Adjusting the White Balance
92
Adjusting the Exposure
95
Using the Spot Light-Metering - Flexible Spot Meter
96
Focusing Manually
98
Using the Spot Focus - Spot Focus
100
Adjusting Recording Level Manually - Sound Recording Level
102
Interval Recording
104
Frame by Frame Recording - Frame Recording
107
Advanced Playback Operations
108
Playing Back Tapes with Picture Effect
108
Playing Back Tapes with Digital Effect
109
Enlarging Images Recorded on Tapes - Tape PB ZOOM
111
Quickly Locating a Scene - ZERO SET MEMORY
113
Searching the Boundaries of a Recorded Tape by Title - TITLE SEARCH
114
Searching a Recording by Date - DATE SEARCH
116
Searching for a Photo - PHOTO SEARCH/PHOTO SCAN
119
Editing
122
Dubbing a Tape
122
Dubbing Only Desired Scenes - Digital Program Editing (on Tapes)
126
Recording Video or TV Programmes
142
Inserting a Scene from a VCR - Insert Editing
146
Audio Dubbing
149
Superimposing a Title
154
Making Your Own Titles
158
Labelling a Cassette
160
Using a "Memory Stick" - Introduction
163
Recording Images from a Tape as Still Images
186
Superimposing a Still Image in the "Memory Stick" on an Image - MEMORY MIX
190
Recording Pictures from a Tape as a Moving Picture
201
Recording Edited Pictures from a Tape as a Moving Picture - Digital Program Editing (on a "Memory Stick")
205
Copying Still Images from a Tape - PHOTO SAVE
209
Viewing Still Images - Memory Photo Playback
211
Viewing Moving Pictures - MPEG Movie Playback
216
Enlarging Still Images Recorded on a "Memory Stick" - Memory PB ZOOM
222
Playing Back Images in a Continuous Loop - SLIDE SHOW
224
Preventing Accidental Erasure - Image Protection
226
Deleting Images - DELETE
228
Writing a Print Mark - PRINT MARK
233
Using the Optional Printer
234
Viewing Images Using Your Computer
236
Viewing Images on Your Computer - Introduction
236
Connecting Your Camcorder to Your Computer Using the USB Cable - for Windows Users
240
Viewing Images Recorded on a Tape on Your Computer - for Windows Users
251
Viewing Images Recorded on a "Memory Stick" on Your Computer - for Windows Users
256
Connecting Your Camcorder to Your Computer Using the USB Cable - for Macintosh Users
259
Viewing Images Recorded on a "Memory Stick" on Your Computer - for Macintosh Users
262
Capturing Images from an Analog Video Unit on Your Computer - Signal Convert Function
264
Using the Network Function
266
DCR-TRV950E Only
266
Accessing the Network
266
For the Details, Refer to the Network Function Operating Instructions
266
Customising Your Camcorder
269
Changing the Default Settings with the Menu
269
Troubleshooting
291
Types of Trouble and How to Correct Trouble
291
Self-Diagnosis Display
298
Warning Indicators and Messages
299
Additional Information
311
Usable Cassettes
311
About the "Infolithium" Battery Pack
315
About I.link
318
Using Your Camcorder Abroad
320
Maintenance Information and Precautions
321
Specifications
328
Quick Reference
332
Identifying Parts and Controls
332
Index
344
Dutch
6
Belangrijke Kenmerken
6
Table of Contents
8
Inhoudsopgave
11
Inserting a Cassette
12
Recording on a "Memory Stick
14
Opnemen Op Cassette
16
Opnemen Op Een "Memory Stick
18
Aan de Slag
20
Omtrent Deze Handleiding
20
Precautions on Camcorder Care
22
Controleren Van Het Bijgeleverd Toebehoren
23
Stap 1 Voorbereiden Van de
24
Stroomvoorziening
24
Aanbrengen Van Het Batterijpak
24
Opladen Van Het Batterijpak
25
Aansluiten Op Een Stopcontact
29
Stap 2 Datum en Tijd Instellen
30
Stap 3 Een Cassette Inbrengen
33
Stap 4 Gebruik Van Het Aanraakscherm
35
Opnemen - Basisbediening
37
Video-Opnamen Maken
37
Adjusting the Lcd Screen
40
Adjusting the Brightness of the Lcd Screen
41
Adjusting the Viewfinder
42
Using the Zoom Feature
43
Shooting with the Mirror Mode
45
Filmen Met Tegenlicht - BACK LIGHT
47
Fel Verlichte Onderwerpen Filmen - SPOT LIGHT
48
Opnemen Met de Zelfontspanner
49
Opnamen Controleren - END SEARCH/ Editsearch/Rec Review
51
Afspelen - Basisbediening
53
Afspelen Van Een Cassette
53
Aanduidingen Op Het LCD-Scherm - Beeldschermaanduidingen
54
Various Playback Modes
57
Aansluitingen Voor Videoweergave Op TV
60
If Your Tv or Vcr Is a Monaural Type
61
Uitgebreide Opnamefuncties
62
Opnemen Van Stilstaande Beelden Op Een "Memory Stick" Tijdens Bandopname
62
Een Stilstaand Beeld Op de Band Opnemen - Foto-Opnamefunctie
69
Breedbeeld-Opnamefunctie
71
In- en Uitfaden
73
Speciale Effecten - Beeldeffect
76
Speciale Effecten - Digitaal Effect
78
De Beeldkwaliteit Voorinstellen - Custom Preset
81
Gebruik Van Het Richtframe
83
Filmen Met Zebrapatroon
84
Gebruik Van de Kleurbalk
85
Filmen Met Handmatige Instelling
86
Gebruik Van PROGRAM AE
87
De Sluitersnelheid Regelen
90
Kleurbalans Regelen
92
Belichting Regelen
95
Gebruik Van Spot Light-Meting - Flexible Spot Meter
96
Handmatig Scherpstellen
98
Gebruik Van de Spot Focus-Functie - Spot Focus
100
Het Opnameniveau Handmatig Regelen - Geluidsopnameniveau
102
Intervalopname
104
Beeld-Per-Beeldopname - Beeldopname
107
Uitgebreide Weergavefuncties
108
Videoweergave Met Beeldeffecten
108
Videoweergave Met Digitaal Beeldeffect
109
Beeldopnamen Op de Videoband Vergroten - Tape PB ZOOM
111
Snel Een Scène Zoeken - ZERO SET MEMORY
113
Opzoeken Van Een Gewenste Opname Op Titel - TITLE SEARCH
114
Opzoeken Van Een Gewenste Opname Op Datum - DATE SEARCH
116
Een Foto Zoeken - PHOTO SEARCH/ PHOTO SCAN
119
Searching for a Photo Without Using Cassette Memory
120
Videomontage
122
Video-Opnamen Overkopiëren
122
Alleen Bepaalde Scènes Kopiëren - Digitale Programmamontage (Op Cassettes)
126
Opnemen Van Video- of TV-Programma's
142
Invoegen Van Een Scène Van Een Videorecorder - Invoegmontage
146
Inserting a Scene from a Vcr – Insert Editing
147
Nieuwe Geluidsopnamen Inlassen
149
Monitoring the New Recorded Sound
153
Een Titel in Beeld Opnemen
154
Erasing a Title
157
Uw Eigen Titelbeelden Samenstellen
158
Een Videocassette Van Een Naam Voorzien
160
Een Videocassette Van Een Naam Voorzien
161
Labelling a Cassette
161
Erasing All the Data in Cassette Memory
162
Memory Stick" Operations
163
Memory Stick" Functies
163
Gebruik Van de "Memory Stick" - Inleiding
163
Using a Touch Panel
166
Selecting the Image Size
172
Recording Still Images on a "Memory Stick" - Memory Photo Recording
175
Opnemen Van Stilstaande Beelden Op Een "Memory Stick" - Geheugenfoto-Opnamefunctie
175
Memory Photo Recording
176
Recording Images Continuously
177
Self-Timer Memory Photo Recording
185
Beelden Van Een Cassette Opnemen als Stilstaande Beelden
186
Recording a Still Image from External Equipment
188
Een Stilstaand Beeld Overkopiëren Op Een "Memory Stick" - MEMORY MIX
190
Memory MIX
191
Recording Superimposed Images on a Tape
192
Still Image
195
Recording Moving Pictures on a "Memory Stick" - MPEG Movie Recording
198
Opnemen Van Bewegende Beelden Op Een "Memory Stick" - MPEG Film-Opnamefunctie
198
Mpeg Movie Recording
199
Een Beeld Vanaf Cassette Opnemen als Bewegend Beeld
201
Recording Pictures from a Tape as a Moving Picture
202
Recording a Moving Picture from External Equipment
203
Gemonteerde Beelden als Bewegend Beeld Opnemen Van Een Cassette - Digitale Programmamontage (Op Een "Memory Stick")
205
Kopiëren Van Stilstaande Beelden Van Een Cassette - PHOTO SAVE
209
Copying Still Images from a Tape
210
Stilstaande Beelden Bekijken - Memory Photo-Weergave
211
Bewegende Beelden Bekijken - MPEG-Filmweergave
216
Playing Back a Moving Picture from the Desired Part
218
Bewegende Beelden
219
Copying Images Recorded on a "Memory Stick" to a Tape
220
Beelden Op Een "Memory Stick" Kopiëren Naar Cassette
220
Vergroten Van Stilstaande Beelden Op Een "Memory Stick" - Memory PB ZOOM
222
Memory Pb Zoom
223
Weergeven Van Een Doorlopende Serie Beelden - SLIDE SHOW
224
Playing Back Images in a Continuous Loop – Slide Show
225
Beveiligen Tegen Per Ongeluk Wissen - Wispreventie
226
Wissen Van Beelden - DELETE
228
Deleting Selected Images on the Index Screen
230
Deleting All Images
231
Markeren Van Af te Drukken Beelden - PRINT MARK
233
Gebruik Van de Los Verkrijgbare Printer
234
Beelden Bekijken Met Uw Computer
236
Beelden Bekijken Met Uw Computer - Inleiding
236
Viewing Images Recorded on a "Memory Stick
238
Uw Camcorder Aansluiten Op Uw Computer Met Een USB Kabel - Voor Windows Gebruikers
240
Installing the Usb Driver
243
If You Cannot Install the Usb Driver
248
Opgenomen Beelden Bekijken Met Uw Computer - Voor Windows Gebruikers
251
Viewing Images Recorded on a Tape on Your Computer
252
Opgenomen Beelden Op Een "Memory Stick" Bekijken Met Uw Computer - Voor Windows-Gebruikers
256
Uw Camcorder Aansluiten Op Uw Computer Met Een USB Kabel - Voor Macintosh-Gebruikers
259
Opgenomen Beelden Op Een "Memory Stick" Bekijken Met Uw Computer - Voor Macintosh-Gebruikers
262
Beelden Van Analoge Video-Apparatuur Vastleggen Op Uw Computer - Signaalomzetting
264
Capturing Images from an Analog Video Unit on Your Computer
265
Gebruik Van de Network-Functie
266
Alleen DCR-TRV950E
266
Toegang Tot Het Netwerk
266
Meer Details Vindt U in de Netwerkhandleiding Van Uw Camcorder
266
Uw Camcorder Naar Eigen Inzicht Aanpassen
269
Standaardinstellingen Wijzigen Via Het Menu
269
Selecting the Mode Setting of each Item
271
Verhelpen Van Storingen
301
Problemen en Oplossingen
301
Zelfdiagnose-Aanduidingen
308
Waarschuwingsaanduidingen en Meldingen
309
Aanvullende Informatie
311
Geschikte Videocassettes
311
Audio Mode
313
Betreffende Het "Infolithium" Batterijpak
315
Betreffende I.link
318
Gebruik Van Uw Camcorder in Het Buitenland
320
Onderhoud en Voorzorgsmaatregelen
321
Moisture Condensation
321
Battery Pack
329
Technische Gegevens
330
Compleet Overzicht
332
Plaats en Functie Van de Bedieningsorganen
332
Remote Commander
340
Operation Indicators
342
Index
345
Advertisement
Sony Handycam DCR-TRV940E Operating Instructions Manual (348 pages)
Digital Video Camera recorder
Brand:
Sony
| Category:
Camcorder
| Size: 20.79 MB
Table of Contents
Main Features
4
Table of Contents
8
Оглавление
11
Quick Start Guide
12
Recording on a Tape
12
Inserting a Cassette
12
Recording on a "Memory Stick
14
PyководCтво По БыCтpомy Зaпycкy - ЗaпиCь Нa Кacceтy
16
ЗaпиCь Нa "Memory Stick
18
Подготовкa К ЭкCплyaтaции
20
PyководCтвa
20
ИCпользовaниe Дaнного
21
Precautions on Camcorder Care
22
Checking Supplied Accessories
23
Пpовepкa ПpилaгaeмыX
23
ПpинaдлeжноCтeй
23
Step 1 Preparing the Power Supply
24
Installing the Battery Pack
24
Питaния
24
УCтaновкa Бaтapeйного Блокa
24
Charging the Battery Pack
25
Шaг 1 Подготовкa ИCточникa
25
Зapядкa Бaтapeйного Блокa
25
Connecting to a Wall Socket
29
Pозeткe
29
Step 2 Setting the Date and Time
30
Шaг 2 УCтaновкa Дaты И Вpeмeни
30
Step 2 Setting the Date and Time
31
Step 3 Inserting a Cassette
33
Шaг 3 УCтaновкa Кacceты
33
Step 4 Using the Touch Panel
35
Шaг 4 ИCпользовaниe CeнCоpной
36
Пaнeли
36
Step 4 Using the Touch Panel
36
Getting Started
20
Using this Manual
20
Recording - Basics
37
Recording a Picture
37
ЗaпиCь - Ocновныe Положeния
37
ЗaпиCь Изобpaжeния
37
Adjusting the Brightness of the Lcd Screen
41
Adjusting the Viewfinder
42
Using the Zoom Feature
43
Cъeмкa Объeктов C Зaднeй
47
Back Light
47
Shooting Backlit Subjects - BACK LIGHT
47
Cъeмкa Объeктов, ОCвeщeнныX
48
Cильным ИCточником Cвeтa
48
Spot Light
48
Shooting Subjects Lit by Strong Light - SPOT LIGHT
48
Self-Timer Recording
49
ЗaпиCь По Тaймepy Caмозaпycкa
49
Checking Recordings - END SEARCH/ Editsearch/Rec Review
51
Пpовepкa Зaпиceй
51
END SEARCH / EDITSEARCH / ПpоCмотp ЗaпиCи
51
Playback - Basics
53
Playing Back a Tape
53
BоCпpоизвeдeниe - Ocновныe Положeния
53
BоCпpоизвeдeниe Кacceты
53
To Display the Screen Indicators - Display Function
54
Для Отобpaжeния ЭкpaнныX Индикaтоpов - Фyнкция Индикaции
54
Viewing the Recording on TV
60
Тeлeвизоpa
60
ПpоCмотp ЗaпиCи Нa Экpaнe
61
If Your Tv or Vcr Is a Monaural Type
61
Advanced Recording Operations Recording Still Images on a "Memory Stick" During Tape Recording
62
УCовepшeнCтвовaнныe Опepaции ЗaпиCи ЗaпиCь НeподвижныX Изобpaжeний Нa
62
Memory Stick" Во Вpeмя ЗaпиCи Нa Кacceтy
62
Recording Still Images on a Tape - Tape Photo Recording
69
ФотоCъeмкa Нa Кacceтy
69
Using the Wide Mode
71
Peжимa
71
Using the Fader
73
ИCпользовaниe Фeйдepa
73
Using Special Effects - Picture Effect
76
Эффeкт Изобpaжeния
76
Using Special Effects - Digital Effect
78
ИCпользовaниe CпeциaльныX Эффeктов - Цифpовой Эффeкт
78
Presetting the Adjustment for Picture Quality - Custom Preset
81
Пpeдвapитeльнaя Нacтpойкa Кaчecтвa Изобpaжeния - Индивидyaльнaя Нacтpойкa
81
Using the Guide Frame
83
ИCпользовaниe Контpольной Paмки
83
Shooting with the Zebra Pattern
84
Cъeмкa C ИCпользовaниeм Полоcaтого Шaблонa
84
Using the Colour Bar
85
ИCпользовaниe Цвeтной ПолоCки
85
Shooting with Manual Adjustment
86
Cъeмкa C ИCпользовaниeм Pyчной Peгyлиpовки
86
Using the PROGRAM AE
87
ИCпользовaниe Фyнкции
87
Program Ae
87
Adjusting the Shutter Speed
90
Peгyлиpовкa CкоpоCти Зaтвоpa
90
Adjusting the White Balance
92
Peгyлиpовкa Бaлaнca Бeлого
92
Adjusting the Exposure
95
Peгyлиpовкa ЭкCпозиции
95
Using the Spot Light-Metering - Flexible Spot Meter
96
ИCпользовaниe Yнивepcaльного
96
Точeчного ФотоэкCпономeтpa - Унивepcaльный Точeчный ФотоэкCпономeтp
96
Focusing Manually
98
Pyчнaя Фокycиpовкa
98
Using the Spot Focus - Spot Focus
100
ИCпользовaниe Точeчного Фокyca - Tочeчный Фокyc
100
Adjusting Recording Level Manually - Sound Recording Level
102
Peгyлиpовкa Ypовня ЗaпиCи Вpyчнyю - Уpовeнь ЗaпиCи Звyкa
102
Interval Recording
104
ЗaпиCь C Интepвaлaми
104
Frame by Frame Recording - Frame Recording
107
Покaдpовaя ЗaпиCь - Покaдpовaя ЗaпиCь
107
Advanced Playback Operations
108
Playing Back Tapes with Picture Effect
108
УCовepшeнCтвовaнныe Опepaции ВоCпpоизвeдeния
108
BоCпpоизвeдeниe Кacceт C Эффeктом Изобpaжeния
108
Playing Back Tapes with Digital Effect
109
BоCпpоизвeдeниe Кacceт C Цифpовым Эффeктом
109
Enlarging Images Recorded on Tapes - Tape PB ZOOM
111
Увeличeниe Изобpaжeний, ЗaпиcaнныX Нa Кacceтax - PB ZOOM Для Кacceты
111
Quickly Locating a Scene - ZERO SET MEMORY
113
БыCтpый ПоиCк Эпизодa - ZERO SET MEMORY
113
Searching the Boundaries of a Recorded Tape by Title - TITLE SEARCH
114
ПоиCк Гpaниц ЗaпиCи Нa Лeнтe По Титpy - TITLE SEARCH
114
Searching a Recording by Date - DATE SEARCH
116
ПоиCк ЗaпиCи По Дaтe - DATE SEARCH
116
Searching for a Photo - PHOTO SEARCH/PHOTO SCAN
119
ПоиCк Фото
119
Photo Search/ Photo Scan
119
Editing
122
Dubbing a Tape
122
Mонтaж
122
ПepeзaпиCь Лeнты
122
Dubbing Only Desired Scenes - Digital Program Editing (on Tapes)
126
ПepeзaпиCь Только НyжныX Эпизодов - Цифpовой Монтaж Пpогpaммы (Нa Кacceтax)
126
Recording Video or TV Programmes
142
ЗaпиCь Видeо Или Тeлeпpогpaмм
142
Inserting a Scene from a VCR - Insert Editing
146
Bcтaвкa Эпизодa C Видeомaгнитофонa - Mонтaж ВCтaвки
146
Audio Dubbing
149
AyдиопepeзaпиCь
149
Superimposing a Title
154
Haложeниe Титpa
154
Making Your Own Titles
158
Cоздaниe BaшиX CобCтвeнныX
158
Титpов
158
Labelling a Cassette
160
Mapкиpовкa Кacceты
160
Erasing All the Data in Cassette Memory
162
Paботa C “Memory Stick”
163
?Memory Stick” Operations
163
Memory Stick" Operations
163
Using a "Memory Stick" - Introduction
163
Paботa C "Memory Stick
163
ИCпользовaниe "Memory Stick" - Bвeдeниe
163
Selecting the Image Size
172
Recording Still Images on a "Memory Stick" - Memory Photo Recording
175
ЗaпиCь НeподвижныX Изобpaжeний Нa "Memory Stick" - ЗaпиCь Фотогpaфий В Пaмять
175
Memory Photo Recording
176
Recording Images Continuously
177
Recording Images from a Tape as Still Images
186
ЗaпиCь Изобpaжeний C Кacceты Кaк НeподвижныX Изобpaжeний
186
Superimposing a Still Image in the "Memory Stick" on an Image - MEMORY MIX
190
Haложeниe Нeподвижного Изобpaжeния Из "Memory Stick" Нa Изобpaжeниe - MEMORY MIX
190
Memory MIX
192
Recording Superimposed Images on a Tape
192
Still Image
195
Recording Moving Pictures on A"Memory Stick" - MPEG Movie Recording
198
ЗaпиCь ДвижyщиXCя Изобpaжeний Нa "Memory Stick" - ЗaпиCь Фильмов MPEG
198
Recording Pictures from a Tape as a Moving Picture
201
ЗaпиCь Изобpaжeний C Кacceты Кaк ДвижyщeгоCя Изобpaжeния
201
Recording Pictures from a Tape as a Moving Picture
202
Recording Edited Pictures from a Tape as a Moving Picture - Digital Program Editing (on a "Memory Stick")
205
ЗaпиCь ОтpeдaктиpовaнныX
205
Изобpaжeний C Кacceты Кaк
205
ДвижyщeгоCя Изобpaжeния
205
Цифpовой Монтaж Пpогpaммы
205
(Нa "Memory Stick")
205
Copying Still Images from a Tape - PHOTO SAVE
209
Копиpовaниe НeподвижныX Изобpaжeний C Кacceты - PHOTO SAVE
209
Viewing Still Images - Memory Photo Playback
211
ПpоCмотp НeподвижныX Изобpaжeний - BоCпpоизвeдeниe ФотоCнимков Из Пaмяти
211
Viewing Moving Pictures - MPEG Movie Playback
216
ПpоCмотp ДвижyщиXCя Изобpaжeний - BоCпpоизвeдeниe Фильмa MPEG
216
Copying Images Recorded on a "Memory Stick" to a Tape
220
Копиpовaниe Изобpaжeний, ЗaпиcaнныX Нa "Memory Stick", Нa Кacceтy
220
Enlarging Still Images Recorded on a "Memory Stick" - Memory PB ZOOM
222
Увeличeниe НeподвижныX Изобpaжeний, ЗaпиcaнныX Нa "Memory Stick" - PB ZOOM Пaмяти
222
Memory Pb Zoom
223
Playing Back Images in a Continuous Loop - SLIDE SHOW
224
BоCпpоизвeдeниe Изобpaжeний В Нeпpepывной ПоCлeдовaтeльноCти По Зaмкнyтомy Циклy - SLIDE SHOW
224
Preventing Accidental Erasure - Image Protection
226
Пpeдотвpaщeниe Cлyчaйного Cтиpaния - Зaщитa Изобpaжeния
226
Deleting Images - DELETE
228
Удaлeниe Изобpaжeний - DELETE
228
Deleting All Images
231
Writing a Print Mark - PRINT MARK
233
ЗaпиCь Знaков Пeчaти - PRINT MARK
233
Using the Optional Printer
234
ИCпользовaниe Дополнитeльного Пpинтepa
234
Viewing Images Using Your Computer
236
Viewing Images on Your Computer - Introduction
236
ПpоCмотp Изобpaжeний C Помощью Компьютepa
236
ПpоCмотp Изобpaжeний Нa Компьютepe - Bвeдeниe
236
Connecting Your Camcorder to Your Computer Using the USB Cable - for Windows Users
240
ПодCоeдинeниe Видeокaмepы К Компьютepy C Помощью Кaбeля USB - Для Пользовaтeлeй Windows
240
For Windows Users
251
Для Пользовaтeлeй Windows
251
Viewing Images Recorded on a Tape on Your Computer
252
Viewing Images Recorded on a "Memory Stick" on Your Computer - for Windows Users
256
ПpоCмотp Изобpaжeний, ЗaпиcaнныX Нa "Memory Stick", C Помощью Компьютepa - Для Пользовaтeлeй Windows
256
Connecting Your Camcorder to Your Computer Using the USB Cable - for Macintosh Users
259
ПодCоeдинeниe Видeокaмepы К Компьютepy C Помощью Кaбeля USB - Для Пользовaтeлeй Macintosh
259
Viewing Images Recorded on a "Memory Stick" on Your Computer - for Macintosh Users
262
ПpоCмотp Изобpaжeний, ЗaпиcaнныX Нa
262
Для Пользовaтeлeй
263
Macintosh
263
Capturing Images from an Analog Video Unit on Your Computer - Signal Convert Function
264
Зaxвaт Изобpaжeний C Aнaлогового ВидeоycтpойCтвa Нa Компьютep - Фyнкция Пpeобpaзовaния Cигнaлa
264
Capturing Images from an Analog Video Unit on Your Computer
265
Using the Network Function
266
DCR-TRV950E Only
266
Accessing the Network
266
ИCпользовaниe Фyнкции Network (Только Модeль DCR-TRV950E)
266
ДоCтyп К Ceти
266
Подpобнyю Инфоpмaцию Cм. В ИнCтpyкции По ЭкCплyaтaции Фyнкции Network, Пpилaгaeмой К Видeокaмepe
266
Customising Your Camcorder
269
Changing the Default Settings with the Menu
269
Bыполнeниe ИндивидyaльныX Ycтaновок Нa Видeокaмepe
269
Измeнeниe Ycтaновок По Yмолчaнию C Помощью Мeню
269
Selecting the Mode Setting of each Item
271
Troubleshooting
291
Types of Trouble and How to Correct Trouble
291
Self-Diagnosis Display
298
Warning Indicators and Messages
299
Поиск И Устранение Неисправностей
301
Tипы НeиCпpaвноCтeй И CпоCобы ИX Ycтpaнeния
301
Индикaция CaмодиaгноCтики
308
Пpeдyпpeждaющиe Индикaтоpы И Cообщeния
309
Additional Information
311
Usable Cassettes
311
Дополнитeльнaя Инфоpмaция
311
ИCпользyeмыe Кacceты
311
Audio Mode
313
About the "Infolithium" Battery Pack
315
O Бaтapeйном Блокe "Infolithium
315
About I.link
318
O Cтaндapтe I.link
318
Using Your Camcorder Abroad
320
ИCпользовaниe Baшeй Видeокaмepы Зa Гpaницeй
320
Maintenance Information and Precautions
321
Инфоpмaция По Yxодy Зa Aппapaтом И Мepы ПpeдоCтоpожноCти
321
Moisture Condensation
321
Maintenance Information and Precautions
322
Specifications
328
Battery Pack
329
Texничecкиe XapaктepиCтики
330
Quick Reference
332
Identifying Parts and Controls
332
Oпepaтивный Cпpaвочник
332
Oбознaчeниe Дeтaлeй И Оpгaнов Yпpaвлeния
332
Remote Commander
340
Operation Indicators
342
Index
344
Алфавитный Указатель
345
Sony Handycam DCR-TRV940E Service Manual (265 pages)
DIGITAL VIDEO CAMERA RECORDER
Brand:
Sony
| Category:
Digital video camera recorder
| Size: 7.55 MB
Table of Contents
Main Features
12
Table of Contents
14
Quick Start Guide
16
Recording on a Tape
16
Recording on a "Memory Stick
18
Getting Started
20
Using this Manual
20
Checking Supplied Accessories
22
Step 1 Preparing the Power Supply
23
Installing the Battery Pack
23
Charging the Battery Pack
24
Connecting to a Wall Outlet
27
Step 2 Setting the Date and Time
28
Step 3 Inserting a Cassette
31
Step 4 Using the Touch Panel
32
Recording - Basics
34
Recording a Picture
34
Shooting Backlit Subjects - BACK LIGHT
42
Shooting Subjects Lit by Strong Light - SPOT LIGHT
43
Self-Timer Recording
44
Checking Recordings - END SEARCH / EDITSEARCH / Rec Review
45
Playback - Basics
47
Playing Back a Tape
47
To Display the Screen Indicators - Display Function
49
Viewing the Recording on TV
53
Advanced Recording Operations
54
Recording Still Images on a "Memory Stick" During Tape Recording
54
Recording Still Images on a Tape - Tape Photo Recording
59
Using the Wide Mode
61
Using the Fader
63
Using Special Effects - Picture Effect
66
Using Special Effects - Digital Effect
67
Presetting the Adjustment for Picture Quality - Custom Preset
70
Using the Guide Frame
72
Shooting with the Zebra Pattern
73
Using the Color Bar
74
Shooting with Manual Adjustment
75
Using the PROGRAM AE
75
Adjusting the Shutter Speed
78
Adjusting the White Balance
80
Adjusting the Exposure
82
Using the Spot Light-Metering - Flexible Spot Meter
83
Focusing Manually
84
Using the Spot Focus - Spot Focus
86
Adjusting Recording Level Manually - Sound Recording Level
87
Interval Recording
89
Frame by Frame Recording - Frame Recording
91
Advanced Playback Operations
92
Playing Back Tapes with Picture Effect
92
Playing Back Tapes with Digital Effect
93
Enlarging Images Recorded on Tapes - Tape PB ZOOM
94
Quickly Locating a Scene - ZERO SET MEMORY
96
Searching the Boundaries of a Recorded Tape by Title - TITLE SEARCH
97
Searching a Recording by Date - DATE SEARCH
98
Searching for a Photo - PHOTO SEARCH/PHOTO SCAN
100
Editing
103
Dubbing a Tape
103
Dubbing Only Desired Scenes - Digital Program Editing (on Tapes)
106
Recording Video or TV Programs
117
Inserting a Scene from a VCR - Insert Editing
121
Audio Dubbing
123
Superimposing a Title
127
Making Your Own Titles
130
Labeling a Cassette
132
?Memory Stick” Operations
134
Memory Stick" Operations
134
Using a "Memory Stick" - Introduction
134
Recording Still Images on a "Memory Stick"- Memory Photo Recording
143
Recording Images from a Tape as Still Images
152
Superimposing a Still Image in the "Memory Stick" on an Image - MEMORY MIX
156
Recording Moving Pictures on A"Memory Stick" - MPEG Movie Recording
161
Recording Pictures from a Tape as a Moving Picture
164
Recording Edited Pictures from a Tape as a Moving Picture - Digital Program Editing (on a "Memory Stick")
168
Copying Still Images from a Tape - PHOTO SAVE
171
Viewing Still Images - Memory Photo Playback
173
Viewing Moving Pictures - MPEG Movie Playback
176
Copying Images Recorded on a "Memory Stick" to a Tape
179
Enlarging Still Images Recorded on a "Memory Stick" - Memory PB ZOOM
181
Playing Back Images in a Continuous Loop - SLIDE SHOW
183
Preventing Accidental Erasure - Image Protection
184
Deleting Images - DELETE
185
Writing a Print Mark - PRINT MARK
188
Using the Optional Printer
189
Viewing Images Using Your Computer
191
Viewing Images on Your Computer - Introduction
191
Connecting Your Camcorder to Your Computer Using the USB Cable - for Windows Users
194
Viewing Images Recorded on a Tape on Your Computer - for Windows Users
202
Viewing Images Recorded on a "Memory Stick" on Your Computer - for Windows Users
207
Connecting Your Camcorder to Your Computer Using the USB Cable - for Macintosh Users
209
Viewing Images Recorded on a "Memory Stick" on Your Computer - for Macintosh Users
211
Capturing Images from an Analog Video Unit on Your Computer - Signal Convert Function
212
Using the Network Function
213
DCR-TRV950 Only
213
Accessing the Network
213
Customizing Your Camcorder
215
Changing the Default Settings with the Menu
215
Troubleshooting
226
Types of Trouble and How to Correct Trouble
226
Self-Diagnosis Display
233
Warning Indicators and Messages
234
Additional Information
236
Usable Cassettes
236
About the "Infolithium" Battery Pack
239
About I.link
241
Using Your Camcorder Abroad
243
Maintenance Information and Precautions
244
Specifications
250
Quick Reference
252
Identifying Parts and Controls
252
Index
262
Advertisement
Sony Handycam DCR-TRV940E Service Manual (107 pages)
DIGITAL VIDEO CAMERA RECORDER
Brand:
Sony
| Category:
Camcorder
| Size: 11.43 MB
Table of Contents
Revision History
1
Battery Pack
2
Memory Stick
2
Specifications
2
Table of Contents
5
1 Service Note
6
Note for Repair
6
Discharging of the Flash Unit's Charging Capacitor
6
Preparing the Short Jig
6
Discharging the Capacitor
6
Power Supply During Repairs
7
To Take out a Cassette When Not Eject (Force Eject)
7
Notes on Handling the Laser Diode
8
[Laser Unit (D501)]
8
Soldering Conditions of Laser Unit (D501)
8
Self-Diagnosis Function
9
Self-Diagnosis Display
9
Service Mode Display
9
Self-Diagnosis Code Table
10
2 Disassembly
11
Cabinet (R) Block
12
P Cabinet (C)
12
Service Position to Check PD-168 Board
13
LCD Module
13
LCD Block
14
Flexible Board
14
Board
15
F Panel Block
15
Service Position to Check MA-410 Board
16
AF Laser Bracket Assembly
16
Board
16
Flexible Board
16
Battery Panel Block
18
Board (TRV950/TRV950E)
18
ST Frame Block
19
Board
19
Db-014 Board
19
MD Block
20
Lens Block
21
Board
21
Mechanism Deck (J200)
22
Stroboscope Block
22
Board
23
Service Position to Check the Camera Section
23
Service Position to Check the VTR Section
24
Flash Unit
25
EVF Block
25
Flexible Board
26
Control Switch Block (PS-1870)
27
Board
27
Grip Cabinet Block
28
Control Switch Block (CF-1870)
29
MS Assembly
29
VF Lens Assembly
30
Circuit Boards Location
31
Flexible Boards Location
32
Overall Block Diagram (3/4)
33
Overall Block Diagram (4/4)
33
Power Block Diagram (1/3)
33
Power Block Diagram (2/3)
33
Power Block Diagram (3/3)
33
3 Block Diagrams
33
Printed Wiring Boards and Schematic Diagrams
41
Frame Schematic Diagrams
41
Frame Schematic Diagram (1/3)
41
Frame Schematic Diagram (2/3)
42
Frame Schematic Diagram (3/3)
43
Schematic Diagrams
45
CCD Imager)
45
Pitch/Yaw Sensor)
45
MIC Amp, Af Laser Control)
45
Control Switch)
45
Av In/Out, DV/Usb Connector)
45
(Lcd Driver, Timing Generator)
45
Control Switch Block
45
Printed Wiring Boards
60
Flexible
60
Waveforms
60
Mounted Parts Location
62
5 Repair Parts List
84
Exploded Views
84
Main Section
84
F Panel Block
85
Cabinet (R) Block
86
LCD Block
87
Cabinet (L) Block
88
Grip Cabinet Block
89
Stroboscope Block
90
EVF Block
91
Battery Panel Block
92
MD Block
93
Lens Block
94
Overall Mechanism Deck Section (J200)
95
LS Chassis Block Assembly
96
Mechanism Chassis Block Assembly
97
Electrical Parts List
98
Sony Handycam DCR-TRV940E Adjustment Manual (79 pages)
Brand:
Sony
| Category:
Camcorder
| Size: 1.03 MB
Table of Contents
Revision History
1
Table of Contents
2
Adjustments
4
Before Starting Adjustments
4
Adjusting Items When Replacing
5
Main Parts and Boards
5
Camera Section Adjustments
7
Preparations before Adjustments (CAMERA Section)
7
List of Service Tools
7
Preparations
8
Precaution
10
Setting the Switch
10
Order of Adjustment
10
Subjects
10
Preparing the Flash Adjustment Box
11
Initialization of 8, A, B, C, D, E, F, 1B, 1E
12
Initialization of A, D Page Data
13
Modification of A, D Page Data
13
Initialization of 8, C Page Data
15
Page Table
16
C Page Table
17
Initialization of E, F, 1E, 1F Page Data
18
Modification of E, F, 1E, 1F Page Data
18
Initialization of B, 1B Page Data
24
Initializing of B, 1B Page Data
24
Modification of B, 1B Page Data
24
Initializing of Network Setting Data
25
(Dcr-Trv950/Trv950E)
25
Camera System Adjustments
26
Mhz/54Mhz Origin Oscillation Adjustment
26
(VC-288 Board)
26
Hall Adjustment
27
MR Adjustment
28
Flange Back Adjustment (Using the Minipattern Box)
29
Flange Back Adjustment (Using the Flange Back Adjustment Chart and Subject more than 500 M Away)
30
Flange Back Check
31
Picture Frame Setting
32
AWB Standard Data Input
33
MAX GAIN Adjustment
33
F No. & ND Light Quality Standard Data Input
34
LV Standard Data Input
34
Auto White Balance Adjustment
35
Auto White Balance Check
36
Color Reproduction Adjustment
37
PSD Sensor Gain Adjustment
38
Angular Velocity Sensor Sensitivity Adjustment
40
Mechanical Shutter Adjustment
41
Strobe Light Level Adjustment
41
Strobe White Balance Adjustment
42
Hologram AF Output Adjustment
43
Hologram AF Angle Check
44
Color Electronic Viewfinder System Adjustments
45
VCO Adjustment (DB-014 Board)
45
RGB AMP Adjustment (DB-014 Board)
46
Contrast Adjustment (DB-014 Board)
46
Back Light Adjustment (DB-014 Board)
47
White Balance Adjustment (DB-014 Board)
47
LCD System Adjustments
48
VCO Adjustment (PD-168 Board)
48
RGB AMP Adjustment (PD-168 Board)
49
Contrast Adjustment (PD-168 Board)
49
V-COM Level Adjustment (PD-168 Board)
50
V-COM Adjustment (PD-168 Board)
50
White Balance Adjustment (PD-168 Board)
51
Mechanism Section Adjustments
52
How to Enter Playback Mode Without Cassette
52
Tape Path Adjustment
52
Video Section Adjustments
53
Preparations before Adjustments
53
Equipment Required
53
Precautions on Adjusting
54
Adjusting Connectors
55
Connecting the Equipment
55
Alignment Tapes
56
Input/Output Level and Impedance
56
System Control System Adjustments
57
Initialization of 8, A, B, C, D, E, F, 1B, 1E
57
Page Data
57
Touch Panel Adjustment
57
Node Unique ID No. Input
58
Input of Company ID
58
Input of Serial no
58
Servo and RF System Adjustments
60
CAP FG Duty Adjustment (VC-288 Board)
60
PLL F & LPF F Pre-Adjustment (VC-288 Board)
60
Switching Position Adjustment (VC-288 Board)
61
AGC Center Level and APC & AEQ Adjustment
61
AGC Center Level Adjustment (VC-288 Board)
62
APC & AEQ Adjustment (VC-288 Board)
62
PLL F & LPF F Final Adjustment (VC-288 Board)
63
Video System Adjustments
64
Chroma BPF F Adjustment (DB-014 Board)
64
S VIDEO out y Level Adjustment
64
(DB-014 Board)
65
S VIDEO out Chroma Level Adjustment
65
VIDEO out Level Check (DB-014 Board)
66
Audio System Adjustments
67
Playback Level Check
67
Overall Level Characteristics Check
67
Overall Distortion Check
67
Overall Noise Level Check
68
Overall Separation Check
68
Service Mode
69
Adjusting Remote Commander
69
Using the Adjustment Remote Commander
69
Precautions Upon Using the Adjustment
69
Remote Commander
69
Data Process
70
Service Mode
71
Setting the Test Mode
71
Emergence Memory Address
71
C Page Emergence Memory Address
71
EMG Code (Emergency Code)
72
MSW Code
73
Bit Value Discrimination
74
Switch Check
75
LED, LCD (Display Window) Check
75
Record of Use Check (1)
76
Record of Use Check (2)
76
Record of Self-Diagnosis Check
77
Sony Handycam DCR-TRV940E Service Manual (60 pages)
DIGITAL VIDEO CAMERA RECORDER
Brand:
Sony
| Category:
Camcorder
| Size: 13.84 MB
Table of Contents
Printed Wiring Boards and Schematic Diagrams
3
Printed Wiring Boards
31
Mounted Parts Location
40
Electrical Parts List
44
Revision History
60
Advertisement
Related Products
Sony Handycam Vision DCR-TRV900E
Sony Handycam DCR-TRV940
Sony Handycam DCR-TRV950E
Sony DCRTRV900 - MiniDV Handycam Digital Video Camcorder
Sony Handycam Vision DCR-TRV9E
Sony Handycam Vision DCR-TRV9
Sony DCR-TRV94O
Sony Handycam DCR-TRV950
Sony Handycam DCR-TRV255E
Sony DCR-TRV
Sony Categories
Laptop
TV
Camcorder
CD Player
Digital Camera
More Sony Manuals
Login
Sign In
OR
Sign in with Facebook
Sign in with Google
Upload manual
Upload from disk
Upload from URL