Sign In
Upload
Manuals
Brands
Pioneer Manuals
Receiver
AVH-X8650BT
Pioneer AVH-X8650BT Manuals
Manuals and User Guides for Pioneer AVH-X8650BT. We have
3
Pioneer AVH-X8650BT manuals available for free PDF download: Owner's Manual
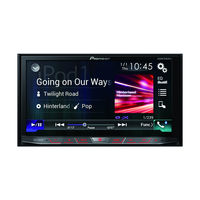
Pioneer AVH-X8650BT Owner's Manual (244 pages)
DVD RDS AV Receiver
Brand:
Pioneer
| Category:
Car Receiver
| Size: 3.42 MB
Table of Contents
English
2
Table of Contents
2
License, Warranty Disclaimer
5
Limitation of Liability
5
Safety Provisions
5
Important Safety Information
5
Parking Brake Interlock
5
To Ensure Safe Driving
5
When Using a Display Con- Nected to V out
6
To Avoid Battery Exhaustion
6
Rear View Camera
6
Handling the SD Card Slot
6
Handling the USB Connector
6
Visit Our Website
6
Protecting the LCD Panel and Screen
6
Notes on Internal Memory
6
Before Removing the Vehicle Battery
6
Data Subject to Erasure
6
Basic Operation
7
Checking Part Names and Functions
7
Remote Control
7
Use and Care of the Remote Control
7
Installing the Battery
7
Using the Remote Control
7
Adjusting the LCD Panel Angle
8
Inserting/Ejecting/Connecting Media
8
Inserting and Ejecting a Disc
8
Inserting and Ejecting an SD Memory Card
9
Connecting and Disconnecting an Ipod
9
Plugging and Unplugging a USB Storage Device
9
Notes on Using the LCD Panel
8
Protecting Your Product against Theft
8
Removing the Front Panel
8
Attaching the Front Panel
8
On First-Time Startup
9
Regular Startup
9
Startup and Termination
9
Turning off the Display
9
Displaying the AV Operation Screen
10
Selecting a Front Source on the AV Source Selection Screen
10
Selecting a Front Source on the Source List
11
Selecting a Rear Source
11
How to Use the Screens
10
Switching Screens Using the Touch Panel Keys
10
Switching Screens Using the Hardware Buttons
10
Supported AV Source
10
Changing the Display Order of Source Icons
11
Changing the Display Order of Source Keys
11
Turning off the AV Source
11
Using the Touch Panel
11
Using the Common Touch Panel Keys
11
Operating List Screens
11
Operating the Time Bar
11
Operating the On-Screen Keyboard
11
Registering and Con- Necting a Bluetooth Device
12
Preparing Communication Devices
12
Registering Your Bluetooth Devices
12
Searching for Nearby Bluetooth Devices
12
Pairing from Your Bluetooth Devices
12
Connecting to a Bluetooth
13
Device Automatically
13
Deleting a Registered Device
13
Connecting a Registered Bluetooth Device Manually
13
Displaying the Bluetooth Device Address
13
Entering the PIN Code for Bluetooth Wireless Connection
13
Switching Visibility
13
Clearing the Bluetooth Memory
14
Displaying the Bluetooth Software Version
14
Using Hands-Free Phoning
14
Displaying the Phone Menu
14
Touch Panel Keys
14
Reading the Screen
14
Making a Phone Call
14
Direct Dialing
14
Calling a Number in the Phone Book
15
Dialing from the History
15
Using the Preset Dial Lists
15
Updating Bluetooth Software
14
Changing the Phone Settings
16
Answering a Call Automatically
16
Switching the Ring Tone
16
Inverting Names in the Phone Book
16
Setting the Private Mode
16
Adjusting the Other Party's Listening Volume
16
Receiving a Phone Call
16
Answering an Incoming Call
16
Tion Screen
16
Notes for Hands-Free Phoning
17
Ipod / Iphone or Smartphone Setup Operation
17
Setting the Device Connection Method
17
The Basic Flow of Ipod / Iphone or Smartphone Setup
17
Using the Voice Recognition
17
Function (for Iphone)
17
Android™ Device Compatibility
18
Information on the Connections and Functions for each Device
18
Using the Radio
19
Ipod Compatibility
18
Mirrorlink Device Compatibility
18
Manual Tuning
19
Reading the Screen
19
Seek Tuning
19
Selecting a Band
19
Selecting a Preset Channel from the Preset Channel List
19
Starting Procedure
19
Storing Broadcast Frequencies
19
Using the Touch Panel Keys
19
Receiving Traffic Announcements
20
Searching for an RDS Station Using PTY Information
20
Storing the Strongest Broad- Cast Frequencies
20
Tuning into Strong Frequencies
20
Using News Program Interruption
20
Limiting Stations to Regional Programming
21
Operating with the Hardware Buttons
21
Using the TV Tuner
21
Switching Auto PI Seek
21
Activating the Auto PI Seek for Preset Stations
21
Tuning into Alternative Frequencies
21
Using the Touch Panel Keys
21
EPG Function
22
Operating with the Hardware Buttons
22
Playing a Disc
22
Reading the Screen
22
Setting the Video Signal
22
Starting Procedure
22
Storing Stations
22
Using the Touch Panel Keys (for Audio)
22
Using the Touch Panel Keys (for Video)
22
Reading the Screen (for Audio)
23
Reading the Screen (for Video)
23
Starting Procedure
23
Name List
24
Frame-By-Frame Playback
24
Operating the DVD Menu
24
Playing Tracks in Random Order
24
Searching for the Part You Want to Play
24
Setting a Repeat Play Range
24
Switching the Audio Language
24
Switching the Media File Type
24
Switching the Subtitle Language
24
Operating the DVD Menu Using Touch Panel Keys
25
Operating with the Hardware Buttons
25
Playing Compressed
25
Resuming Playback (Bookmark)
25
Returning to a Specified Scene
25
Selecting the Audio Output
25
Slow Motion Playback
25
Switching the Multi-Angle DVD Display
25
Using the Touch Panel Keys
25
Audio Files
26
Reading the Screen
26
Starting Procedure (for Disc)
26
Starting Procedure (for USB/SD)
26
Operating with the Hardware Buttons
27
Playing Compressed
27
Playing Files in Random Order
27
Selecting a File from the List Related to the Song Cur- Rently Playing (Link Search)
27
Setting a Repeat Play Range
27
Switching the Browse Mode
27
Name List
27
Switching the Media File Type
27
Reading the Screen
28
Setting a Repeat Play Range
28
Selecting Files from the File Name List
28
Starting Procedure (for Disc)
28
Starting Procedure (for USB/SD)
28
Name List
28
Using the Touch Panel Keys
28
Frame-By-Frame Playback
29
Operating with the Hardware Buttons
29
Playing Compressed
29
Reading the Screen
29
Slow Motion Playback
29
Starting Procedure
29
Name List
29
Switching the Media File Type
29
Using the Touch Panel Keys
29
Operating with the Hardware Buttons
30
Using an Ipod
30
Playing Files in Random Order
30
Setting a Repeat Play Range
30
Setting the Slideshow Interval
30
Switching the Media File Type
30
Using the Touch Panel Keys (for Audio)
30
Reading the Screen (for Audio)
31
Reading the Screen (for Video)
31
Setting a Repeat Play Range
31
Setting the Shuffle Play
31
Starting Procedure
31
Using the Touch Panel Keys (for Video)
31
Changing the Speed of Audio- Book Playback
32
Displaying Lists Related to the Song Currently Playing (Link Search)
32
Operating with the Hardware Buttons
32
Playing Back Music from a Music App Other than Ipod Music, as the Ipod Source
32
Using the Touch Panel Keys
32
Reading the Screen
33
Using Your Iphone or Smartphone Applications
33
Selecting Song or Video Sources from the Playlist Screen
32
Using this Product's Ipod Function from Your Ipod
32
Using Appradio Mode
33
Using the Touch Panel Keys (App Control Side Bar)
33
Starting Procedure
33
Using the Keyboard
34
Adjusting the Image Size (for Smartphone Users)
34
Displaying the Image of Your Application (Iphone with 30-Pin Connector)
35
Displaying the Image of Your Application (Iphone with Lightning Connector)
35
Displaying the Image of Your Application (Smartphone)
35
Using Mirrorlink
35
Using the Touch Panel Keys
35
Control Side Bar)
35
Starting Procedure
35
Reading the Screen
36
Using the Audio MIX Function
36
Using a Bluetooth Audio Player
36
Using the Touch Panel Keys
36
Operating with the Hardware Buttons
37
Using an HDMI Source
37
Playing Files in Random Order
37
Reading the Screen
37
Using an AUX Source
37
Setting a Repeat Play Range
37
Starting Procedure
37
Name List
37
Using the Touch Panel Keys
37
Reading the Screen
38
Setting the Video Signal
38
Starting Procedure
38
Switching the Operation Screen
38
Using AV Input
38
Using the Touch Panel Keys
38
MIXTRAX Operation
39
Reading the Screen
39
Selecting an Item to Play Songs
39
Selecting Songs Not to be Played
39
Setting the Video Signal
39
Using MIXTRAX
39
Starting Procedure
39
Touch Panel Keys
39
Setting the Flash Pattern
40
System Settings
40
Setting the Steering Wheel Control
40
For Steering Wheel Control Adapter for Pioneer Users
40
For Users Directly Connecting this Product to the Vehicle's Steering Wheel Control Harness
40
Specifying the Playback Portion
40
Activating the Bluetooth Audio Source
41
Setting AV Input
41
Setting the am Tuning Step
41
Setting the Ever Scroll
41
Setting the FM Tuning Step
41
Setting the Rear View Camera
41
Setting Rear View Camera Activation
42
Setting the Polarity of the Rear View Camera
42
Displaying the Parking Assist Guidelines
42
Setting Guidelines on the Rear View Image
42
Setting the Camera for Camera View Mode
42
Adjusting the Picture
43
Adjusting the Response Posi- Tions of the Touch Panel (Touch Panel Calibration)
43
Selecting the System Language
43
Setting the Beep Sound
43
Setting the Keyboard Lan- Guage with the Application for Iphone
43
Turning off the Demo Screen
43
Checking the Connections of Leads
44
Audio Adjustments
45
Displaying the Firmware Version
44
Updating Firmware
44
Adjusting Source Levels
45
Switching Sound Muting/ Attenuation
45
Using Balance Adjustment
45
Using Fader/Balance Adjustment
45
Adjusting the Filter
46
Adjusting the Front and Rear Speaker Output
46
Using the Subwoofer Output
46
Adjusting the Speaker Output
47
Levels Finely
47
Adjusting the Time Alignment
47
Selecting the Listening Position
47
Adjusting the Equalizer Curve Automatically (Auto EQ)
48
Before Operating the Auto EQ Function
49
Performing Auto EQ
49
Theme Menu
50
Using the Equalizer
48
Recalling Equalizer Curves
48
Customizing the Equalizer Curves
48
Using the Auto-Adjusted Equalizer
48
Selecting the Background Display
50
Changing to the Background
50
Selecting the Theme Color
50
Setting the Illumination Color
50
Selecting the Color from the Preset Colors
50
Display Image Stored on the External Device (USB/SD)
50
Creating a User-Defined Color
50
Changing the Preinstalled Splash Screen
51
Changing to the Splash Screen Stored on the External Device (USB/SD)
51
Exporting "Theme" Settings
51
Importing "Theme" Settings
51
Setting up the Video Player
51
Replicating the Settings
51
Selecting the Clock Image
51
Setting the Top-Priority Languages
51
Setting the Subtitle Language
51
Setting the Audio Language
52
Setting the Menu Language
52
Setting Parental Lock
52
Setting the Code Number and Level
52
Setting the Angle Icon Display
52
Setting the Aspect Ratio
52
Automatic Playback of Dvds
53
Displaying Your DIVX VOD Deregistration Code
53
Displaying Your DIVX VOD Registration Code
53
Setting the Video Output Format
53
Setting the Video Signal for the Rear View Camera
53
Language Code Chart for Dvds
54
Favorite Menu
54
Removing a Shortcut
54
Common Operations
54
Selecting a Shortcut
54
Setting the Time and Date
54
Changing the Wide Screen Mode
55
Other Functions
55
Selecting the Video for the Rear Display
55
Setting the "Sound Retriever" Function
55
Setting the Anti-Theft Function
55
Setting the Password
55
Entering the Password
56
Deleting the Password
56
Forgotten Password
56
Important Safeguards
56
Precautions before Connecting the System
56
Restoring this Product to the Default Settings
56
Restoring the Default Settings
56
Precautions
56
Your New Product and this Manual
56
Before Installing this Product
57
To Prevent Damage
57
Notice for the Blue/White Lead
57
Connecting the Power Cord
58
Connecting an Iphone with Lightning Connector
59
Connecting Via the USB Port
59
Connecting Via the HDMI Port
59
Connecting to Separately Sold Power Amp
59
Connecting an Iphone with 30-Pin Connector
60
Connecting Via the AUX Input
60
Connecting Via the RGB Input
60
Connecting the Android™ Device
60
Connecting an Android Device with an HDMI Port
60
Connecting an Android Device with an MHL Port
60
Connecting the Mirrorlink™ Device
60
Connecting a Rear View Camera
61
Connecting the External Video Component
61
Using AV Input
61
Using an AUX Input
62
Securing the High Speed HDMI® Cable
61
Before Installing
62
Connecting an HDMI Device
62
Connecting the Rear Display
62
When Using a Rear Display con
62
Nected to Rear Video Output
62
Installation
62
Installing this Product
62
Installation Notes
62
Installation Using the Screw
63
Holes on the Side of this Product
63
Precautions before Installation
62
Installing the Microphone
63
Mounting on the Sun Visor
63
Installation on the Steering Column
63
Adjusting the Microphone Angle
64
Appendix
64
Troubleshooting
64
Error Messages
65
Handling and Care of Discs
67
Built-In Drive and Care
67
Ambient Conditions for Playing a Disc
68
Detailed Information for Play- Able Media
68
Compatibility
68
Media Compatibility Chart
70
DIVX Compatibility
71
Playable Discs
68
DVD-Video and CD
68
AVCHD Recorded Discs
68
Playing Dualdisc
68
Dolby Digital
68
Aac
72
Android
72
Bluetooth
72
Detailed Information Regard- Ing Connected Ipod Devices
72
Ipod and Iphone
72
Lightning
72
DIVX
72
Mirrorlink
72
Sdhc
72
Wma/Wmv
72
Hdmi
73
Mhl
73
Notice Regarding DVD-Video Viewing
73
Notice Regarding MP3 File Usage
73
Notice Regarding Video Viewing
73
Using the LCD Screen Correctly
73
Handling the LCD Screen
73
Liquid Crystal Display (LCD) Screen
73
Maintaining the LCD Screen
73
LED (Light-Emitting Diode) Backlight
73
Specifications
74
Advertisement
Pioneer AVH-X8650BT Owner's Manual (212 pages)
DVD RDS AV RECEIVER
Brand:
Pioneer
| Category:
Receiver
| Size: 4.48 MB
Table of Contents
Table of Contents
2
Precaution
5
Important Safety Information
5
License, Warranty Disclaimer
5
Limitation of Liability
5
Safety Provisions
5
Parking Brake Interlock
5
To Ensure Safe Driving
5
Handling the SD Card Slot
6
Handling the USB Connector
6
Notes on Internal Memory
6
Before Removing the Vehicle Battery
6
Data Subject to Erasure
6
Using the Remote Control
7
Protecting the LCD Panel and Screen
6
Rear View Camera
6
To Avoid Battery Exhaustion
6
Visit Our Website
6
When Using a Display Con- Nected to V out
6
Basic Operation
7
Checking Part Names and Functions
7
Remote Control
7
Adjusting the LCD Panel Angle
8
Inserting/Ejecting/Connecting Media
8
Inserting and Ejecting a Disc
8
Inserting and Ejecting an SD Memory Card
9
Connecting and Disconnecting an Ipod
9
Plugging and Unplugging a USB Storage Device
9
Notes on Using the LCD Panel
8
Protecting Your Product against Theft
8
Removing the Front Panel
8
Attaching the Front Panel
8
On First-Time Startup
9
Regular Startup
9
Startup and Termination
9
Turning off the Display
9
Displaying the AV Operation Screen
10
Selecting a Front Source on the AV Source Selection Screen
10
Selecting a Front Source on the Source List
11
Selecting a Rear Source
11
How to Use the Screens
10
Switching Screens Using the Touch Panel Keys
10
Switching Screens Using the Hardware Buttons
10
Supported AV Source
10
Changing the Display Order of Source Icons
11
Changing the Display Order of Source Keys
11
Turning off the AV Source
11
Using the Touch Panel
11
Using the Common Touch Panel Keys
11
Operating List Screens
11
Operating the Time Bar
11
Operating the On-Screen Keyboard
11
Registering and Con- Necting a Bluetooth Device
12
Preparing Communication Devices
12
Registering Your Bluetooth Devices
12
Searching for Nearby Bluetooth Devices
12
Pairing from Your Bluetooth Devices
12
Connecting to a Bluetooth Device Automatically
13
Deleting a Registered Device
13
Connecting a Registered Bluetooth Device Manually
13
Displaying the Bluetooth Device Address
13
Entering the PIN Code for Bluetooth Wireless Connection
13
Switching Visibility
13
Clearing the Bluetooth Memory
14
Displaying the Bluetooth Software Version
14
Using Hands-Free Phoning
14
Displaying the Phone Menu
14
Touch Panel Keys
14
Reading the Screen
14
Making a Phone Call
14
Direct Dialing
14
Calling a Number in the Phone Book
15
Dialing from the History
15
Using the Preset Dial Lists
15
Updating Bluetooth Software
14
Changing the Phone Settings
16
Answering a Call Automatically
16
Switching the Ring Tone
16
Inverting Names in the Phone Book
16
Setting the Private Mode
16
Adjusting the Other Party's
17
Listening Volume
17
Receiving a Phone Call
16
Answering an Incoming Call
16
Tion Screen
16
Notes for Hands-Free Phoning
17
Ipod / Iphone or Smartphone Setup Operation
17
Setting the Device Connection Method
17
The Basic Flow of Ipod / Iphone or Smartphone Setup
17
Using the Voice Recognition
17
Function (for Iphone)
17
Android™ Device Compatibility
18
Information on the Connections and Functions for each Device
18
Using the Radio
19
Ipod Compatibility
18
Mirrorlink Device Compatibility
18
Manual Tuning
19
Reading the Screen
19
Seek Tuning
19
Selecting a Band
19
Selecting a Preset Channel from the Preset Channel List
19
Starting Procedure
19
Storing Broadcast Frequencies
19
Using the Touch Panel Keys
19
Receiving Traffic Announcements
20
Searching for an RDS Station Using PTY Information
20
Storing the Strongest Broad- Cast Frequencies
20
Tuning into Strong Frequencies
20
Using News Program Interruption
20
Limiting Stations to Regional Programming
21
Operating with the Hardware Buttons
21
Using the TV Tuner
21
Switching Auto PI Seek
21
Activating the Auto PI Seek for Preset Stations
21
Tuning into Alternative Frequencies
21
Using the Touch Panel Keys
21
Operating with the Hardware Buttons
22
Playing a Disc
22
Reading the Screen
22
Setting the Video Signal
22
Starting Procedure
22
Storing Stations
22
Using the Touch Panel Keys (for Audio)
22
Using the Touch Panel Keys (for Video)
22
Reading the Screen (for Audio)
23
Reading the Screen (for Video)
23
Starting Procedure
23
Name List
23
Frame-By-Frame Playback
24
Operating the DVD Menu
24
Playing Tracks in Random Order
24
Searching for the Part You Want to Play
24
Setting a Repeat Play Range
24
Slow Motion Playback
24
Switching the Audio Language
24
Switching the Media File Type
24
Switching the Subtitle Language
24
Operating the DVD Menu Using Touch Panel Keys
25
Operating with the Hardware Buttons
25
Playing Compressed
25
Resuming Playback (Bookmark)
25
Returning to a Specified Scene
25
Selecting the Audio Output
25
Switching the Multi-Angle DVD Display
25
Using the Touch Panel Keys
25
Reading the Screen
26
Starting Procedure (for Disc)
26
Starting Procedure (for USB/SD)
26
Switching the Browse Mode
26
Name List
27
Operating with the Hardware Buttons
27
Playing Compressed
27
Playing Files in Random Order
27
Selecting a File from the List
27
Related to the Song Cur
27
Rently Playing (Link Search)
27
Setting a Repeat Play Range
27
Switching the Media File Type
27
Using the Touch Panel Keys
27
Frame-By-Frame Playback
28
Reading the Screen
28
Setting a Repeat Play Range
28
Slow Motion Playback
28
Starting Procedure (for Disc)
28
Starting Procedure (for USB/SD)
28
Name List
28
Operating with the Hardware Buttons
29
Playing Compressed
29
Playing Files in Random Order
29
Reading the Screen
29
Selecting Files from the File Name List
29
Starting Procedure
29
Name List
29
Switching the Media File Type
29
Using the Touch Panel Keys
29
Operating with the Hardware Buttons
30
Using an Ipod
30
Setting a Repeat Play Range
30
Setting the Slideshow Interval
30
Switching the Media File Type
30
Using the Touch Panel Keys (for Audio)
30
Using the Touch Panel Keys (for Video)
30
Reading the Screen (for Audio)
31
Reading the Screen (for Video)
31
Selecting Song or Video Sources from the Playlist Screen
31
Setting a Repeat Play Range
31
Setting the Shuffle Play
31
Starting Procedure
31
Changing the Speed of Audio- Book Playback
32
Displaying Lists Related to the Song Currently Playing (Link Search)
32
Operating with the Hardware Buttons
32
Playing Back Music from a Music App Other than Ipod Music, as the Ipod Source
32
Using the Touch Panel Keys
32
Reading the Screen
33
Pioneer AVH-X8650BT Owner's Manual (136 pages)
DVD RDS AV RECEIVER
Brand:
Pioneer
| Category:
Receiver
| Size: 3.26 MB
Table of Contents
Table of Contents
2
Precaution
5
Important Safety Information
5
License, Warranty Disclaimer
5
Limitation of Liability
5
Safety Provisions
5
Parking Brake Interlock
5
To Ensure Safe Driving
5
Handling the SD Card Slot
6
Handling the USB Connector
6
Notes on Internal Memory
6
Before Removing the Vehicle Battery
6
Data Subject to Erasure
6
Protecting the LCD Panel and Screen
6
Rear View Camera
6
To Avoid Battery Exhaustion
6
Visit Our Website
6
When Using a Display Con- Nected to V out
6
Basic Operation
7
Checking Part Names and Functions
7
Remote Control
7
Use and Care of the Remote Control
7
Installing the Battery
7
Using the Remote Control
7
Adjusting the LCD Panel Angle
8
Inserting/Ejecting/Connecting Media
8
Inserting and Ejecting a Disc
8
Inserting and Ejecting an SD Memory Card
9
Connecting and Disconnecting an Ipod
9
Plugging and Unplugging a USB Storage Device
9
Notes on Using the LCD Panel
8
Protecting Your Product against Theft
8
Removing the Front Panel
8
Attaching the Front Panel
8
On First-Time Startup
9
Regular Startup
9
Startup and Termination
9
Turning off the Display
9
Displaying the AV Operation Screen
10
Selecting a Front Source on the AV Source Selection Screen
10
Selecting a Front Source on the Source List
11
Selecting a Rear Source
11
How to Use the Screens
10
Switching Screens Using the Touch Panel Keys
10
Switching Screens Using the Hardware Buttons
10
Supported AV Source
10
Changing the Display Order of Source Icons
11
Changing the Display Order of Source Keys
11
Turning off the AV Source
11
Using the Touch Panel
11
Using the Common Touch Panel Keys
11
Operating List Screens
11
Operating the Time Bar
11
Operating the On-Screen Keyboard
11
Registering and Con- Necting a Bluetooth Device
12
Preparing Communication Devices
12
Registering Your Bluetooth Devices
12
Searching for Nearby Bluetooth Devices
12
Pairing from Your Bluetooth Devices
12
Connecting to a Bluetooth
13
Device Automatically
13
Deleting a Registered Device
13
Connecting a Registered Bluetooth Device Manually
13
Displaying the Bluetooth Device Address
13
Entering the PIN Code for Bluetooth Wireless Connection
13
Switching Visibility
13
Clearing the Bluetooth Memory
14
Displaying the Bluetooth Software Version
14
Using Hands-Free Phoning
14
Displaying the Phone Menu
14
Touch Panel Keys
14
Reading the Screen
14
Making a Phone Call
14
Direct Dialing
14
Calling a Number in the Phone Book
15
Dialing from the History
15
Using the Preset Dial Lists
15
Updating Bluetooth Software
14
Changing the Phone Settings
16
Answering a Call Automatically
16
Switching the Ring Tone
16
Inverting Names in the Phone Book
16
Setting the Private Mode
16
Adjusting the Other Party's Listening Volume
16
Receiving a Phone Call
16
Answering an Incoming Call
16
Tion Screen
16
Notes for Hands-Free Phoning
17
Ipod / Iphone or Smartphone Setup Operation
17
Setting the Device Connection Method
17
The Basic Flow of Ipod / Iphone or Smartphone Setup
17
Using the Voice Recognition
17
Function (for Iphone)
17
Android™ Device Compatibility
18
Information on the Connections and Functions for each Device
18
Using the Radio
19
Ipod Compatibility
18
Mirrorlink Device Compatibility
18
Manual Tuning
19
Reading the Screen
19
Seek Tuning
19
Selecting a Band
19
Selecting a Preset Channel from the Preset Channel List
19
Starting Procedure
19
Storing Broadcast Frequencies
19
Using the Touch Panel Keys
19
Receiving Traffic Announcements
20
Searching for an RDS Station Using PTY Information
20
Storing the Strongest Broad- Cast Frequencies
20
Tuning into Strong Frequencies
20
Using News Program Interruption
20
Limiting Stations to Regional Programming
21
Operating with the Hardware Buttons
21
Using the TV Tuner
21
Switching Auto PI Seek
21
Activating the Auto PI Seek for Preset Stations
21
Tuning into Alternative Frequencies
21
Using the Touch Panel Keys
21
Operating with the Hardware Buttons
22
Playing a Disc
22
Reading the Screen
22
Setting the Video Signal
22
Starting Procedure
22
Storing Stations
22
Using the Touch Panel Keys (for Audio)
22
Using the Touch Panel Keys (for Video)
22
Playing Tracks in Random Order
23
Reading the Screen (for Audio)
23
Reading the Screen (for Video)
23
Starting Procedure
23
Name List
23
Frame-By-Frame Playback
24
Operating the DVD Menu
24
Searching for the Part You Want to Play
24
Setting a Repeat Play Range
24
Slow Motion Playback
24
Switching the Audio Language
24
Switching the Media File Type
24
Switching the Subtitle Language
24
Operating the DVD Menu Using Touch Panel Keys
25
Operating with the Hardware Buttons
25
Playing Compressed
25
Resuming Playback (Bookmark)
25
Returning to a Specified Scene
25
Selecting the Audio Output
25
Switching the Multi-Angle DVD Display
25
Using the Touch Panel Keys
25
Audio Files
26
Reading the Screen
26
Starting Procedure (for Disc)
26
Starting Procedure (for USB/SD)
26
Switching the Browse Mode
26
Name List
27
Related to the Song Cur
27
Rently Playing (Link Search)
27
Operating with the Hardware Buttons
27
Playing Compressed
27
Playing Files in Random Order
27
Setting a Repeat Play Range
27
Switching the Media File Type
27
Using the Touch Panel Keys
27
Video Files
27
Frame-By-Frame Playback
28
Reading the Screen
28
Setting a Repeat Play Range
28
Slow Motion Playback
28
Starting Procedure (for Disc)
28
Starting Procedure (for USB/SD)
28
Name List
28
Operating with the Hardware Buttons
29
Playing Compressed
29
Playing Files in Random Order
29
Reading the Screen
29
Starting Procedure
29
Name List
29
Still Image Files
29
Switching the Media File Type
29
Using the Touch Panel Keys
29
Operating with the Hardware Buttons
30
Using an Ipod
30
Setting a Repeat Play Range
30
Setting the Slideshow Interval
30
Switching the Media File Type
30
Using the Touch Panel Keys (for Audio)
30
Using the Touch Panel Keys (for Video)
30
Reading the Screen (for Audio)
31
Reading the Screen (for Video)
31
Selecting Song or Video Sources from the Playlist Screen
31
Setting a Repeat Play Range
31
Setting the Shuffle Play
31
Starting Procedure
31
Changing the Speed of Audio- Book Playback
32
Displaying Lists Related to the Song Currently Playing (Link Search)
32
Operating with the Hardware Buttons
32
Playing Back Music from a Music App Other than Ipod Music, as the Ipod Source
32
Using the Touch Panel Keys
32
Reading the Screen
33
Advertisement
Advertisement
Related Products
Pioneer AVH-X8690BT
Pioneer AVH-X8890BT
Pioneer AVH-X8800BT
Pioneer AVH-X7500BT
Pioneer AVH-X4700BS
Pioneer AVH-X3700BHS
Pioneer AVH-X2700BS
Pioneer AVH-X7800BT
Pioneer AVH-X2800BT
Pioneer AVH-X3800BHS
Pioneer Categories
Car Receiver
Receiver
Stereo Receiver
Amplifier
CD Player
More Pioneer Manuals
Login
Sign In
OR
Sign in with Facebook
Sign in with Google
Upload manual
Upload from disk
Upload from URL