Sign In
Upload
Manuals
Brands
Konica Minolta Manuals
Label Maker
AccurioLabel 230
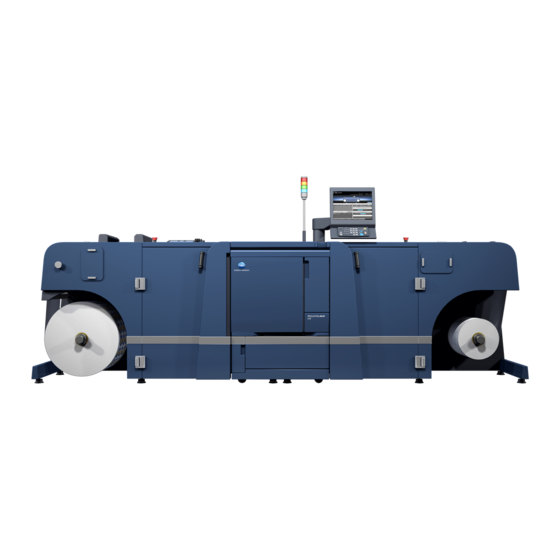
Konica Minolta AccurioLabel 230 Manuals
Manuals and User Guides for Konica Minolta AccurioLabel 230. We have
1
Konica Minolta AccurioLabel 230 manual available for free PDF download: Quick Manual
Konica Minolta AccurioLabel 230 Quick Manual (194 pages)
Brand:
Konica Minolta
| Category:
Label Maker
| Size: 3.81 MB
Table of Contents
Table of Contents
3
1 Introduction
7
Welcome
9
Notations and Symbols Used in this Manual
9
Intended Use of this Machine
10
Intended Use
10
Impermissible Operating Conditions
10
Exclusion of Liability
10
Target Groups
11
Configuration and Usage of this Manual
11
2 Before Using this Machine
13
Power-On/Off
15
Main Body Power-On/Off
15
Turn the Main Body on
15
Turn the Main Body off
18
Turn on Roll Winder RW-110/Roll Winder RW-210
19
Turn off Roll Winder RW-110/Roll Winder RW-210
20
Machine Panel
23
Control Panel (Main Body)
23
Control Panel (Roll Winder RW-110/Roll Winder RW-210)
25
Touch Panel (Roll Winder RW-110/Roll Winder RW-210)
26
[Startup] Screen
26
[Stop] Screen
27
[Debug/Settings] Screen
28
[Taper Tension] Screen
29
[Run] Screen
30
Emergency Stop
31
Control Panel of External Sensor Kit ES-101
32
Web Guide
33
3 Printing Workflow
35
Before Printing
38
Step 1: Cleaning
38
Step 2: Prepare the Media
38
Step 3: Prepare the Machine
38
Step 4: Adjust (Image Position and Image Quality)
42
Paper Setting
42
Image Position Adjustment
51
Registration Adj
51
[Zoom]/[Image Shift] Adjustment
52
[Chart Adjustment]
54
Quality Adj
57
Job Printing
58
Step 1: Prepare Print Data
58
Step 2: Send Print Data
59
Step 3: Print Test
59
Step 4: Print All
63
Operation after Printing
67
Step 1: Replace the Media Core
67
Step 2: Idle the Machine
67
4 Handling Paper
69
Media Route
71
Setting Media
72
Set the Media to the Unwinder Spindle
72
Feed the Media to Roll Winder RW-110
76
Feed the Media to the Main Body of the Printer
77
Feed the Media to Roll Winder RW-210
80
Set the Media Core to the Rewinder Spindle
81
Adjust the Media Conveyance
82
Specify the Paper Type and Thickness (Weight)
88
Replacing the Media
91
Set the Media to the Unwinder Spindle
91
Connect the Media Using the Workbench
93
Convey the Media
96
Replacing the Media Core
97
Set the Media Core to the Rewinder Spindle
97
Splicing the Media (for Cleaning/Clearing Paper Jam)
101
Connect the Media between Roll Winder RW-210 and the Main Body
101
Additional Printing on the Media with Eye Mark Printed
103
Conditions of Detection of Eye Mark
104
Install External Sensor Kit ES-101
104
Removing ES-101
104
Installing ES-101 (When Checking the Eye Mark in the Upper Side of the Media)
105
Installing ES-101 (When Checking the Eye Mark in the Lower Side of the Media)
109
Turn on the Additional Printing Function
112
Confirm/Change the Teach-In Mode
113
Confirm the Teach-In Mode
113
Change in the Teach-In Mode
114
Adjust the Sensor Position
114
Adjust the Position of the Media
115
For Black Eye Mark with White Background
116
Adjust
116
For White Eye Mark with Black Background
118
Confirmation of the Detection Stability
120
Install the Reflection Holder
121
Installing the Reflection Holder (When Checking the Eye Mark in the Upper Side of the Media)
121
Installing the Reflection Holder (When Checking the Eye Mark in the Lower Side of the Media)
122
Print Test
123
Adjust the Additional Printing Position
123
Print All
124
5 Cleaning
125
Cleaning Parts and Intervals
127
Daily Cleaning
129
Clean the Leading Section
129
Clean the Delivering Section
131
Adjust the Position of the Media
134
Weekly Cleaning
136
Clean the Interior of the Main Body
136
Set the Media to the Main Body
142
Clean the Web Cleaner
145
Monthly Cleaning
146
Clean the Workbench
146
Clean the Roller
146
Clean the Inspection Table
147
Check the Compressor
147
Clean the Web Cleaner
147
Clean the Exterior
148
Clean the Control Panel
149
Clean the Web Guide
150
6 Troubleshooting
151
Replenishing Toner Supply
153
Replacing Waste Toner Box
155
Stop by Paper Mismatch During Printing
156
Cancel Printing, Change Media, and Restart Printing
156
Forcibly Print on the Set Media
158
Clearing Paper Jams
159
How to View the Animation Guidance
159
[JAM Position] Screen
159
JAM Code List
160
Remove Paper Jam Inside the Main Body
163
A Media Feeding Error Occurs
168
Media Snakes or Is Mis-Centered
169
Adjust the Media Conveyance Position to Solve Meandering and Mis-Centering
170
The Jam Code J-1714 Is Displayed
173
The Jam Code J-3105 Is Displayed
174
White Spots Appear on the Output Paper
174
The Media Wrinkles
175
The Media in the Feeding Section Goes out Alignment
175
The Status of Roll Winder RW-110/Roll Winder RW-210 Is Displayed in Red
175
Torque too High, Reduce Tension or Increase Taper" Is Displayed and Media Is Not Transferred
175
The Message "Safety Door Open" Is Displayed
175
To Change the Timing of Media-Break Detection
176
Trouble of Optional Products
177
The Operation of the Knife Is Slow
177
How to Reset Emergency Stop
178
If You Have Forgotten the Administrator Password
178
7 Appendix
179
Name of each Component
181
Main Body
181
External Machine Items
181
Internal Machine Items
183
Leading Section
184
Delivering Section
185
External Machine Items
186
Internal Machine Items
187
External Machine Items
188
Internal Machine Items
189
Status Indicator Light MK-744C
190
External Sensor Kit ES-101
191
Advertisement
Advertisement
Related Products
Konica Minolta Magicolor 2300W
Konica Minolta Magicolor 2300 DL
Konica Minolta Magicolor 2350 EN
Konica Minolta 2330
Konica Minolta Magicolor 2350 PJL
Konica Minolta PageScope Authentication Manager 2.3
Konica Minolta BIZHUB 210
Konica Minolta bizhub 25e
Konica Minolta Magicolor 2590 MF
Konica Minolta Magicolor 2 Desklaser
Konica Minolta Categories
All in One Printer
Printer
Digital Camera
Measuring Instruments
Copier
More Konica Minolta Manuals
Login
Sign In
OR
Sign in with Facebook
Sign in with Google
Upload manual
Upload from disk
Upload from URL