Sign In
Upload
Manuals
Brands
Daikin Manuals
Air Conditioner
Altherma EAVZ16S18DA6V
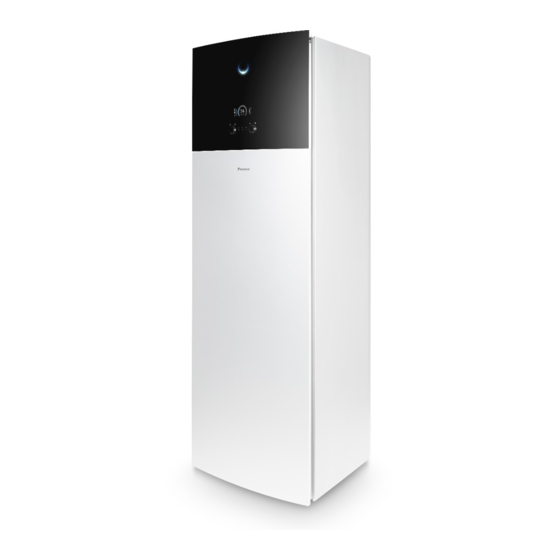
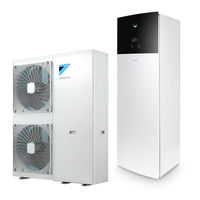
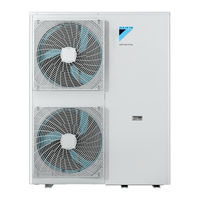
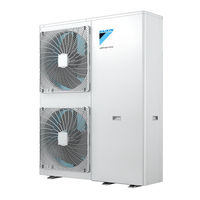
Daikin Altherma EAVZ16S18DA6V Manuals
Manuals and User Guides for Daikin Altherma EAVZ16S18DA6V. We have
6
Daikin Altherma EAVZ16S18DA6V manuals available for free PDF download: Installer's Reference Manual, Installation Manual, User Reference Manual, Operation Manual
Daikin Altherma EAVZ16S18DA6V Installer's Reference Manual (216 pages)
Brand:
Daikin
| Category:
Heat Pump
| Size: 11.47 MB
Table of Contents
Table of Contents
2
1 About this Document
6
Meaning of Warnings and Symbols
7
Installer Reference Guide at a Glance
8
2 General Safety Precautions
10
For the Installer
10
General
10
Installation Site
11
Refrigerant - in Case of R410A or R32
11
Water
13
Electrical
13
3 Specific Installer Safety Instructions
16
4 About the Box
21
Overview: about the Box
21
Outdoor Unit
21
To Unpack the Outdoor Unit
21
To Handle the Outdoor Unit
22
To Remove the Accessories from the Outdoor Unit
22
To Remove the Transportation Stay
23
Indoor Unit
24
To Unpack the Indoor Unit
24
To Remove the Accessories from the Indoor Unit
24
To Handle the Indoor Unit
25
5 About the Units and Options
26
Overview: about the Units and Options
26
Identification
26
Identification Label: Outdoor Unit
26
Identification Label: Indoor Unit
26
Combining Units and Options
27
Possible Options for the Outdoor Unit
27
Possible Options for the Indoor Unit
27
Possible Combinations of Indoor Unit and Outdoor Unit
29
6 Application Guidelines
30
Overview: Application Guidelines
30
Setting up the Space Heating/Cooling System
30
Multiple Rooms - Two LWT Zones
31
Setting up the Domestic Hot Water Tank
33
System Layout - Integrated DHW Tank
33
System Layout - Standalone DHW Tank
33
Selecting the Volume and Desired Temperature for the DHW Tank
33
Setup and Configuration - DHW Tank
35
DHW Pump for Instant Hot Water
35
DHW Pump for Disinfection
36
Setting up the Energy Metering
36
Produced Heat
37
Consumed Energy
37
Normal Kwh Rate Power Supply
37
Preferential Kwh Rate Power Supply
39
Setting up the Power Consumption Control
40
Permanent Power Limitation
40
Power Limitation Activated by Digital Inputs
41
Power Limitation Process
42
Setting up an External Temperature Sensor
43
7 Unit Installation
44
Preparing the Installation Site
44
Installation Site Requirements of the Outdoor Unit
44
Additional Installation Site Requirements of the Outdoor Unit in Cold Climates
47
Installation Site Requirements of the Indoor Unit
47
Opening and Closing the Units
48
About Opening the Units
48
To Open the Outdoor Unit
49
To Remove the Transportation Stay
49
To Close the Outdoor Unit
50
To Open the Indoor Unit
50
To Lower the Switch Box on the Indoor Unit
52
To Close the Indoor Unit
53
Mounting the Outdoor Unit
53
About Mounting the Outdoor Unit
53
Precautions When Mounting the Outdoor Unit
54
To Provide the Installation Structure
54
To Install the Outdoor Unit
55
To Provide Drainage
55
Mounting the Indoor Unit
56
About Mounting the Indoor Unit
56
Precautions When Mounting the Indoor Unit
56
To Install the Indoor Unit
56
To Connect the Drain Hose to the Drain
57
8 Piping Installation
59
Preparing Water Piping
59
Water Circuit Requirements
59
Formula to Calculate the Expansion Vessel Pre-Pressure
62
To Check the Water Volume and Flow Rate
62
Changing the Pre-Pressure of the Expansion Vessel
65
To Check the Water Volume: Examples
65
Connecting Water Piping
66
About Connecting the Water Piping
66
Precautions When Connecting the Water Piping
66
To Connect the Water Piping
66
To Connect the Recirculation Piping
69
To Fill the Water Circuit
70
To Protect the Water Circuit against Freezing
70
To Fill the Domestic Hot Water Tank
73
To Insulate the Water Piping
73
9 Electrical Installation
75
About Connecting the Electrical Wiring
75
Precautions When Connecting the Electrical Wiring
75
Guidelines When Connecting the Electrical Wiring
76
About Electrical Compliance
77
About Preferential Kwh Rate Power Supply
77
Overview of Electrical Connections Except External Actuators
78
Connections to the Indoor Unit
78
To Connect the Main Power Supply
78
To Connect the Backup Heater Power Supply
80
To Connect the Shut-Off Valve
82
To Connect the Electricity Meters
82
To Connect the Domestic Hot Water Pump
83
To Connect the Alarm Output
83
To Connect the Space Cooling/Heating ON/OFF Output
83
To Connect the Changeover to External Heat Source
84
To Connect the Power Consumption Digital Inputs
84
To Connect the Safety Thermostat (Normally Closed Contact)
85
To Connect a Smart Grid
86
After Connecting the Electrical Wiring to the Indoor Unit
86
10 Configuration
87
Overview: Configuration
87
To Access the most Used Commands
88
Configuration Wizard
90
Possible Screens
91
Possible Screens: Overview
91
Home Screen
92
Main Menu Screen
94
Menu Screen
95
Setpoint Screen
95
Detailed Screen with Values
96
Schedule Screen: Example
96
Weather-Dependent Curve
100
What Is a Weather-Dependent Curve
100
2-Points Curve
101
Slope-Offset Curve
102
Using Weather-Dependent Curves
103
Settings Menu
105
Malfunctioning
105
Room
106
Main Zone
109
Additional Zone
119
Space Heating/Cooling
123
Tank
131
User Settings
132
Information
136
Installer Settings
137
Operation
151
Menu Structure: Overview User Settings
153
Menu Structure: Overview Installer Settings
154
11 Commissioning
155
Overview: Commissioning
155
Precautions When Commissioning
155
Checklist before Commissioning
156
Checklist During Commissioning
156
To Check the Minimum Flow Rate
157
Air Purge Function
157
To Perform an Operation Test Run
159
To Perform an Actuator Test Run
160
Underfloor Heating Screed Dryout
161
12 Hand-Over to the User
165
13 Maintenance and Service
166
Overview: Maintenance and Service
166
Maintenance Safety Precautions
166
Checklist for Yearly Maintenance of the Outdoor Unit
166
Checklist for Yearly Maintenance of the Indoor Unit
166
To Drain the Domestic Hot Water Tank
169
About Cleaning the Water Filter in Case of Trouble
170
To Remove the Water Filter
170
To Clean the Water Filter in Case of Trouble
171
To Install the Water Filter
172
14 Troubleshooting
173
Overview: Troubleshooting
173
Precautions When Troubleshooting
173
Solving Problems Based on Symptoms
174
Symptom: the Unit Is NOT Heating or Cooling as Expected
174
Symptom: Hot Water Does NOT Reach the Desired Temperature
174
Symptom: the Compressor Does NOT Start (Space Heating or Domestic Water Heating)
175
Symptom: the System Is Making Gurgling Noises after Commissioning
175
Symptom: the Pump Is Making Noise (Cavitation)
176
Symptom: the Pressure Relief Valve Opens
176
Symptom: the Water Pressure Relief Valve Leaks
177
Symptom: the Space Is NOT Sufficiently Heated at Low Outdoor Temperatures
177
Symptom: the Pressure at the Tapping Point Is Temporarily Unusually High
178
Symptom: Decoration Panels Are Pushed Away Due to a Swollen Tank
178
Symptom: Tank Disinfection Function Is NOT Completed Correctly (AH-Error)
178
Solving Problems Based on Error Codes
179
To Display the Help Text in Case of a Malfunction
179
Error Codes: Overview
180
15 Disposal
186
To Recover Refrigerant
186
To Open the Stop Valves
187
To Manually Open the Electronic Expansion Valves
187
Recovery Mode
188
16 Technical Data
190
Service Space: Outdoor Unit
190
Piping Diagram: Outdoor Unit
191
Piping Diagram: Indoor Unit
192
Wiring Diagram: Outdoor Unit
193
Wiring Diagram: Indoor Unit
196
Advertisement
Daikin Altherma EAVZ16S18DA6V Installer's Reference Manual (104 pages)
Low temperature split
Brand:
Daikin
| Category:
Air Conditioner
| Size: 7.45 MB
Table of Contents
Table of Contents
2
1 General Safety Precautions
3
About the Documentation
3
Meaning of Warnings and Symbols
3
General
4
Installation Site
4
Refrigerant
4
Brine
5
Water
5
Electrical
5
2 About the Documentation
6
About this Document
6
Installer Reference Guide at a Glance
7
3 About the Box
7
Overview: about the Box
7
Outdoor Unit
7
To Unpack the Outdoor Unit
7
To Handle the Outdoor Unit
7
To Remove the Accessories from the Outdoor Unit
8
To Remove the Transportation Stay
8
Indoor Unit
8
To Unpack the Indoor Unit
8
To Handle the Indoor Unit
8
7 Installation
7
4 About the Units and Options
9
Overview: about the Units and Options
9
Identification
9
Identification Label: Outdoor Unit
9
Identification Label: Indoor Unit
9
Combining Units and Options
9
Possible Options for the Outdoor Unit
9
Possible Options for the Indoor Unit
9
5 Application Guidelines
10
Overview: Application Guidelines
10
Setting up the Space Heating/Cooling System
10
Single Room
11
Multiple Rooms - One LWT Zone
12
Multiple Rooms - Two LWT Zones
14
Setting up an Auxiliary Heat Source for Space Heating
15
Setting up the Domestic Hot Water Tank
16
System Layout - Integrated DHW Tank
16
Selecting the Volume and Desired Temperature for the DHW Tank
17
Setup and Configuration - DHW Tank
17
DHW Pump for Instant Hot Water
17
DHW Pump for Disinfection
18
Setting up the Energy Metering
18
Produced Heat
18
Consumed Energy
18
Normal Kwh Rate Power Supply
18
Preferential Kwh Rate Power Supply
19
Setting up the Power Consumption Control
19
Permanent Power Limitation
19
Power Limitation Activated by Digital Inputs
20
Power Limitation Process
20
Setting up an External Temperature Sensor
21
6 Preparation
21
Overview: Preparation
21
Preparing the Installation Site
21
Installation Site Requirements of the Outdoor Unit
21
Additional Installation Site Requirements of the Outdoor Unit in Cold Climates
22
Installation Site Requirements of the Indoor Unit
22
Preparing Water Piping
23
Water Circuit Requirements
23
Formula to Calculate the Expansion Vessel Pre-Pressure
24
To Check the Water Volume and Flow Rate
24
Changing the Pre-Pressure of the Expansion Vessel
25
To Check the Water Volume: Examples
25
Preparing Electrical Wiring
25
About Preparing Electrical Wiring
25
About Preferential Kwh Rate Power Supply
26
Overview of Electrical Connections Except External Actuators
26
Overview of Electrical Connections for External and Internal Actuators
26
Overview: Installation
27
Opening the Units
27
About Opening the Units
27
To Open the Outdoor Unit
27
To Open the Indoor Unit
27
To Open the Switch Box Cover of the Indoor Unit
28
To Lower the Switch Box on the Indoor Unit
28
Mounting the Outdoor Unit
29
About Mounting the Outdoor Unit
29
Precautions When Mounting the Outdoor Unit
29
To Provide the Installation Structure
29
To Install the Outdoor Unit
29
To Provide Drainage
29
To Fix the Fluorinated Greenhouse Gases Label
30
To Prevent the Outdoor Unit from Falling over
30
Mounting the Indoor Unit
30
About Mounting the Indoor Unit
30
Precautions When Mounting the Indoor Unit
30
To Install the Indoor Unit
30
To Connect the Drain Hose to the Drain
30
Connecting the Water Piping
31
About Connecting the Water Piping
31
Precautions When Connecting the Water Piping
31
To Connect the Water Piping
31
To Connect the Recirculation Piping
32
To Fill the Water Circuit
32
To Protect the Water Circuit against Freezing
32
To Fill the Domestic Hot Water Tank
34
To Insulate the Water Piping
34
Connecting the Electrical Wiring
34
About Connecting the Electrical Wiring
34
About Electrical Compliance
34
Precautions When Connecting the Electrical Wiring
35
Guidelines When Connecting the Electrical Wiring
35
Specifications of Standard Wiring Components
35
To Connect the Electrical Wiring on the Outdoor Unit
35
To Connect the Electrical Wiring on the Indoor Unit
36
To Connect the Main Power Supply
37
To Connect the Backup Heater Power Supply
37
To Connect the Shut-Off Valve
38
To Connect the Electrical Meters
38
To Connect the Domestic Hot Water Pump
38
To Connect the Alarm Output
38
To Connect the Space Cooling/Heating ON/OFF Output
39
To Connect the Changeover to External Heat Source
39
To Connect the Power Consumption Digital Inputs
39
To Connect the Safety Thermostat (Normal Closed Contact)
39
Finishing the Outdoor Unit Installation
40
To Finish the Outdoor Unit Installation
40
Finishing the Indoor Unit Installation
40
To Close the Indoor Unit
40
8 Configuration
40
Overview: Configuration
40
To Access the most Used Commands
40
Configuration Wizard
41
Possible Screens
42
Possible Screens: Overview
42
Home Screen
42
Main Menu Screen
42
Menu Screen
43
Setpoint Screen
43
Detailed Screen with Values
43
Detailed Screen with Weather-Dependent Curve
43
Schedule Screen: Example
44
Settings Menu
45
Malfunction
45
Room
45
Main Zone
47
Additional Zone
51
Space Heating/Cooling
52
Tank
56
User Settings
59
Information
60
Installer Settings
61
Operation
67
Menu Structure: Overview User Settings
68
Menu Structure: Overview Installer Settings
69
9 Commissioning
70
Overview: Commissioning
70
Precautions When Commissioning
70
Checklist before Commissioning
70
Checklist During Commissioning
70
To Check the Minimum Flow Rate
70
Air Purge Function
71
To Perform an Operation Test Run
71
To Perform an Actuator Test Run
72
Underfloor Heating Screed Dryout
72
10 Hand-Over to the User
73
11 Maintenance and Service
73
Overview: Maintenance and Service
73
Maintenance Safety Precautions
73
Checklist for Yearly Maintenance of the Outdoor Unit
73
Checklist for Yearly Maintenance of the Indoor Unit
73
To Drain the Domestic Hot Water Tank
75
About Cleaning the Water Filter in Case of Trouble
75
To Remove the Water Filter
75
To Clean the Water Filter in Case of Trouble
75
To Install the Water Filter
76
12 Troubleshooting
76
Overview: Troubleshooting
76
Precautions When Troubleshooting
76
Solving Problems Based on Symptoms
76
Symptom: the Unit Is NOT Heating or Cooling as Expected
76
Symptom: Hot Water Does NOT Reach the Desired Temperature
77
Symptom: the Compressor Does NOT Start (Space Heating or Domestic Water Heating)
77
Symptom: the System Is Making Gurgling Noises after Commissioning
77
Symptom: the Pump Is Making Noise (Cavitation)
77
Symptom: the Pressure Relief Valve Opens
78
Symptom: the Water Pressure Relief Valve Leaks
78
Symptom: the Space Is NOT Sufficiently Heated at Low Outdoor Temperatures
78
Symptom: the Pressure at the Tapping Point Is Temporarily Unusually High
78
Symptom: Decoration Panels Are Pushed Away Due to a Swollen Tank
79
Symptom: Tank Disinfection Function Is NOT Completed Correctly (AH-Error)
79
Solving Problems Based on Error Codes
79
To Display the Help Text in Case of a Malfunction
79
Error Codes: Overview
79
13 Disposal
81
Overview: Disposal
81
To Pump down
81
To Activate/Deactivate the Vacuum Mode Field Setting
81
To Perform Vacuum Drying
82
Using the Stop Valve and Service Port
82
To Handle the Stop Valve
82
To Open/Close the Stop Valve
82
To Handle the Stem Cap
83
To Handle the Service Cap
83
14 Technical Data
84
Service Space: Outdoor Unit
84
Piping Diagram: Outdoor Unit
85
Piping Diagram: Indoor Unit
86
Wiring Diagram: Outdoor Unit
87
Wiring Diagram: Indoor Unit
89
ESP Curve: Indoor Unit
92
Daikin Altherma EAVZ16S18DA6V Installer's Reference Manual (100 pages)
Low temperature split
Brand:
Daikin
| Category:
Air Conditioner
| Size: 9.72 MB
Table of Contents
Table of Contents
2
General Safety Precautions
3
About the Documentation
3
Meaning of Warnings and Symbols
3
For the Installer
4
General
4
Installation Site
4
Refrigerant
4
Brine
5
Water
5
Electrical
5
About the Documentation
6
Installation
7
Installer Reference Guide at a Glance
7
About the Box
7
Overview: about the Box
7
Outdoor Unit
7
To Unpack the Outdoor Unit
7
To Handle the Outdoor Unit
7
To Remove the Accessories from the Outdoor Unit
8
To Remove the Transportation Stay
8
Indoor Unit
8
To Unpack the Indoor Unit
8
To Handle the Indoor Unit
8
About the Units and Options
9
Overview: about the Units and Options
9
Identification
9
Identification Label: Outdoor Unit
9
Identification Label: Indoor Unit
9
Combining Units and Options
9
Possible Options for the Outdoor Unit
9
Possible Options for the Indoor Unit
9
Application Guidelines
10
Overview: Application Guidelines
10
Setting up the Space Heating System
10
Multiple Rooms - Two LWT Zones
11
Setting up an Auxiliary Heat Source for Space Heating
11
Setting up the Domestic Hot Water Tank
12
System Layout - Integrated DHW Tank
12
Selecting the Volume and Desired Temperature for the DHW Tank
13
Setup and Configuration - DHW Tank
13
DHW Pump for Instant Hot Water
13
DHW Pump for Disinfection
13
Setting up the Energy Metering
14
Produced Heat
14
Consumed Energy
14
Normal Kwh Rate Power Supply
14
Preferential Kwh Rate Power Supply
15
Setting up the Power Consumption Control
15
Permanent Power Limitation
15
Power Limitation Activated by Digital Inputs
16
Power Limitation Process
16
Setting up an External Temperature Sensor
16
Preparation
17
Overview: Preparation
17
Preparing the Installation Site
17
Installation Site Requirements of the Outdoor Unit
17
Additional Installation Site Requirements of the Outdoor Unit in Cold Climates
18
Installation Site Requirements of the Indoor Unit
18
Preparing Water Piping
19
Water Circuit Requirements
19
Formula to Calculate the Expansion Vessel Pre-Pressure
20
To Check the Water Volume and Flow Rate
20
Changing the Pre-Pressure of the Expansion Vessel
21
To Check the Water Volume: Examples
21
Preparing Electrical Wiring
21
About Preparing Electrical Wiring
21
About Preferential Kwh Rate Power Supply
22
Overview of Electrical Connections Except External Actuators
22
Overview of Electrical Connections for External and Internal Actuators
22
Overview: Installation
23
Opening the Units
23
About Opening the Units
23
To Open the Outdoor Unit
23
To Open the Indoor Unit
23
To Open the Switch Box Cover of the Indoor Unit
24
To Lower the Switch Box on the Indoor Unit
24
Mounting the Outdoor Unit
25
About Mounting the Outdoor Unit
25
Precautions When Mounting the Outdoor Unit
25
To Provide the Installation Structure
25
To Install the Outdoor Unit
25
To Provide Drainage
25
To Fix the Fluorinated Greenhouse Gases Label
26
To Prevent the Outdoor Unit from Falling over
26
Mounting the Indoor Unit
26
About Mounting the Indoor Unit
26
Precautions When Mounting the Indoor Unit
26
To Install the Indoor Unit
26
To Connect the Drain Hose to the Drain
26
Connecting the Water Piping
27
About Connecting the Water Piping
27
Precautions When Connecting the Water Piping
27
To Connect the Water Piping
27
To Connect the Recirculation Piping
28
To Fill the Water Circuit
29
To Protect the Water Circuit against Freezing
29
To Fill the Domestic Hot Water Tank
30
To Insulate the Water Piping
30
Connecting the Electrical Wiring
31
About Connecting the Electrical Wiring
31
About Electrical Compliance
31
Precautions When Connecting the Electrical Wiring
31
Guidelines When Connecting the Electrical Wiring
31
Specifications of Standard Wiring Components
31
To Connect the Electrical Wiring on the Outdoor Unit
31
To Connect the Electrical Wiring on the Indoor Unit
32
To Connect the Main Power Supply
33
To Connect the Backup Heater Power Supply
33
To Connect the Shut-Off Valve
34
To Connect the Electrical Meters
35
To Connect the Domestic Hot Water Pump
35
To Connect the Alarm Output
35
To Connect the Space Cooling/Heating ON/OFF Output
35
To Connect the Changeover to External Heat Source
35
To Connect the Power Consumption Digital Inputs
35
To Connect the Safety Thermostat (Normal Closed Contact)
35
Finishing the Outdoor Unit Installation
36
To Finish the Outdoor Unit Installation
36
Finishing the Indoor Unit Installation
36
To Close the Indoor Unit
36
Configuration
36
Overview: Configuration
36
To Access the most Used Commands
37
Configuration Wizard
37
Possible Screens
38
Possible Screens: Overview
38
Home Screen
38
Main Menu Screen
39
Menu Screen
39
Setpoint Screen
39
Detailed Screen with Values
40
Detailed Screen with Weather-Dependent Curve
40
Schedule Screen: Example
40
Settings Menu
42
Malfunction
42
Room
42
Main Zone
43
Additional Zone
47
Space Heating/Cooling
49
Tank
52
User Settings
55
Information
57
Installer Settings
57
Operation
63
Menu Structure: Overview User Settings
64
Menu Structure: Overview Installer Settings
65
Commissioning
66
Overview: Commissioning
66
Precautions When Commissioning
66
Checklist before Commissioning
66
Checklist During Commissioning
66
To Check the Minimum Flow Rate
66
Air Purge Function
67
To Perform an Operation Test Run
68
To Perform an Actuator Test Run
68
Underfloor Heating Screed Dryout
68
10 Hand-Over to the User
69
Maintenance and Service
69
Overview: Maintenance and Service
69
Maintenance Safety Precautions
69
Checklist for Yearly Maintenance of the Outdoor Unit
70
Checklist for Yearly Maintenance of the Indoor Unit
70
To Drain the Domestic Hot Water Tank
71
About Cleaning the Water Filter in Case of Trouble
71
To Remove the Water Filter
71
To Clean the Water Filter in Case of Trouble
71
To Install the Water Filter
72
12 Troubleshooting
72
Overview: Troubleshooting
72
Precautions When Troubleshooting
72
Solving Problems Based on Symptoms
73
Symptom: the Unit Is NOT Heating or Cooling as Expected
73
Symptom: Hot Water Does NOT Reach the Desired Temperature
73
Symptom: the Compressor Does NOT Start (Space Heating or Domestic Water Heating)
73
Symptom: the System Is Making Gurgling Noises after Commissioning
73
Symptom: the Pump Is Making Noise (Cavitation)
73
Symptom: the Pressure Relief Valve Opens
73
Symptom: the Water Pressure Relief Valve Leaks
74
Symptom: the Space Is NOT Sufficiently Heated at Low Outdoor Temperatures
74
Symptom: the Pressure at the Tapping Point Is Temporarily Unusually High
74
Symptom: Decoration Panels Are Pushed Away Due to a Swollen Tank
74
Symptom: Tank Disinfection Function Is NOT Completed Correctly (AH-Error)
74
Solving Problems Based on Error Codes
75
To Display the Help Text in Case of a Malfunction
75
Error Codes: Overview
75
13 Disposal
77
Overview: Disposal
77
To Pump down
77
To Activate/Deactivate the Vacuum Mode Field Setting
77
To Perform Vacuum Drying
77
Using the Stop Valve and Service Port
78
To Handle the Stop Valve
78
To Open/Close the Stop Valve
78
To Handle the Stem Cap
78
To Handle the Service Cap
78
14 Technical Data
79
Service Space: Outdoor Unit
79
Piping Diagram: Outdoor Unit
80
Piping Diagram: Indoor Unit
81
Wiring Diagram: Outdoor Unit
82
Wiring Diagram: Indoor Unit
84
ESP Curve: Indoor Unit
87
Advertisement
Daikin Altherma EAVZ16S18DA6V Installation Manual (32 pages)
Brand:
Daikin
| Category:
Heater
| Size: 5.22 MB
Table of Contents
Table of Contents
3
About this Document
3
Specific Installer Safety Instructions
4
About the Box
5
Indoor Unit
5
To Remove the Accessories from the Indoor Unit
5
To Handle the Indoor Unit
5
Unit Installation
5
Preparing the Installation Site
5
Installation Site Requirements of the Indoor Unit
5
Opening and Closing the Unit
5
To Open the Indoor Unit
5
To Lower the Switch Box on the Indoor Unit
6
To Close the Indoor Unit
7
Mounting the Indoor Unit
7
To Install the Indoor Unit
7
To Connect the Drain Hose to the Drain
7
Piping Installation
8
Preparing Water Piping
8
To Check the Water Volume and Flow Rate
8
Connecting Water Piping
8
To Connect the Water Piping
8
To Connect the Recirculation Piping
9
To Fill the Water Circuit
9
To Protect the Water Circuit against Freezing
9
To Fill the Domestic Hot Water Tank
10
To Insulate the Water Piping
10
Electrical Installation
10
About Electrical Compliance
11
Guidelines When Connecting the Electrical Wiring
11
Connections to the Indoor Unit
11
Overview of Electrical Connections for External and Internal Actuators
11
To Connect the Electrical Wiring to the Indoor Unit
11
To Connect the Main Power Supply
12
To Connect the Backup Heater Power Supply
13
To Connect the Shut-Off Valve
14
To Connect the Electricity Meters
14
To Connect the Domestic Hot Water Pump
14
To Connect the Alarm Output
14
To Connect the Space Cooling/Heating ON/OFF Output
14
To Connect the Changeover to External Heat Source
14
To Connect the Power Consumption Digital Inputs
15
To Connect the Safety Thermostat (Normally Closed Contact)
15
After Connecting the Electrical Wiring to the Indoor Unit
15
Configuration
16
Overview: Configuration
16
To Access the most Used Commands
16
Configuration Wizard
17
Configuration Wizard: Language
17
Configuration Wizard: Time and Date
17
Configuration Wizard: System
17
Configuration Wizard: Backup Heater
18
Configuration Wizard: Main Zone
19
Configuration Wizard: Additional Zone
20
Configuration Wizard: Tank
20
Weather-Dependent Curve
20
What Is a Weather-Dependent Curve
20
2-Points Curve
21
Slope-Offset Curve
21
Using Weather-Dependent Curves
22
Settings Menu
23
Main Zone
23
Additional Zone
23
Information
23
Menu Structure: Overview Installer Settings
24
Commissioning
25
Checklist before Commissioning
25
Checklist During Commissioning
25
To Check the Minimum Flow Rate
25
To Perform an Air Purge
26
To Perform an Operation Test Run
26
To Perform an Actuator Test Run
26
Possible Actuator Test Runs
26
To Perform an Underfloor Heating Screed Dryout
26
Hand-Over to the User
27
10 Technical Data
28
Piping Diagram: Indoor Unit
28
Wiring Diagram: Indoor Unit
29
Daikin Altherma EAVZ16S18DA6V User Reference Manual (20 pages)
Low temperature split
Brand:
Daikin
| Category:
Air Conditioner
| Size: 1.88 MB
Table of Contents
1 General Safety Precautions
2
Table of Contents
2
About the Documentation
2
Meaning of Warnings and Symbols
2
For the User
2
2 About this Document
3
3 About the System
3
Components in a Typical System Layout
4
4 Operation
4
User Interface: Overview
4
Possible Screens: Overview
4
Home Screen
5
Main Menu Screen
5
Setpoint Screen
6
Detailed Screen with Values
6
Basic Usage
6
Using the Home Screen
6
Using the Menu Structure
6
Turning Operation on or off
6
Space Heating/Cooling Control
6
About Space Heating/Cooling Control
6
Setting the Space Operation Mode
6
Determining Which Temperature Control You Are Using
7
To Change the Desired Room Temperature
8
To Change the Desired Leaving Water Temperature
8
Domestic Hot Water Control
8
About Domestic Hot Water Control
8
Reheat Mode
8
Scheduled Mode
9
Scheduled + Reheat Mode
9
To Change the Domestic Hot Water Temperature
9
Using DHW Powerful Operation
9
Advanced Usage
9
Using Quiet Mode
10
Using Holiday Mode
10
Reading out Information
10
To Configure Time and Date
10
Preset Values and Schedules
11
Using Preset Values
11
Setting the Energy Prices
11
Using and Programming Schedules
12
Schedule Screen: Example
12
Weather Dependent Operation
13
Detailed Screen with Weather-Dependent Curve
14
Menu Structure: Overview User Settings
15
Installer Settings: Tables to be Filled in by Installer
16
Configuration Wizard
16
Settings Menu
16
5 Energy Saving Tips
16
6 Maintenance and Service
16
Overview: Maintenance and Service
16
To Find the Contact/Helpdesk Number
17
7 Troubleshooting
17
To Display the Help Text in Case of a Malfunction
17
To Check the Malfunction History
17
Symptom: You Are Feeling too Cold (Hot) in Your Living Room
17
Symptom: the Water at the Tap Is too Cold
17
Symptom: Heat Pump Failure
17
Symptom: the System Is Making Gurgling Noises after Commissioning
18
8 Relocation
18
Overview: Relocation
18
Daikin Altherma EAVZ16S18DA6V Operation Manual (20 pages)
Brand:
Daikin
| Category:
Heat Pump
| Size: 2.17 MB
Table of Contents
Table of Contents
2
About this Document
2
User Safety Instructions
3
General
3
Instructions for Safe Operation
3
About the System
4
Components in a Typical System Layout
4
Operation
4
User Interface: Overview
4
Possible Screens: Overview
5
Home Screen
5
Main Menu Screen
6
Setpoint Screen
6
Detailed Screen with Values
7
Turning Operation on or off
7
Visual Indication
7
To Turn on or off
7
Space Heating/Cooling Control
8
Setting the Space Operation Mode
8
To Change the Desired Room Temperature
8
To Change the Desired Leaving Water Temperature
9
Domestic Hot Water Control
9
Reheat Mode
9
Scheduled Mode
9
Scheduled + Reheat Mode
9
Using DHW Powerful Operation
9
Advanced Usage
10
Schedule Screen: Example
10
Menu Structure: Overview User Settings
13
Installer Settings: Tables to be Filled in by Installer
14
Configuration Wizard
14
Settings Menu
14
Energy Saving Tips
14
Maintenance and Service
14
Overview: Maintenance and Service
14
To Find the Contact/Helpdesk Number
15
Troubleshooting
15
To Display the Help Text in Case of a Malfunction
15
Symptom: You Are Feeling too Cold (Hot) in Your Living Room
15
Symptom: the Water at the Tap Is too Cold
15
Symptom: Heat Pump Failure
15
Symptom: the System Is Making Gurgling Noises after Commissioning
16
Disposal
16
Glossary
16
Advertisement
Related Products
Daikin Altherma EAVZ16S23DA6V
Daikin Altherma EAVZ16S23DA9W
Daikin Altherma EAVZ16S18DA9W
Daikin Altherma EAVZ-D6V
Daikin Altherma EAVZ-D9W
Daikin Altherma EAVH-D9WG
Daikin Altherma EAVX-D6VG
Daikin Altherma 3 H F+W EAVH-D6VG
Daikin Altherma EAVX16S23DA6V
Daikin Altherma EAVH16S18DA6V
Daikin Categories
Air Conditioner
Heat Pump
Remote Control
Chiller
Fan
More Daikin Manuals
Login
Sign In
OR
Sign in with Facebook
Sign in with Google
Upload manual
Upload from disk
Upload from URL