Table of Contents
Advertisement
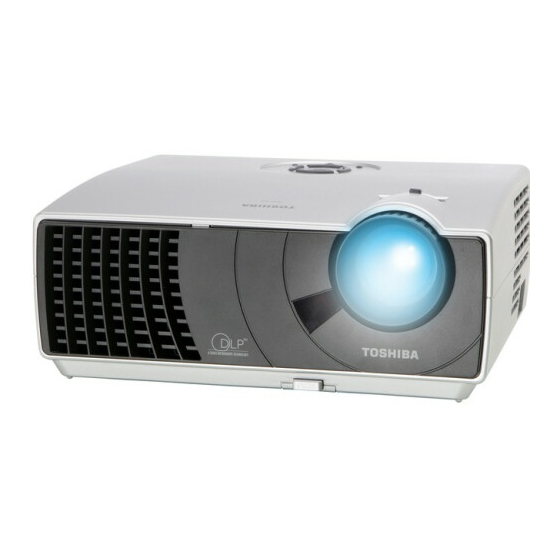
SERVICE MANUAL
DLP DATA PROJECTOR
TDP-T9
TDP-T8
TDP-S8
The above models are classified as green product (s) (*1), as indicated by the underlined serial number (s).
This Service Manual describes replacement parts for green product (s). When repairing any green product (s), use
the parts described in this manual and lead-free solder (*2).
For (*1) and (*2) , see the next page.
© TOSHIBA CORPORATION
FILE NO. 330-200601GR
Published in Japan, January 2006 GREEN
Advertisement
Table of Contents

Related Manuals for Toshiba TDP-T8


Summary of Contents for Toshiba TDP-T8
-
Page 1: Service Manual
This Service Manual describes replacement parts for green product (s). When repairing any green product (s), use the parts described in this manual and lead-free solder (*2). For (*1) and (*2) , see the next page. © TOSHIBA CORPORATION Published in Japan, January 2006 GREEN... - Page 2 Hazardous Substances. From July 1, 2006, the RoHS Directive will prohibit any marketing of new products containing the restricted substances. Increasing attention is given to issues related to the global environmental. Toshiba Corporation recognizes environmental protection as a key management tasks, and is doing its utmost to enhance and improve the quality and scope of its environmental activities.
- Page 3 Preface This manual is applied to S8 T8 T9 0.55” DMD SVGA (S8) and XGA (T8/T9) digital projection system. It’ s the mode of single Panel, 180 Watt Compact P-VIP Lamp and 800(H) x 600(V) (S8) and 1024(H) x 768(V) (T8/T9) and resolution. The manual gives you a brief description of basic technical information to help in service and maintaining the product.
-
Page 4: Table Of Contents
Table of Contents C h ap t e r 1 I nt r o du c t io n 1 - 1 Highlight Mechanical Specifications Electrical Specifications Optical Specifications Environmental Compatible Mode Chapter 2 Disassembly Process Equipment Needed Disassemble Lamp, Keypad Board, Top Cover and Front Cover Disassemble IR Sensor Board, Main Board, I/O Module, Speaker, Back Cover and Lamp Driver Disassemble Lamp Driver Module, LVPS, Thermal Sensor,... -
Page 5: Introduction
Chapter 1 Introduction T9/T8/S8 main different parts Parts \ Model MAIN BOARD T9 F/W Same as T9 S8 F/W DMD Chip 0.55 XGA 0.55 XGA(Same as 0.55SVGA Top Cover Bottom Cover Same as T9 Front Cover Same as T9 Rear Cover Same as T9 Lamp Cover Same as T9... -
Page 6: Mechanical Specifications
Item Description True 800X600 resolution, 16.7M True colors (S8) Resolution True 1024 X 768 resolution, 16.7M True colors (T8/T9) -With up, down, left, and right screen reverse -Build-in full screen NTSC/PAL/SECAM video capability with S-video / Composite / component through D-sub terminals -SXGA/XGA/SVGA/VGA/MAC compatibility. -
Page 7: Electrical Specifications
Item Description Lamp Door Lamp power supply shut off automatically when door open Protection 1-3 Electrical Specifications Item Description -Universal AC 100--240V~ 50 / 60 Hz with PFC input Power -200W Lamp @ normal operation Supply -Variance FAN speed control ( Depend on temperature vari- ance) Power -250 Watt +/- 10% at normal operation... -
Page 8: Optical Specifications
Item Description 14 languages selection: On-Screen English, François, German, Italiano, Espanol, Portuguese, Display Russian, Swedish, Turkism, Polish, Japanese, Simplify Chi- Menu nese, Traditional Chinese, Korea 1-4 Optical Specifications Item Description F# 2.7 – 3.0 @2.4m, f = 21.8 ~23.8mm @2.4m. Projection 1.10X Manual Zoom Lens. -
Page 9: Environmental
1-5 Environmental Item Description - Operating: 5 - 35°C Tempera- - Storage: -20- - 60°C ture If the lamp temp is too high, the warning message will appear. Maximum - Operating: 5 - 35°C, 80% RH (Max.), non-condensing Humidity - Storage: -20- - 60°C, 80%RH (Max.), non-condensing - Normal mode: 38 dB(A)(typical at 23 +/-2 degree C) Acoustic - Dim mode: 35 dB(A) (typical at 23 +/-2 degree C) -
Page 10: Compatible Mode
1-6 Compatible Mode Analog (S8/T8/T9) Compatibility Resolution V-Sync [Hz] H-Sync [KHz] 640x350 31.5 640x350 37.9 640x400 37.9 640x480 31.5 640x480 37.9 640x480 37.5 640x480 43.3 720x400 31.5 720x400 37.9 SVGA 800x600 35.2 800x600 37.9 800x600 48.1 800x600 46.9 800x600 53.7 1024x768 48.4 1024x768... -
Page 11: Disassembly Process
Chapter 2 Disassembly Process 2-1 Equipment Needed Item Photo Item Photo Screw Bit Sleeves (+) :107 Screw Bit Screw Bit (+) :102 (+) :101 Screw Bit (-) :101 S8 T8 T9... -
Page 12: Disassemble Lamp, Keypad Board, Top Cover And
2-2 Disassemble Lamp, Keypad Board, Top Cover and Front Cover Procedure Photo Loosen 2 screws to remove the Lamp Cover Loosen 2 screws to remove Lamp Module Lamp Cover Lamp Unscrew 1 screw and press the left tenon (A) on the lower cover first and then press the right one (B) on the lower cover to pull the... - Page 13 Procedure Photo Tear off the mylar first. Un- plug the FFC cable and un- screw 4 screws to remove Keypad Button, Enter Key and Keypad Board. Keypad Button Keypad Board FFC Cable Enter Key Keypad Cap Top Cover Unscrew 2 screws to re- move Top Cover Shielding.
- Page 14 Procedure Photo Unscrew 2 screws to re- move Lamp Plate. Lamp Iron Plate Unplug the red connector from Main Board, unscrew 1 screw and pull Buttom Cov- er outwards and pull forward Front Cover to remove it. Pull Front Cover S8 T8 T9...
- Page 15 Procedure Photo Take off the maylar first, unscrew 1 screw to remove IR Sensor Board. IR Sensor Board Push Push the three tenons to remove IR Lens and Front Cover. Front Cover S8 T8 T9...
- Page 16 Procedure Photo Unplug 8 connectors and unscrew 2 screws to sepa- rate Main Board and I/O Module from the unit.. Main Board I/O Module S8 T8 T9...
- Page 17 Procedure Photo Unscrew 2 screws and 4 hex screws to separate Main Board and I/O Module. Notice: Please re-attach EMI gasket to the position shown in the red circle again after replacing Main Board. Unscrew 2 screws to re- move Speaker Sponge and Speaker from EMI Shielding Back Cover.
- Page 18 Procedure Photo Push the tenons (in yel- low circle) to remove Back Cover from EMI Shielding Back Cover. Back Cover EMI Shielding Back Cover Unscrew 2 screws and un- plug 2 connectors to remove Lamp Driver Module. Lamp Driver Module S8 T8 T9...
-
Page 19: Disassemble Lamp Driver Module, Lvps, Thermal Sensor, Fan Module, Photo Sensor And Color Wheel
2-4 Disassemble Lamp Driver Module, LVPS, Thermal Sensor, Fan Module, Photo Sensor and Color Wheel Procedure Photo Unscrew 4 screws and unplug one connector to separate Lamp Driver from Lamp Driver Holder and the connector. Lamp Driver Module Unscrew 5 screws and un- plug 3 connectors to remove LVPS and AC Socket. - Page 20 Procedure Photo Unplug 2 connectors to remove 2 pin connector and 14 pin connector from LVPS. Unscrew 1 screw to remove Thermal Sensor Board. Thermal Sensor Board Unscrew 2 screws to re- move Fan Module. Fan Module S8 T8 T9 2-10...
- Page 21 Procedure Photo Unscrew 4 screws to break down Fan module. Unscrew 4 screws to re- move Lamp Cable and Limit Switch. Limit Switch Lamp Driver Cable Unscrew 1 screw to remove Photo Sensor. Photo Sensor S8 T8 T9 2-11...
- Page 22 Procedure Photo Unscrew 1 screw to remove Color Wheel. Note: be careful not to scratch Color Wheel while removing. Color Wheel S8 T8 T9 2-12...
-
Page 23: Disassemble Dmd Board, Dmd Chip, Thermal Switch, Focus Ring, Zoom Ring, Engine Module, Blower Fan And Elevator
2-5 Disassemble DMD Board, DMD Chip, Thermal Switch, Focus Ring, Zoom Ring, Engine Module, Blower Fan and Elevator Procedure Photo Unscrew 4 screws to re- move DMD Heatsink and DMD Heatsink Spring. Gasket DMD Heatsink DMD Heatsink Spring Unscrew 4 hex screws to remove DMD Module and DMD Board. - Page 24 Procedure Photo Assembly Notice: 1. Check if DMD pins are broken or tilted and if there is any rem- nant or dirt. 2. Please stick Thermal Pad in the middle of DMD socket (shown in red circle) and the edge of tape cannot touch DMD socket.
- Page 25 Procedure Photo Unscrew 1 screw to remove Thermal Switch. Thermal Switch Unscrew 3 screws to re- move Focus Ring Lightcut Mylar and Focus Ring. Focus Ring Focus Ring Lightcut Maylar Unscrew 2 screws to re- move Zoom Ring and Zoom Ring Holder.
- Page 26 Procedure Photo Unscrew 3 screws to re- move Projection Lens. Projection Lens Unscrew 1 screw to remove Lamp Lightcut Top. Lamp Lightcut Top Unscrew 4 screws to re- move Engine Frame. Engine Frame S8 T8 T9 2-16...
- Page 27 Procedure Photo Unscrew 4 screws to re- move Rod Fix Plate and then Rod can be removed. Rod Fix Plate Unscrew 3 screws to re- move Blower Fan Module. Blower Fan S8 T8 T9 2-17...
- Page 28 Procedure Photo Unscrew 1 screw to remove Elevator Foot Elevator Foot Remove 2 screws to re- move Elevator Module. Elevator Module Loosen 4 tenons (in yellow circle) to remove Bottom Cover Shielding. Bottom Cover Shielding Tear off EMI Bottom Gasket from Bottom Cover.
-
Page 29: Troubleshooting
Chapter 3 Troubleshooting Equipment Needed PC or pattern generator DVD player (Video, S-Video, Audio) Pattern generator: Quantum Data 802B or CHROMA 2327 After changing parts, check the below information. Adjustment Needed (after parts replacement & FW upgrade) For example, after replacing Main Board, you need to do ADC and Video Calibration, and adjust Color Wheel Index. -
Page 30: Main Procedure
Error Status Status \ Light TEMP POWER LAMP Remark Troubleshooting Standby ON(O) After 5 sec. Check: 1. Lamp: goto 2. Lamp Driver Standby 3. M/B Normal(Power ON) ON(O) Check: 1. Lamp Door 2. Limit Switch. Powering up Blink(G) Check: 1. Thermal Switch: 2. - Page 31 No Image \ No Display (but some LED is lit) Ensure that the signal cable and source work well. (If you connect multiple sources at the same time, use the “Input” button on the control panel to switch.) Ensure that all connectors are securely connected and aren’ t broken. Check Lamp Door (refer to LED Lighting Message) Check Limit Switch...
- Page 32 Color Abnormal Do “Reset” of the OSD Menu. Adjust Color Wheel Index (See Chapter 4 for Color Wheel Index Adjusment) Do PC on Video Calibration (See Chapter 4 for Video Calibration) Check Main Board Check DMD Board Check Color Wheel Poor Uniformity/Shadow Ensure the projection screen without dirt.
- Page 33 Function Abnormal Do “ Reset” of the OSD menu Check Main Board Check DMD board S8 T8 T9...
-
Page 34: Function Test And Alignment Procedure
Chapter 4 Function Test & Alignment Procedure Test Equipment IBM PC with XGA and SVGA resolution (Color Video Signal & Pattern Generator) DVD player with Local Video System HDTV Tuner or Source (480i/p, 576 i/p, 720p, 1080i), equipped with “S- Video”, “Component”, “Composite”... -
Page 35: Test Display Modes & Pattern
Test Display Modes & Pattern Function Test Display Pattern Item Test Content Pattern Specification Remark Eliminate visual wavy noise by Frequency & Tracking Fine Line Moire Rsync, Frequency or Tracking Figure 1 selection. Gray level should be Contrast/Brightness 64 RGBW scale distinguishable and without color Figure 2 abnormal. - Page 36 Figure 1. Fine Line Moire Figure 2. 64 RGBW Scale Figure 3. Red Pattern Figure 4. Green Pattern Figure 6. Full White Figure 5. Blue Pattern Figure 8. Gary 30 Pattern Figure 7. Full Black S8 T8 T9...
- Page 37 Figure 9. Blue 60 Pattern Figure 10. Text Pattern Figure 12. 94%white Figure 11. Boundary Frame Figure 13. Calibration Pattern S8 T8 T9...
-
Page 38: Inspection Procedure
Inspection Procedure Note: Do “Reset” in OSD menu before function test. Frequency and Tracking Test Signal : 1024x768@60Hz (T8/T9); 800x600@60Hz (S8) Test Pattern : Line Moire Pattern Check and see if image sharpness and focus are well performed. If not, readjust by following steps. Select “Frequency”... - Page 39 Calibration Pattern should be in full screen mode, white above and black below. DTV / HDTV Equipment : CHROMA 2327 or DVD player Test Signal : 480i, 480p, 720P, 1080i Please ensure the projector can display DTV/HDTV signal without color or image abnormal.
-
Page 40: Guide To Entering Factory Mode And Reset In Osd
Audio Please check and ensure the function of audio works well. (Volume, Treble, Bass, Mute) If not, please return the unit to repair area. Screen Uniformity Test Signal : 1024x768@60Hz (T8/T9); 800x600@60Hz (S8) Test Pattern : Full White Pattern Please check and ensure the unit is under the spec. Please check and see if it’... - Page 41 Reset in OSD After final QC step, we have to erase all saved change again and restore the factory defaults. Please enter the OSD mode to do the “Reset” then choose “YES” and press enter to see if it works. This action will allow you to erase all end-user’...
-
Page 42: Firmware Upgrade Procedure
Chapter 5 Firmware Upgrade Procedure 5-1 Equipment Needed Software : - DLP Composer Lite - Firmware (S8/T8/T9) (*.img file) Note: The FW upgrade procedure for T9/T8/S8 is the same. Here, we take S8 as an example. Hardware : Photo Item Photo Item Projector... -
Page 43: Installation Procedure
5-2 Installation Procedure 5-2.1 DLP Composer Lite Installation Procedure (Must use Ver. 4.1) Step Procedure Photo 1 DLP Choose "DLP Composer Composer Lite Lite v4.1 Setup" program. Installation file Next Click "Next" button. Next 1. Reading the "License Agreement" rules. 2. - Page 44 Step Procedure Photo Next 1. Click "Next" button. Next Click "Next" button. Finish Press "Finish" button. Reboot Click "Yes" button to reboot. S8 T8 T9...
- Page 45 5-3 Firmware Upgrade Procedure Step Procedure Photo Execute the "DLP TM" Composer file. Click "Edit" and "Preferences". 1. Select "Edit\Preferences\ Communications" and choose "Serial Port". 2. Click the serial port connected. Here we select COM1. 3. Press "Configure" 1. Make sure the setting is same as the left picture shows.
- Page 46 Step Procedure Photo 1. Choose "Flash Loader" 2. Click "Browse" to search the S8 Firmware. (*.img.file) 3. Select the item "Skip Boot Loader Area (load all but the first 16KB)." 1. If the firmware is ready, click "Start Download" to process the firmware upgrade.
- Page 47 Step Procedure Photo "Download After the firmware is Complete" successfully loaded, you will Message see "Download Complete" message and only the Power LED is lit (Standby Mode). (The FW upgrade will take about 6 minutes.) Unplug and re-plug the power cord of the projector. Checking Power on the projector and Firmware...
-
Page 48: Firmware Upgrade Procedure
Chapter 6 Firmware Upgrade Procedure I. Factory Mode Introduction Only functions concerning repair are introduced. Functions not introduced are reserved for engineering use. How to enter Factory Mode: Must be with signal input. Hot key: press “ON/STANDBY” “VOL-” “VOL-” “MENU” sequentially to enter Factory Mode. -
Page 49: Test Pattern
Test Pattern Select “Test Pattern” and then press “Enter” key to activate “Test Pattern” for function test. Color Wheel Index Select “Color Setting” and then press “Enter” key to Enter “Color Setting.” Choose “Color Wheel Index” and then the color wheel index can be adjusted by “Left” and “Right”... -
Page 50: Spare Part
23587882 LABEL, LAMP BREAK CAUTION TDP-T9 A005 23587883 LABEL, BOTTOM CAUTION TDP-T9 A006 23587884 LABEL, SPEC TDP-T9 A007 23587885 LABEL, SPEC TDP-T8 A008 23587886 LABEL, LAMP CAUTION TDP-T9 A009 23587887 LABEL, LAMP BOTTOM CAUTION TDP-S8 A010 23587888 LABEL, LAMP CAUTION TDP-S8... - Page 51 23587917 FOOT, ELEVATOR PC+ABS A013 23587918 COVER, TOP PC+ABS-CA07A TDP-T9 A014 23587919 COVER, TOP PC+ABS-CA08 TDP-S8 A015 23587920 COVER, TOP PC+ABS-CA07A TDP-T8 A016 23587921 COVER, BOTTOM PC+ABS-CA07 TDP-T9 A017 23587922 COVER, BOTTOM PC+ABS-CA08 TDP-S8 A018 23587923 COVER, FRONT PC+ABS-CA08 TDP-T9...
- Page 52 U004 23587958 PC BOARD ASSY, THERMAL SENSOR PD120 U005 23587959 PC BOARD ASSY, MAIN T9 XGA U006 23587960 PC BOARD ASSY, MAIN TDP-T8 XGA U007 23587961 PC BOARD ASSY, IR SENSOR TDP-T9 U008 23587962 PC BOARD ASSY, MAIN TDP-S8 SVGA...
- Page 53 T O S H I B A C O R P O R A T I O N 1- -1, SHIBAURA 1- - CHOME, MINATO - - KU, TOKYO 105 -- 8001, JAPAN...