Marantz SR3001 User Manual
Marantz user guide av surround receiver sr3001
Hide thumbs
Also See for SR3001:
- Specification sheet (2 pages) ,
- Service manual (83 pages) ,
- User manual (43 pages)
Table of Contents
Advertisement
Advertisement
Table of Contents

Related Manuals for Marantz SR3001


Summary of Contents for Marantz SR3001
- Page 1 Model SR3001 User Guide AV Surround Receiver...
-
Page 2: Important Safety Instructions
CAUTION RISK OF ELECTRIC SHOCK DO NOT OPEN CAUTION: TO REDUCE THE RISK OF ELECTRIC SHOCK, DO NOT REMOVE COVER (OR BACK) NO USER-SERVICEABLE PARTS INSIDE REFER SERVICING TO QUALIFIED SERVICE PERSONNEL The lightning flash with arrowhead symbol within an equilateral triangle is intended to alert the user to the presence of uninsulated “dangerous voltage”... - Page 3 Grounding or Polarization – This product m a y b e e q u i p p e d w i t h a p o l a r i z e d alternatingcurrent line plug (a plug having one blade wider than the other). This plug will fi...
-
Page 4: Table Of Contents
Your Marantz product has been prepared to comply • Do not obstruct the ventilation holes. with the household power and safety requirements that exist in your area. SR3001 can be powered by 120V AC only. COPYRIGHT 8 ins. (0.2 m) -
Page 5: Description
DESCRIPTION DTS-ES Extended Surround is a new multichannel digital signal format developed by Digital Theater Systems Inc. While offering high compatibility with DTS was introduced in 1994 to provide 5.1 channels of the conventional DTS Digital Surround format, DTS- discrete digital audio into home theater systems. ES Extended Surround greatly improves the 360- DTS brings you premium quality discrete multichannel degree surround impression and space expression... -
Page 6: Features
CD while remaining The SR3001 features a fully discrete 7 channel amplifi er completely compatible with the CD format. section capable of delivering 60 watts of high-current When listening to HDCD recordings, you hear more amplifi... -
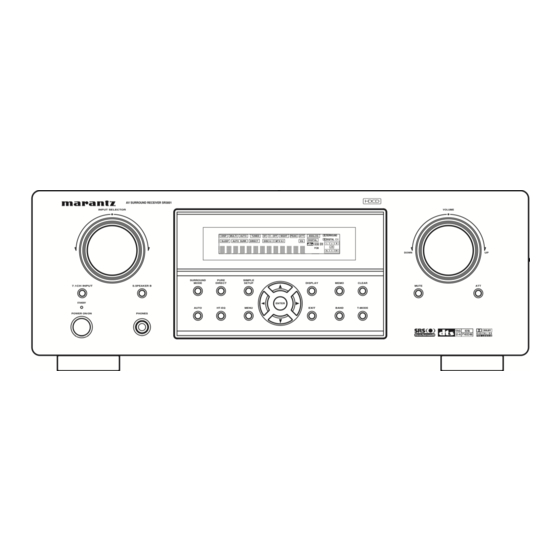
Page 7: Front Panel
FRONT PANEL o !0 AV SURROUND RECEIVER SR3001 INPUT SELECTOR DISP MULTI AUTO TUNED V – OFF NIGHT PEAK ANALOG DIGITAL SLEEP AUTO SURR DIRECT DISC 6.1 MTX 6.1 SURROUND PURE SIMPLE MODE DIRECT SETUP DISPLAY 7.1CH INPUT S. SPEAKER B... -
Page 8: Fl Display
HEADPHONE jack for stereo FL DISPLAY headphones This jack may be used to listen to the SR3001’s output through a pair of headphones. Be certain that the headphones have a standard 1 / 4" stereo phono plug. Note that the main room speakers will automatically be turned off when the headphone jack is in use. -
Page 9: Rear Panel
AC Power Cord (TV, DVD, VCR1, DSS/VCR2) Connect to an AC power outlet. SR3001 has to be powered by 120V AC only. 7.1 CHANNEL INPUT By connecting a DVD Audio player, SACD multichannel player, or other components that has a multichannel port, you can playback the audio with 5.1 channel or 7.1 channel outputs. -
Page 10: Remote Control Operation
FUNCTION AND OPERATION (when AMP mode is selected) The provided remote control unit is a universal Press to switch the power of the SR3001 ON or remote controller. The POWER button, numeric OFF after pressing the AMP button. buttons and control buttons are used in common across different input source components. -
Page 11: Programming The Remote Controller
OSD button Note: Important: This button is unavailable for SR3001. • Use the remote control buttons for programming, not the buttons of the receiver or other appliances. ¤4 • Some codes may be not match your equipment. In... -
Page 12: Operation Of Remote Control Unit
Close the cover until it clicks. GENERAL INFORMATION OF RC5500SR TO SR3001 To control the SR3001 by your RC5500SR, you have to select the device AMP or TUNER by pressing the function selector button. Please refer below for the details in AMP and TUNER mode. - Page 13 THE CONTRABLE FUNCTION TABLE POWER POWER POWER VCR1 DSS/VCR2 CALL UP MENU TUNER TAPE CDR/MD MENU AUX1 Cursor Cursor MAIN VOL. SLEEP MUTE VOL. ENTER MENU SETUP/T.TONE – ENTER SET UP/ MENU OFF MENU OFF – T.TONE PURE DIRECT AUTO NIGHT CSII EX/ES...
-
Page 14: Connections
Surround left and right speakers CONNECTIONS When the SR3001 is used in surround operation, the preferred location for surround speakers is on the side walls of the room, at or slightly behind the SPEAKER PLACEMENT listening position. The center of the speaker should face into the room. -
Page 15: Connecting Audio Components
Tape Deck OUT IN Analog Audio Digital Audio (coaxial) RC-5 AC IN VIDEO MONITOR VCR1 MONITOR MODEL NO. SR3001 MODEL NO. SR3001 Digital Audio (optical) 7.1CH INPUT DSS / VCR 2 MONITOR DIGITAL INPUT COMPONENT VIDEO SURROUND CENTER S. SPEAKER B Notes: •... -
Page 16: Connecting Video Components
Make component video connections to a TV or monitor with component inputs to produce higher quality video images. Use a component video cable or 3 video cords to connect the component video out jacks on the SR3001 to the monitor. Notes: VIDEO VIDEO... -
Page 17: Advanced Connecting
Therefore you only need to aim the remote at one unit. Also, if a Marantz power amplifi er (some models excluded) is connected to one of these terminals, the power amplifier’s, power switch is synchronized with this unit’s power switch. -
Page 18: Connecting The Antenna Terminals
Put it as far away as RC-5 AC IN possible from the unit, televisions, speaker cables, VIDEO and power cords. MODEL NO. SR3001 MODEL NO. SR3001 If you experience poor reception quality, an outdoor antenna may improve the quality. DSS / VCR 2 MONITOR... -
Page 19: Setup
After all components are connected, initial setup must be performed. SETUP MENU SYSTEM The SR3001 incorporates an menu on the front display, which makes various operations possible by using the cursor (3, 4, 1, 2) and ENTER buttons. ENTER THE DESIRED MENU ITEM OF THE SETUP MENU 3. -
Page 20: Simple Setup
NONE SMALL NONE NONE • DIG.1 to DIG.3 : Digital FIXED mode NONE NONE The SR3001 chooses a digital input regardless of a NONE NONE NONE input signal from the selected source. NONE NONE NONE •... -
Page 21: Speaker Setup
• The TUNER is fi xed to the analog input, and can not be selected for any digital input. 2. SPEAKER SETUP After you have installed the SR3001, connected all the components, and determined the speaker layout, it is now time to perform the settings in the Speaker Setup menu for the optimum sound acoustics for your environment and speaker layout. - Page 22 This is important for the timing of the acoustics to 1.0 foot interval (0.3 to 9 meters in 0.3-meter intervals). create the proper sound space that the SR3001 and SL&SR: today’s sound systems are able to produce. Set the distance from the surround left and right Note that the speakers that you selected “None”...
- Page 23 ENTER button to return the previous “2-2. Speakers Distance” setup. If you select “MANUAL”, adjust the output level of each speaker as follow. 1. 3. 5. 1. 5. 1. 2. 5. AV SURROUND RECEIVER SR3001 INPUT SELECTOR SURROUND DISP MULTI AUTO TUNED V –...
-
Page 24: Preference
MENU by pressing the ENTER button. 1. 4. 3. 4. 2. 4. Or press the 1 or 2 cursor button to select “EXIT” then press the ENTER button to exit the D RECEIVER SR3001 SETUP MENU. SURROUND DISP MULTI AUTO TUNED V –... -
Page 25: Pl Ii (Dolby Pro Logic Ii ) Music Parameter
MUSIC PARAMETER Pro Logic II-Music mode creates a rich and enveloping surround ambience from stereo sources such as CDs. In this mode, SR3001 includes three controls to fi ne- tune the soundfi eld as follows. 1. 3. 5. 2. 5. -
Page 26: Basic Operation (Play Back)
BASIC OPERATION Example : AUTO SURROUND (PLAY BACK) SELECTING AN INPUT SOURCE Before you can listen to any input media, you must fi rst select the input source on the SR3001. 7.1CH INPUT Example : DVD STANDBY POWER ON/OFF AV SURROUND RECEIVER SR3001... -
Page 27: Surround Mode
2 MODE SURROUND MODE (Dolby Digital, Pro Logic IIx MOVIE, Pro Logic IIx The SR3001 is equipped with many surround modes. MUSIC, Pro Logic IIx GAME, Pro Logic) These are provided to reproduce a variety of surround This mode is used with source materials encoded in sound effects, according to the content of the source Dolby Digital and Dolby Surround. - Page 28 DTS source signals Digital, Dolby Pro Logic or DTS. from certain CD players and LD players even if you connect the player to the SR3001 digitally. This is because the digital signal has been processed STEREO (such as the output level, sampling frequency, This mode bypasses all surround processing.
- Page 29 The surround mode is selected with the surround AUTO mode selector on SR3001 or the remote control unit. However, the sound you hear is subject to the relationship between the selected surround mode and input signal. That relationship is as follows;...
-
Page 30: Other Function
LISTENING THROUGH HEADPHONES OTHER FUNCTION This jack may be used to listen to the SR3001’s output through a pair of headphones. Be certain that the ATTENUATION TO ANALOG INPUT SIGNAL headphones have a standard 1/4" stereo phono plug. (Note that the speakers will automatically be turned off... -
Page 31: Recording An Analog Source
You can add the sound from one source to the In normal operation, the audio or video source video of another source to make your own video selected for listening through the SR3001 is sent to recordings. the record outputs. -
Page 32: 7.1 Ch Input Level
• The condition of these setup will be memorized to 7.1CH INPUT source. MENU STRUCTURE of 7.1CH INPUT LEVEL setup 7.1-L 7.1-C 4. 5. 2. 5. 7.1-R D RECEIVER SR3001 7.1-SR DISP MULTI AUTO TUNED V – OFF NIGHT PEAK... -
Page 33: Basic Operation (Tuner)
MENU SYSTEM REMOTE CONTROLLER RC 00SR To select tuner and desired band (FM or AM), AV SURROUND RECEIVER SR3001 press the TUNER button twice within two INPUT SELECTOR seconds on the remote. Press the F.DIRECT on the remote, display will 7.1CH INPUT... - Page 34 Note: To clear all stored preset stations, press and hold the CLEAR and the ENTER buttons for two seconds. SORTING PRESET STATIONS SET UP/ MENU OFF T.TONE AV SURROUND RECEIVER SR3001 INPUT SELECTOR PURE DIRECT AUTO NIGHT CSII EX/ES VIRTUAL...
-
Page 35: Surround Speaker B System
The Surround Speaker B system is a function which allows you to listen to the same source in a room other than the room in which the SR3001 is located. The operations possible with the Surround speaker function are explained briefl y below. -
Page 36: Troubleshooting
If your trouble cannot be recovered with the remedy actions listed in the following table, malfunction of the internal circuitry is suspected; immediately unplug the power cable and contact your dealer, nearest Marantz authorized dealer or the Marantz Service Center in your country. -
Page 37: Technical Specifications
PHONES Should the operation or display seem to be abnormal, reset the unit with the following procedure. The SR3001 is turned on, press and hold the 7.1CH INPUT and ATT buttons simultaneously for 3 seconds or more. Remember that the procedure will reset the settings... - Page 38 Luxman ... 0120 Classic ... 0324 LXI ... 0332 Fisher ... 0352 Magnavox ... 0184, 0332 Harman/Kardon ... 0229 Marantz ... 0999, 0056, 0184 JVC ... 0321 MCS ... 0056 Kenwood ... 0999 Miro ... 0027 Marantz ... 0999 Mission ... 0184 Philips ...
- Page 39 LXI ... 0074, 0081, 0181, 0183, 0205 Changhong ... 0792 Magnavox ... 0081, 0057, 1481, 0733, 1281 Citizen ... 0087, 0057, 0119 Marantz ... 0081, 0057, 1581, 0731 Clarion ... 0207 Matsushita ... 0277, 0677 Contec ... 0207 Megatron ... 0205, 0172 Craig ...
- Page 40 Shogun ... 0267 Koss ... 0678 Sonic Blue ... 0643 Magnavox ... 0530, 0848 Sony ... 0062, 0059, 0060, 0027, 1259, 0663 Marantz ... 0566 STS ... 0069 Memorex ... 0722 Sylvania ... 0062, 0108, 0027, 0070, 1808 Microsoft ... 0549 Symphonic ...
- Page 41 You can find your nearest authorized distributor or dealer on our website. is a registered trademark. Printed in China 09/2006 00M23CW851250 ecmf-e...