Central Boiler CL 4030 Owner's Manual
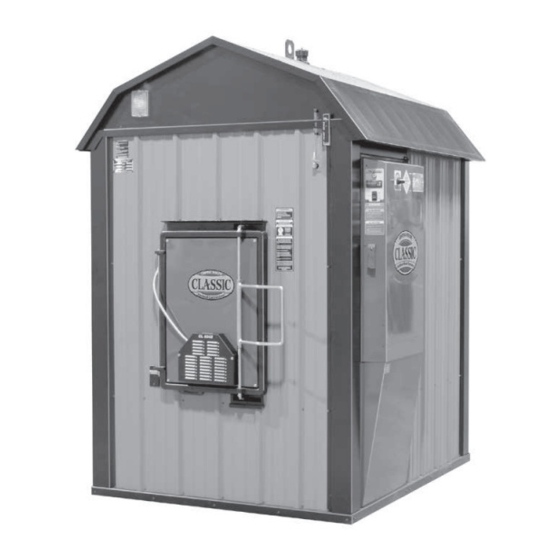
Classic
Hide thumbs
Also See for CL 4030:
- Owner's manual (52 pages) ,
- Owner's manual (52 pages) ,
- Owner's manual (52 pages)
Table of Contents
Advertisement
OUTDOOR WOOD FURNACE
OWNER'S MANUAL
For parts and accessories, service or repairs, call your authorized Central Boiler dealer or heating
contractor. Record the information below for future reference.
Model
Dealership Name
Owner Name
Tested &
Portland
Listed By
Oregon USA
US
OMNI-Test Laboratories, Inc.
117-S-12-2 & 117-S-16-4
Serial Number
Dual Fuel Models
CL 4030
CL 5036
CL 6048
CL 7260
Installation Date
Phone Number
Save This Manual
For Future Reference
(p/n 9000167 REV.A) - 27-Jan-14
Advertisement
Table of Contents

Related Manuals for Central Boiler CL 4030


Summary of Contents for Central Boiler CL 4030
- Page 1 Dual Fuel Models CL 4030 CL 5036 CL 6048 CL 7260 For parts and accessories, service or repairs, call your authorized Central Boiler dealer or heating contractor. Record the information below for future reference. Model Serial Number Installation Date Dealership Name...
- Page 2 20502 160th Street Greenbush, MN 56726 www.CentralBoiler.com The Central Boiler Classic Dual Fuel models models CL 4030, CL 5036, CL 6048 and CL 7260 are OMNI tested and listed. French Owner's Manual and decal set available upon request from your dealer.
-
Page 3: Table Of Contents
PARTS LISTING, CL 4030 DR ........ -
Page 4: Introduction
INTRODUCTION Foreword Labeling and Terminology The outdoor furnace and this owner's manual use the This manual and the accompanying gas or fuel oil burner Operator's Manual (if the furnace is supplied with a following terms and symbols to bring attention to the burner) are to be used as a guideline for installation, presence of hazards of various risk levels and important operation, and maintenance of the Classic Dual Fuel... -
Page 5: Important Precautionary Information
IMPORTANT PRECAUTIONARY INFORMATION The information contained on pages 5-6 appears throughout this manual. Be sure to read carefully and understand these precautions before, during and after the installation, operation and maintenance of the outdoor furnace. CAUTION WARNING This outdoor furnace is not intended to be the only Allow the outdoor furnace to thoroughly cool and source of heat. - Page 6 IMPORTANT PRECAUTIONARY INFORMATION The information contained on pages 5-6 appears throughout this manual. Be sure to read carefully and understand these precautions before, during and after the installation, operation and maintenance of the outdoor furnace. WARNING NOTE: Chloride or sulfurous gases can be generated if plastic or rubber is burned and will Maintain the following clearances from mix with the moisture from the wood and form...
-
Page 7: Section 1 - Outdoor Furnace Installation
In higher populated areas, extend the chimney to a owner's manual. height above the roofs of surrounding buildings. Use Central Boiler Chimney Extensions when extending the If any installation questions arise that cannot be chimney. Each extension section must be secured at the... -
Page 8: General Installation Information
Fig. 3 The installation of a spark arrester is recommended, Fig. 4 particularly where there are dry conditions or where there is combustible material near the unit, unless the installation of a spark arrester is prohibited by local requirements. Use common sense to avoid potential fires, including exercising caution when disposing of ashes, cleaning and refueling. -
Page 9: Potable Water
To prevent potential problems, do not water well. use propylene glycol that is premixed with unknown inhibitors. Central Boiler Corrosion Inhibitor Plus (p/n Shut-Off Valves Shut-off valves must be installed on each hot supply 1650) is compatible with straight propylene glycol. It is... -
Page 10: Supply And Return Lines
Before digging, be sure to call for utility locator lines from the outdoor furnace to where the supply and service. return lines will connect to the existing heating system. Central Boiler recommends using the ThermoPEX ® The trench depth for ThermoPEX should be between piping system. -
Page 11: Auxiliary Burner
Standard for Controls and Safety Devices for Automatically Fired Boilers, ANSI/ASME CSD-1. Each optional burner is accompanied by Central Boiler instructions and the manufacturer's instructions which provide the information for proper installation, setup, adjustment and service. -
Page 12: Access To Ports On Outdoor Furnace
Access to Ports on Outdoor Furnace 3- Pump Configuration (Taco 007) The upper ports are the hot supply outlets and the lower Fig. 10 ports are the return inlets. This configuration allows for mounting the circulation pumps on the outdoor furnace. Fig. -
Page 13: Installing Circulation Pumps
Fig. 13 NOTE:Be sure to insulate around the pump(s) and water lines. © 2007 Central Boiler Installing Circulation Pumps NOTE: If installing three pumps on the outdoor The following guidelines must be adhered to when furnace, use a UL approved adapter on the installing the circulation pump(s). -
Page 14: Shut-Off Valves
For example, if the outdoor furnace is 20 feet from the © 2007 Central Boiler building and pumping water through one-inch pipes, a heat exchanger, and back to the outdoor furnace, the Fig. -
Page 15: Thermostatic Valves
NOTE: For additional thermostatic valves, or heat emitter(s). for 1-1/4" thermostatic valves, contact your authorized Central Boiler dealer. It is recommended that the water temperature setpoint of the furnace be set to 185˚F (85˚C) to decrease the NOTE:... - Page 16 Section 1 - Furnace Installation...
-
Page 17: Purging Air From The System - Manual Air Bleeders
Purging Air from the System - Manual Air WATER HEATER INSTALLATION Bleeders WARNING Manual air bleeders may be installed in the high points DO NOT disable or remove any safety reliefs or of the water lines where air may get trapped and cause controls. -
Page 18: Existing Forced Air Installation
• The lower fitting is the inlet/hot supply from the EXISTING FORCED AIR INSTALLATION outdoor furnace and the top fitting is the outlet/ When the Classic Dual Fuel Outdoor Wood Furnace return back to the outdoor furnace. is installed in conjunction with an existing forced air system, a water-to-air heat exchanger is mounted in the •... - Page 19 Fig. 24 Section 1 - Furnace Installation...
- Page 20 Fig. 25 Section 1 - Furnace Installation...
-
Page 21: Thermostatic Controls
2. An alternative method is to install a line voltage Thermostatic Controls thermostat to control the blower on the forced air There are several methods for installing thermostatic controls for this type of installation. furnace. In this installation, a 120-volt line is run from the thermostat to the forced air furnace. -
Page 22: Heating Multiple Zones Or Buildings
Models with side panels offer three sets of supply and HEATING MULTIPLE ZONES OR BUILDINGS return ports (for up to three zones or buildings, without A single pump and manifold may be used to heat more than one zone as long as the return water can be the need for manifolds) for mounting of up to three maintained above 150°F. -
Page 23: Hydronic Installations
If the existing heating system is marginal or designed HYDRONIC INSTALLATIONS to operate with water temperatures above 165°F, there NOTE: It is recommended that the circulation are alternative installation procedures that will make pump in all hydronic systems be located in the the existing system work very well with the outdoor hot supply line, not in the return line (see Fig. -
Page 24: Pressurized Water System Installations
The addition of a wraparound pump with a water-to- Pressurized Water System Installations water heat exchanger (see Fig. 29) may increase heat Water-to-Water Heat Transfer System transfer by allowing circulation continuously through To keep the existing system pressurized, a plate the existing boiler and heat exchanger. -
Page 25: Vented System Installation
It is very important to eliminate all air and water leaks Vented System Installation The Classic Outdoor Wood Furnace may be connected (valve packings, bleeders, etc.) and purge all air from the existing system. directly into an existing hot water system, changing it to an atmospheric vented system. -
Page 26: Direct Circulation Baseboard Installation
Fig. 31 and 32 illustrate direct circulation baseboard Direct Circulation Baseboard Installation installation examples. Baseboard heaters, as either the main source of heat or as supplements to forced-air or boiler applications are easily plumbed into the water lines from the outdoor furnace. -
Page 27: Radiant Floor System Installations
Soil/Sand Barrier Insulation Insulation Slab on grade Slab Plate Ground Level Insulation Wire Poly Vapor Mesh Barrier Footing ® 2" Blueboard Styrofoam Soil/Sand is recommended (minimum ® of 1" Blueboard Styrofoam © 2013 Central Boiler Section 1 - Furnace Installation... - Page 28 Fig. 34 Fig. 35 Section 1 - Furnace Installation...
- Page 29 Fig. 36 Fig. 37 Section 1 - Furnace Installation...
-
Page 30: Pool And/Or Hot Tub Heating
WARNING Pool and/or Hot Tub Heating Valves should be installed so the heat exchanger can be Do not use automotive or ethylene glycol isolated and bypassed when shock-treating or adding antifreeze in an outdoor furnace connected to chemicals to a pool or hot tub (Fig. 38). Incorrect a swimming pool heat exchanger as a damaged chemical concentrations can cause rapid corrosion to heat exchanger may cause severe personal... -
Page 31: Finalizing The Installation
4. Cover Supply and Return Lines. Backfill the FINALIZING THE INSTALLATION Before firing the outdoor furnace for the first time, trench for the supply and return lines. Enclose the perform the following important steps: area where the supply and return lines enter the outdoor furnace. - Page 32 12. Refer to Firing the Outdoor Furnace to start the NOTE: Be sure to fill the outdoor furnace with outdoor furnace. Cycle the furnace several times water of good quality (softened water, if possible). to ensure proper operation. Do a functional test of See Water Quality and Maintenance section.
-
Page 33: Section 2 - Operating Instructions
SECTION 2 – OPERATING INSTRUCTIONS Fig. 41 • Increased moisture in the firebox can result in Wood Selection and Preparation corrosion. For the best results, it is best to burn seasoned split wood. However, it may be possible to burn some unsplit •... -
Page 34: Firing The Furnace
A reading of 212°F or above indicates either a low-water FIRING THE FURNACE condition or a malfunctioning temperature controller NOTE: Before firing the outdoor furnace for or snap disc (unless the door is open or not sealing the first time, make sure the proper amount of properly). -
Page 35: Cleaning And Inspecting
Fig. 43 Fig. 44 WARNING When adding wood to the firebox, be careful not to get pinched between the wood and the door frame or any part of the outdoor furnace. Use extreme care with large pieces of wood that may be difficult to handle. -
Page 36: Modes Of Operation
Central Boiler. For specific operating instructions PELLETS/CORN position. not included in this manual, refer to those instructions. A safety interlock switch is built into the firebox door... -
Page 37: Section 3 - Maintenance Instructions
SECTION 3 – MAINTENANCE INSTRUCTIONS SERVICE INTERVAL Section 3 - Maintenance Instructions... -
Page 38: Routine Maintenance
CAUTION 3-4. Stir Ash Stir the ashes in the firebox and pull them forward Use only genuine Central Boiler Parts and to prevent the ashes from sealing in moisture on the Accessories if it ever becomes necessary to bottom and along the edges. It is especially important to replace any component of the outdoor furnace. - Page 39 4. Inspect the door casting and heat shields. If the door WARNING casting is not cracked through or broken, allowing When cleaning the outdoor furnace, be careful not air to leak in, the door casting should not need to to spill any hot ash outside of the noncombustible be replaced.
-
Page 40: Water Quality And Maintenance
An important part of furnace maintenance is controlling the quality of the water in the furnace. Central Boiler outdoor furnace may be filled with this water. supplies a pH tape and a nitrite test kit with each new 4. -
Page 41: System Maintenance
3. Dip the pH test strip from the test kit in the water CAUTION sample. Shake excess water off the test strip. Completely clean out the firebox before draining Compare the color of the test strip to the chart water from the outdoor furnace. provided to determine pH level. -
Page 42: Post Heating Season Maintenance
POST HEATING SEASON MAINTENANCE Fig. 47 The water should be left in the outdoor furnace if the outdoor furnace is not being used for an extended period of time. Check pH and nitrite levels as described in the Water Quality and Maintenance section. 1. -
Page 43: Section 4 - Owner Serviceable Items
Labor is not covered. Make sure the firebox door seal rope is not stretched NOTE: Use only genuine Central Boiler parts as it is pressed into the corners. Force the firebox and accessories if it ever becomes necessary to door seal rope out to fill in the corners as shown in replace any component on the outdoor furnace. -
Page 44: Temperature Controller
• To test the solenoid with a multimeter, turn the 4. While supporting the solenoid with your hand, Power Disconnect Switch to the OFF position and remove the top two solenoid mounting screws and refer to Testing Solenoid. loosen the bottom two. •... -
Page 45: Water Temperature Sensor
WARNING TESTING WATER TEMPERATURE SENSOR 1. Disconnect the electrical power at the main power Do not attempt service inside the electrical source to the outdoor furnace; then open the control control panel without first disconnecting the panel door. Remove the screws securing the access electrical power at the main power source. -
Page 46: Section 5 - Troubleshooting
If this condition is suspected, power to the pump. Close valves at the pump. contact your Central Boiler dealer. Disassemble the pump and try to turn the pump shaft. If the shaft is stuck, replace the pump cartridge. - Page 47 Corrosion Inhibitor Plus™ (p/n 1650) and fresh water. CONTACT A QUALIFIED CENTRAL BOILER DEALER FOR FURTHER ASSISTANCE OR TO SCHEDULE A SERVICE CALL. Section 5 - Troubleshooting...
-
Page 48: Section 6 - General Information
SECTION 6 – GENERAL INFORMATION Make note of these precautionary statements also found on the furnace. NOTICE Ensure firebox draft is a minimum of -.02" water column in all modes of operation. When using the fuel oil option, for proper operation use either #1 or #2 fuel oil of the proper viscosity for the ambient temperature of the power burner. -
Page 49: Parts Listing, Cl 4030 Dr
PARTS LISTING, CL 4030 DR 4283 (2) 10853-011 6500002 (2) 10854-011 Sight Gauge 6751 6146 10882 7632 5032 4279 6725 812 (.75) 4283 (2) 10792 10792 4283 (3) 3033 4278 (3) 6509 6510 DF Temp Cover 6808 6835 Burner Tube Assembly... -
Page 50: Parts Listing, Cl 5036 Dr
445 (2) 5328 2500053 6514 4318 2500020 10529(4) 5230 6059-011 (2) 5357 5962(4) 4707 5924 5270 6234 5063 5062 4238 5923 Door Handle Door Rope Door Switch Bushing Kit - 10785 5220 © 2013 Central Boiler Section 6 - General Information... -
Page 51: Parts Listing, Cl 6048 Dr
5116 6650 5776 6500 6650 6058-011 (2) 5775 3667 4626 6501 5328 10529(4) 6514 5358 4184 5962 (4) 445 (2) 5271 2500053 4708 6234 2500020 Door 4238 Rope Door 5220 Switch © 2013 Central Boiler Section 6 - General Information... -
Page 52: Parts Listing, Cl 7260
5775 3667 5065 4626 5719 2000137 6501 5328 7595 1005 (2) 6514 5962 (4) 5973 1106 4184 2000165 445 (2) 6942 2500053 6234 4238 5718 Door Door Switch Rope 5996-011 1200042-005 © 2013 Central Boiler Section 6 - General Information... -
Page 53: Furnace Measurements
FURNACE MEASUREMENTS Section 6 - General Information... -
Page 54: Wiring Diagrams
WIRING DIAGRAMS Fig. 53 Section 6 - General Information... - Page 55 INSPECTION RECORD Date Inspection Performed Date Inspection Performed...
-
Page 56: 1-Year Limited Warranty
Central Boiler is not liable for damage or repairs required as a consequence of faulty installations or applications by others or any event of force majeure. Central Boiler is not liable for incidents or accidents which can be prevented by the owner or that occur from the operation of the outdoor furnace. A backup heating system should be in place to prevent damage in case of failure to refuel the outdoor furnace or mechanical failure of the outdoor furnace or system occurs.