Table of Contents
Advertisement
Quick Links
Advertisement
Table of Contents

Related Manuals for KitchenAid KMCX4510


Summary of Contents for KitchenAid KMCX4510
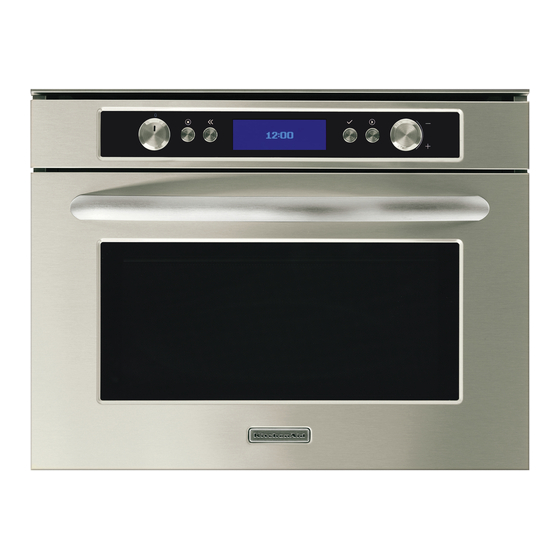
- Page 1 Instructions for use...
-
Page 3: Table Of Contents
Important information Safeguarding the environment Before first use Important safety instructions Important precautions After sales service Accessories Probe placing Start protection Key lock Doneness (auto functions only) Messages Cooling down Shortcuts On/Off Changing settings Continuos cooking Delayed start Kitchen timer Cook and reheat with microwaves Jet start Rapid pre-heat... -
Page 4: Important Information
Important information BEFORE MOUNTING Do not operate this appliance if it has a damaged mains cord or plug, if it is not working This appliance complies to current safety properly, or if it has been damaged or dropped. Do standard. not immerse the mains cord or plug in water. -
Page 5: Safeguarding The Environment
Safeguarding the environment Disposing of packaging • By ensuring that this product is disposed of • The packing material can be 100% recycled as correctly, you will help prevent potentially confirmed by the recycling symbol negative consequences for the environment and •... -
Page 6: Important Safety Instructions
Important safety instructions READ CAREFULLY AND KEEP FOR FUTURE Do not use your microwave oven for heating REFERENCE anything in airtight sealed containers. The pressure increases and may cause damage when opening or Do not heat, or use flammable materials in or may explode. -
Page 7: Important Precautions
Important precautions GENERAL After heating baby food or liquids in a baby bottle or in a baby food jar, always stir and check the This appliance is designed for domestic use only! temperature before serving. This will ensure that the The appliance should not be operated without heat is evenly distributed and the risk of scalding or food in the oven when using microwaves. -
Page 8: After Sales Service
After sales service Before contacting the Customer Care Centre: 1. Try to solve the problem yourself based on the descriptions given in the "Troubleshooting guide". 2. Turn the appliance off and restart it to see if the fault persists. If after carrying out the above checks, the fault persists, contact the Customer Care Centre. Please give: •... -
Page 9: Accessories
Accessories GENERAL GLASS DRIP TRAY Ensure that the utensils you use are oven proof Use the glass driptray beneath the wire shelf and allow microwaves to pass through them before when using the Grill or cooking. Grill and Microwaves in combination. -
Page 10: Probe Placing
Probe placing 1. Place the CHICKEN temperature probe in When the probe is used the food while it is still to roast chicken, the tip on the kitchen counter. should be positioned in the fleshiest part of the chicken, i.e. on the inside of the thigh just behind the leg. -
Page 11: Start Protection
Start protection The start protection function is activated one minute after the oven has returned to "stand by mode". The door must be opened and closed e.g. putting food into it, Safety Lock is activated close door and press before the safety lock is released. Key lock 19:30 1. -
Page 12: Doneness (Auto Functions Only)
Doneness (auto functions only) Doneness is available in most of the auto This is done by selecting a doneness level with functions. You have the possibility to personally the Up & Down buttons before pressing the Start control the end result through the Adjust doneness button. -
Page 13: Cooling Down
Cooling down When a function is finished, the oven may carry out a cooling 180°C 35:00 procedure. This is normal. After this procedure the oven TEMPERATURE COOK TIME switches off automatically. Oven is Hot! If the temperature is higher than 100°C, the current cavity --:-- END TIME temperature is displayed. -
Page 14: On/Off
On/Off The appliance is turned ON or OFF using the On/Off button or simply by turning the Multifunction Knob. When the appliance is turned ON, all buttons & knobs function normally and the 24 hour clock is not displayed. When the appliance is turned OFF. The 24 hour clock is displayed. Note: The oven behavior may differ from the above described, depending on the ECO function being turned ON or OFF (see ECO for more information). -
Page 15: Clock Setting
Clock setting Brightness Time Volume Appliance and display settings 1. Turn the adjust knob until Time is displayed. 2. Press the ok button. (The digits flicker). 3. Turn the adjust knob to set the 24 hour clock. 4. Press the ok button again to confirm the change. Turn +/- to set time, to confirm The clock is set and in operation. - Page 16 Brightness Volume Brightness Eco Mode Appliance and display settings 1. Turn the adjust knob until Brightness is displayed. High 2. Press the ok button. Medium 3. Turn the adjust knob to set the level of brightness suitable to your preference. For normal living conditions 4.
-
Page 17: Continuos Cooking
During cooking Once the cooking process has been started: The time can easily be increased in 30-second steps by pressing the Start button. Each press increases the time with 30 seconds. You may also Turn the Adjust Knob to increase or decrease the time. -
Page 18: Delayed Start
Delayed start Use this function when you need to have the cooking finished at a specific time. The oven needs to know the desired cooking duration and the time of day when the food should be ready. 1. Follow the setting procedure for the function DELAYED START WORKS WITH THESE you wish to use and stop when the cooking FUNCTIONS... -
Page 19: Cook And Reheat With Microwaves
Cook and reheat with microwaves Microwave 1. Turn the multifunction knob until Microwave is shown. 750W 00:05 2. Turn the adjust knob to set the cooking time. POWER COOK TIME Microwave 3. Press the OK button to confirm your setting. 4. -
Page 20: Jet Start
Jet start 900 W 03:00 POWER MM:SS Cooking 19:03 END TIME 1. Turn the multifunction knob until Microwave is shown. 750W 00:05 POWER COOK TIME 2. Press the on / off button. Microwave 3. Press the start button to automatically start with full 19:00 microwave power level and the cooking time set to 30 END TIME... -
Page 21: Rapid Pre-Heat
Rapid pre-heat Rapid Preheat 1. Turn the multifunction knob until you find 180°C the Rapid Pre-heat function. TEMPERATURE 2. Turn the adjust knob to set the temperature. Rapid Preheat 3. Press the start button. 180°C TEMPERATURE Preheating Use this function to preheat the empty oven. Preheating is always done with the oven empty just like you would in a conventional oven before cooking or baking. -
Page 22: Conventional
Conventional Conventional 1. Turn the multifunction knob to the Conventional position. Conventional + MW 2. Press the ok button to confirm your selection. Conventional 3. Turn the adjust knob to set the temperature. 4. Press the OK button to confirm your selection. For baked food such as cookies, cakes and rolls 5. -
Page 23: Conventional + Mw
Conventional + MW Conventional 1. Turn the multifunction knob to the Conventional position. 2. Turn the adjust knob to the Conventional + MW position. Conventional + MW 3. Press the OK button to confirm your selection. Conventional 4. Turn the adjust knob to set the cooking time. For baked food such as fruit cakes and tin bread 5. -
Page 24: Grill
Grill Grill Functions For food like cheese toast, steaks and sausages, place the Turbo Grill + MW food on the Wire rack Grill 1. Turn the multifunction knob to the Grill position. Grill + MW 2. Press the ok button to confirm your selection. To quickly give food a brown surface 3. -
Page 25: Grill + Mw
Grill + MW Grill Functions 1. Turn the multifunction knob to the Grill position. Grill 2. Turn the adjust knob to the Grill + MW position. Grill + MW 3. Press the OK button to confirm your selection. Turbo Grill 4. -
Page 26: Turbo Grill
Turbo grill Grill Functions 1. Turn the multifunction knob until Grill is shown. Grill + MW 2. Turn the adjust knob until Turbo Grill is shown. Turbo Grill Turbo Grill + MW 3. Press the OK button to confirm your selection. For food such as vegetables and fruit crumbles 4. -
Page 27: Turbo Grill + Mw
Turbo Grill + MW Grill Functions 1. Turn the multifunction knob until Grill is shown. Turbo Grill 2. Turn the adjust knob until Turbo Grill + MW is shown. Turbo Grill + MW 3. Press the OK button to confirm your selection. Grill 4. -
Page 28: Forced Air
Forced Air Forced Air Functions 1. Turn the multifunction knob until you find the Forced Air Forced Air + MW position. Forced Air 2. Press the OK button to confirm your selection. 3. Turn the adjust knob to set the temperature. To cook pastry, cakes, poultry and roast meats 4. -
Page 29: Forced Air + Mw
Forced Air + MW Forced Air Functions 1. Turn the multifunction knob until you find the Forced Air position. Forced Air + MW 2. Turn the adjust knob until you find the Forced Air + MW is Forced Air shown. To bake, roast and cook fresh and frozen.. -
Page 30: Special - Keep Warm
Special - Keep warm Special 1. Turn the multifunction knob to the Special position. Dough Proving 2. Turn the adjust knob to the Keep Warm position. Keep Warm 3. Press the OK button to confirm your selection. For maintaining serving temperature 4. -
Page 31: Special - Dough Proving
Special - Dough proving Special 1. Turn the multifunction knob to the Special position. 2. Turn the adjust knob to the Dough Proving position. Dough Proving Keep Warm 3. Press the ok button to confirm your selection. For proving your dough 4. -
Page 32: Auto Reheat
Auto Reheat Automatic 1. Turn the multifunction knob to the Automatic position. Rapid Defrost 2. Turn the adjust knob to the Auto Reheat position. Reheat 3. Press the ok button to confirm your selection. For reheating ready-made food 4. Turn the adjust knob to select food class. 5. - Page 33 Auto Reheat When you are saving a meal in the refrigerator Always cover food when using this function or "plating" a meal for reheating, arrange the except when reheating chilled soups in which case thicker, denser food to the outside of the plate and a cover is not needed! the thinner or less dense food in the middle.
-
Page 34: Rapid Defrost
Rapid Defrost Automatic 1. Turn the multifunction knob to the Auto position. Reheat 2. Turn the adjust knob to the Rapid Defrost position. Rapid Defrost Recipes 3. Press theokbutton to confirm your selection. For defrosting 5 types of food 4. Turn the adjust knob to select the type of food you want to defrost. - Page 35 FROZEN FOODS: If the food is warmer than deep-freeze temperature (-18°C), choose lower weight of the food. If the food is colder than deep-freeze temperature (-18°C), choose higher weight of the food. WEIGHT: This function needs to know the net weight of the food. The oven will then automatically calculate the needed time to finish the procedure.
-
Page 36: Manual Defrost
Manual Defrost Follow the procedure for "Cook & Reheat with Shield areas of food with small pieces of microwaves" and choose power level 160 W when aluminum foil if they start to become warm (e.g. defrosting manually. chicken legs and wing tips). Check and inspect the food regularly. -
Page 37: Pro Bakery
Pro Bakery Use this function when baking bread and Pizzas. 1. Turn the multifunction knob to the PRO position. Pro Roasting 2. Turn the adjust knob to the Pro Bakery position. Pro Bakery 3. Press the OK button to confirm your selection. Pro Pastry 4. -
Page 38: Pro Pastry
Pro Pastry Use this function when baking pastry. 1. Turn the multifunction knob to the PRO position. Pro Bakery 2. Turn the adjust knob to the Pro Pastry position. Pro Pastry 3. Press the OK button to confirm your selection. Pro Roasting 4. -
Page 39: Pro Roasting
Pro Roasting Use this function when preparing roasts. This function is primarely designed to be used with meat probe but can also be run as a traditional oven without the probe. Pro Pastry 1. Turn the multifunction knob to the PRO position. Pro Roasting 2. - Page 40 SHELF PROBE FOOD CLASS UTENSILS OVEN °C TIME LEVEL °C WATER Roast Pork / Roasting pan on 50-80 AFTER 20 Level 1 190°C 68°C Veal wire rack Roast Beef Wire rack on glass AFTER 12 Level 1 200°C 48°C 35 MIN (rare) drip pan Roast Beef...
-
Page 41: Maintenance And Cleaning
Maintenance and cleaning Cleaning is the only maintenance normally DISHWASHER SAFE: required. Failure to maintain the oven in a clean condition could lead to deterioration of the surface that Wire shelf could adversely affect the life of the appliance and possibly result in a hazardous situation. -
Page 42: Trouble Shooting Guide
Trouble shooting guide If the oven does not work, do not make a service If the mains cord needs replacing it should call until you have made the following checks: be replaced by the original mains cord, which is • The Plug is properly inserted in the wall socket. available via our service organization. - Page 44 Printed in Italy 10/12 5019 500 00007...